
It was bound to happen. I mean, this is everything fiber arts, right?
My husband bought me a Schacht Flip loom for my birthday… Wait for it..
2 years ago!
I kept putting it off because I had only ever heard how hard warping would be. In the long run, believing this, may have helped. This idea I had built up in my head, of how difficult this was going to be, that when I mustered up the courage to take on the massive job of warping, I was pleasantly surprised with how easy it actually is. I did have some help from the people in Fibery Goodness group on fb. They talked me through any troubles. If you don’t know about them they are a great community.
And Fibery Goodness Facebook group can be found on Facebook Here
I had never taken a class on weaving. Everything I learned about weaving had come from YouTube. But the questions I still had, I was given answers in the Fibery Goodness group! Such great resource and people and classes in Fibery Goodness. I still don’t know the proper terminology for weaving. But, it is so much easier than I thought. Although, I have a lot to learn.
For whatever reason I had these preconceived ideas which I have since learned are not true, for me.
I thought I’d share those with you.
The following are myths I believed and what I have learned.
Myth – Warping is really hard
I followed directions from a video for direct warping with a peg. I’ve learned that warping is really easy. Considering it was a first time, I found it was pretty straight forward. Cutting the string at the end once removing it from the peg, was the tiniest bit nerve wracking, but they were already safe in their slots. The next time I have to make this cut, I won’t think twice about it.
Myth – warping will take longer than the actual weaving 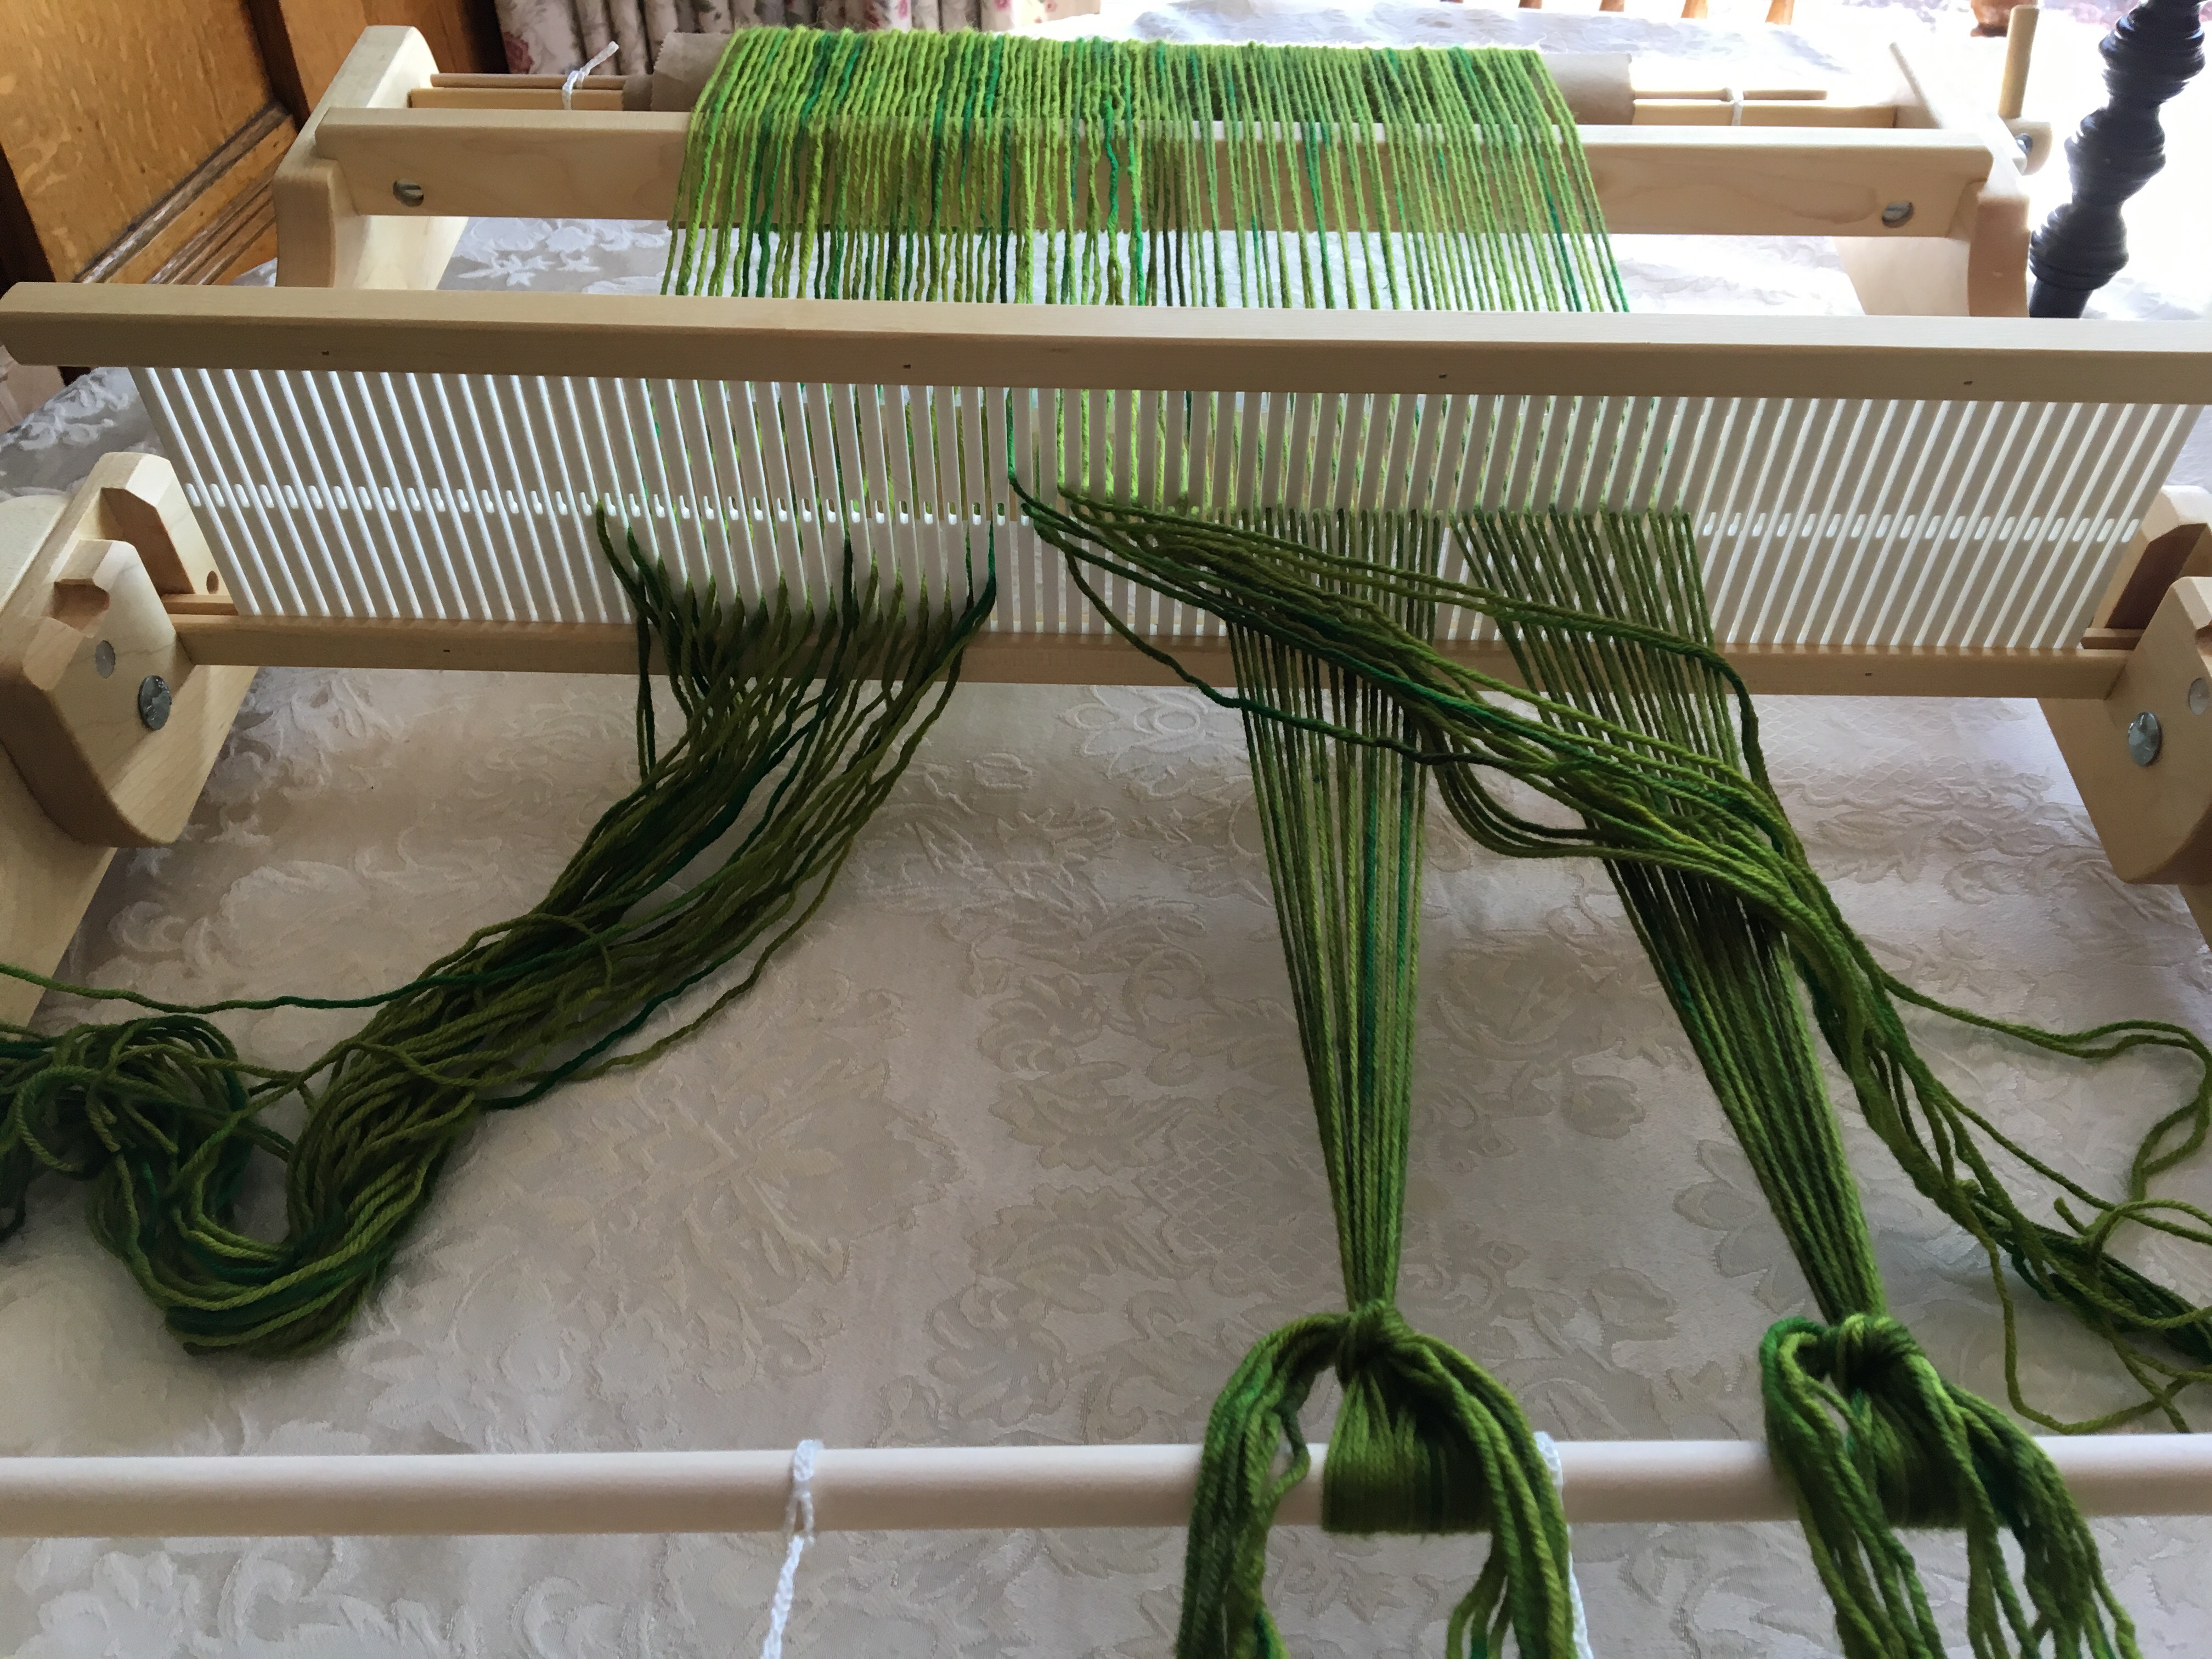
The warping process took me 45 minutes to an hour. I have been weaving a bit each day for a week and I’m still not halfway. The steps that take the longest are bringing the yarn through each slot to the warping peg, and then when I was finished with the warping peg removing all those loops held by that warping peg, and cutting them. Rolling the warp threads closer to the loom, then taking one of the two pieces of yarn in the slot and hooking it with a special tool through the hole. It’s not fast, it’s not difficult, once you thread the first few holes, you get into a groove. Stick your hook in the hole, grab one thread from the slot next to it, pull it through the hole, NEXT! It becomes a process of doing one after the other and before I knew it I was at my last slot/hole.
Myth – lots of adjustments tying it on make sure it’s tight

It doesn’t have to be tight, it has to be even. The second you need to roll it on, you have to release a latch that completely loosens everything, but it will be rolled to the other side and that can make it as tight as you want. That’s why being evenly tensioned is more important than tight. Initially, I kept tightening each group of threads but I realized that tightness can be dealt with by turning the warp beam. It’s making sure it’s even so that when it’s turned it all turns together.
As far as I remember, I didn’t have any misconceptions about the waste yarn. Although, I am glad I used separate pieces. At the end after taking it off the loom, when waste yarn is pulled out, if I had to unweave one long string that would have been a pain, vs pulling out short bits, one row at a time

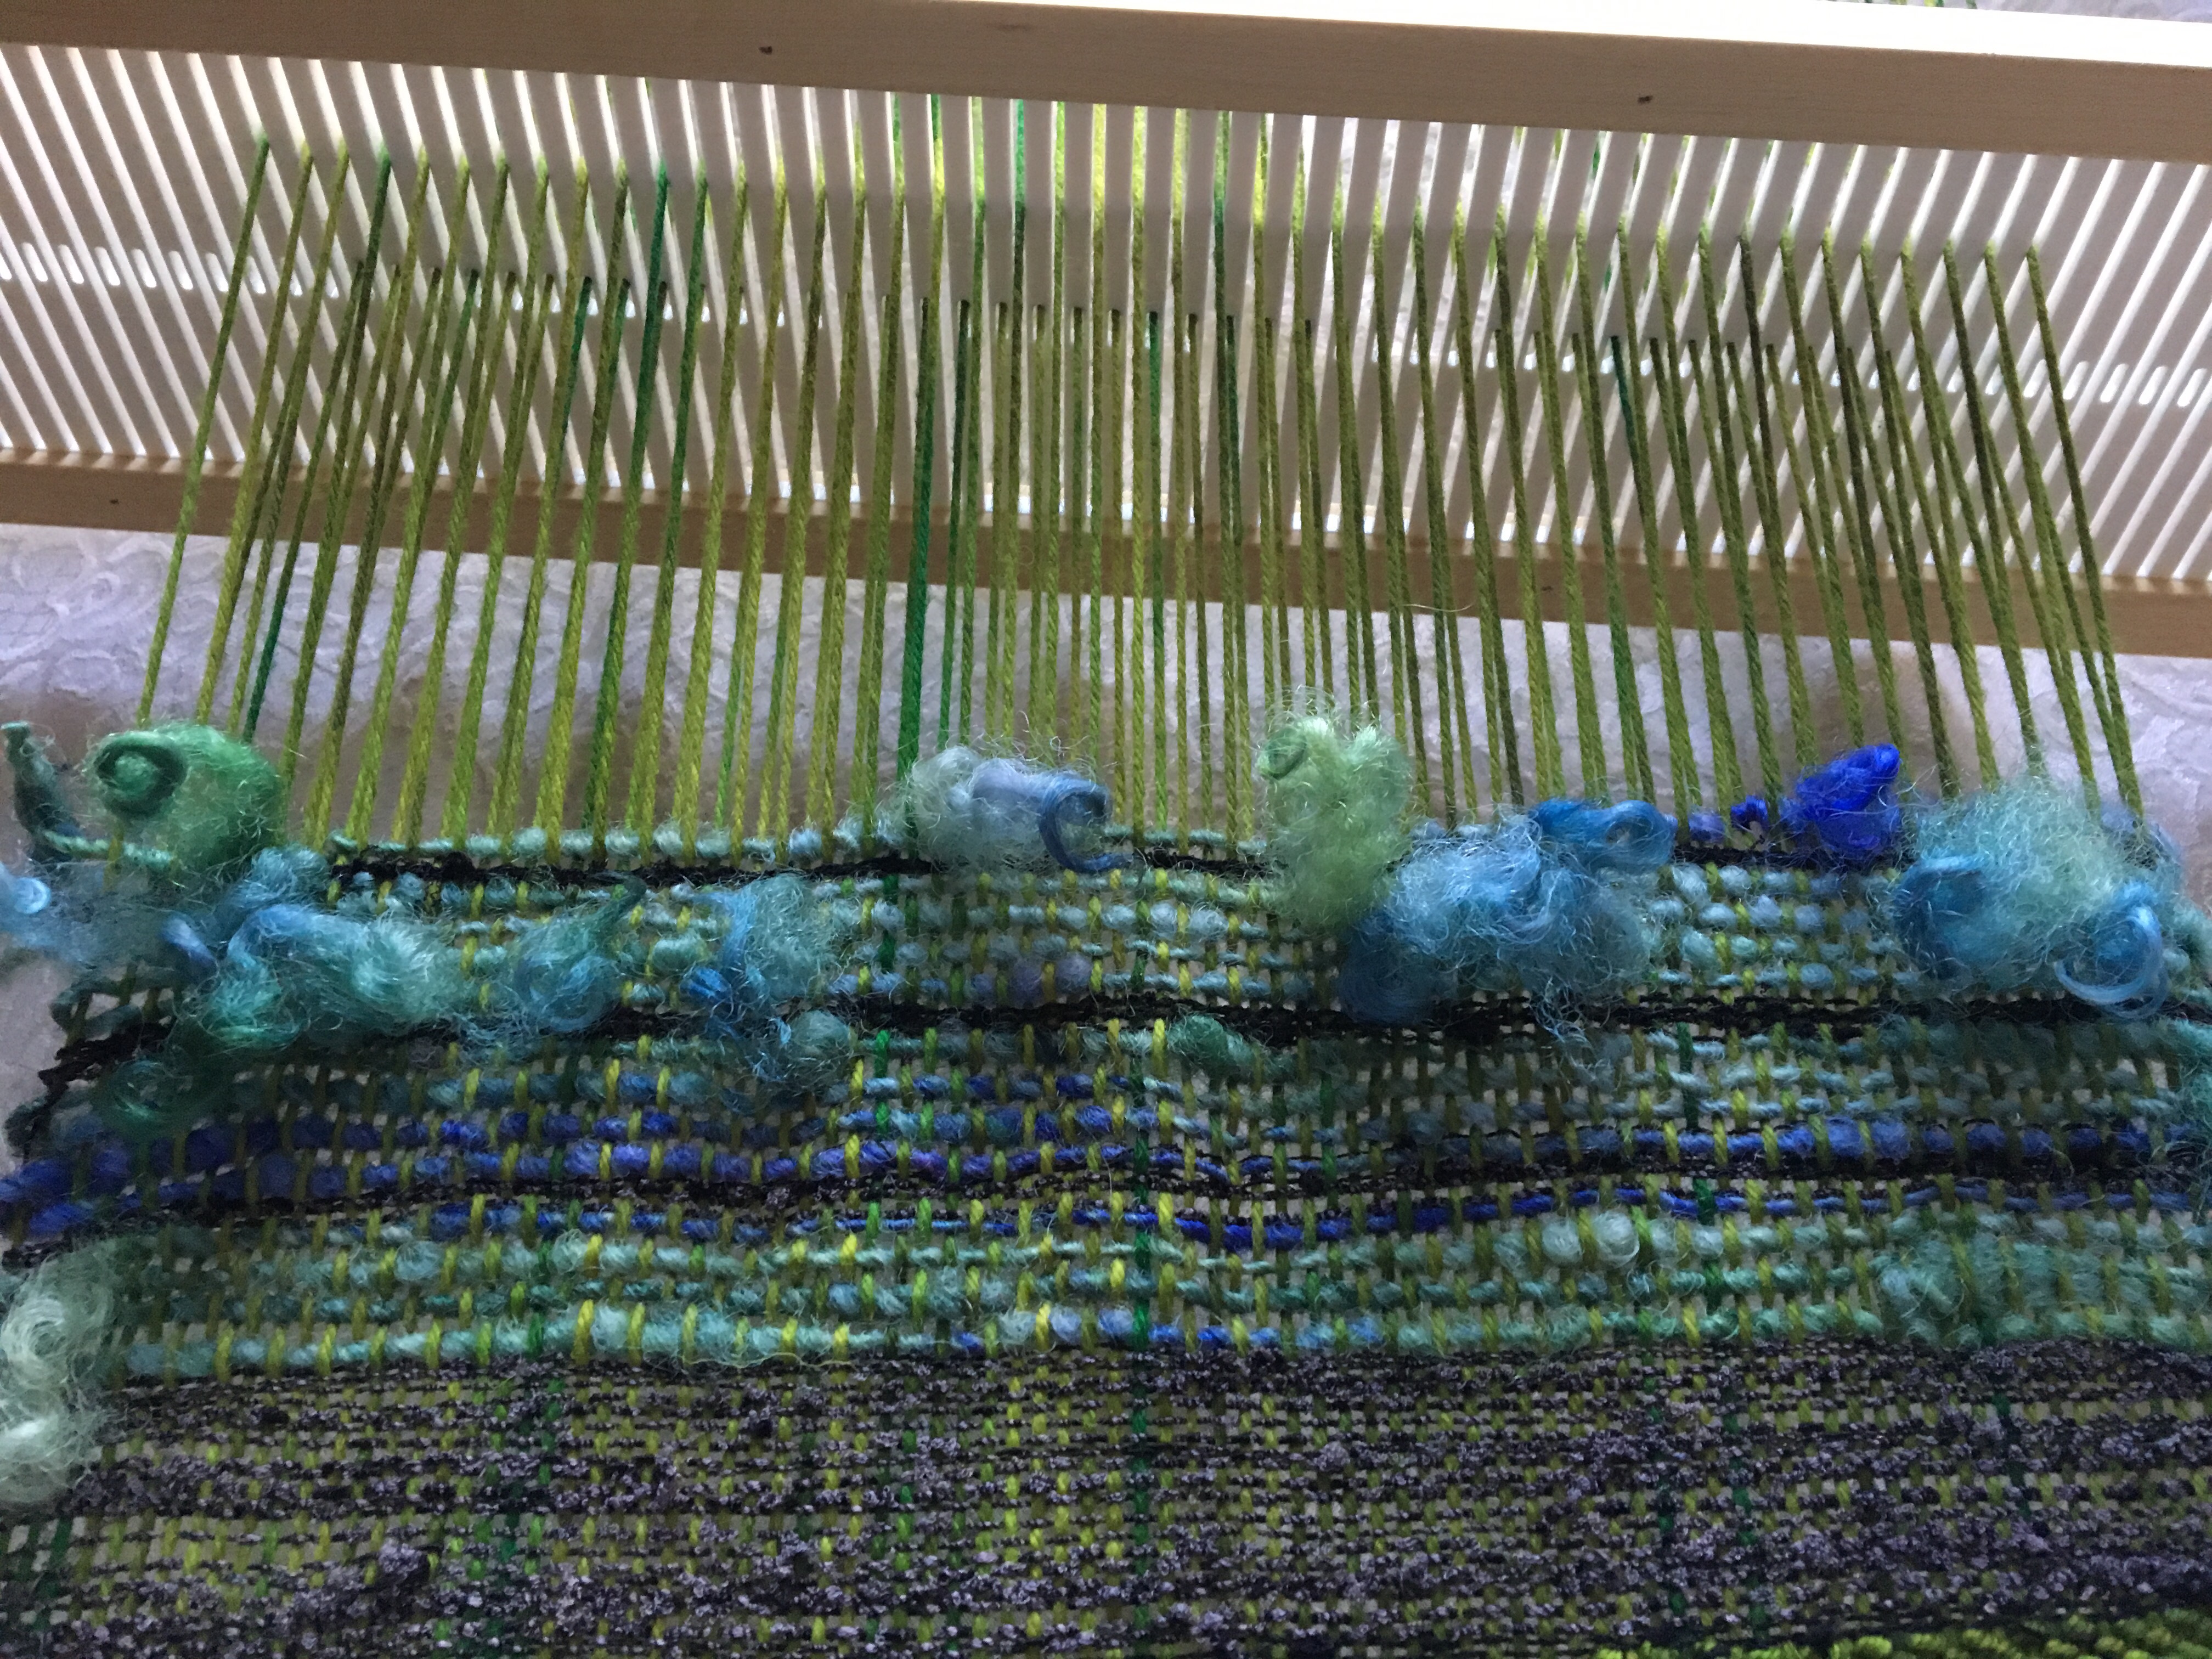
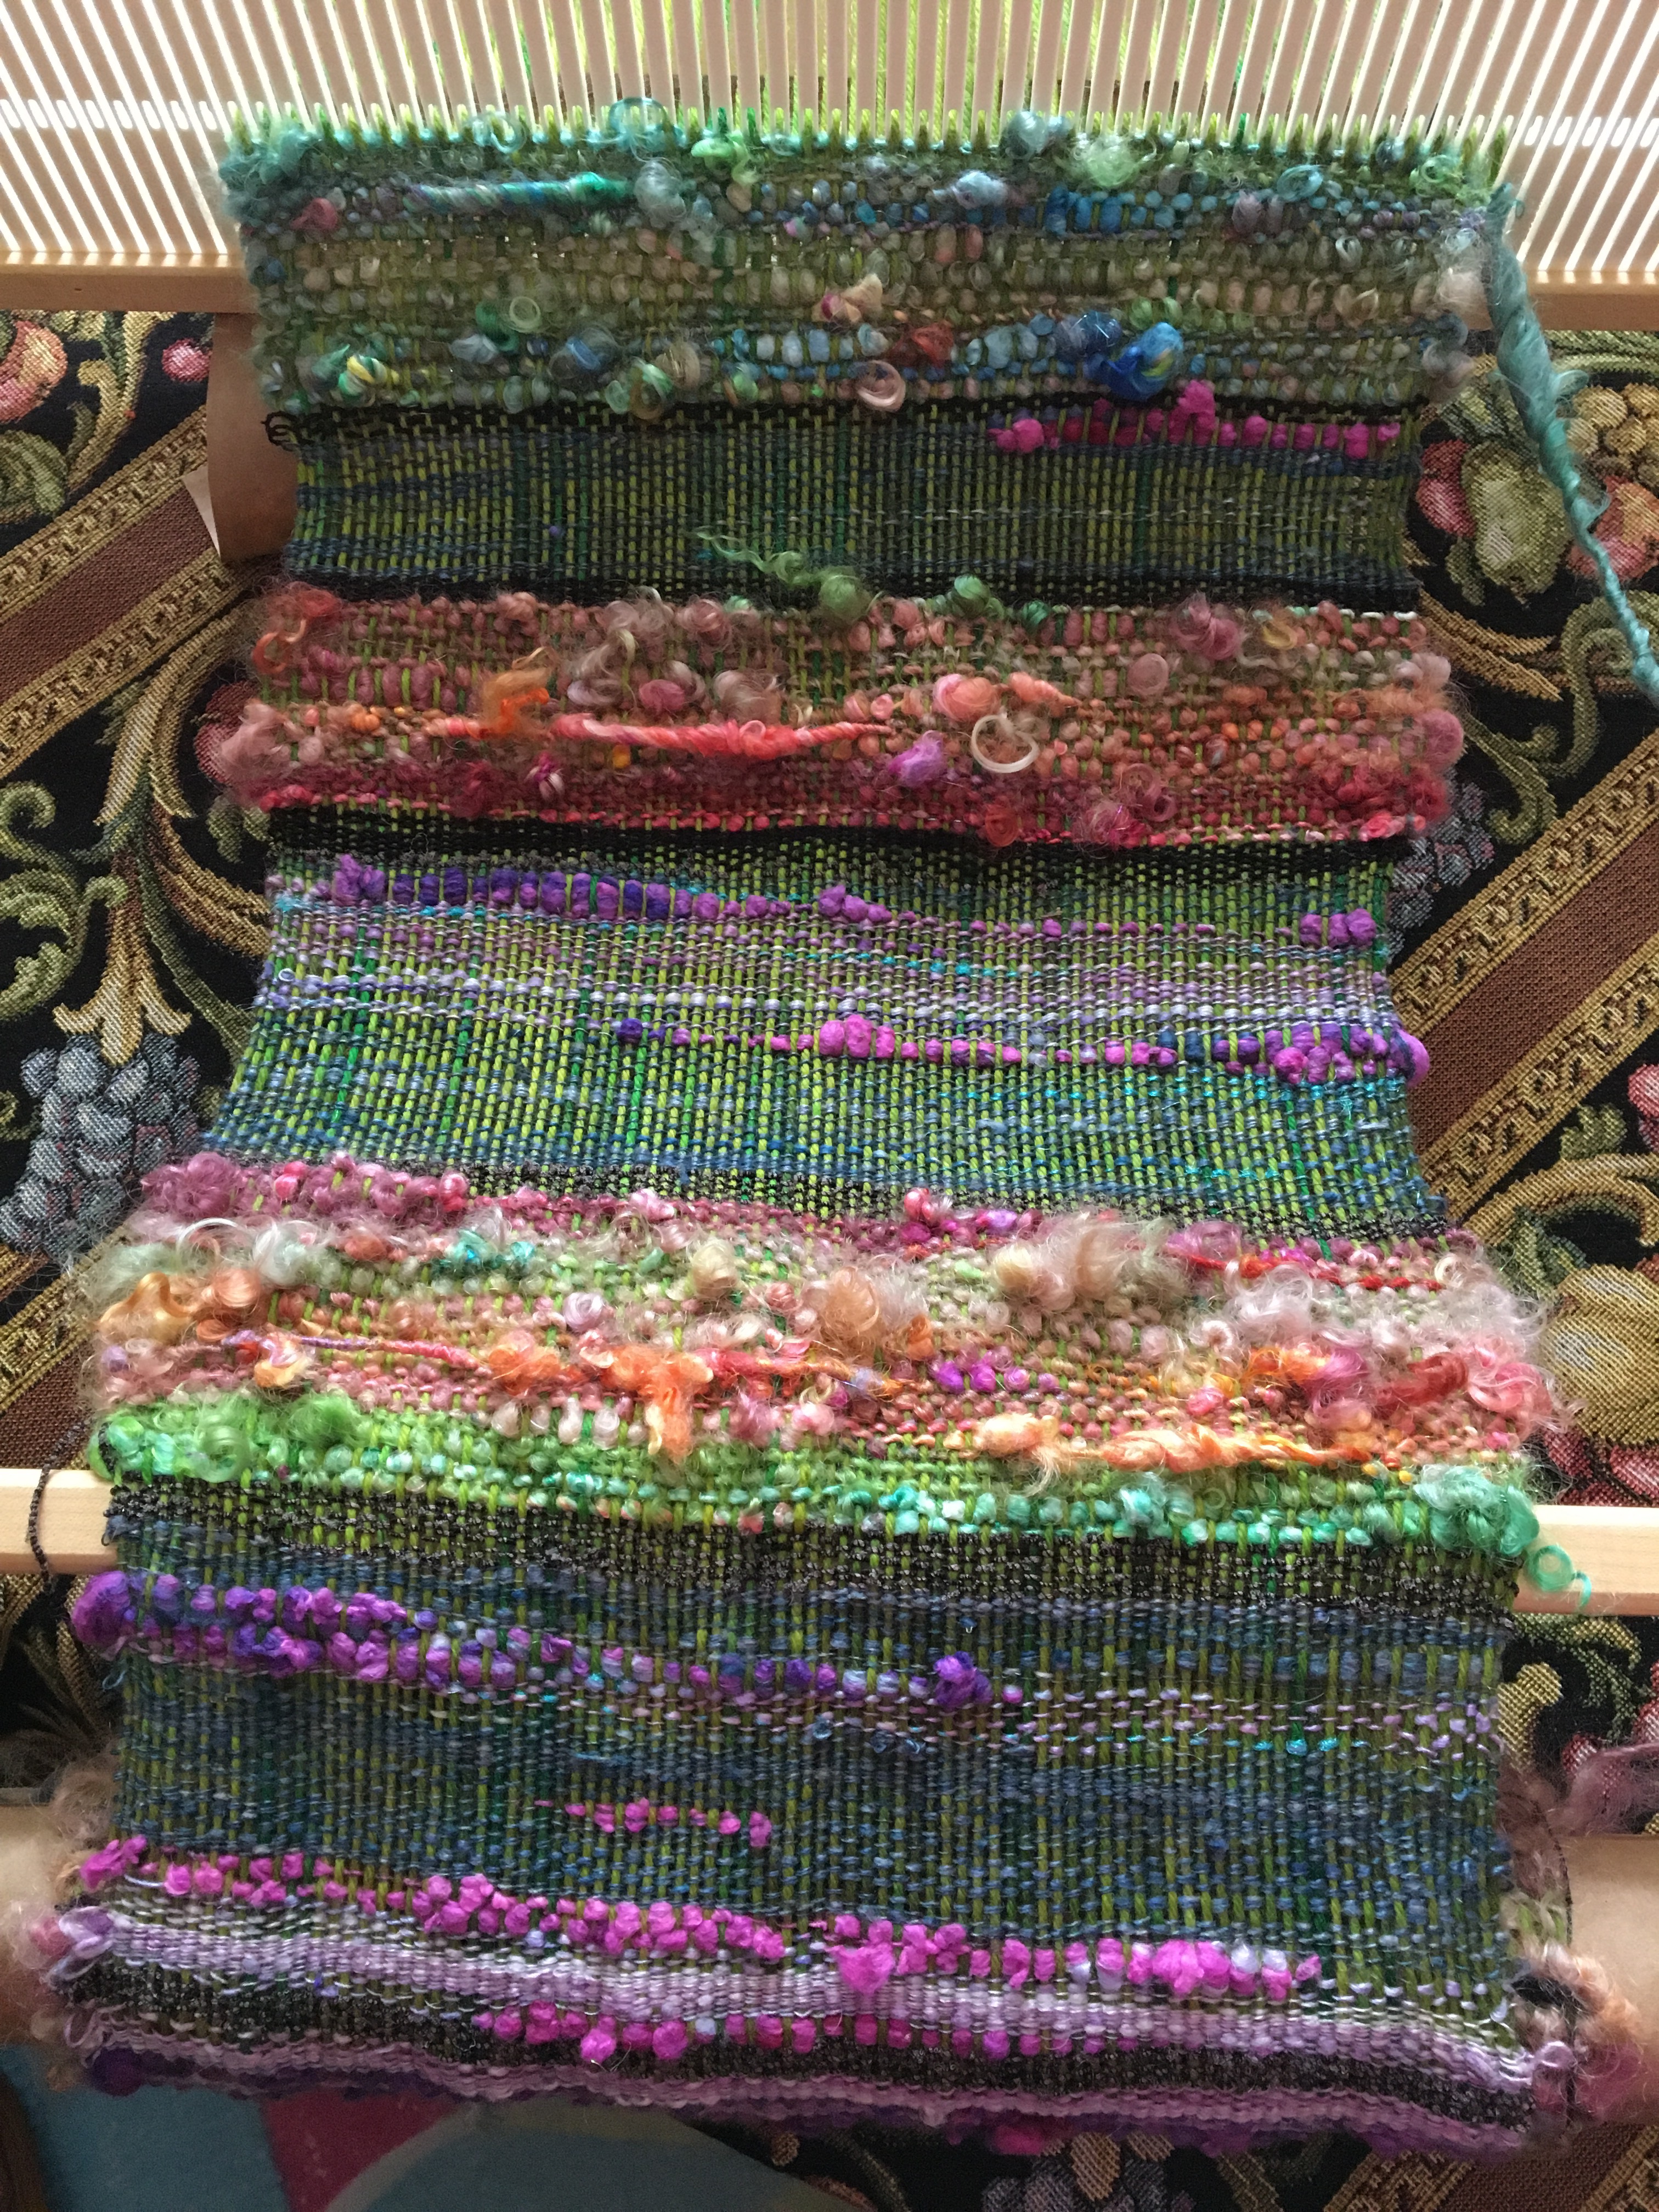
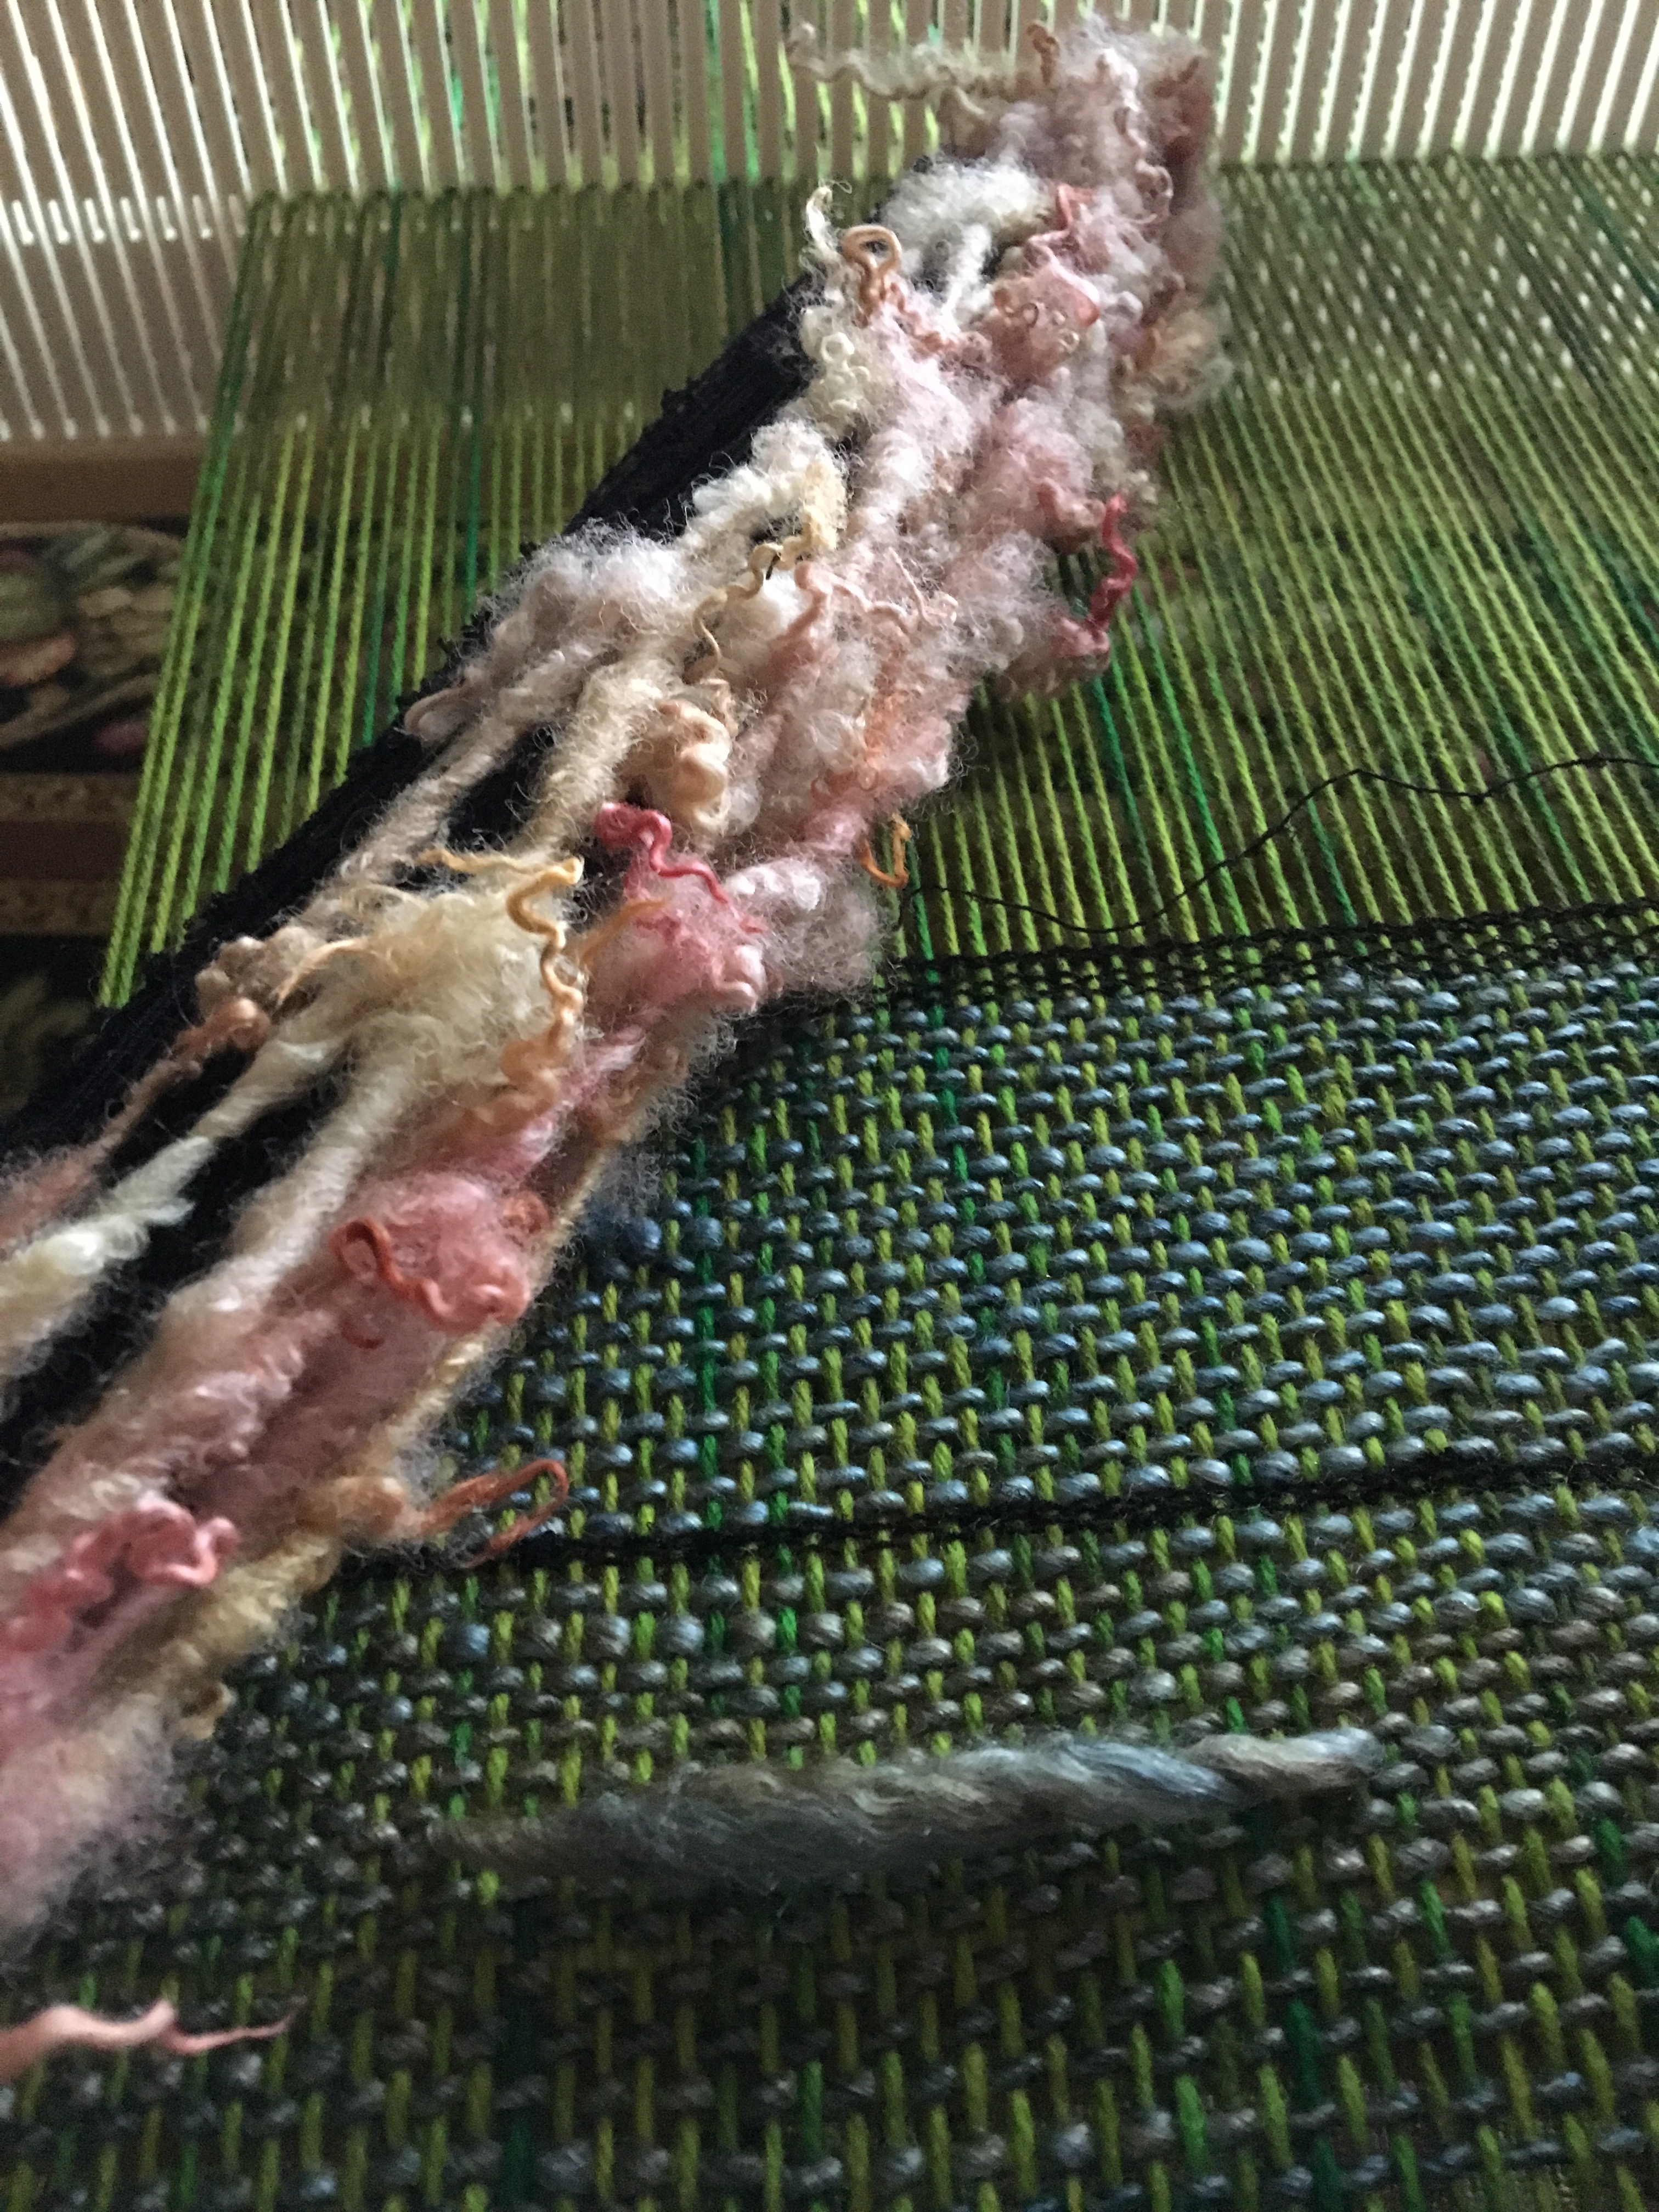
I enjoyed adding the waste yarn because I could see the warp yarn align itself to its proper place with every beat. I’ve seen regular yarn used for this but I wanted something bigger thinking it would be easier to retrieve at the end. People use cardboard strips, or rolled up paper towels, strips of fabric, I used a yarn that I made from cut up cotton tank tops.
Myth-Weaving goes by quicker then the set up aka warping

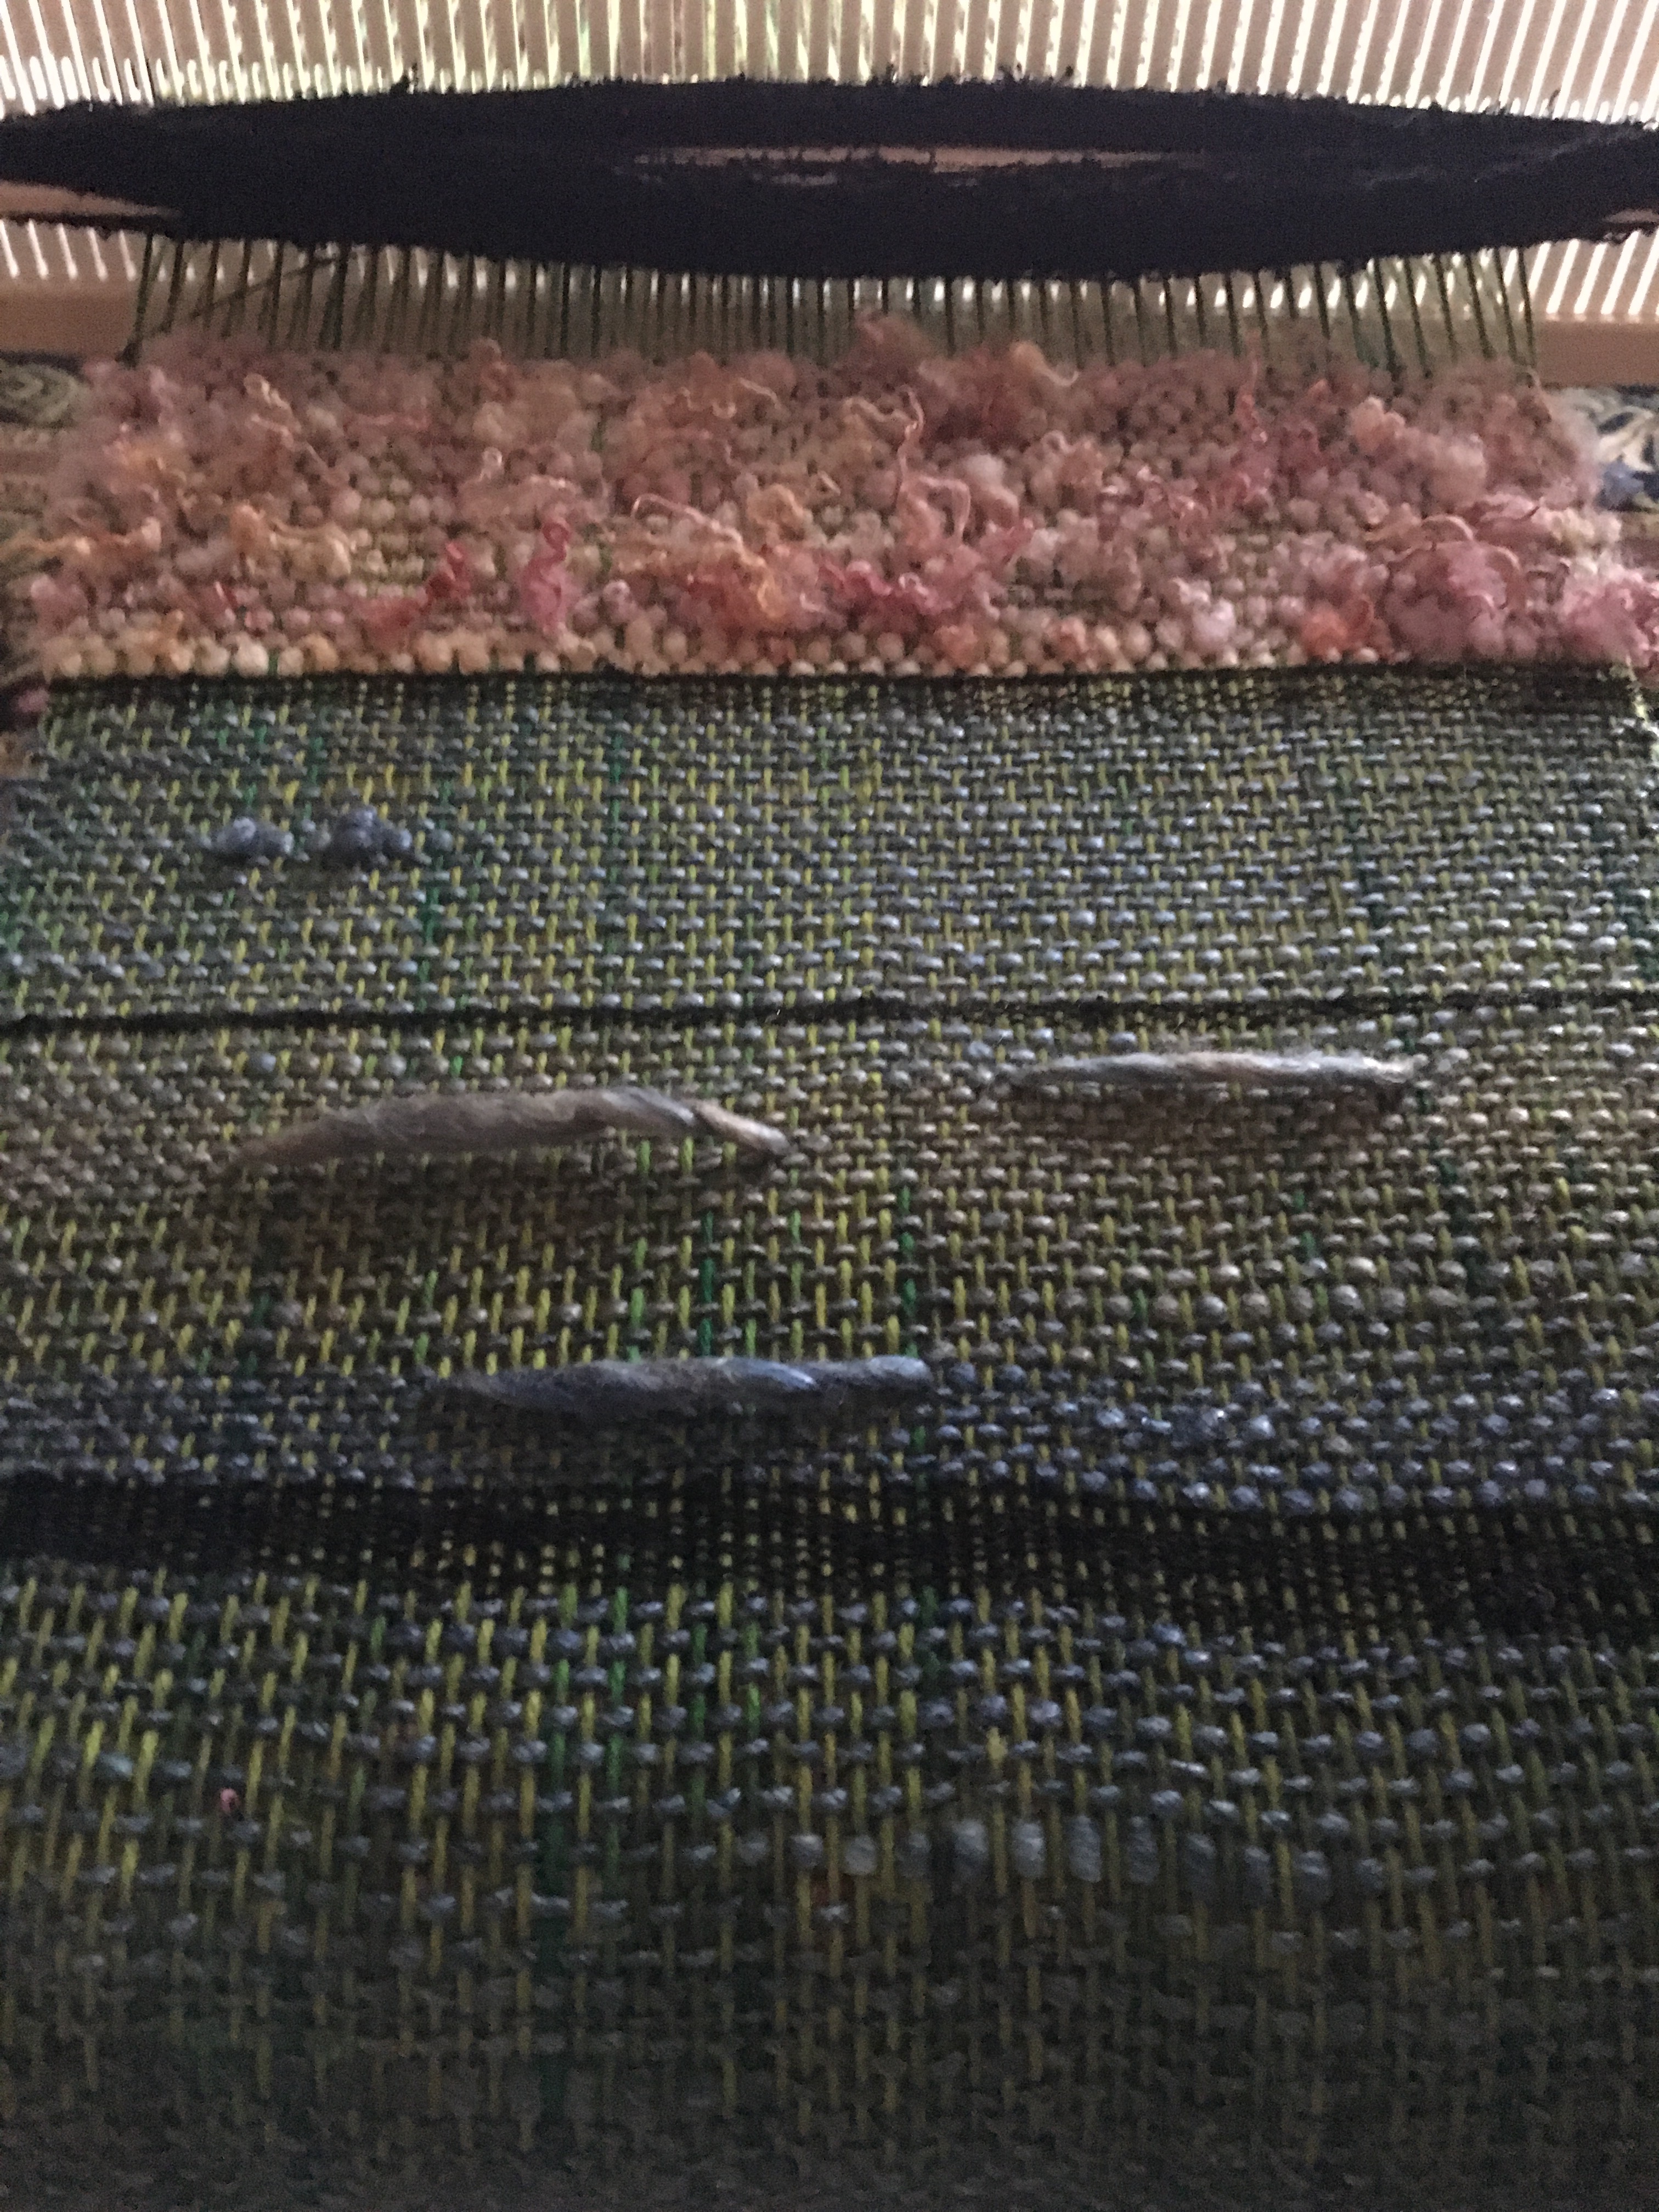
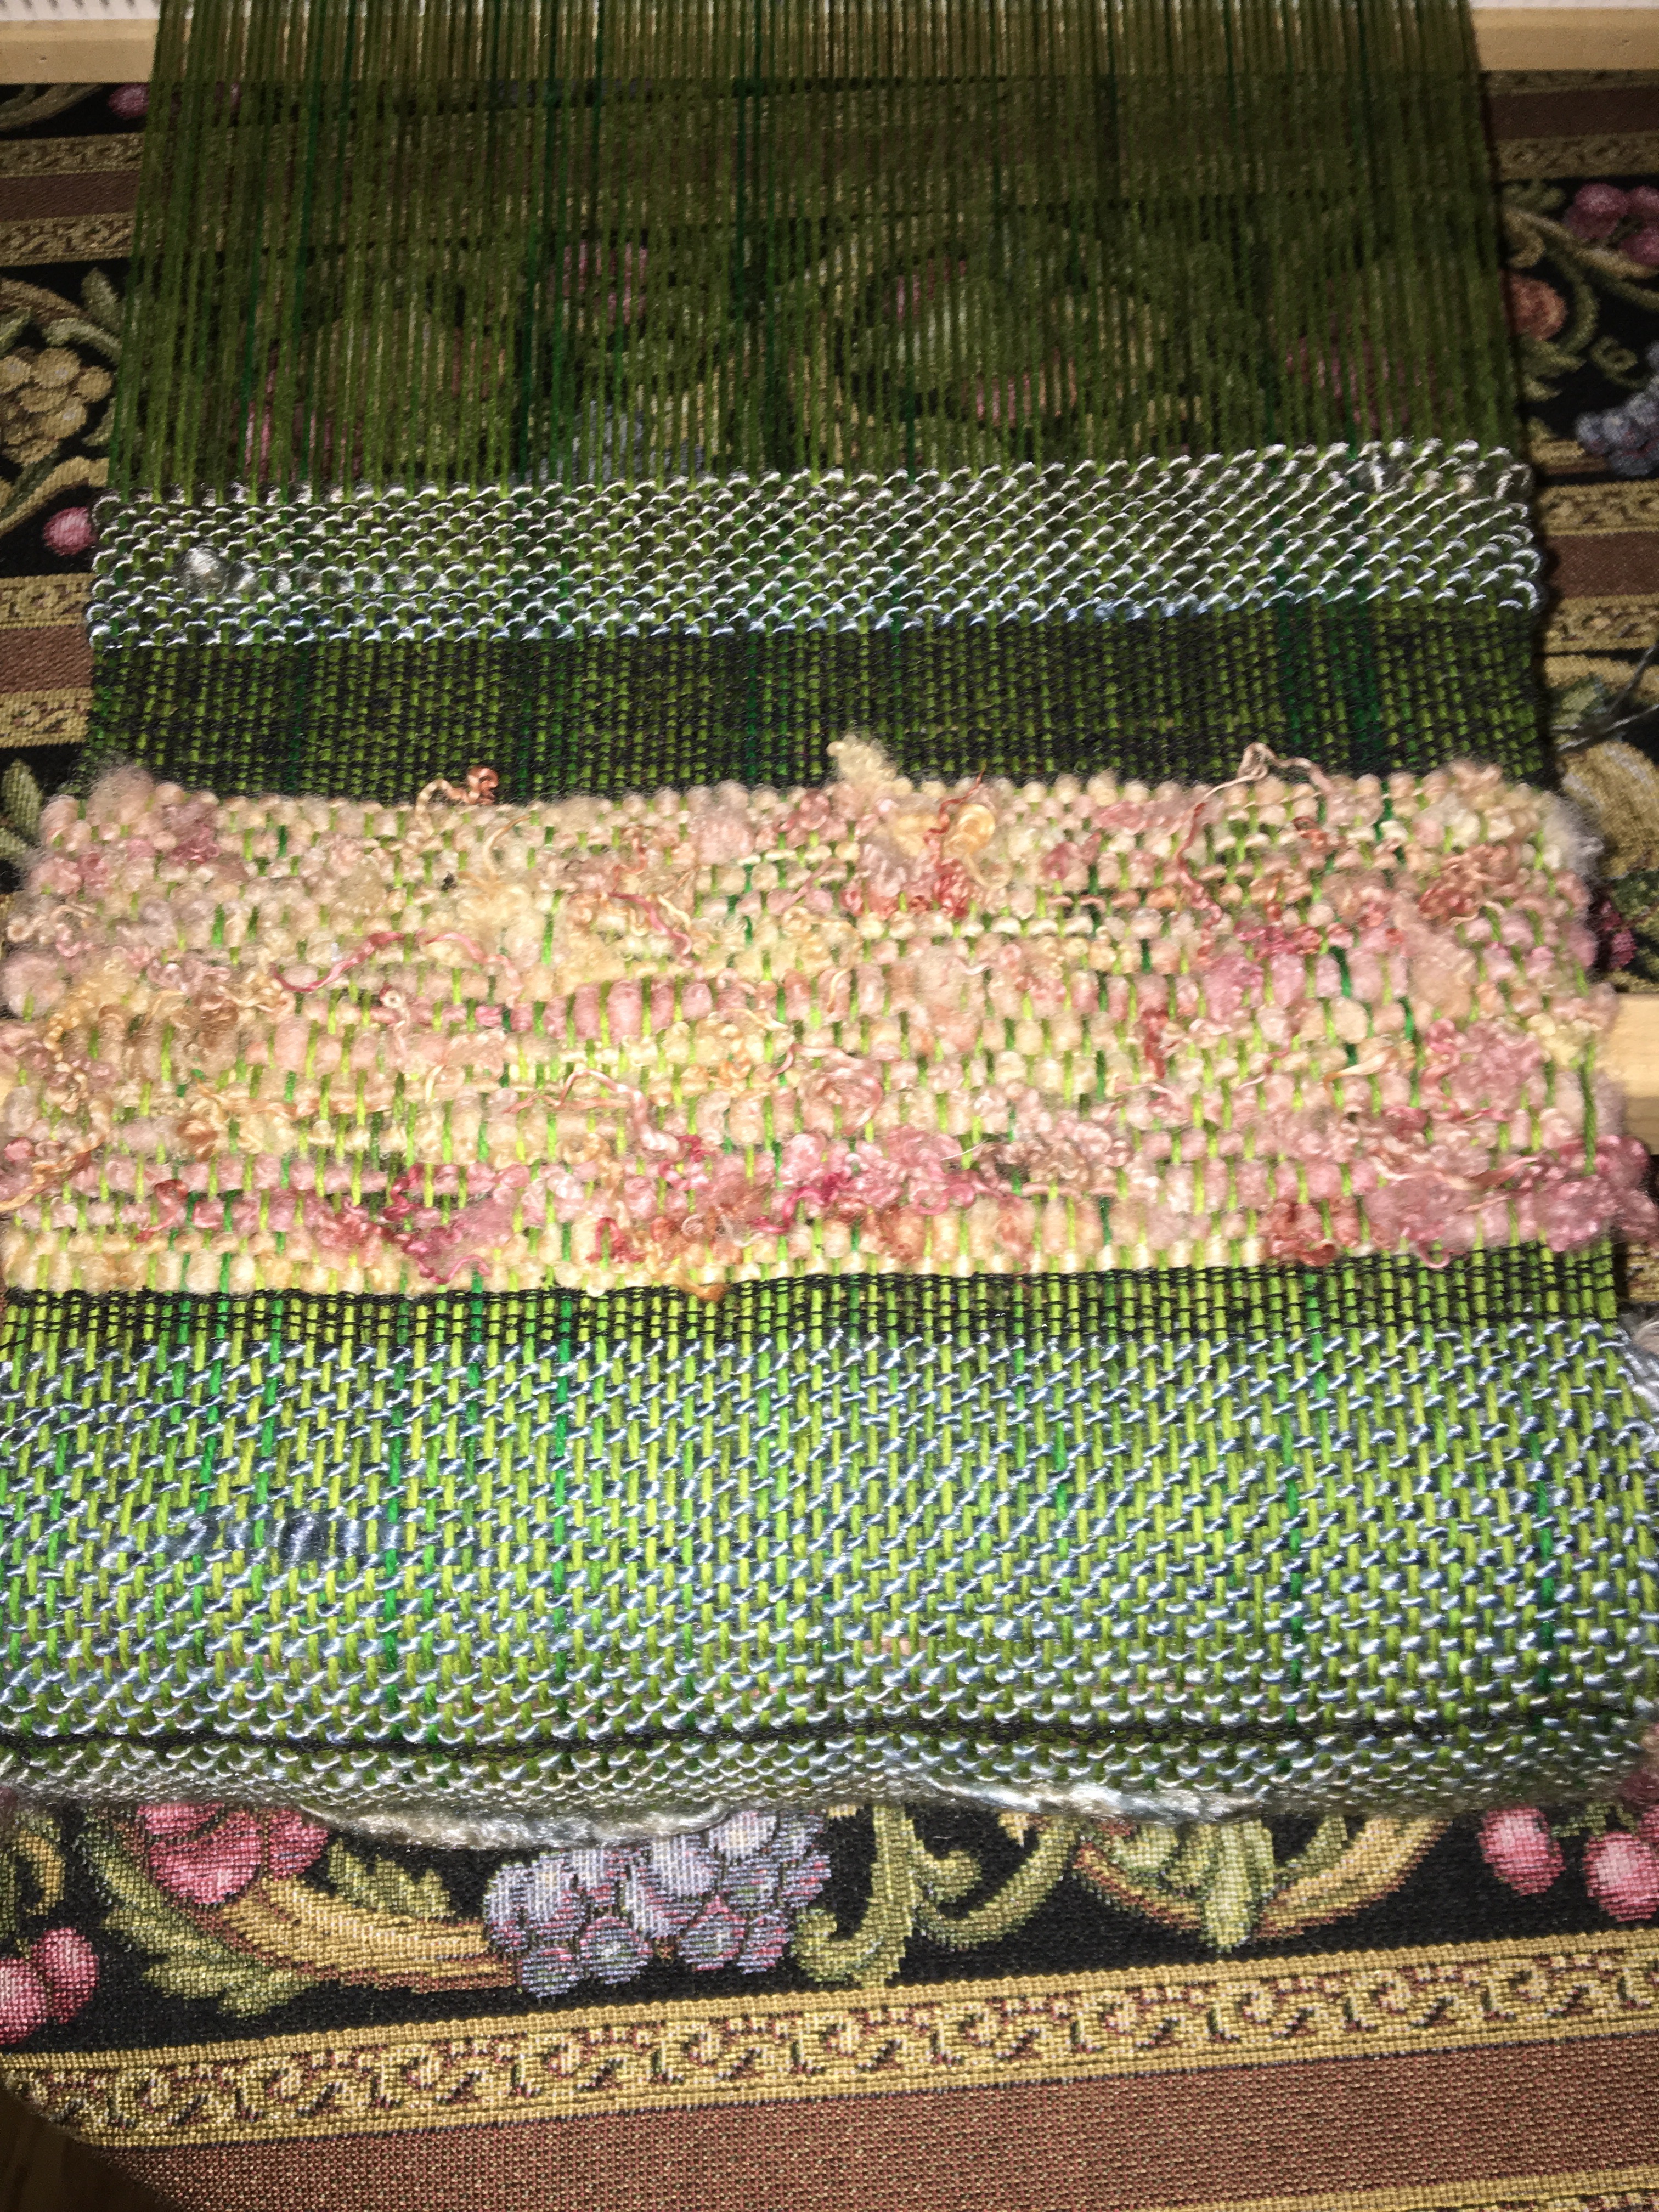
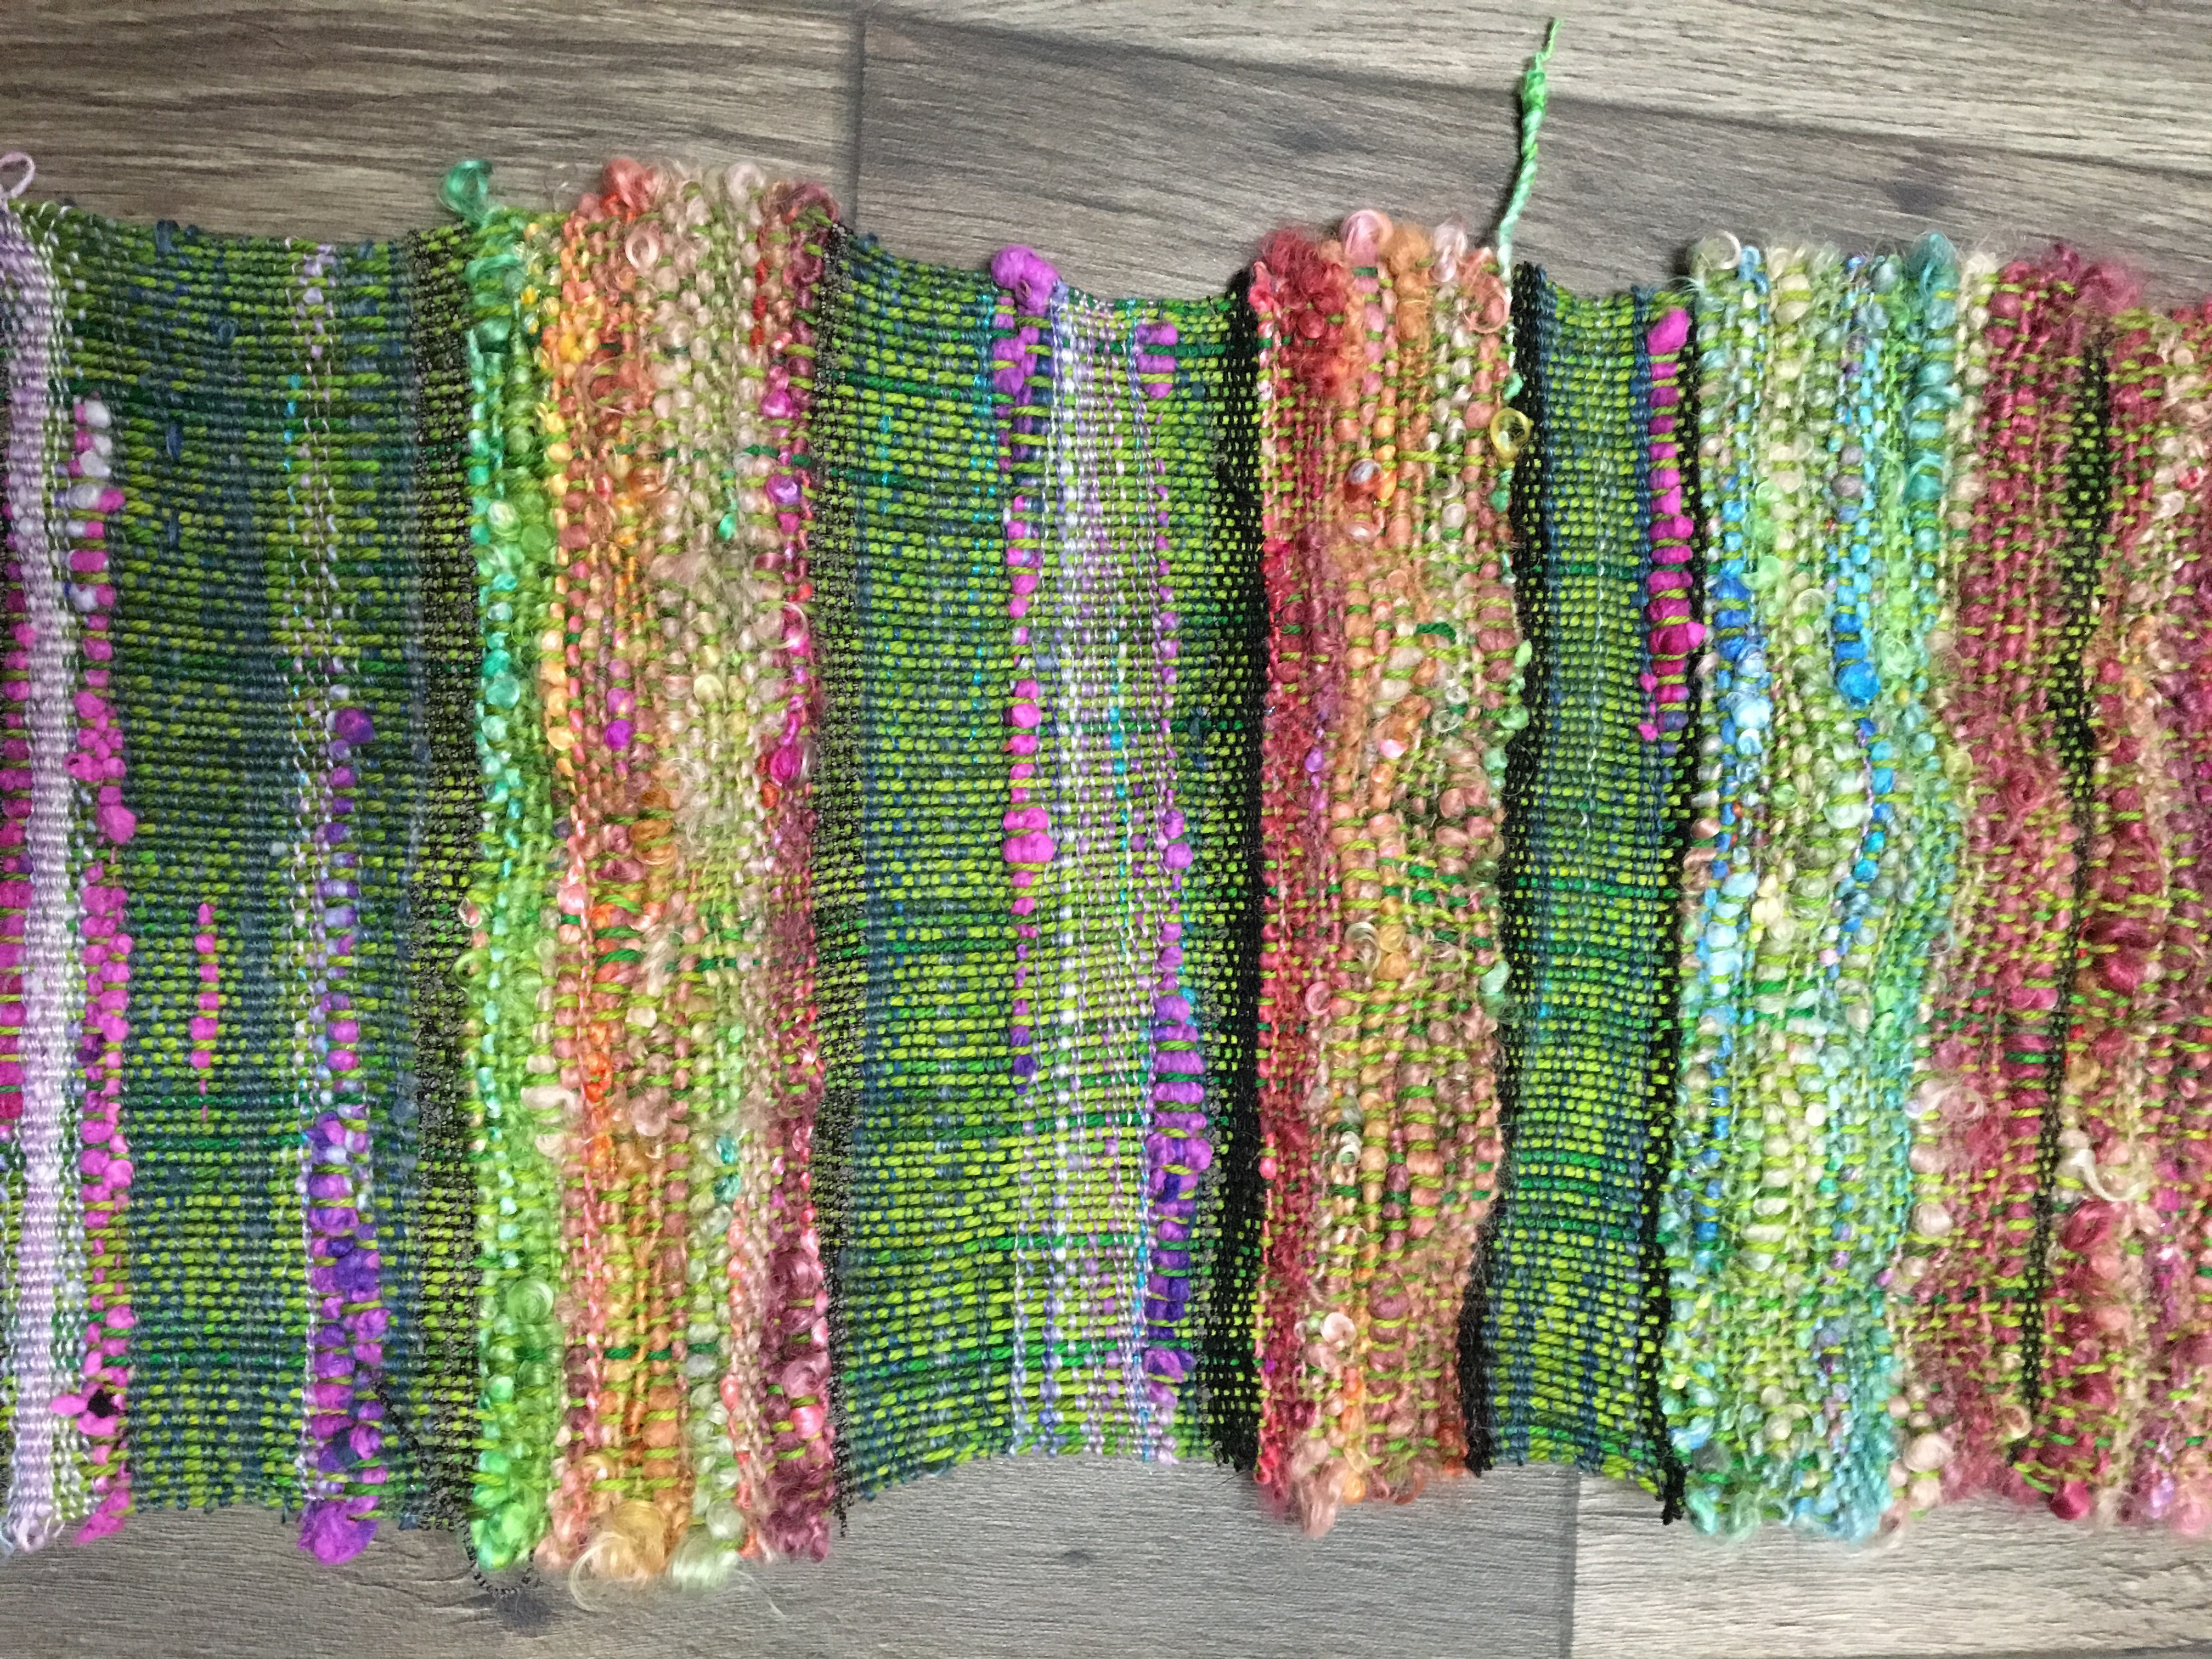
I thought warping was pretty quick and easy. I varied the thickness of my weft threads. Some were lace weight and some was chunky. Obviously, the lace weight goes a lot slower. The above black lace weight weft was only 2 inches of weaving and took longer then the whole warping process.
Even when I switched to a thicker weft it still took longer for me. Which I am pleased to have discovered. Weaving is definitely the fun part. I got a good week almost two weeks of weaving time everyday.

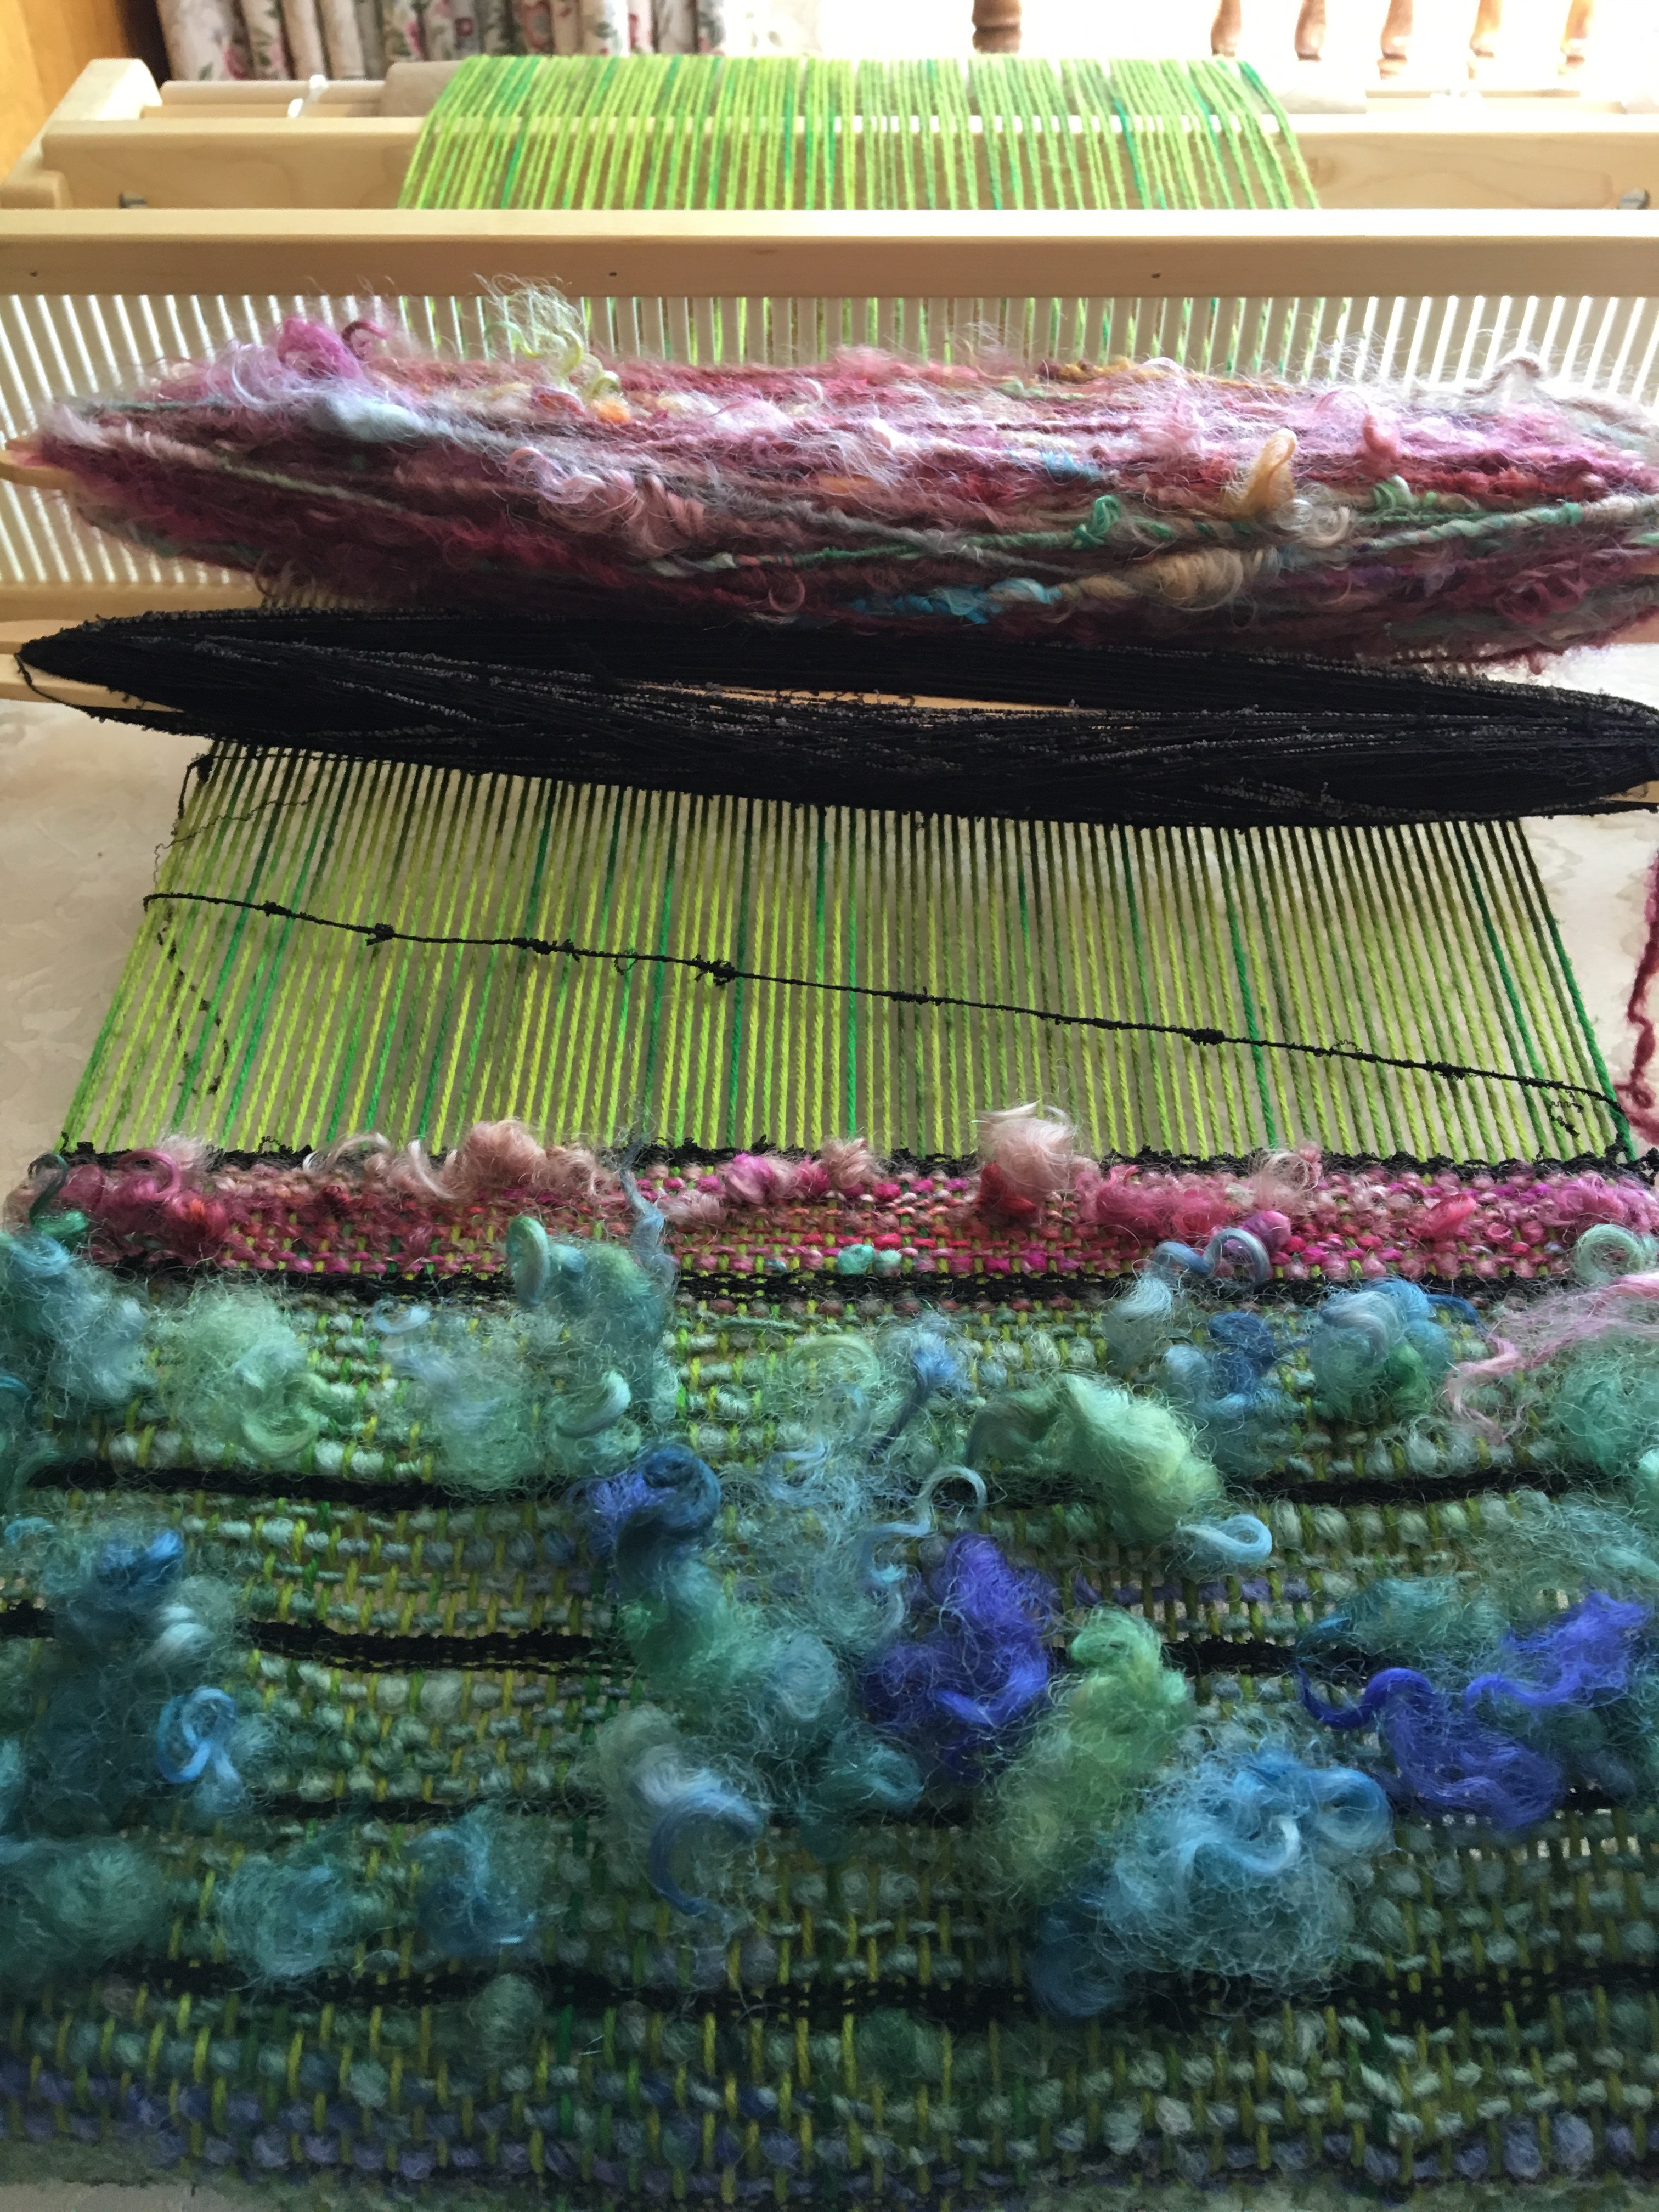
I also discovered how many different colors actually go with green. Weaving allowed me lots of color play that I never experienced with crochet or knitting maybe because it blends the color evenly throughout. Being over and under every thread. Whereas, with knitting or crochet it’s more color blocks.


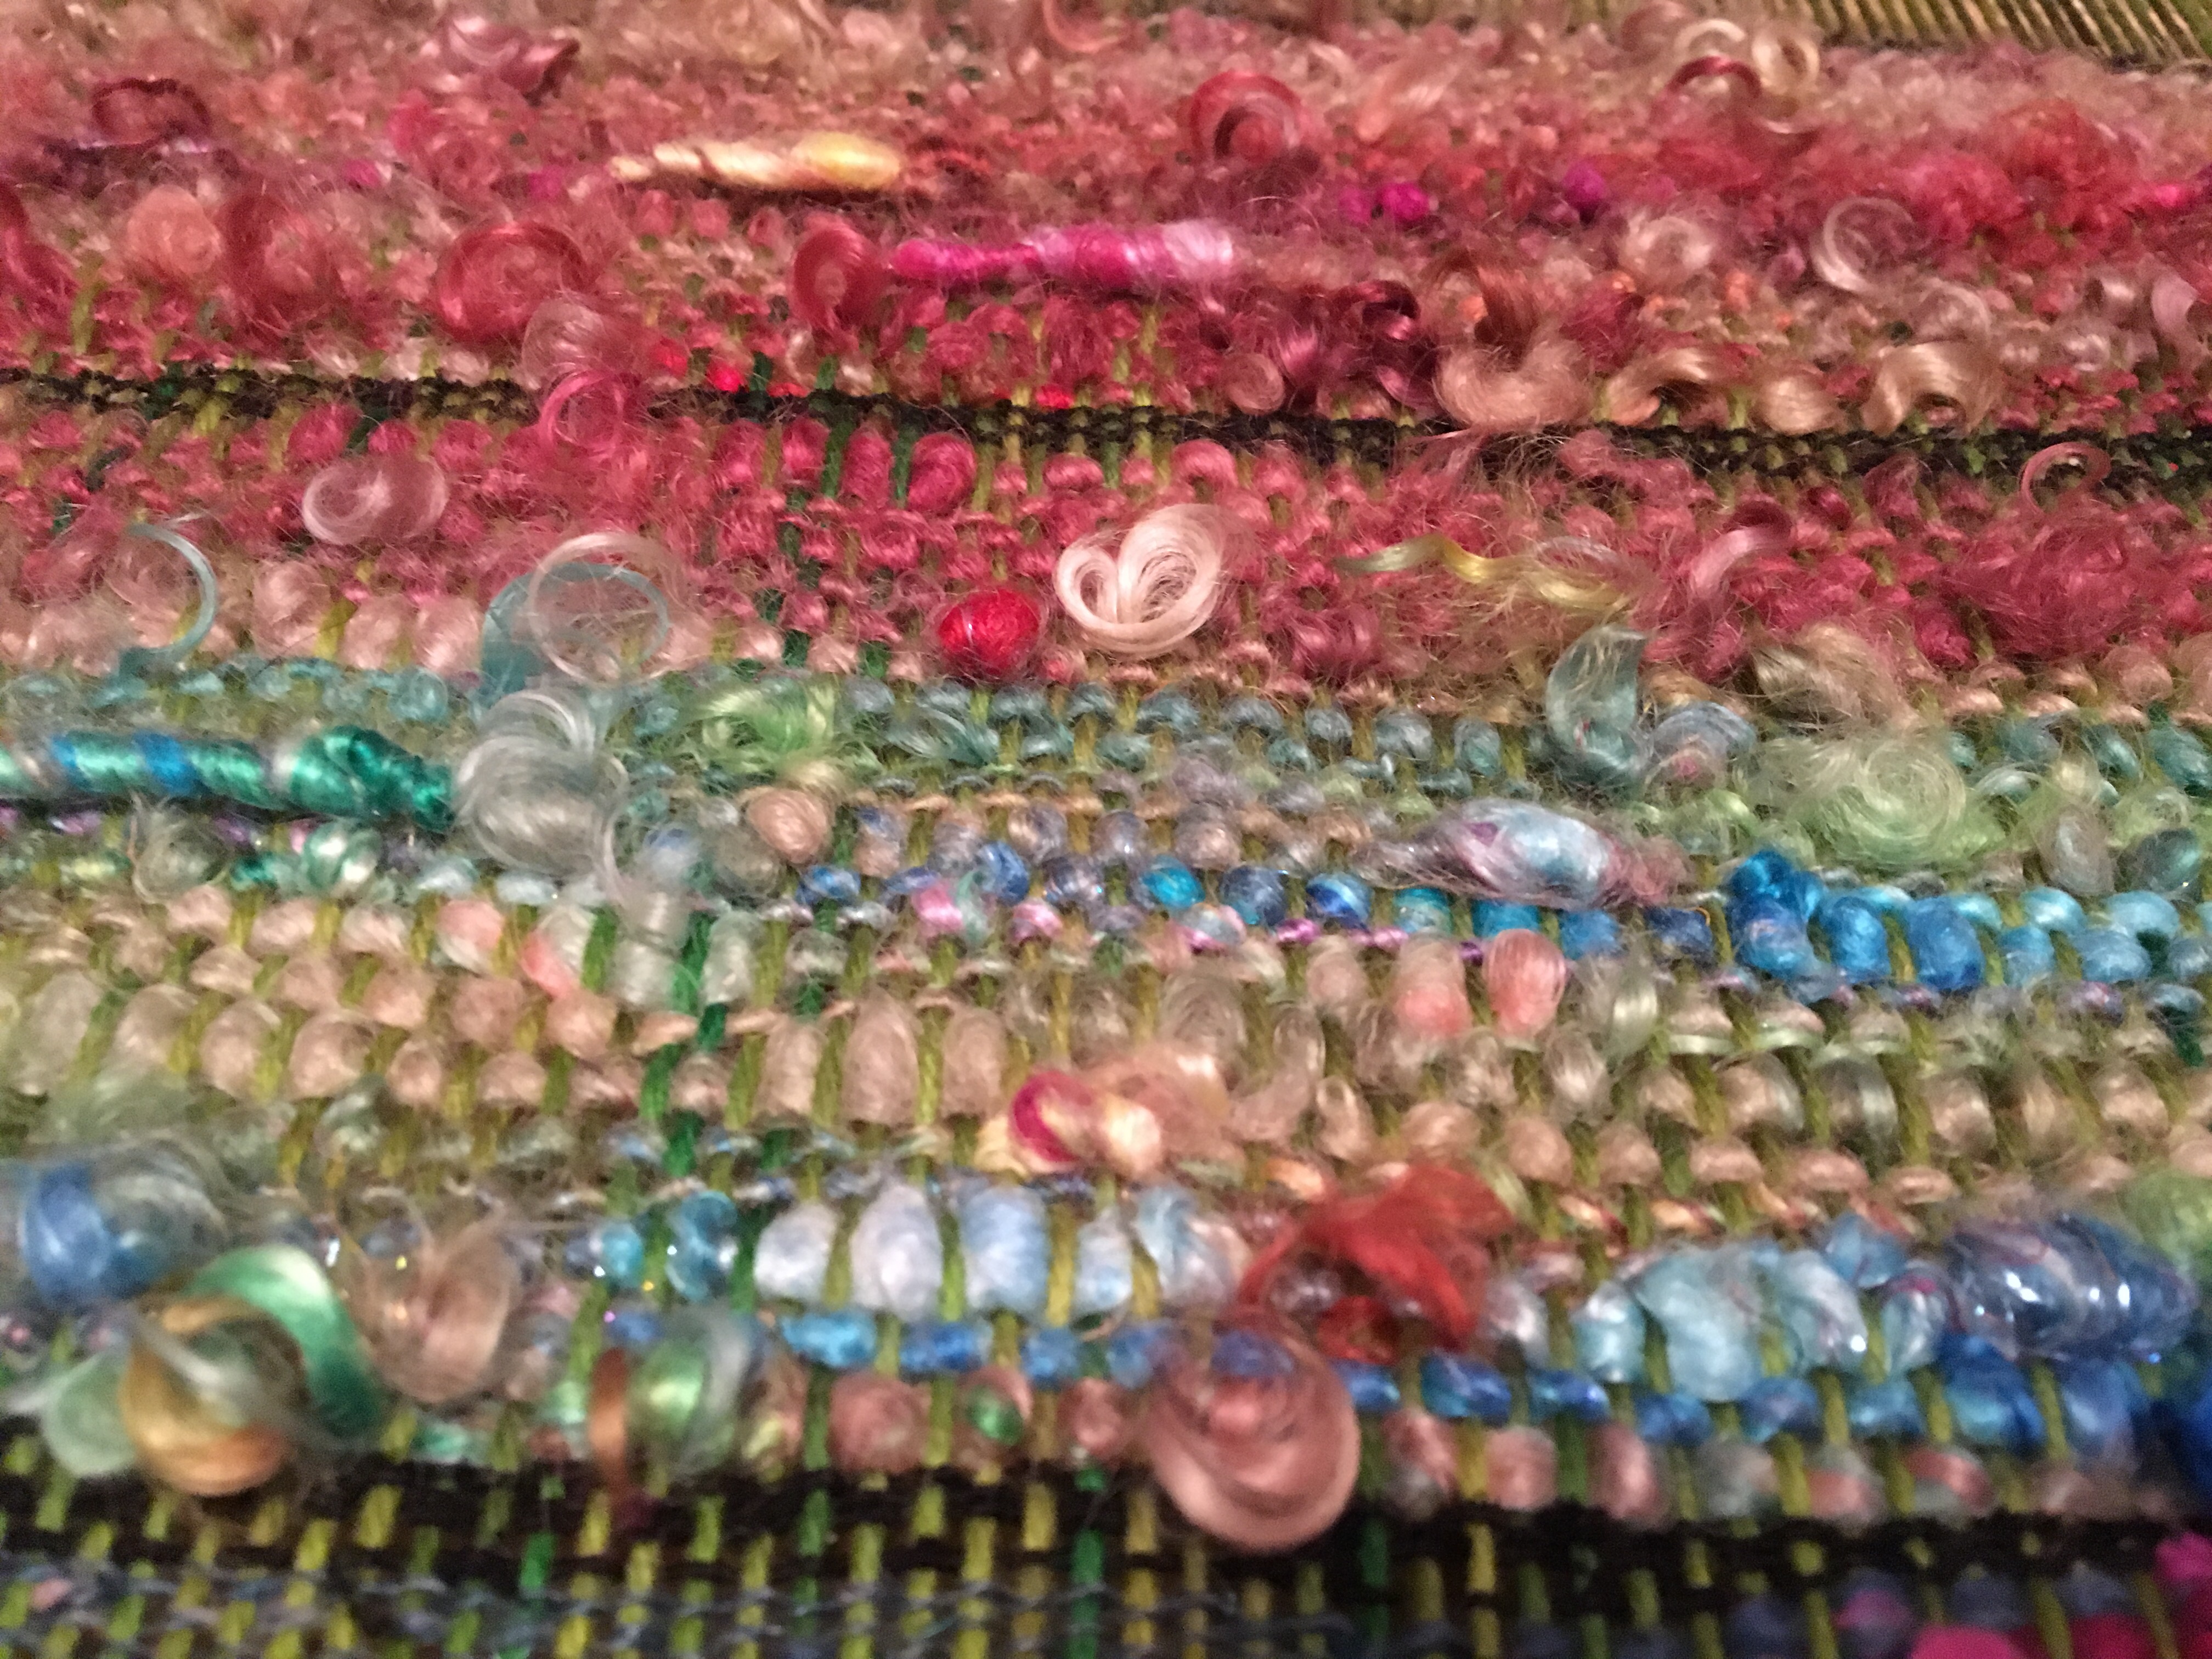
I played with different textures, as well. Leaving favorite bits of handspun out of the woven fabric. Switching from silk hanky and silk noil, to mohair, to wool and tencel blends. From lockspun, to thick and thin, to a traditionally spun smooth single. It all worked.
I did end up signing up for a weaving class and wow!! I’m so glad I did!! I learned a bunch of fun techniques from an online weaving class given by Stacey Budge-Kamison of
Urban Gypz website she teaches a lot of cool tricks for art weaving, using handspun and art yarns, but actually showcasing them. The class was very affordable definitely worth every cent. She gives both written and video. Plus has a group on Facebook that is private in case people may have questions or want to share. It’s not your average weaving class. It’s the fun stuff. It’s art weaving tricks. It tips on adding certain things to showcase anything that might be important to you. She gives so many ideas. One can use a small loom, add things to weaving I’ve never seen, weaving to wear, wall hangings, pictures, not just yarn in a woven piece (get creative) and add it. That class got me really excited about the possibilities. I’m filled with new ideas. The same way art yarns have add ins…
Weaving can too.
We have basic spinning that can be learned and art yarns that can be learned.
Well this is fun and showcases ways to use art yarns for those special one of a kind woven pieces.
So far my knitting and crochet have been pretty vanilla but I want my weaving to be as free as my art yarns. For wearing, for fabric for accent pieces, and wall hangings. I already feel like weaving gives me a kind of freedom.
Again this is something I didn’t do much with crochet and knitting. Weaving gave me a new outlet and I didn’t start thinking his way, weaving spoke to me. I felt different when I was weaving m, I felt more free. I did use the same black silk lace weight thread all the way through my project to somehow tie everything in from beginning to end. But I’m not convinced it did. And that’s ok too.
Myth-as long as you have even tension and you use that angle before you beat, you will have even edges.

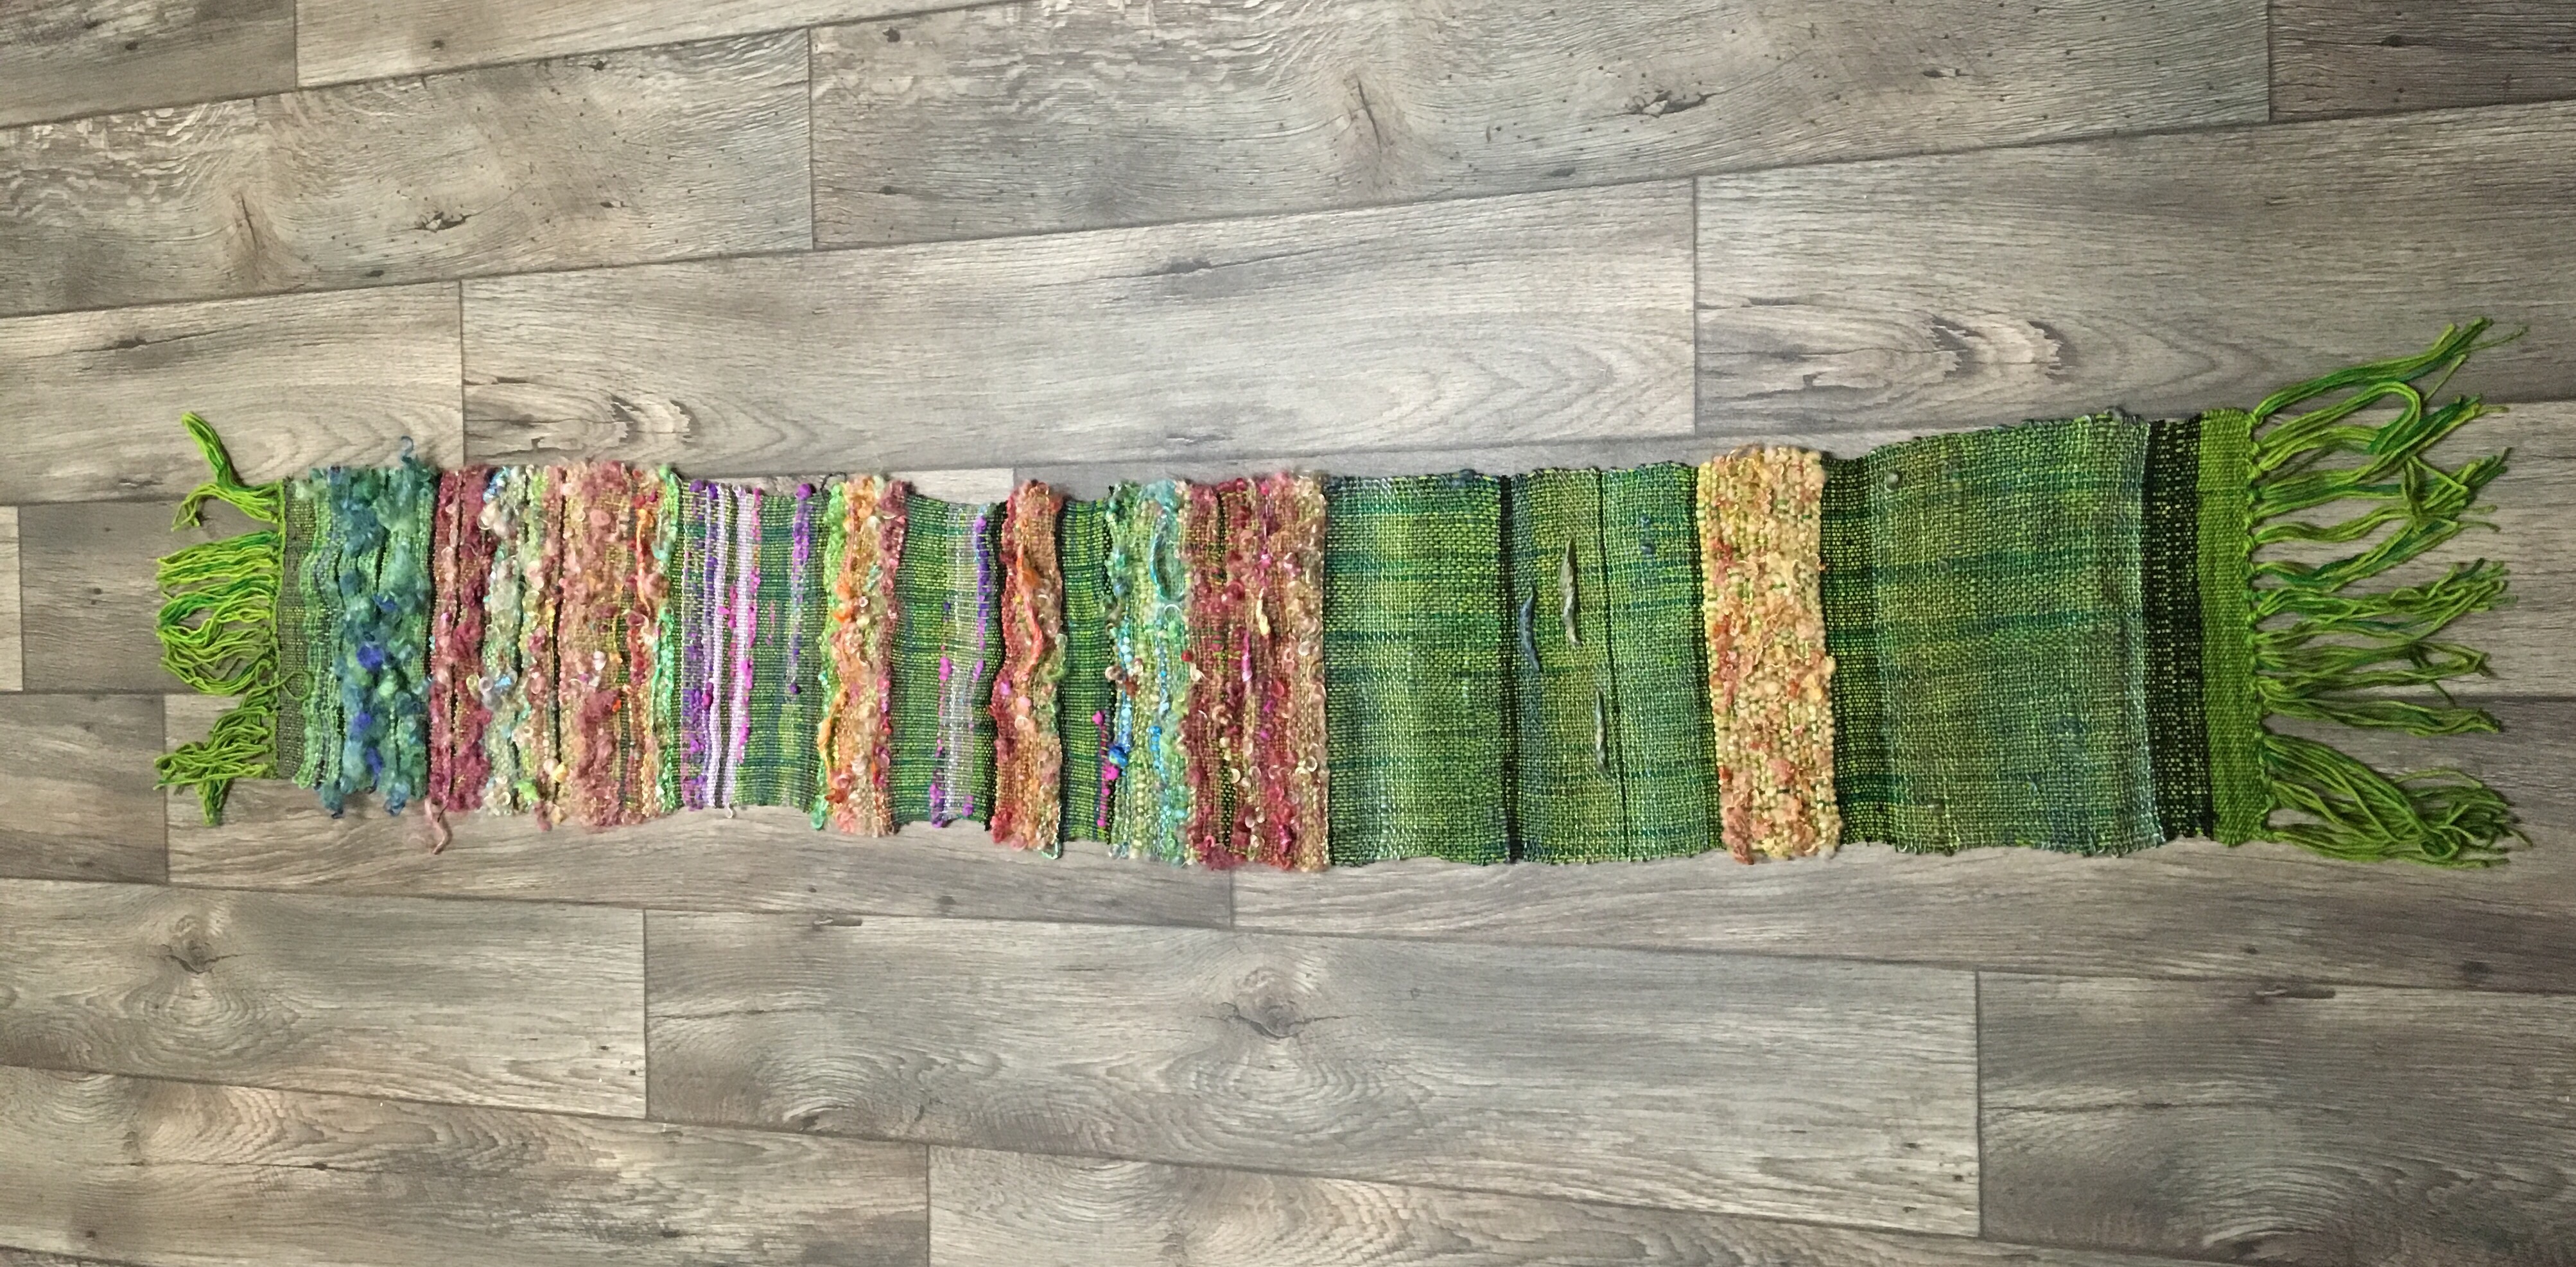
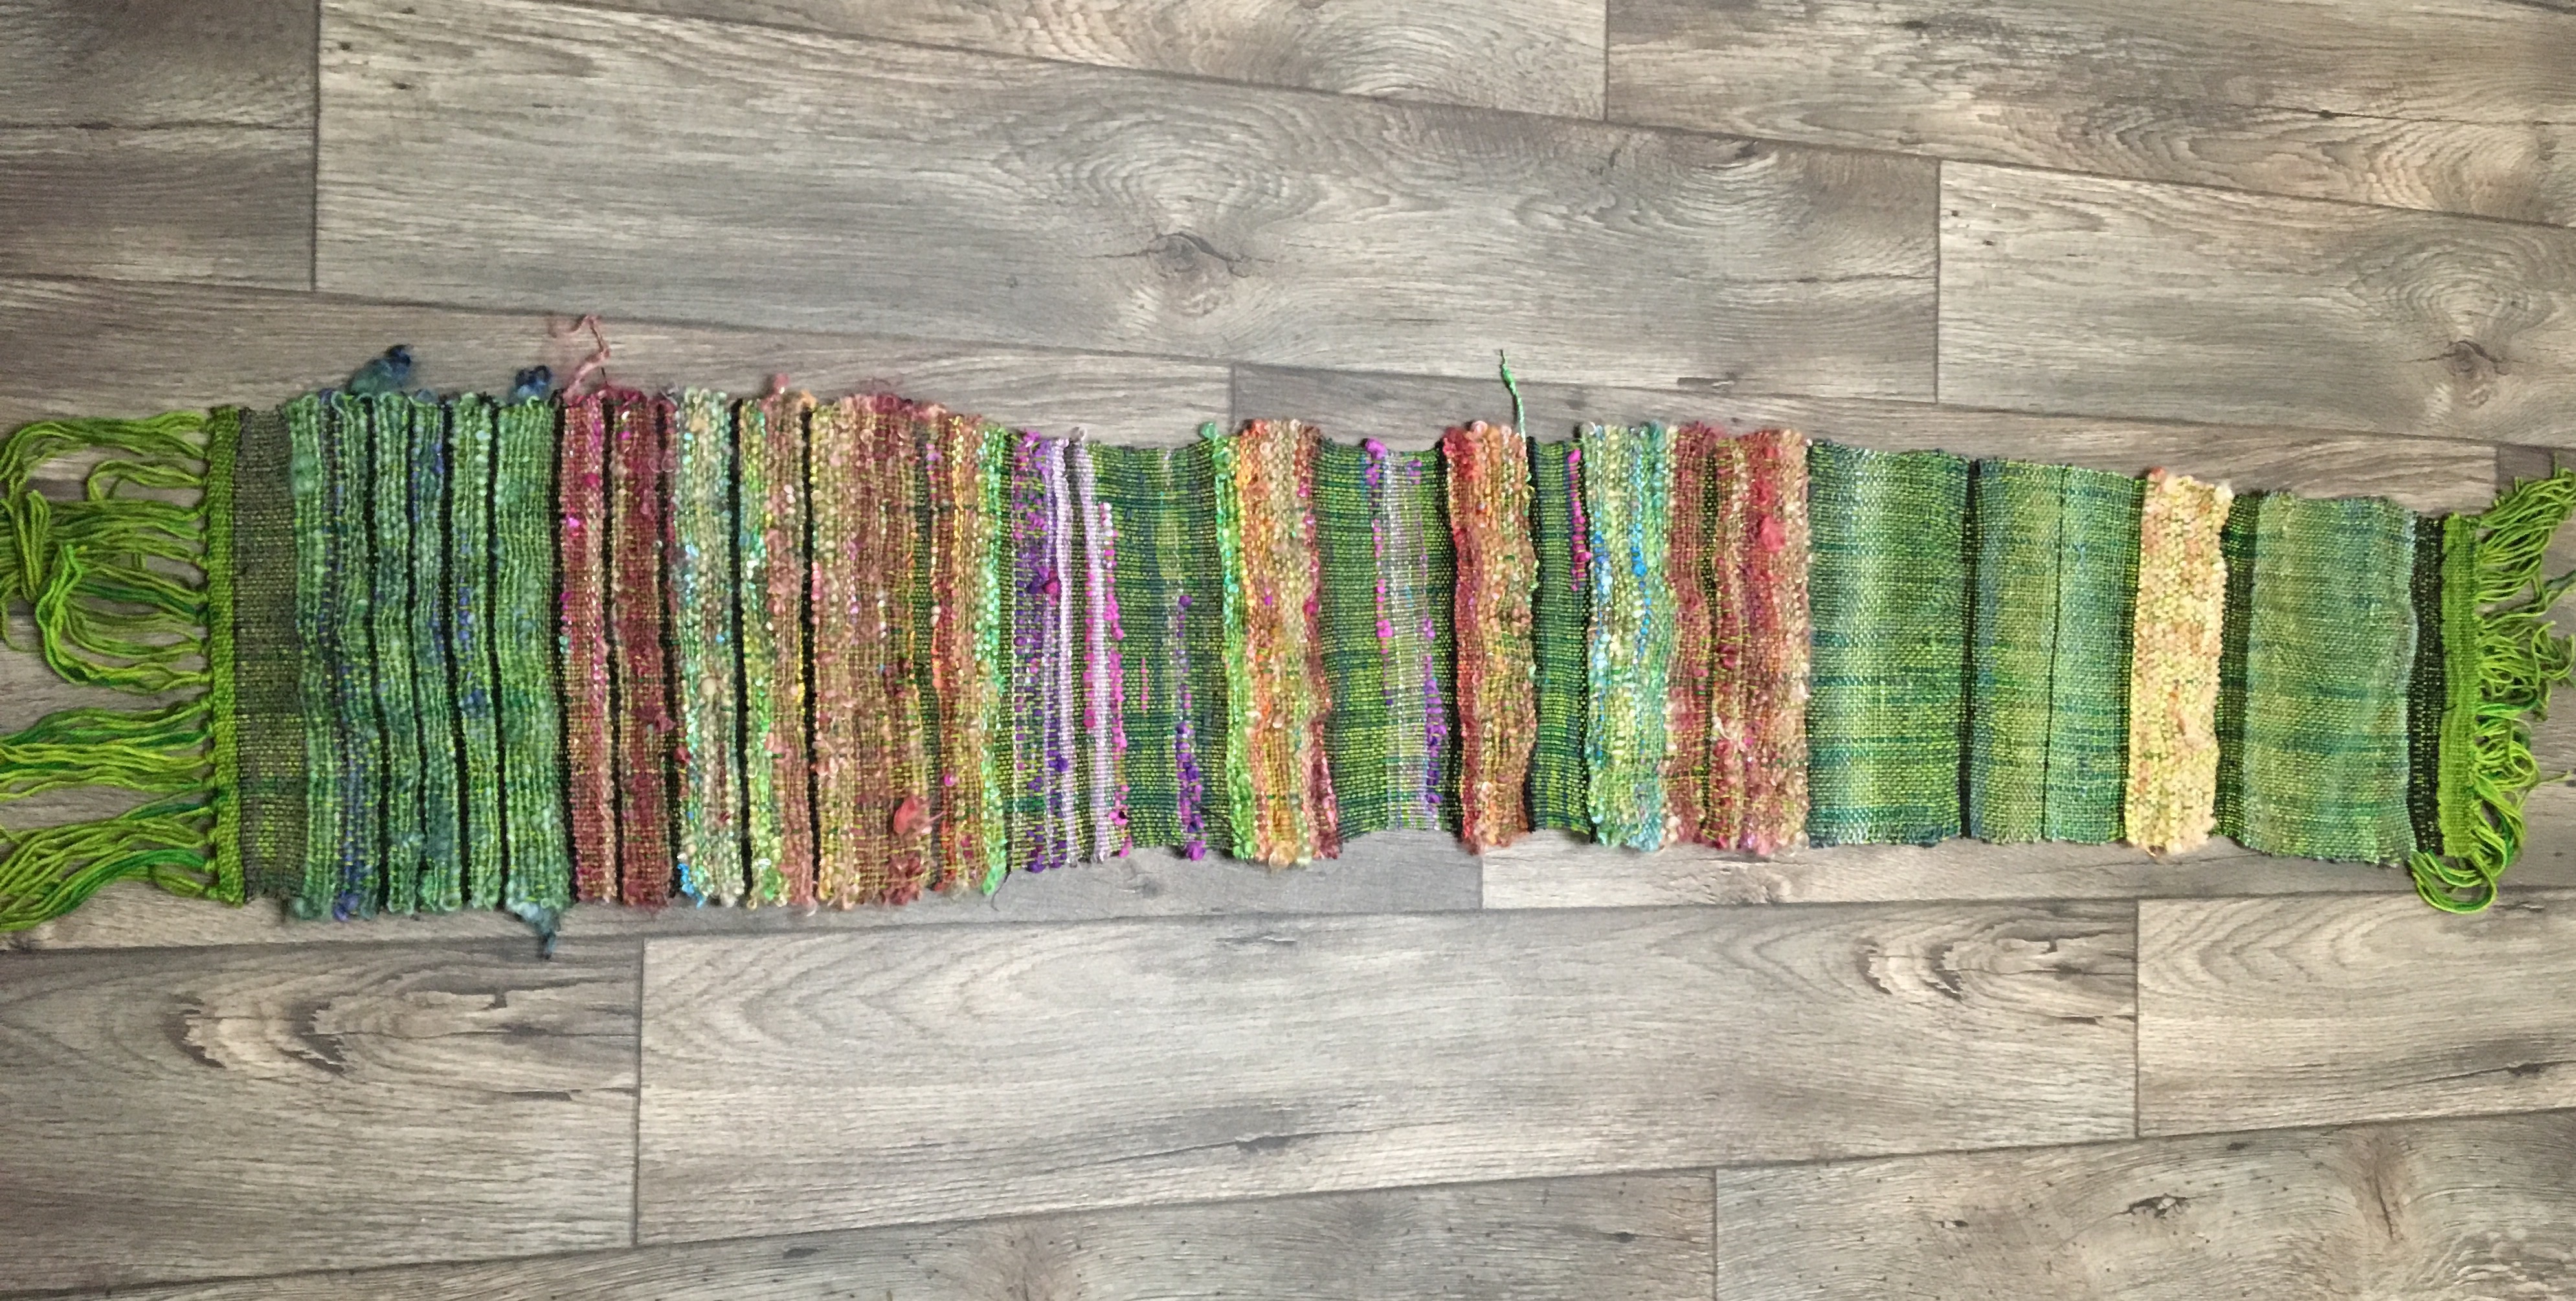
Well I really tried to do exactly what was shown in several videos and got nothing close to even. Now to be fair, I haven’t washed it at this point, but the pictures show how my edges go in and out. I don’t know if this is truly a myth yet. I’m ok with my edges for now. Being a beginner, it’s a weaving right of passage to have wonky edges. I have a feeling, that using thicker yarns, then thinner, then thicker yarns may cause different widths in the fabric and thereby uneven edges. I need to weave more and find out how that works. I’ll learn with each piece if there is any truth to my thinking regarding this.

I love the way weaving can showcase yarns!
I really had no rhyme or reason to this project. I wanted to weave my first project and experience what it was, to weave. I didn’t worry about perfection.
I didn’t worry about anything except carrying that black lace thread in certain places, throughout the project, to tie in the beginning with the end. I found that as soon as the fabric was wound onto the beam and I couldn’t see it, even with pictures, I wasn’t sure what it looked like. I couldn’t remember how thick each section was before I used my black thread again. At the end, I know I was using the black thread less often.
Another thing I did, was have any lock tips only poke through one side. So the side facing me is fluffy, and has fluffy, lustrous locks and sweet little lamb tips coming out. On the opposite side it’s smooth. 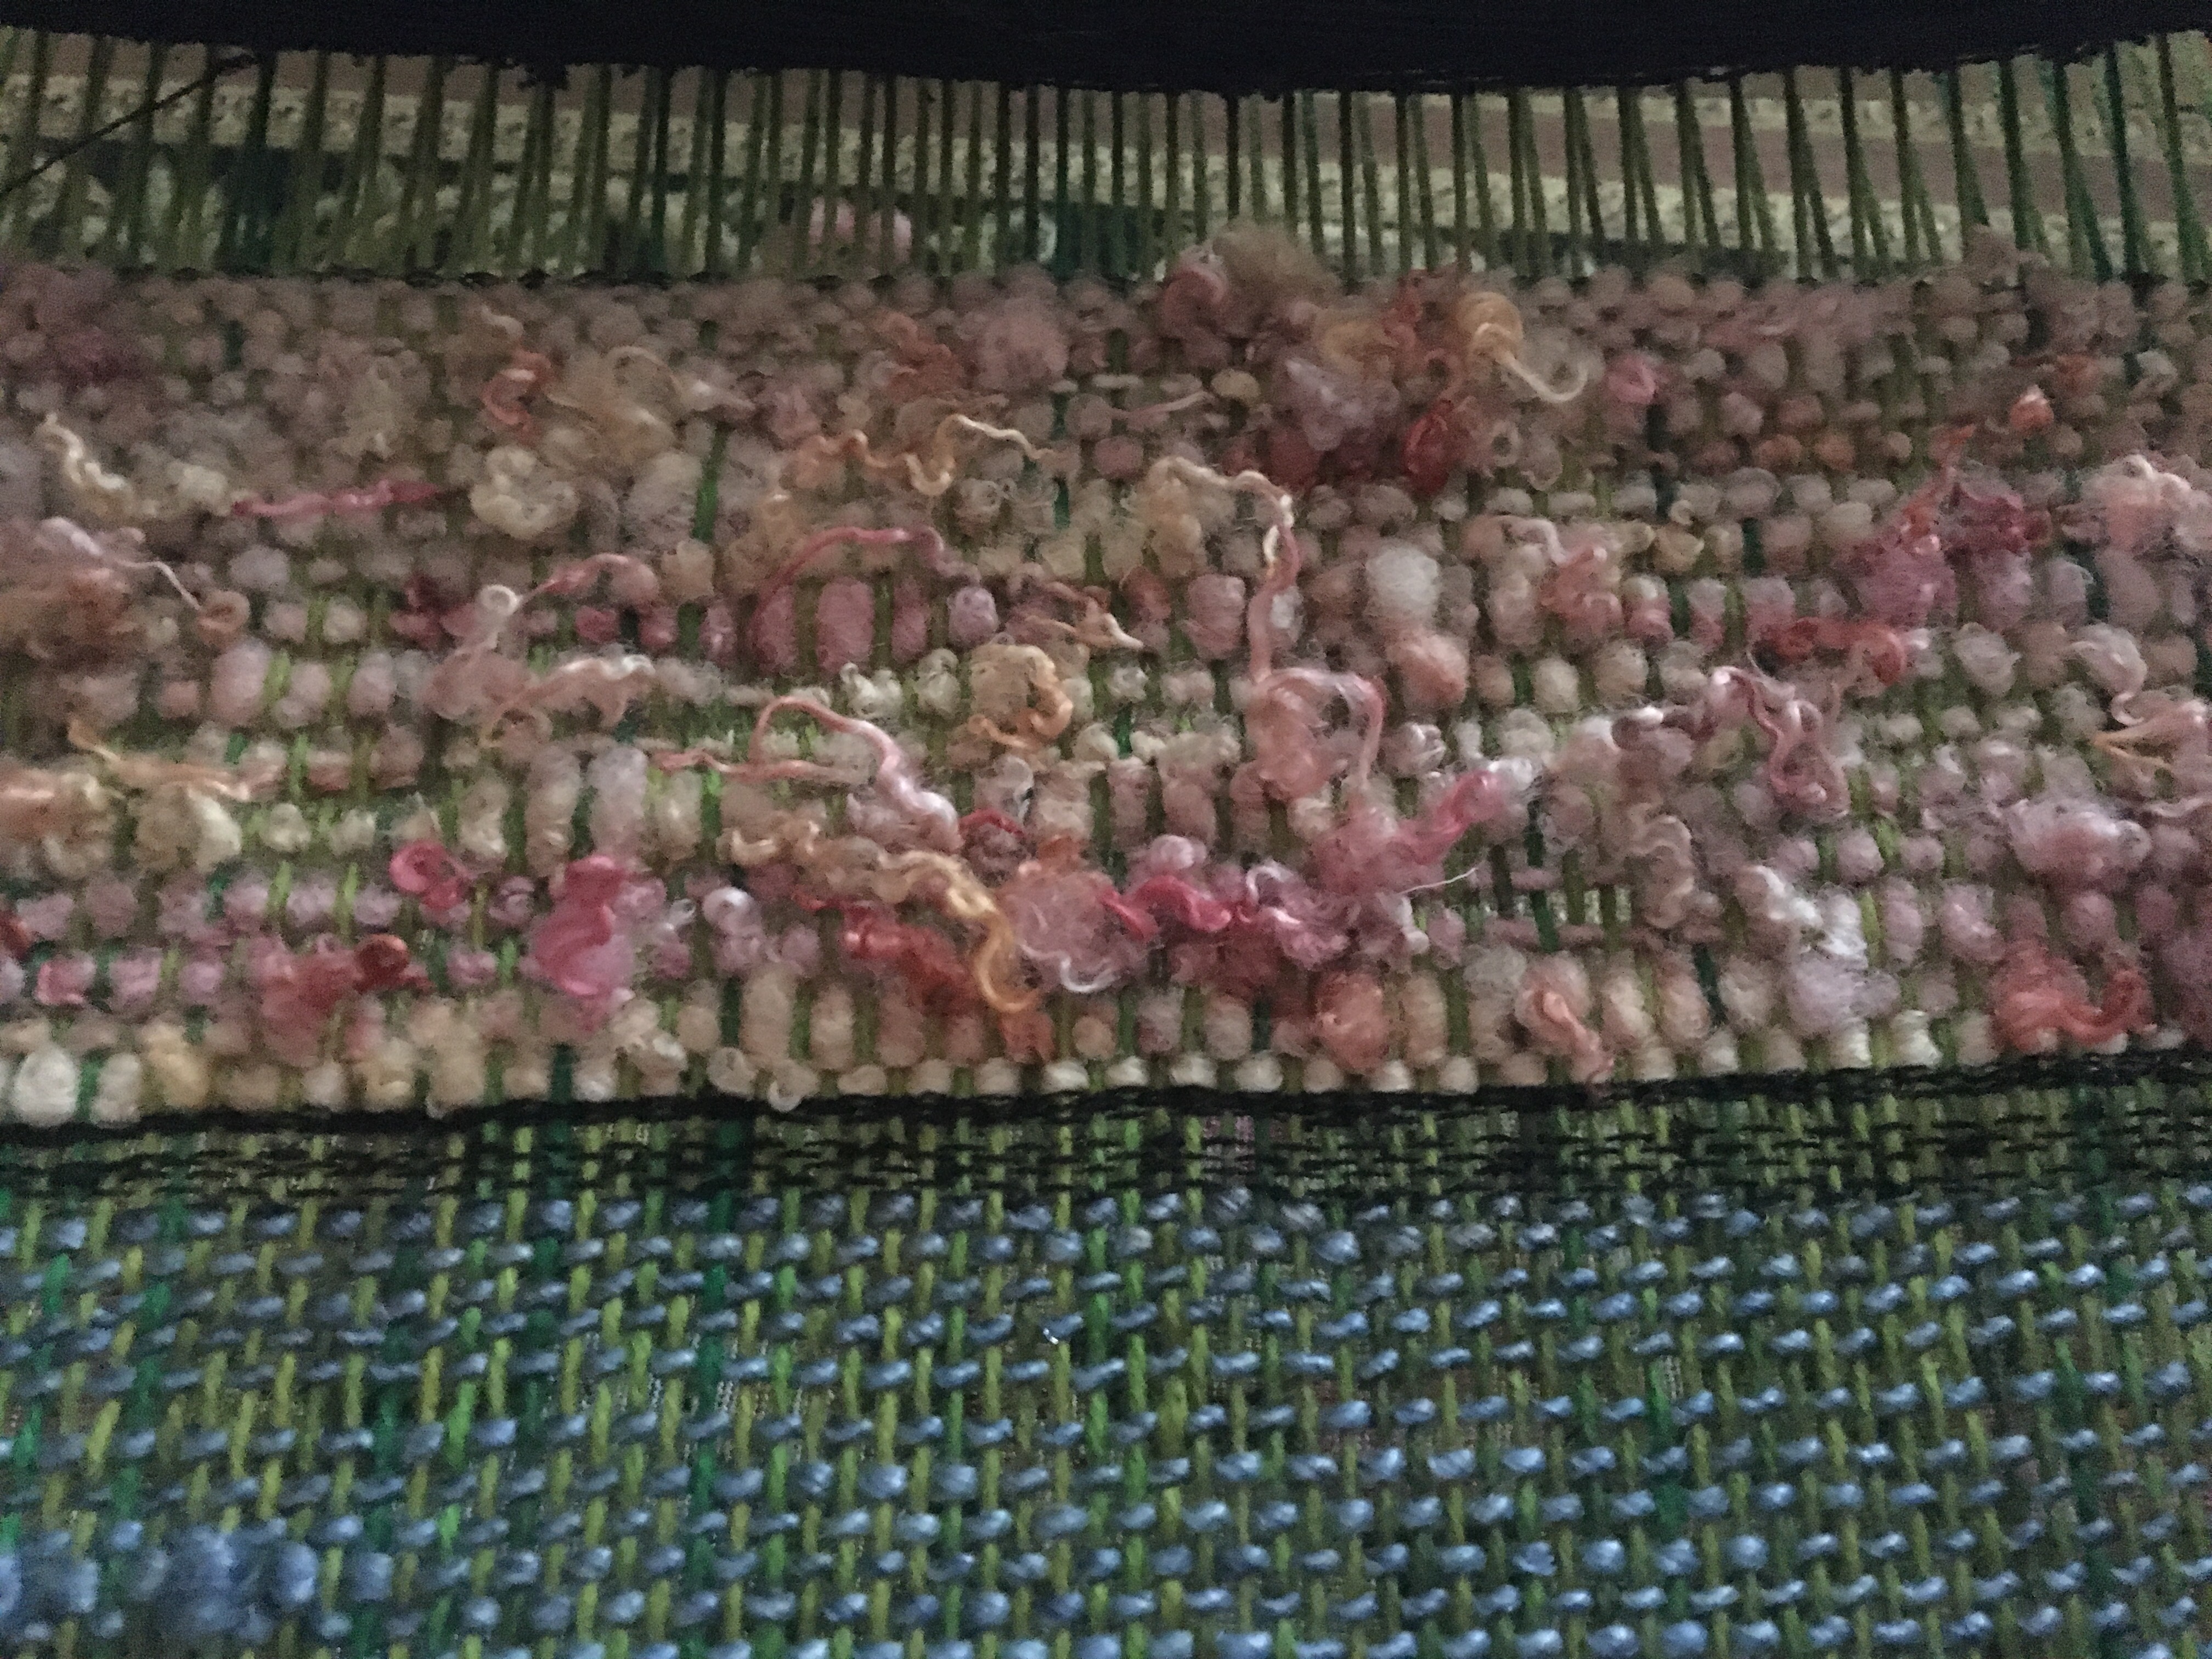
The same is true for any bits left out of the weave. These things only happen on one side. Leaving the other side to look smooth and pretty straight forward.

This piece is kind of like a mullet. All business in front and party in the back.
As it turns out, one end has more crazy lockspun where the other end has more smooth handspun.
If worn as a scarf, depending on which end you have in front or in back, it can look more business or more party.
Myth- weaving uses up a lot of stash yarn quickly

THAT IS NOT A MYTH! This is so awesome for busting through stash. If you have a crap ton of yarn, and crochet and knit as slow as I do, this can overnight make you realize….you just might not be at SABLE, like you may have thought you were!!! I know any one thinking about the possibility they are at SABLE, if you are without a loom, I can’t suggest enough to give it a try.
They have many looms that are pricey. But even trying a smaller inexpensive loom to see if this might be fun. An ashford sampler loom, a Schacht cricket loom,
Not to mention many people destash their looms at great prices when they upgrade. Look for those. Some Lys like mine even rent looms out when classes are taught. If you were in the slightest bit interested see what’s available to you.
SABLE = stash acquired beyond life expectancy
A loom is a gift for you but it’s also a major gift to your stash!! This scarf used 14 skeins of yarn!!!
Fourteen skeins of yarns!!!
Think about that a scarf!
I get to continue spinning, crocheting, knitting, to my hearts content, and weaving took 14 skeins from my stash in under 2 weeks! Next. Project I will take pictures of all the skeins I went through I had no idea how much I would have used!! Stash people that don’t have a loom… You may love this. I don’t have the saori, I didn’t make the big investment until I knew I’d enjoy it. For now this works I want to make fun stuff.
Ok so… I got to the end of my warp. I cut the edge free and did half of a Damascus edge (just one way across), and tied groupings of warp threads into a sort of fringe.
I have yet to wash it. Full it, get it wet, or whatever.
It feels rough and looks kind of a mess. I’m hoping for the magic that happens with this step everyone talks about.
Here is the woven piece before fulling.
 The fluffy side front
 The smooth side back
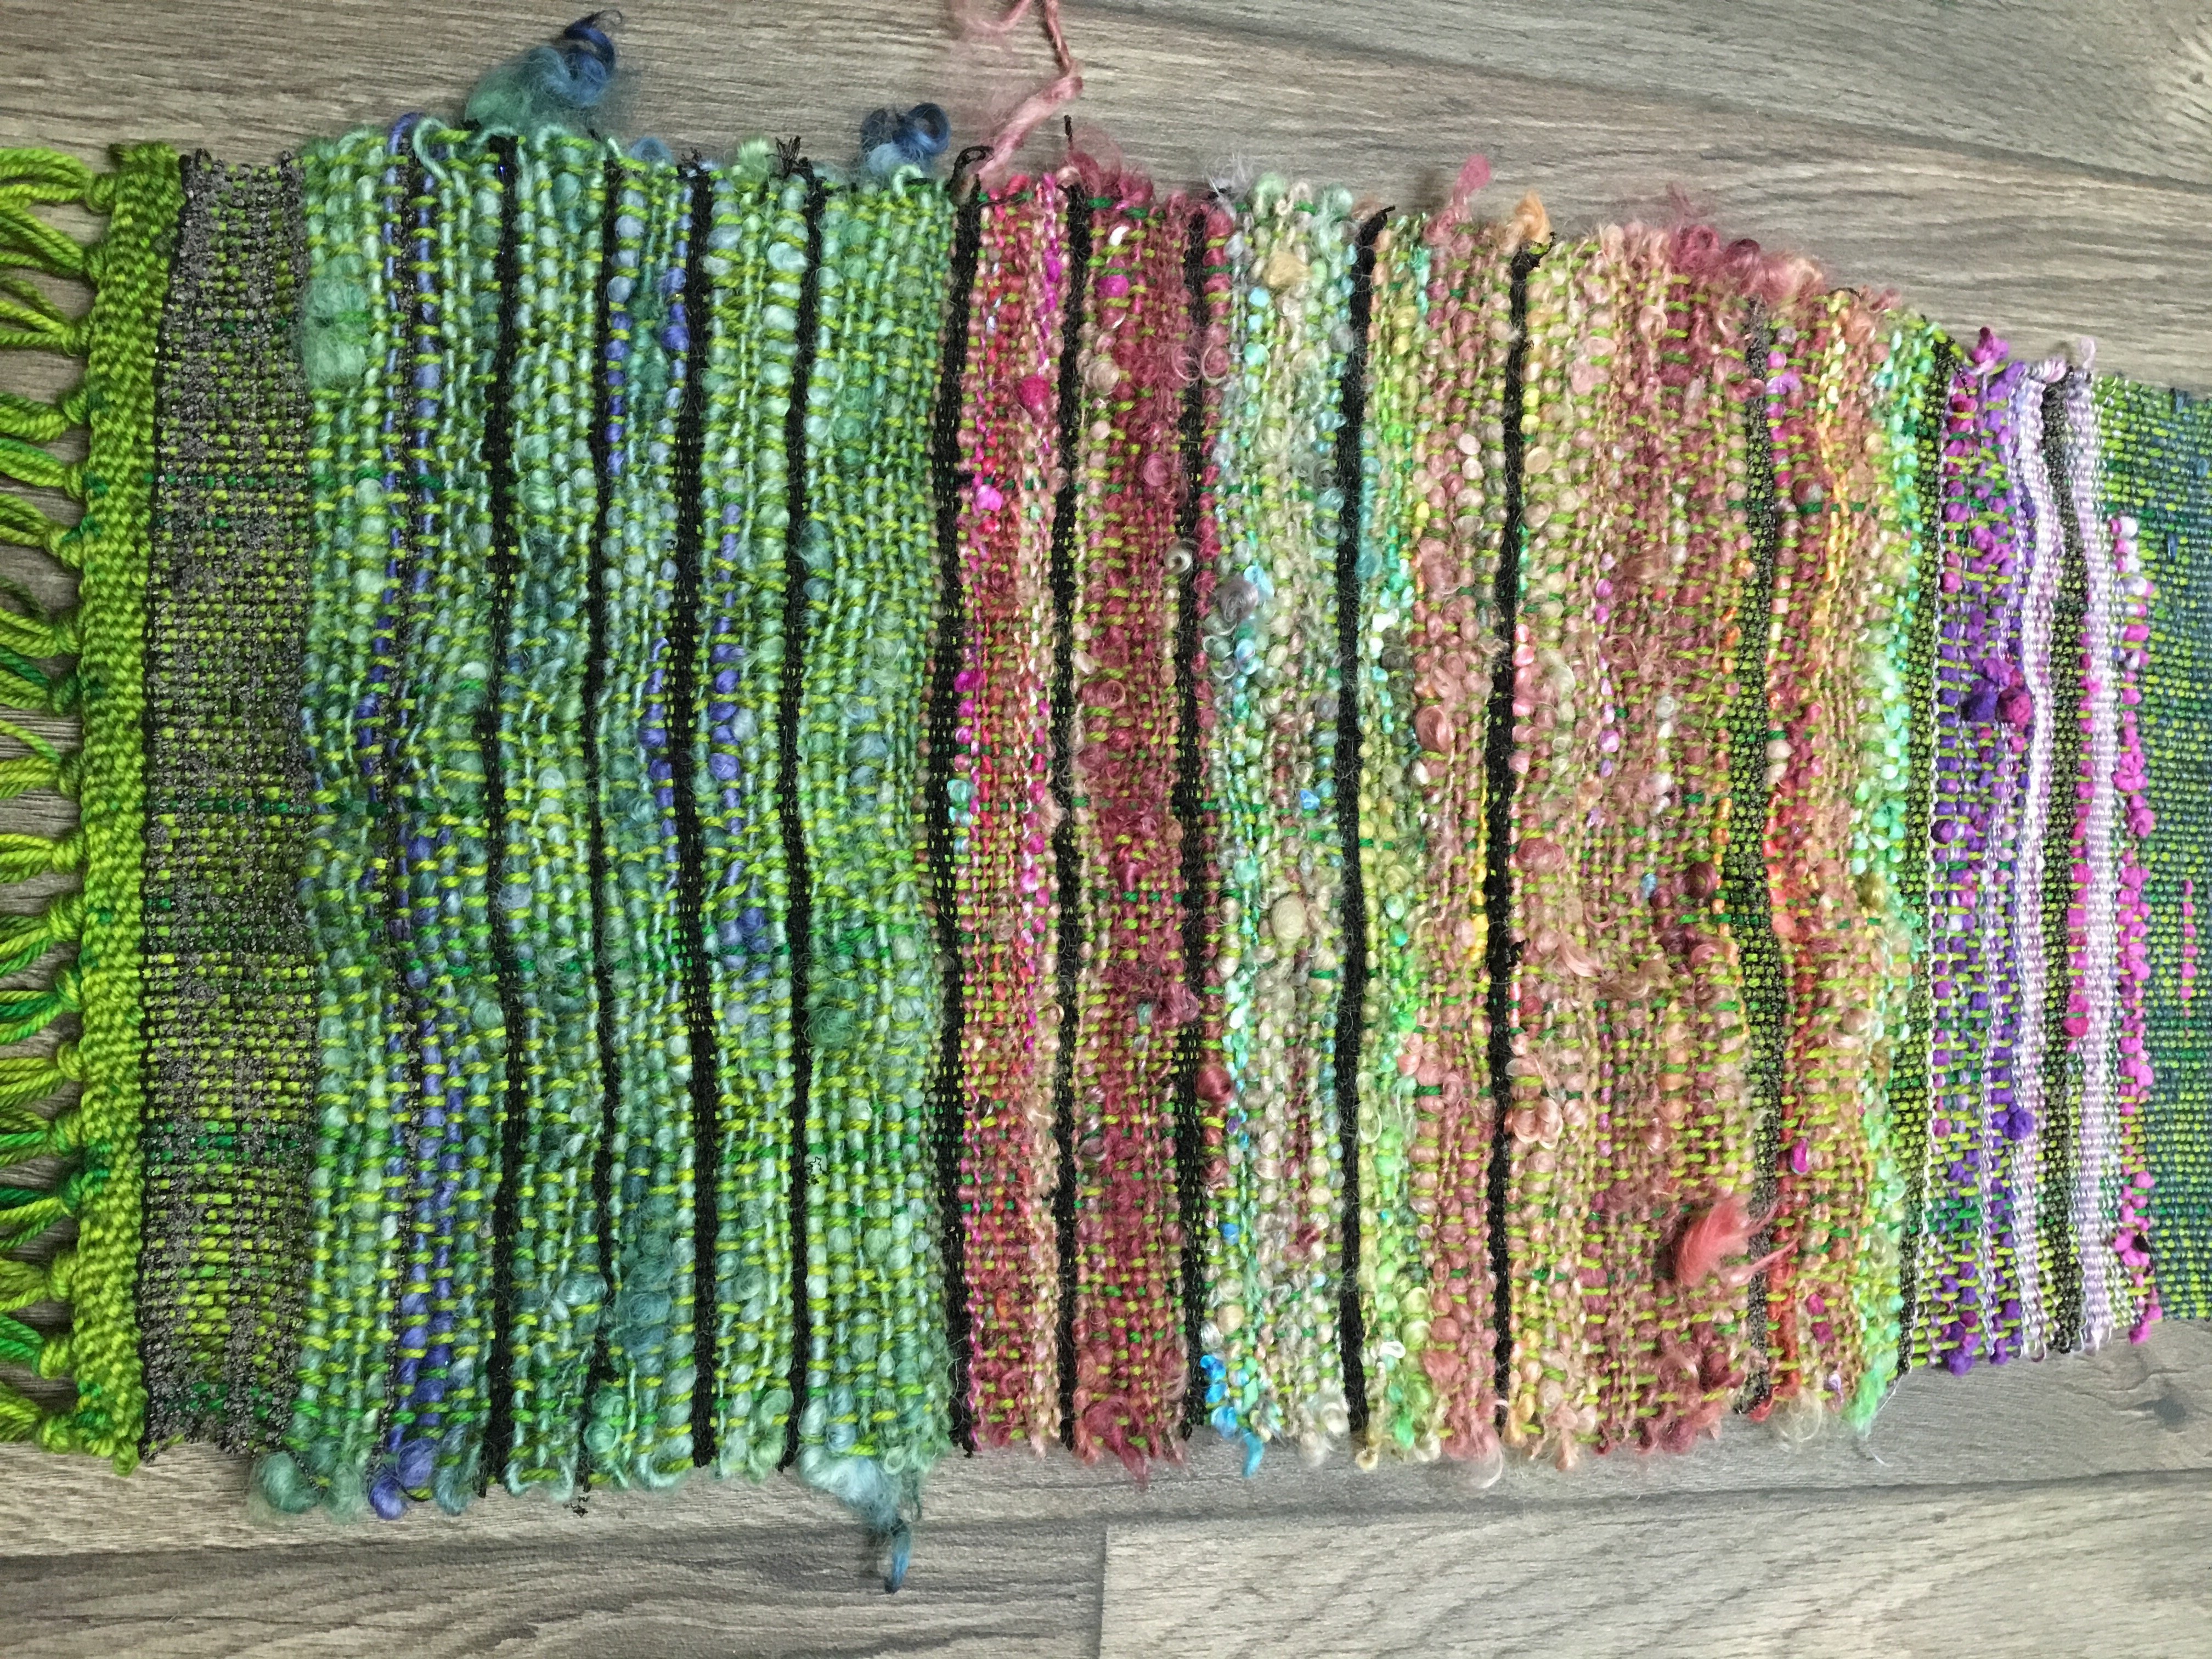 Closer of the smooth side
 Yea I don’t know how much fulling can/will help this much wonk but while I won’t expect much, I’m hopeful. 😊
All in all, weaving is pretty cool and my stash is thankful! And so am I for an awesome birthday gift from my husband!
I hope this will encourage people to try weaving. I know my first try at weaving isn’t a masterpiece by any means but have you seen my first handspun ?
Here she is in all her glory.
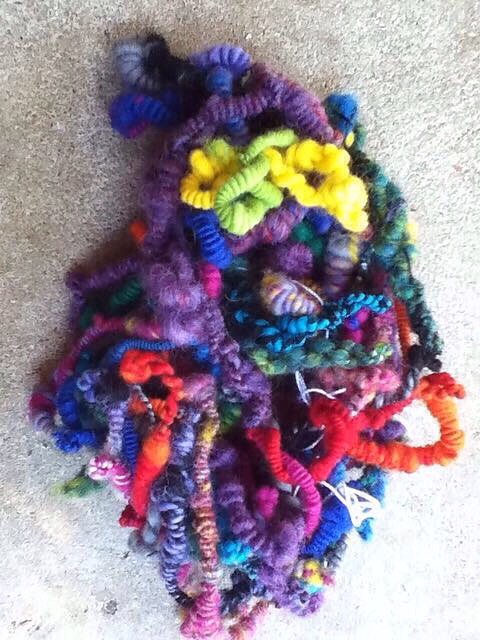
No it wasn’t meant to be art yarn
This was my trying to spin a normal yarn.
Those aren’t coils. That is so overspun it won’t straighten at all and it is a hard rock.. If I threw it at someone’s head, they would be concussed. It could cause damage to sheet rock if thrown at a wall.
Even weighted after a soak and thwack…. Nothing. It doesn’t straighten out, it’s not usable. Can you believe that’s just wool? It is wool.
Some people saw it and say look at those coils and other art yarn techniques I’d never heard of at the time. That was not what I was going for. I thought I was spinning something I’d use hahahaha
It’s hilarious. But I could only improve from there and it’s funny now. I can’t say I’ve ever seen a first handspun quite this bad. Especially when I was hoping for a regular usable yarn. It was a great starting point because I could only go up.
I hope the same with weaving and I hope others will join me. Especially new weavers or yes experienced weavers. Fibery goodness has been wonderful and also if you are interested check out the art weaving class I took listed above.
I’ll post the woven piece once it’s finished. It needs those finishing touches.

