I gotta say… This process was not at all, what I expected. Usually, I take great measures not to felt my fiber. I’ve always been afraid of the dreaded accidental felting. I would let the raw wool sink on its own in the scour process, to avoid agitation. I actually bought a laser temperature gun to make sure the fiber I was transferring to a new tub of rinse water, it would be the same.
I was really careful. I know the mechanics of felting… agitation, temperature change, soap (change in pH). I have watched several videos on the internet showing both how not to felt and even more on how to felt.
I had my bubble wrap, mesh, pool noodle all set…
Imagine my surprise, when it took me hours and hours to felt a very thin layer of cobweb felt. No exaggeration, it took hours of full on abuse to finally get a result. I wasn’t even sure I had felted the piece when I stopped that days attempt, from pure exhaustion. I physically could not continue. I got on Facebook live to express my frustration and I said jokingly,
“Now I understand why people started violently throwing it at a certain point… because they really were pissed trying to make felt”
All the videos I had watched would say, ‘now is a good time to get out any pent up aggression’ and proceed to wad it up and slam it into their work surface. The only aggression I had was toward this scarf I was failing at felting.
Putting myself on pause was the best thing, even though I couldn’t have gone on if I wanted.
The next day, I went to check…
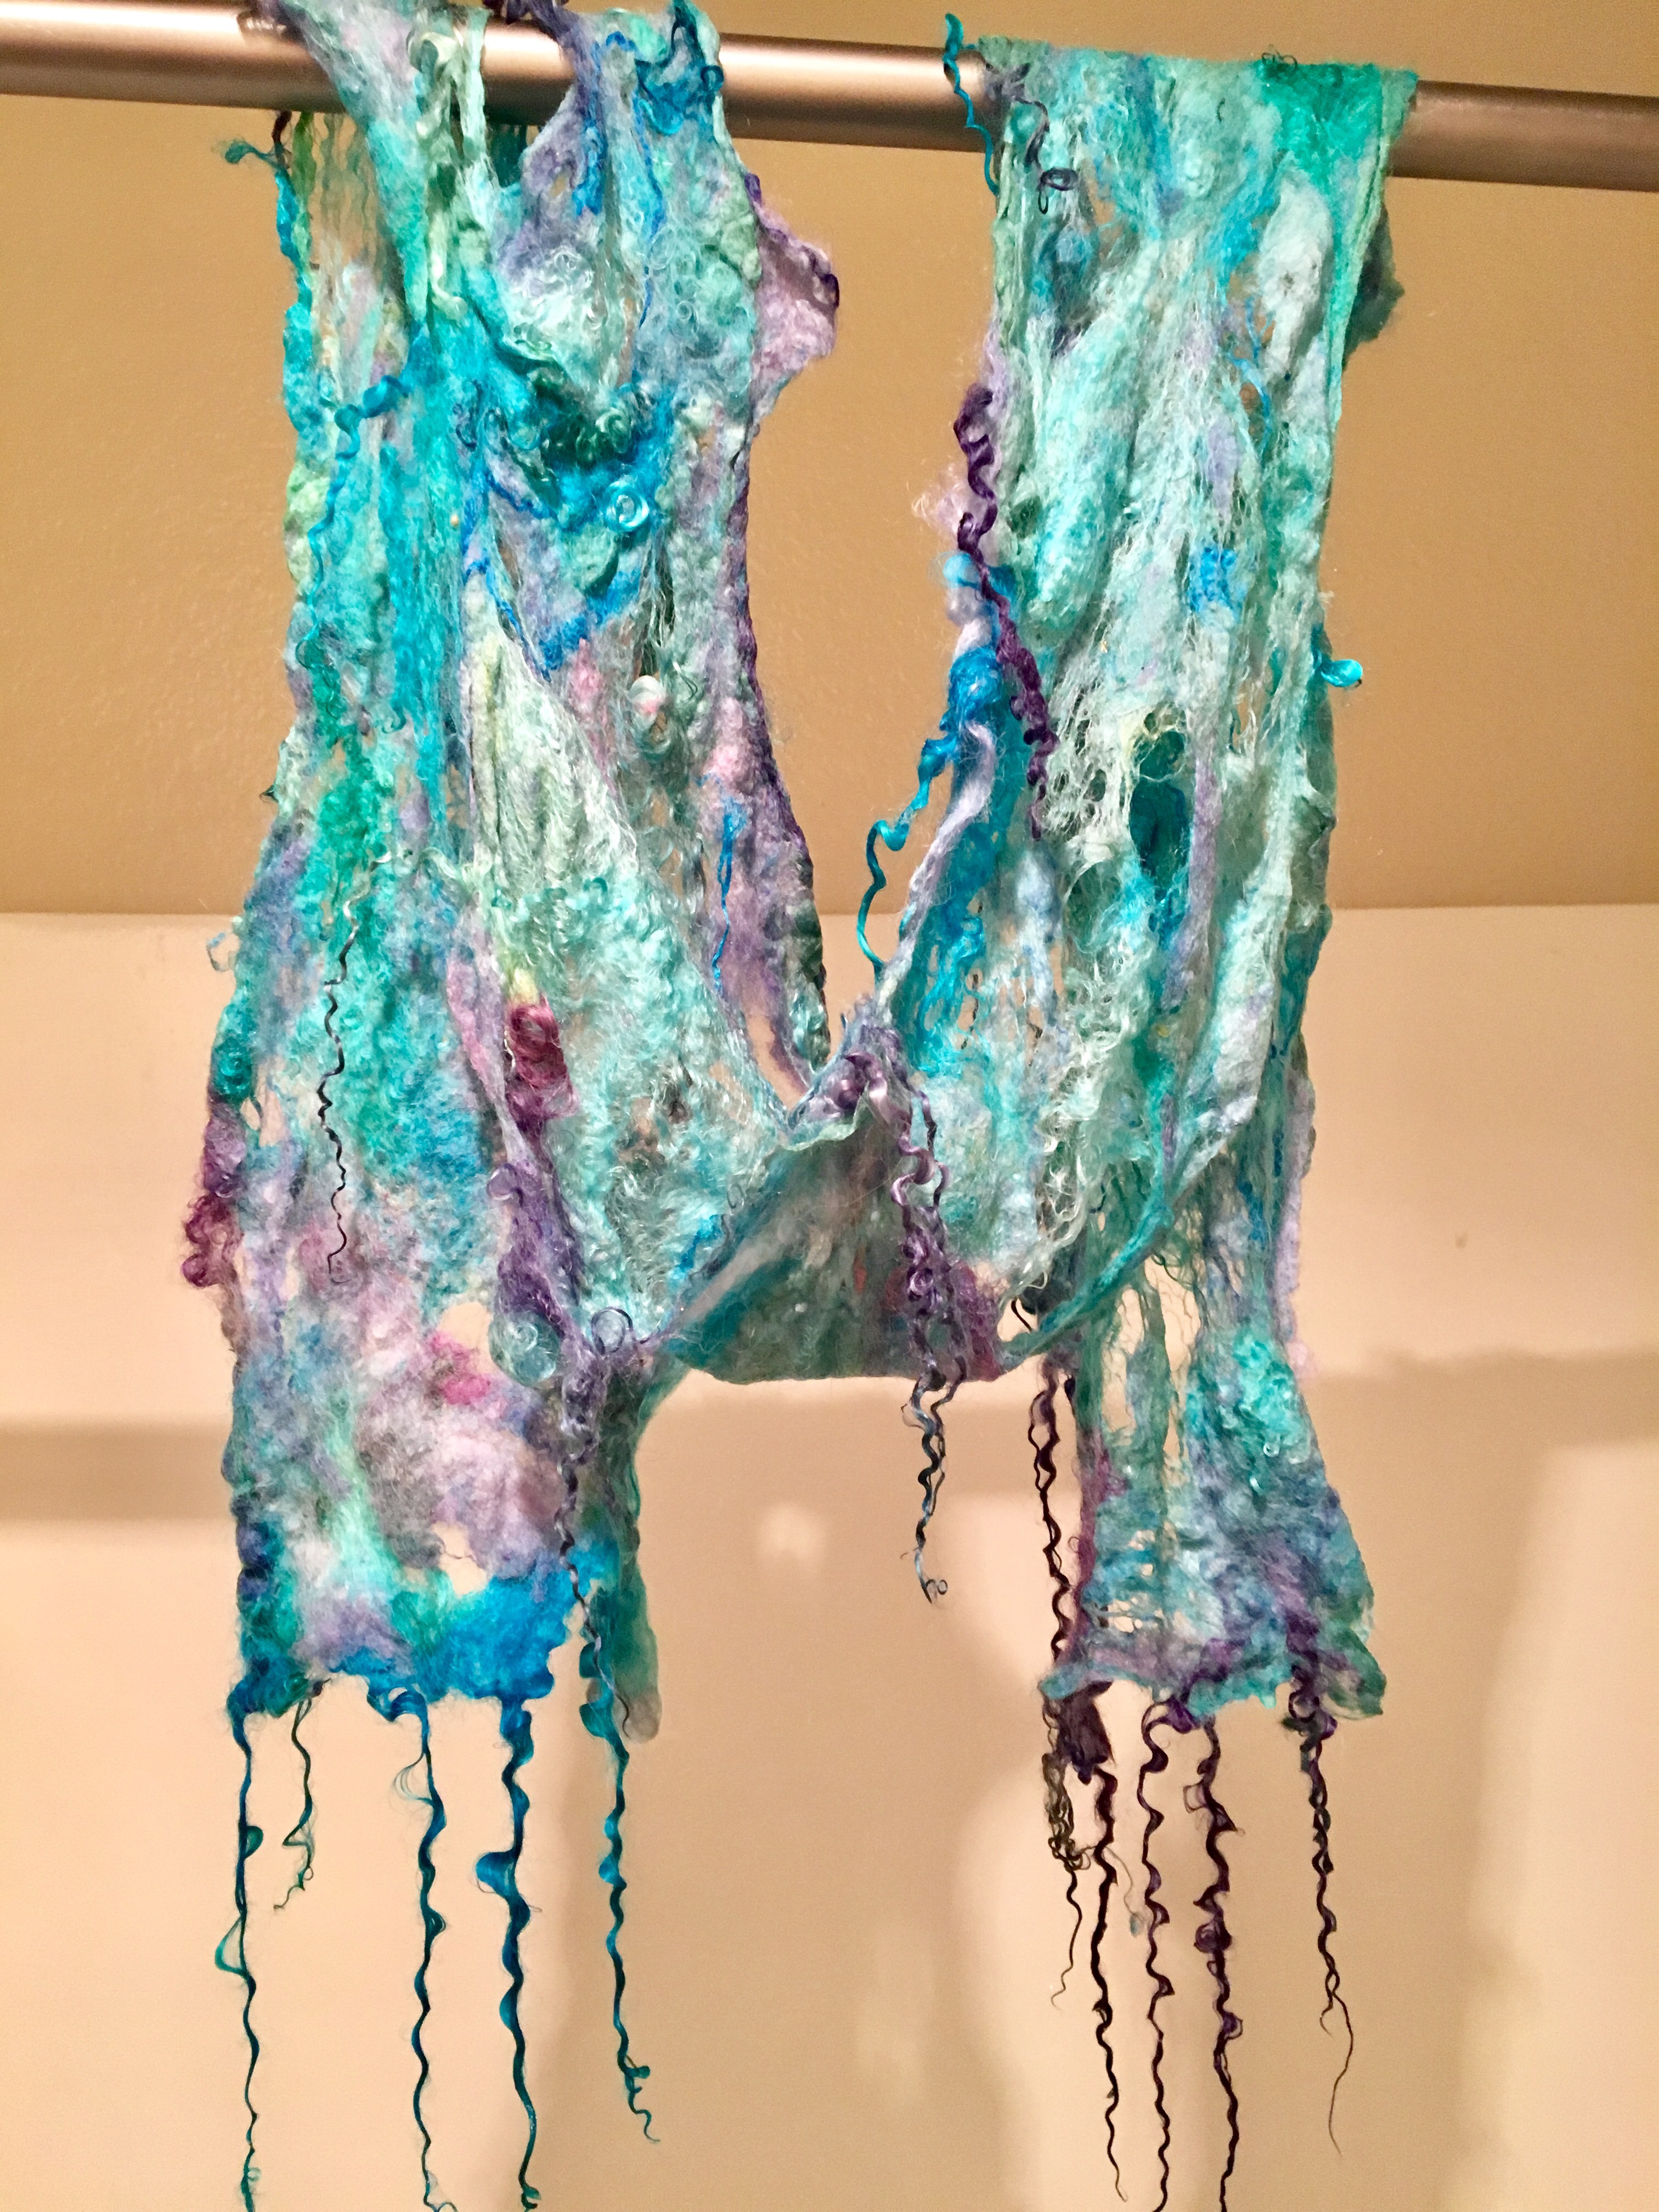
it was dry and damn if I wasn’t relieved, it was felted!!!
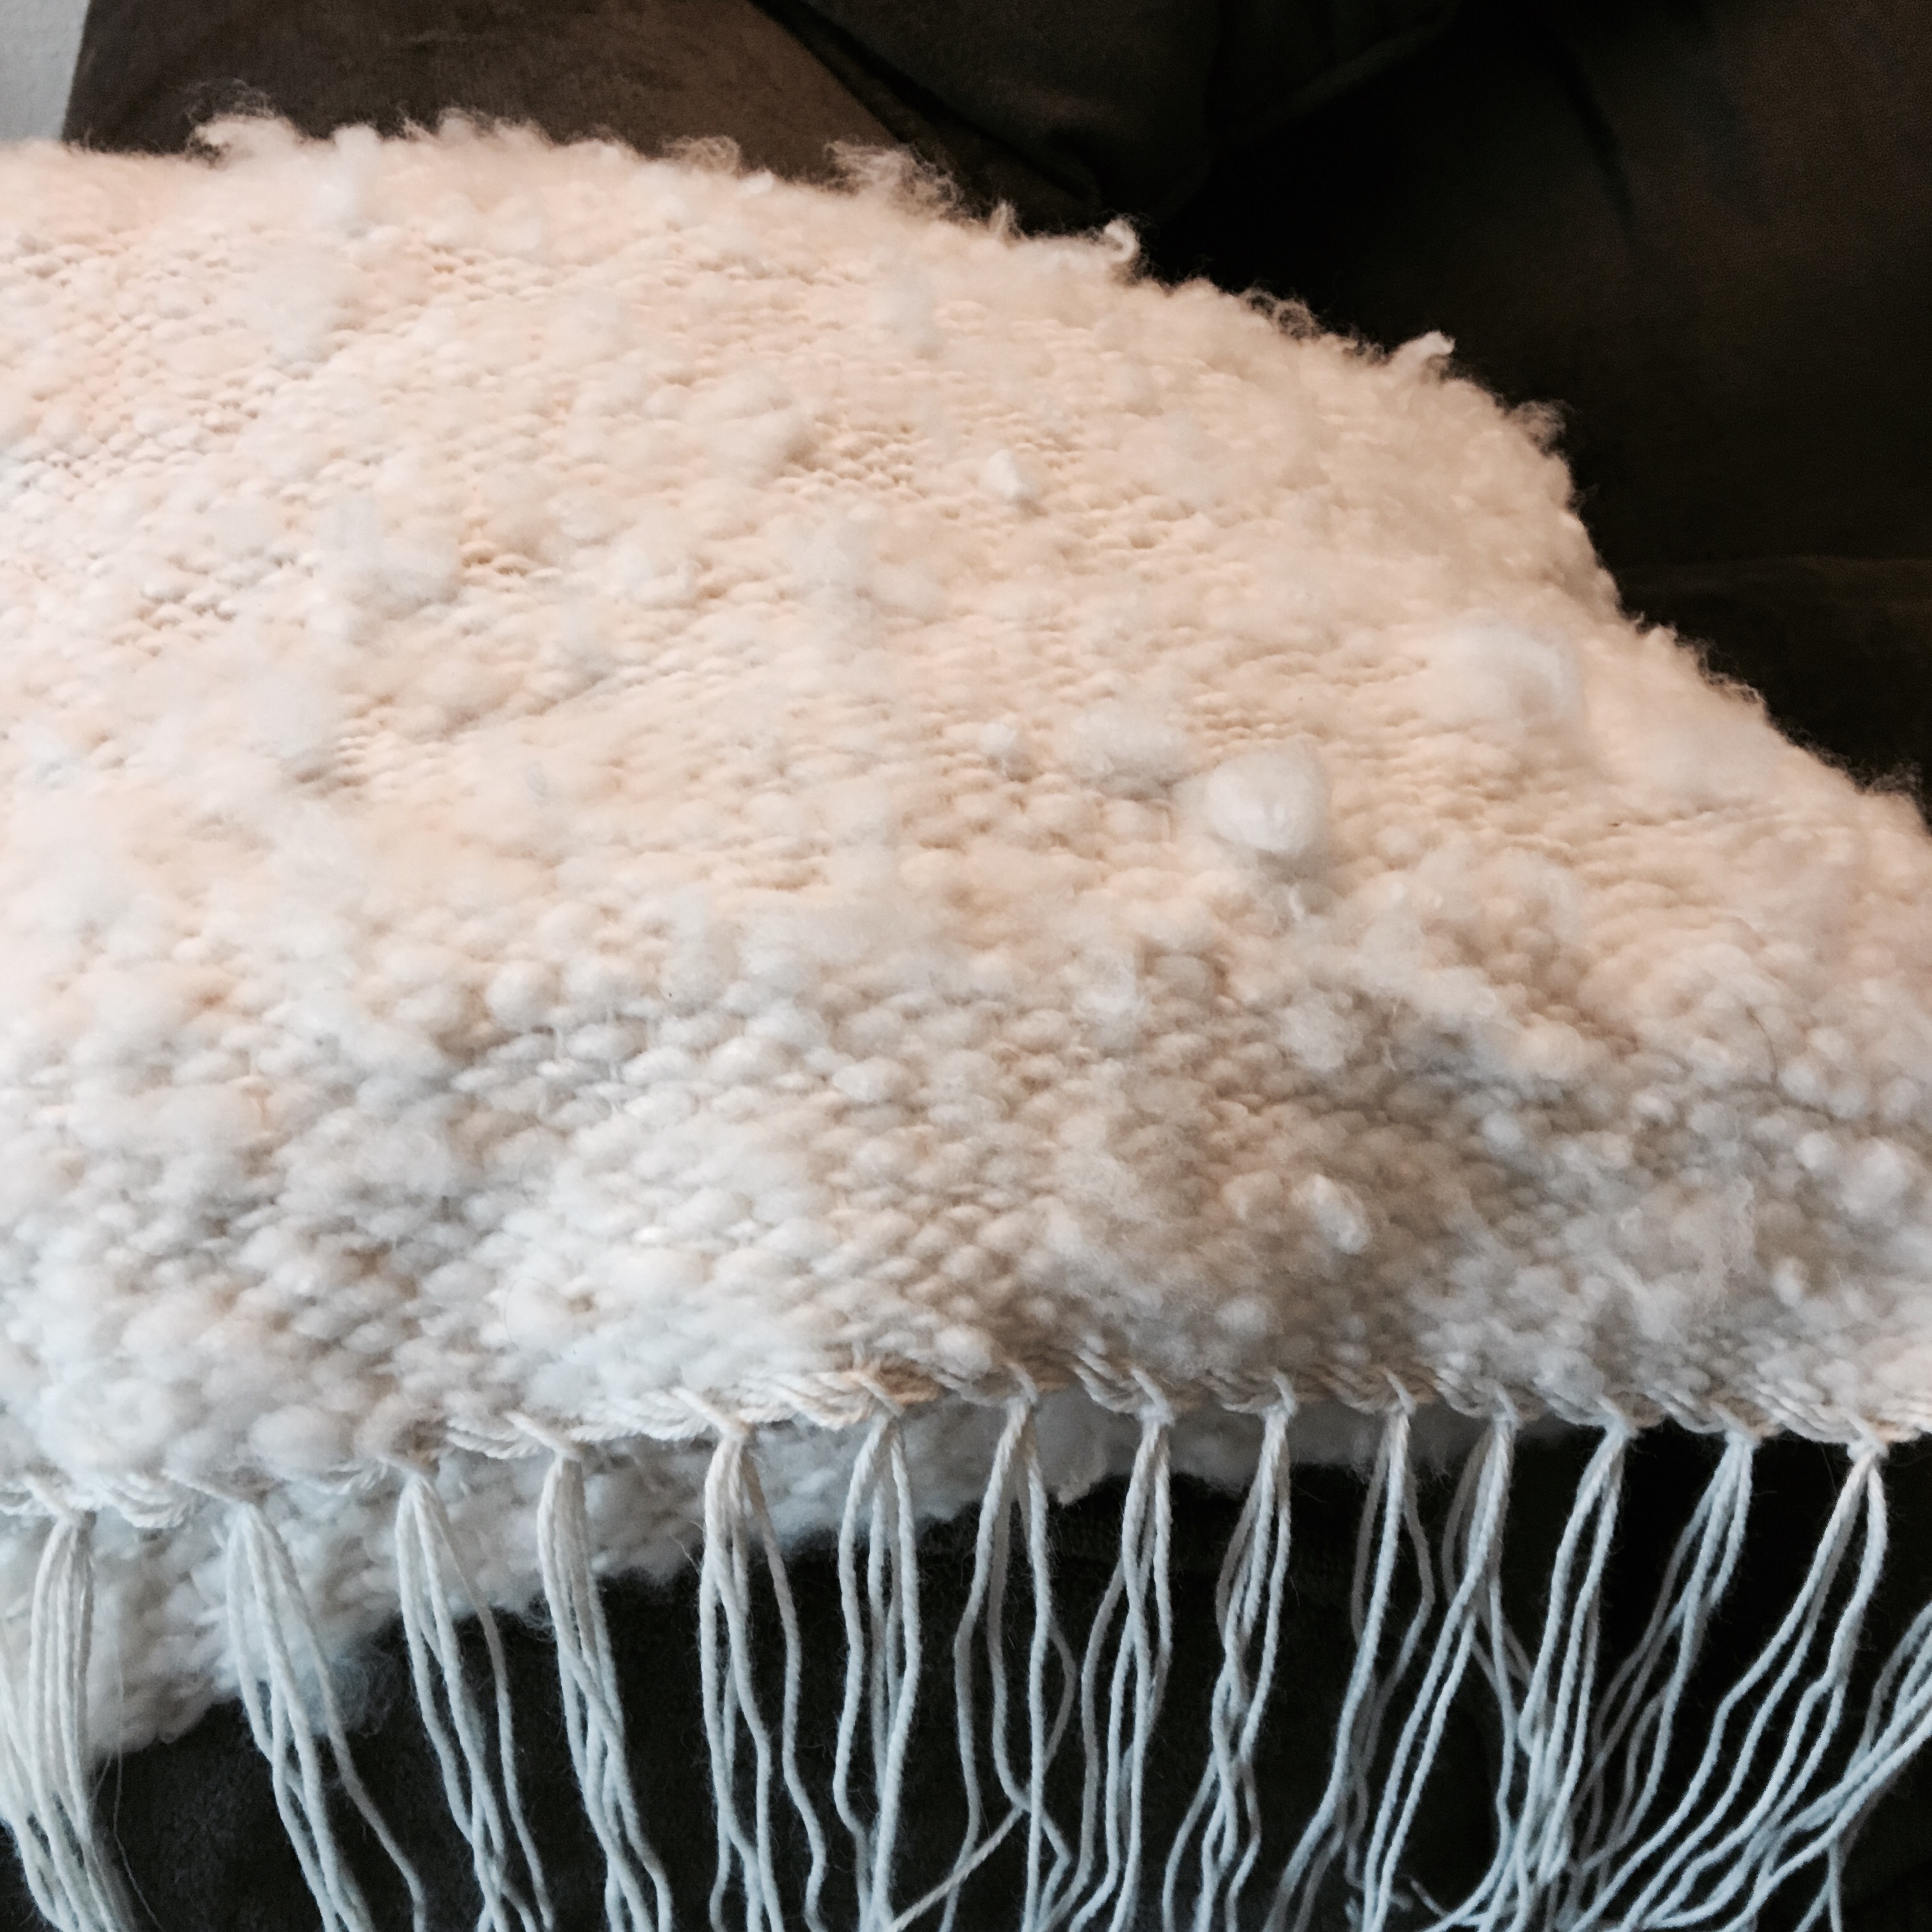
Let me just say wet cobweb felt does not feel felted. Or, maybe it does, but I just don’t have any clue what I’m looking for. I have to say I was really pleased with my result. It was light and airy and soft cobweb felt with teeswater locks dangling and silk integrated into the fabric.
Felt is the first ever cloth humans made. And I managed to make my own… barely. I didn’t know I had managed to create anything at the time, so there is still lots of learning to be done.
I really love the result. I didn’t expect it to be so soft and light. I’m into it… which is great news for all the wool waiting to be played with
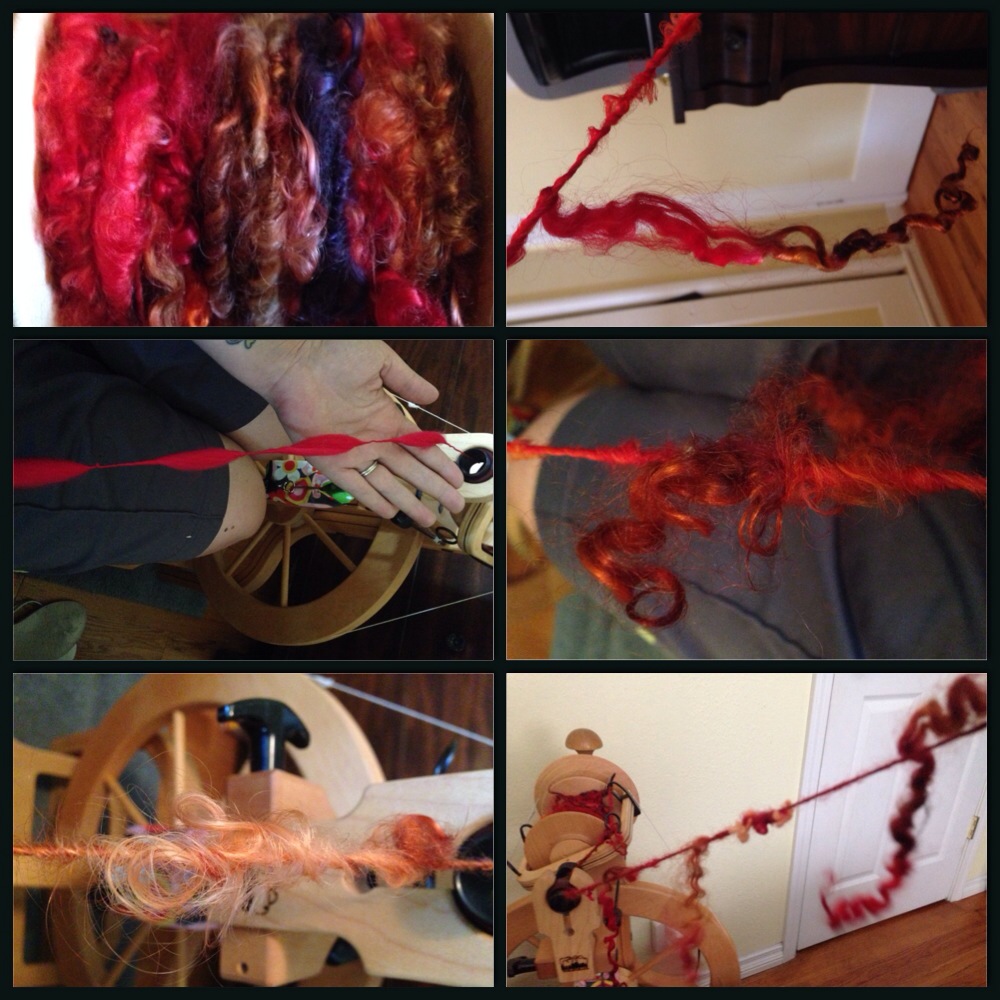
I made this video to show how I spin locks and leave dangling curls with my small kiwi orifice and 4ounce bobbin.
Before I had any wheels that had the specs for more bulky and textured yarns, I really wanted to try spinning locks and having the curls dangle. I wanted tailspun. While I couldn’t have a yarn any thicker than my orifice, I made it work with thin yarns. I spun it just like I would spin a traditional yarn. I didn’t core spin or anything fancy. I just spun it the way I knew how like it was a traditional yarn. I did spin much longer locks but lamb locks and thin locks worked the best for my orifice. I made this video to show a friend how I did it and thought I’d share it here..
As far as plying, sometimes I would make two bobbins full and then ply them together for twice the dangley locks, or I’d thread ply but most often I’d leave it as a single, and it was fine as a single. You can see in the video even the smallest orifice can fit this size art yarn. So give it a try. I’m spinning blue faced leister lamb locks. And the orange locks are mohair. https://www.youtube.com/watch?v=SkOWi_jlcwE&feature=share
I think I was avoiding my oldest work in progress (the daisy square afghan), by way of, starting another project from deep stash.
My husband gifted me a drum carder and raw merino fleece the first Xmas after I started spinning. I was only spinning a couple months by this time and had no experience with raw fleece. I was so lucky that I didn’t felt/over scour/ruin the fleece during the washing process. After washing, I tried spinning and koolaid dyeing a few skeins but several pounds went into stash. And there it waited.
In my avoidance of the WIPs I already have going (daisy afghan, viajante, socks etc) and should be doing I went to my stash.. just window shopping, really. I came across one of several bags of this merino fleece.
This fleece is just gorgeous. Incredibly soft, from a coated sheep, crimp to sing about, and bright white. (Many of the pictures have a yellow cast from the lightbulb, but it’s a true white)
I’ve had this fleece for years. I really wanted to try spinning a textured single that would show off that crimp. It’s such a good thing I had stashed this fleece long enough to learn Laura Spinner’s magic thumb technique.Magic thumb video
That technique is so cool for long locks but it also works for fine wool.
Specifically, magic thumb is able to save lock structure and crimp like no other. It made this airy woolen coreless corespun. Keeping the crimp throughout the yarn was important to me.
It’s those curls I wanted to save in spinning the yarn and hopefully try to keep in a finished project.
I would grab a handful of the clean locks, and lightly hand pick and spin magic thumb. I had spun 3 skeins when I thought how awesome a blanket would be. That was the plan when I warped the loom.
Hahahaha. That’s too funny! I settled for a shawl since a blanket might take another 20years. But initially, the grand idea was making several strips that would be whip stitched together for a blanket. I started spinning the yarn on May 22,2016 and pulled the finished piece from the loom on June 4, 2016.
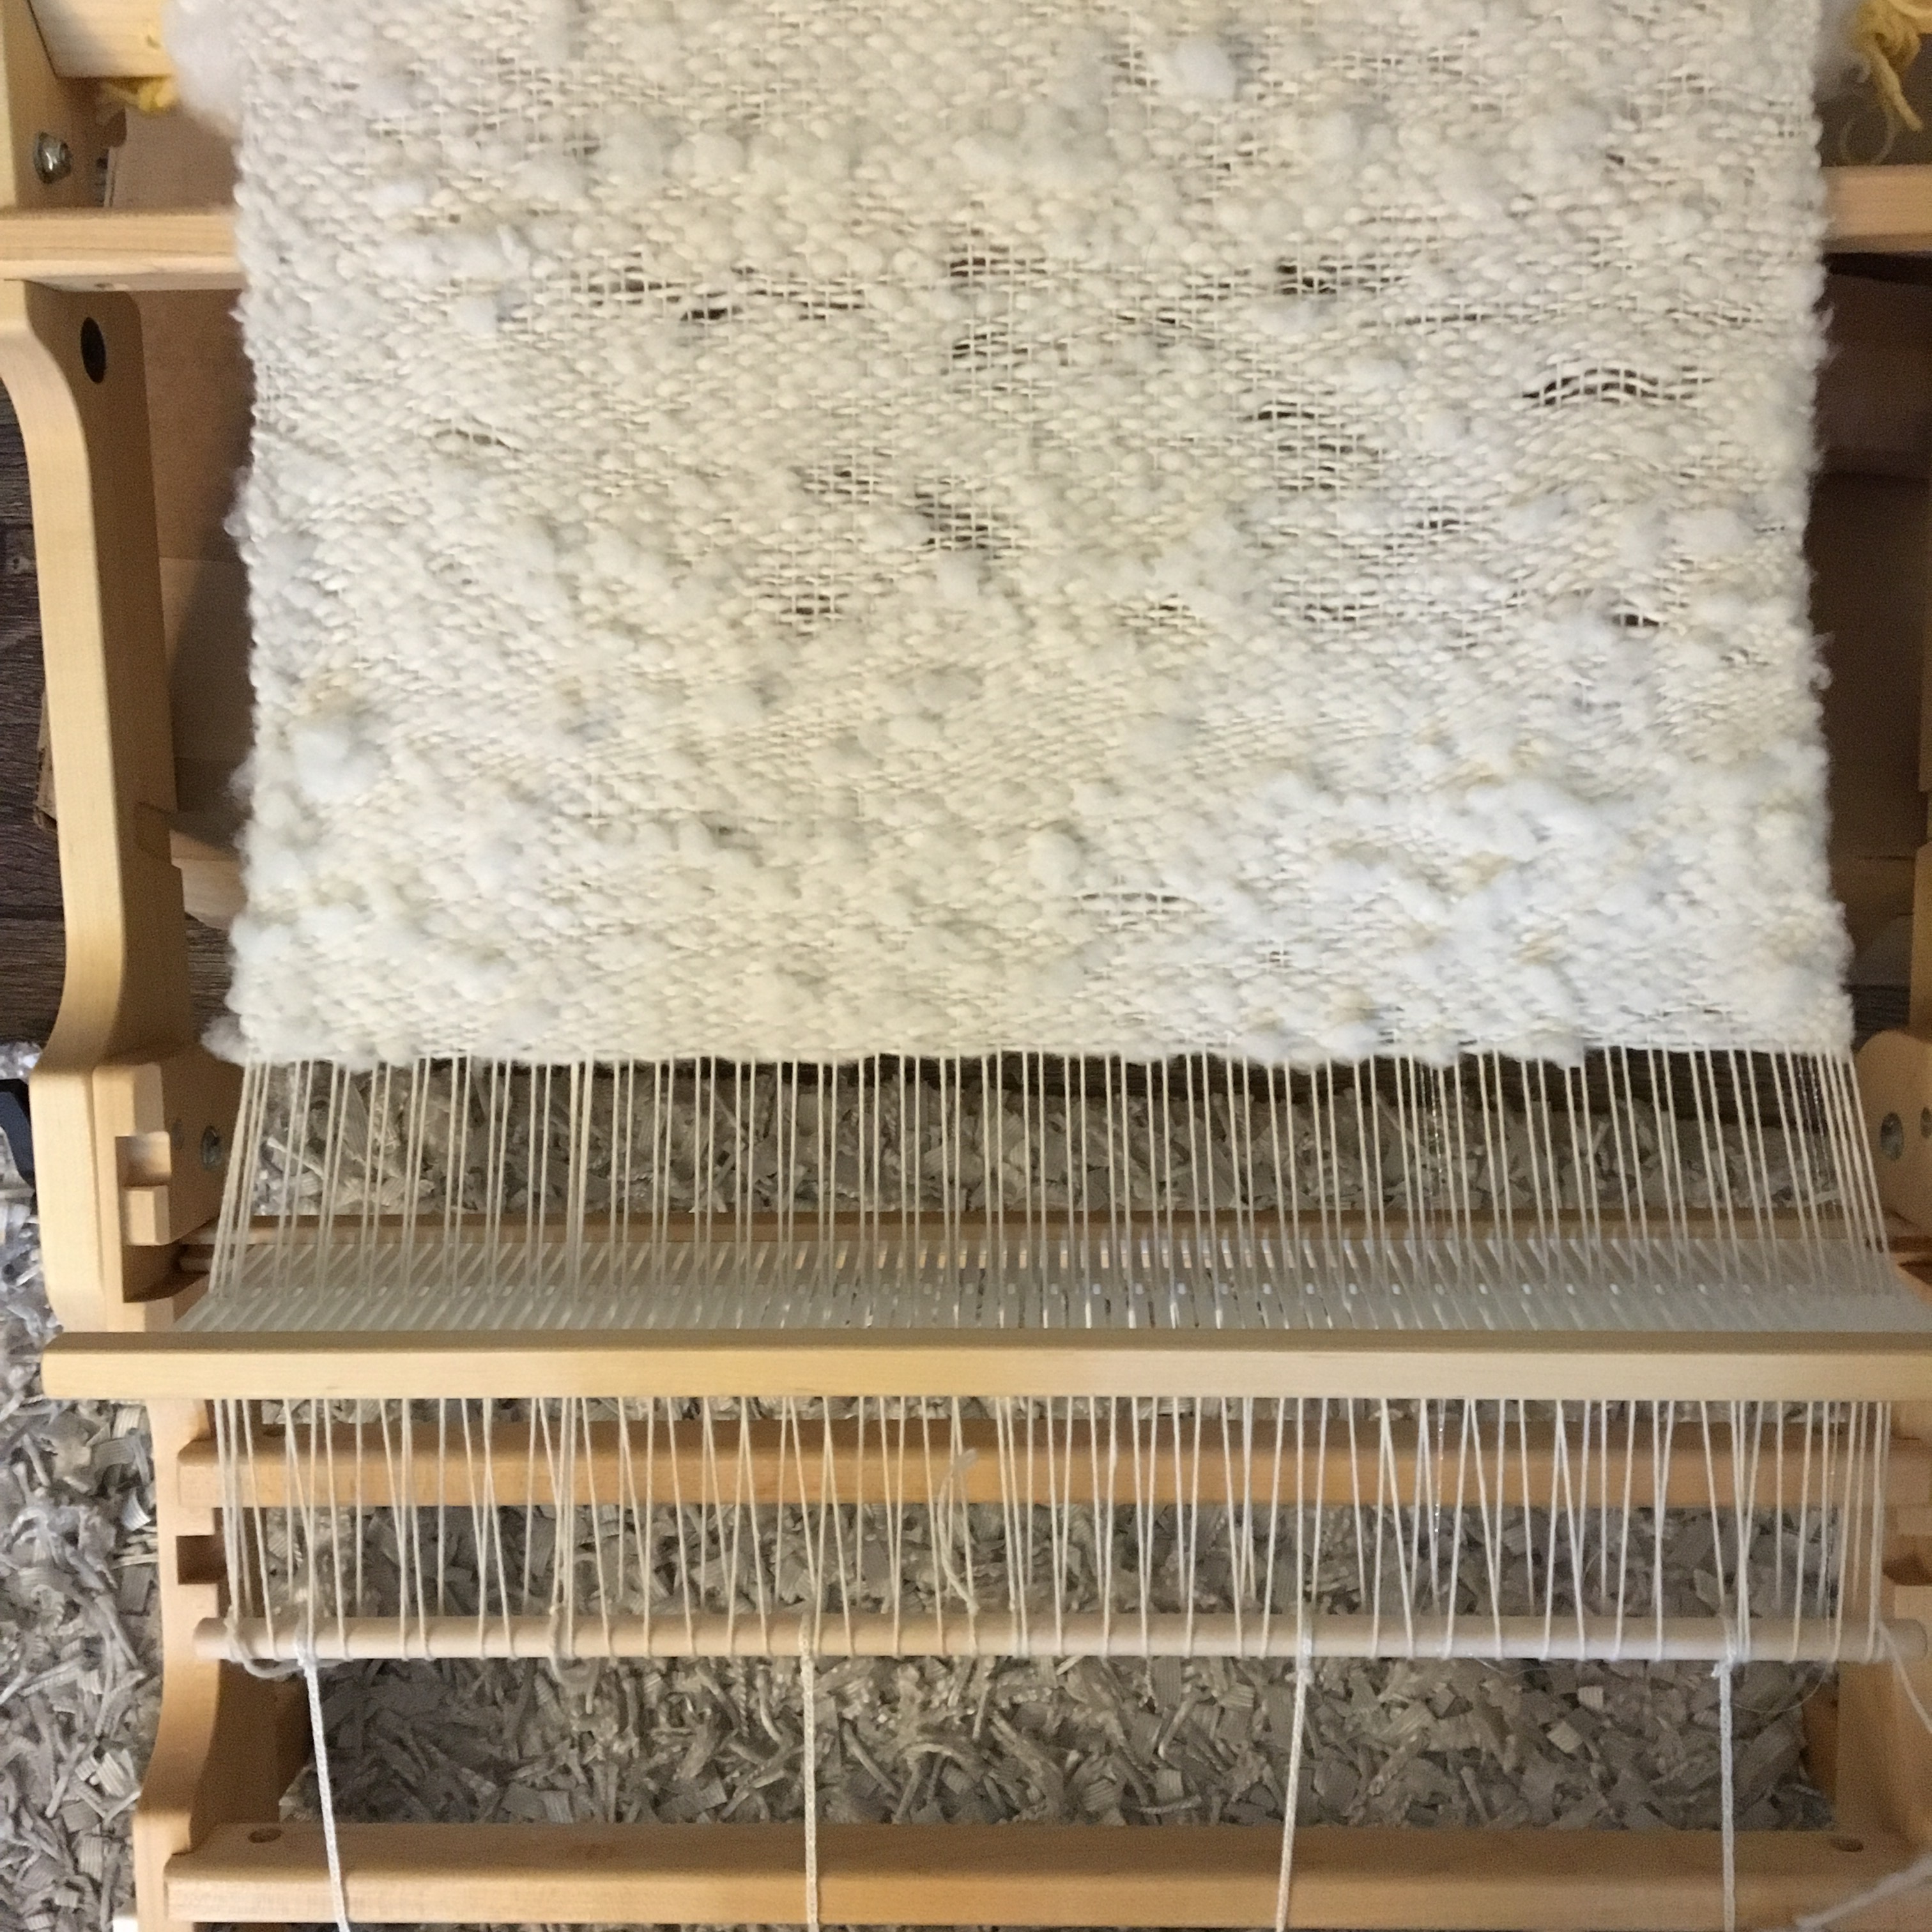
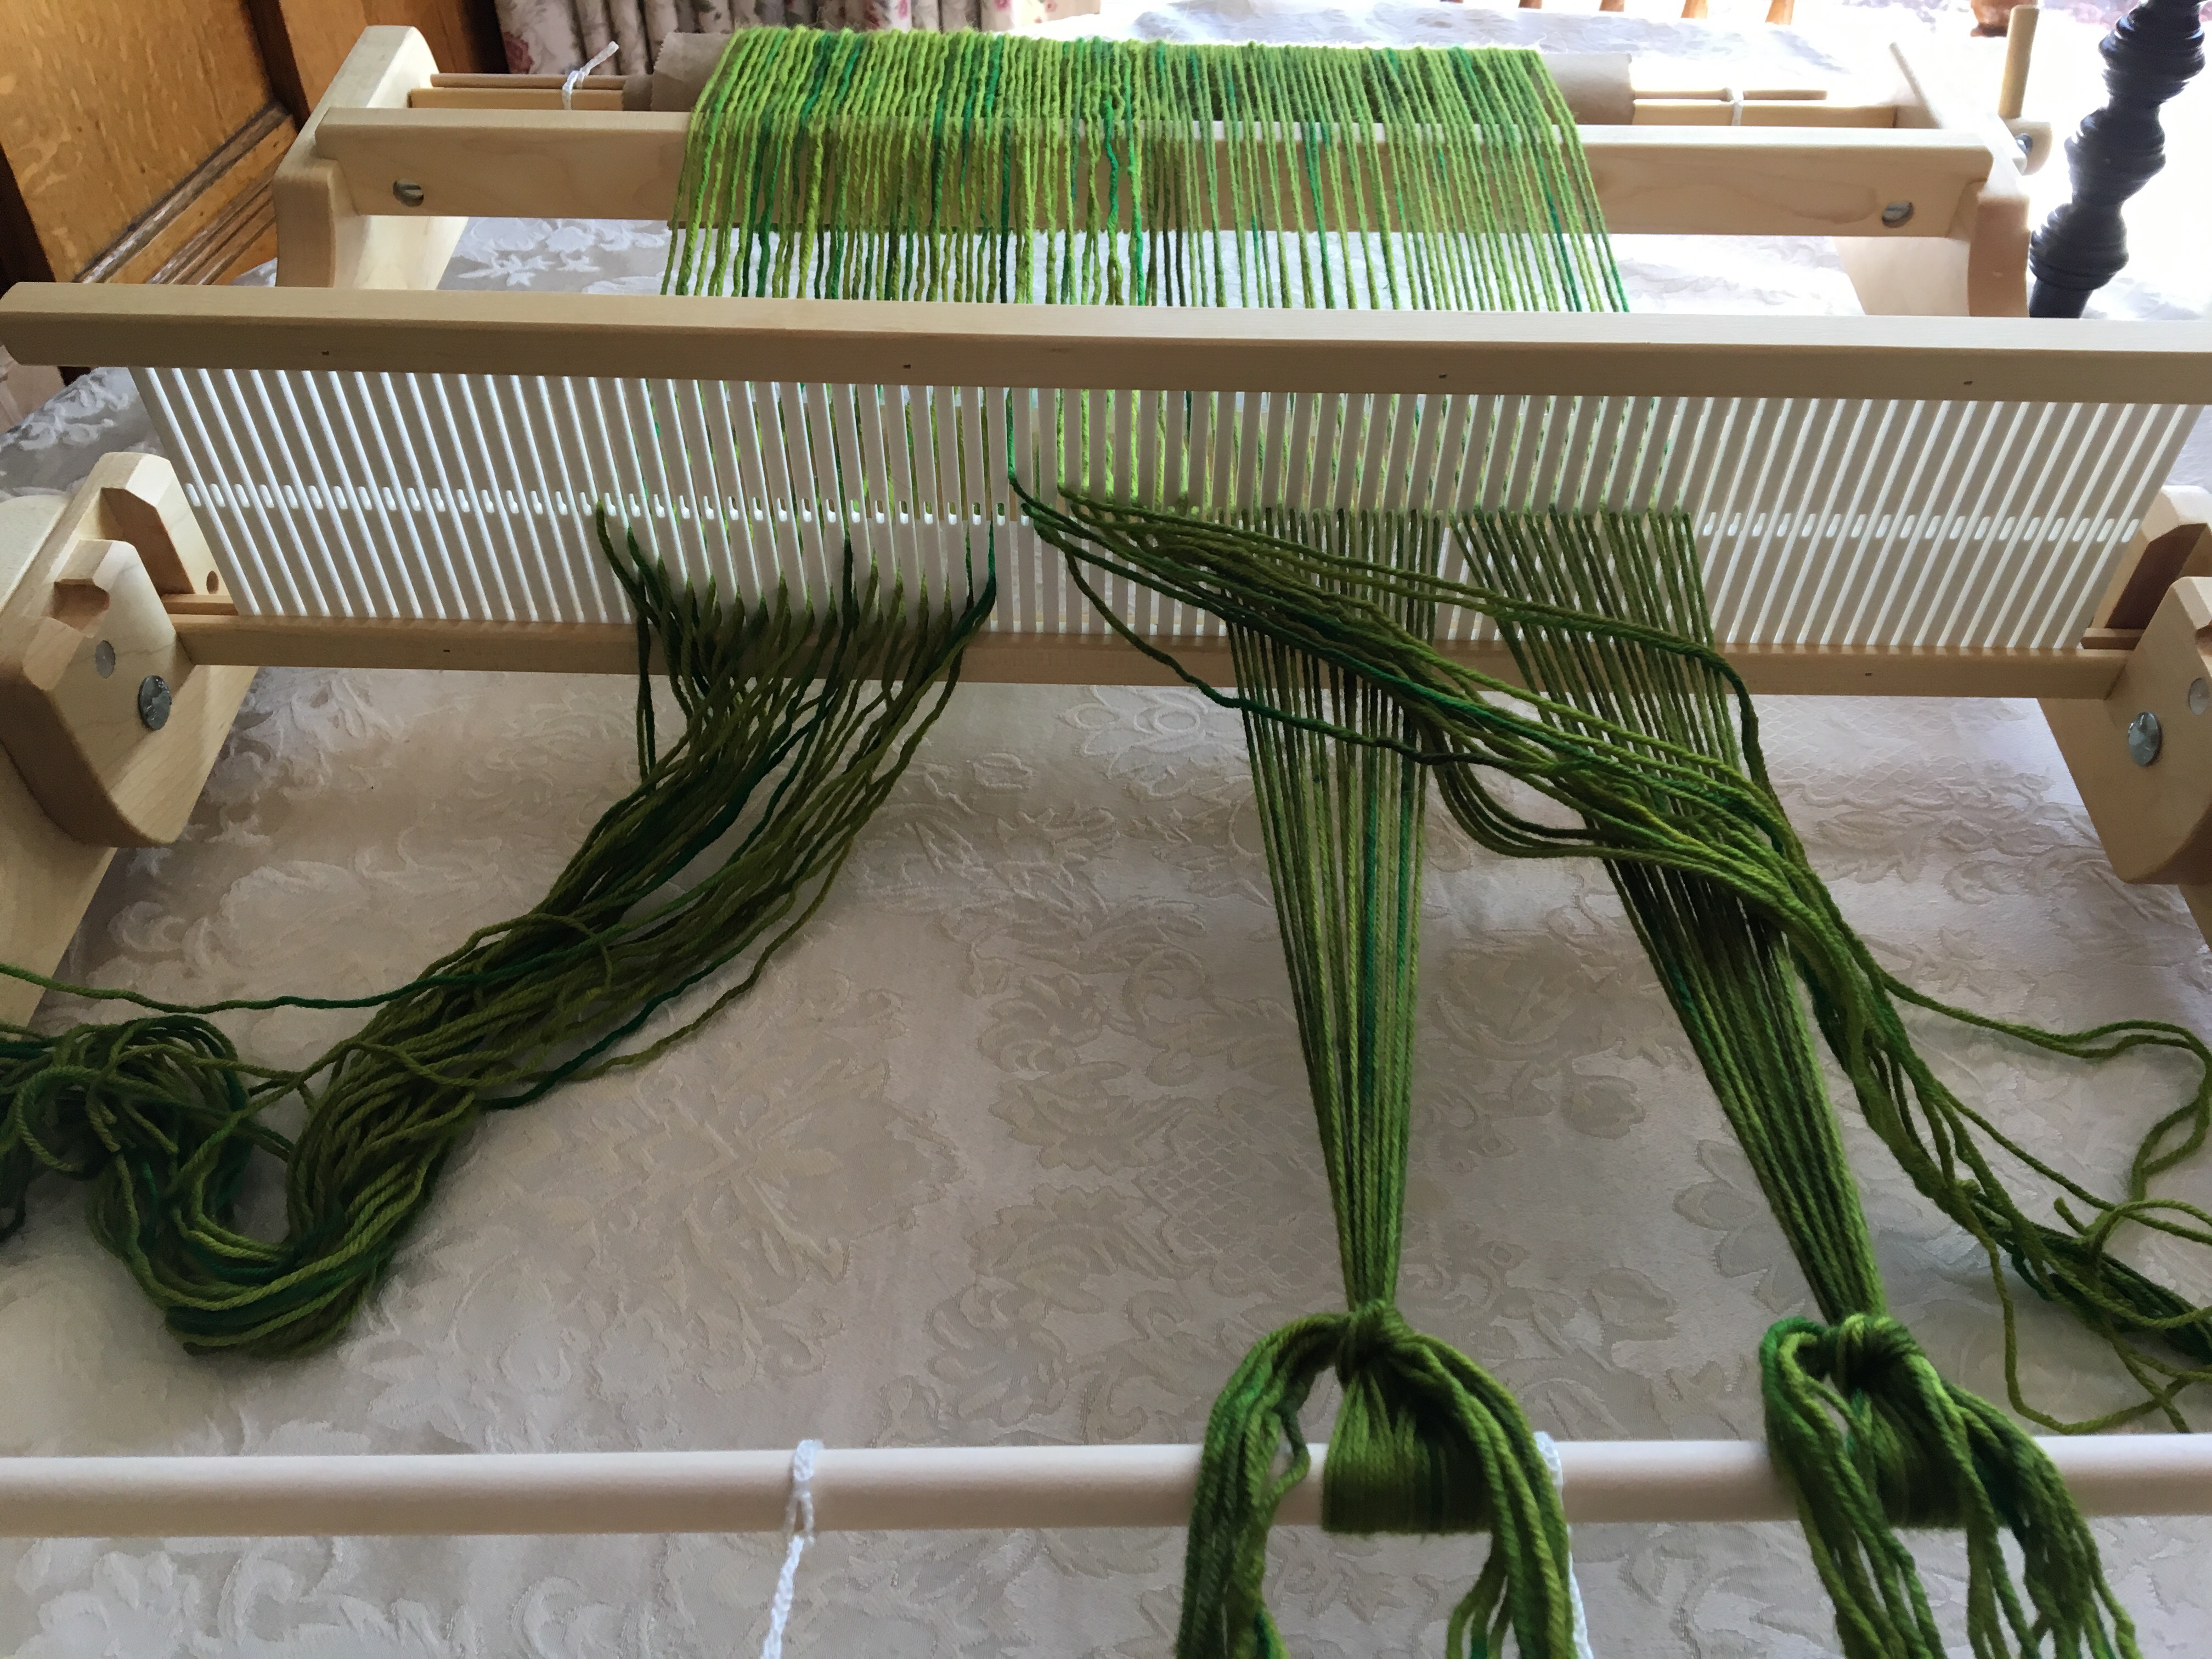
The loom was warped with 2 skeins of a white commercial yarn, made of, 50% alpaca, 25% merino, 25% silk. Since the weft was bulky, I warped every other slot. This being only the second attempt weaving, I wasn’t sure how this would work out, but gauge works the same in weaving, as it does with knitting and crochet. I wanted a fabric that was soft and drapey vs something stiff and able to stand upright by itself.
I wouldn’t have had enough yarn to warp had I gone every slot, so every other slot worked perfectly.
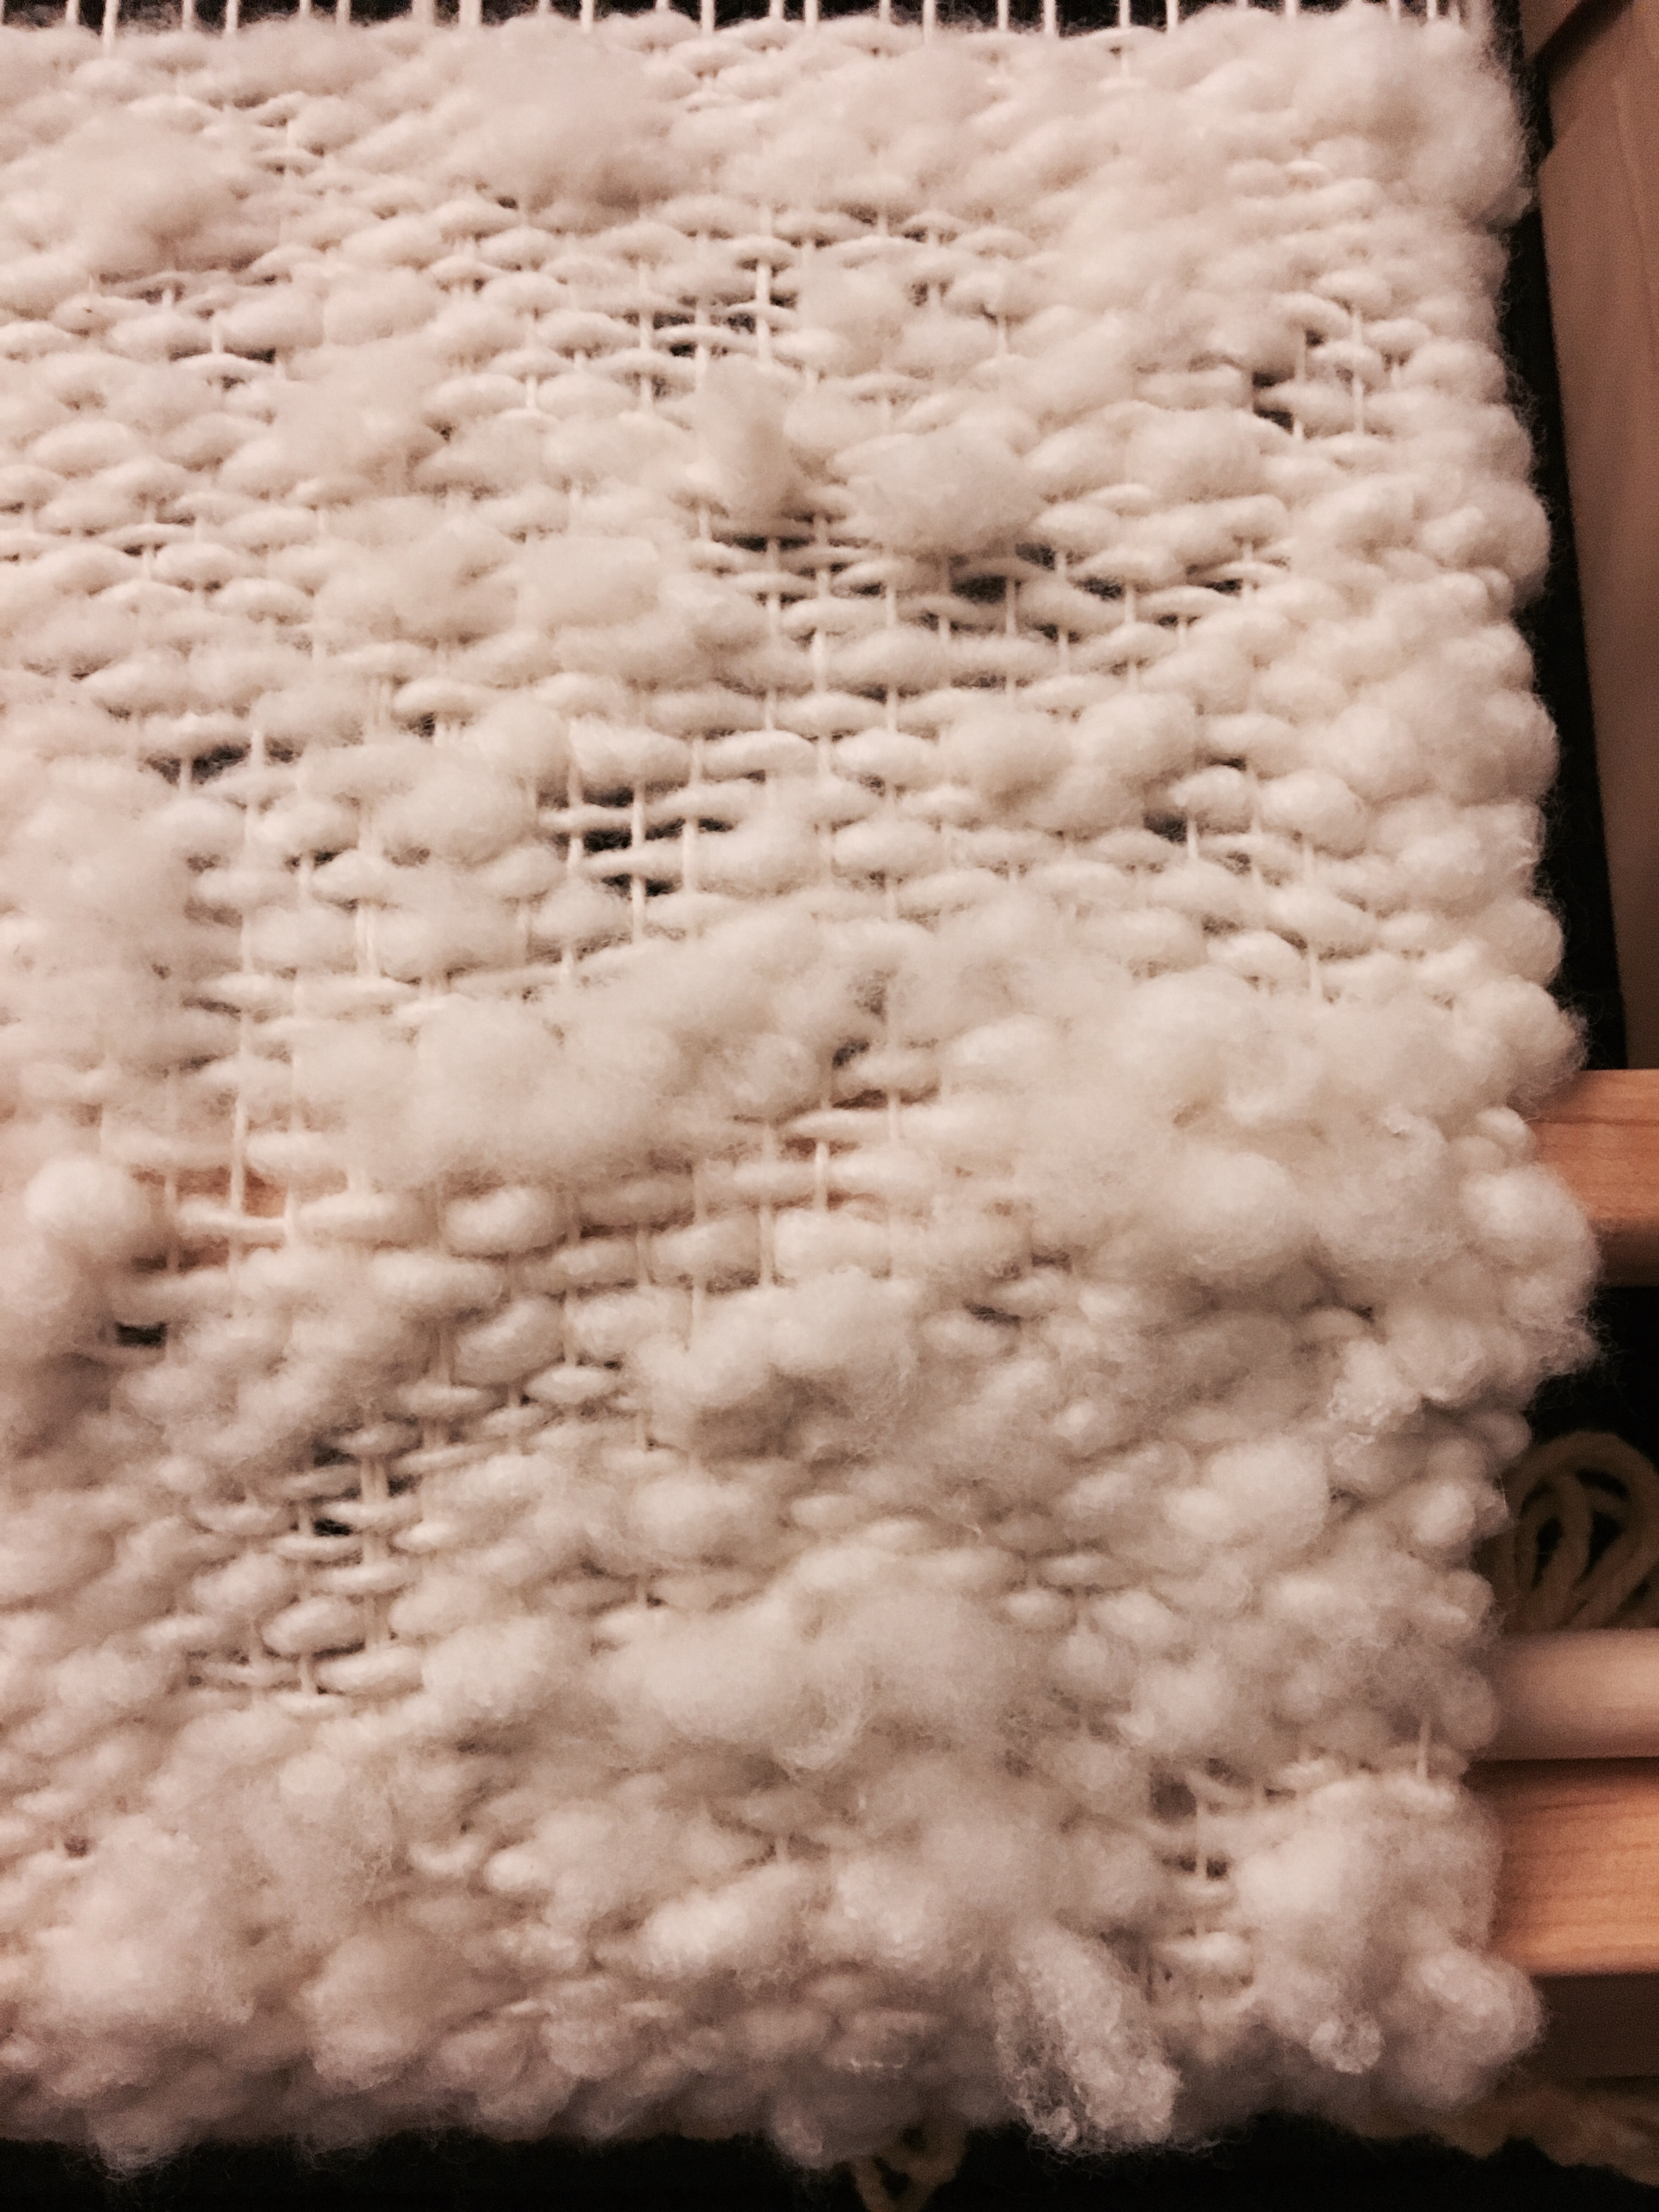
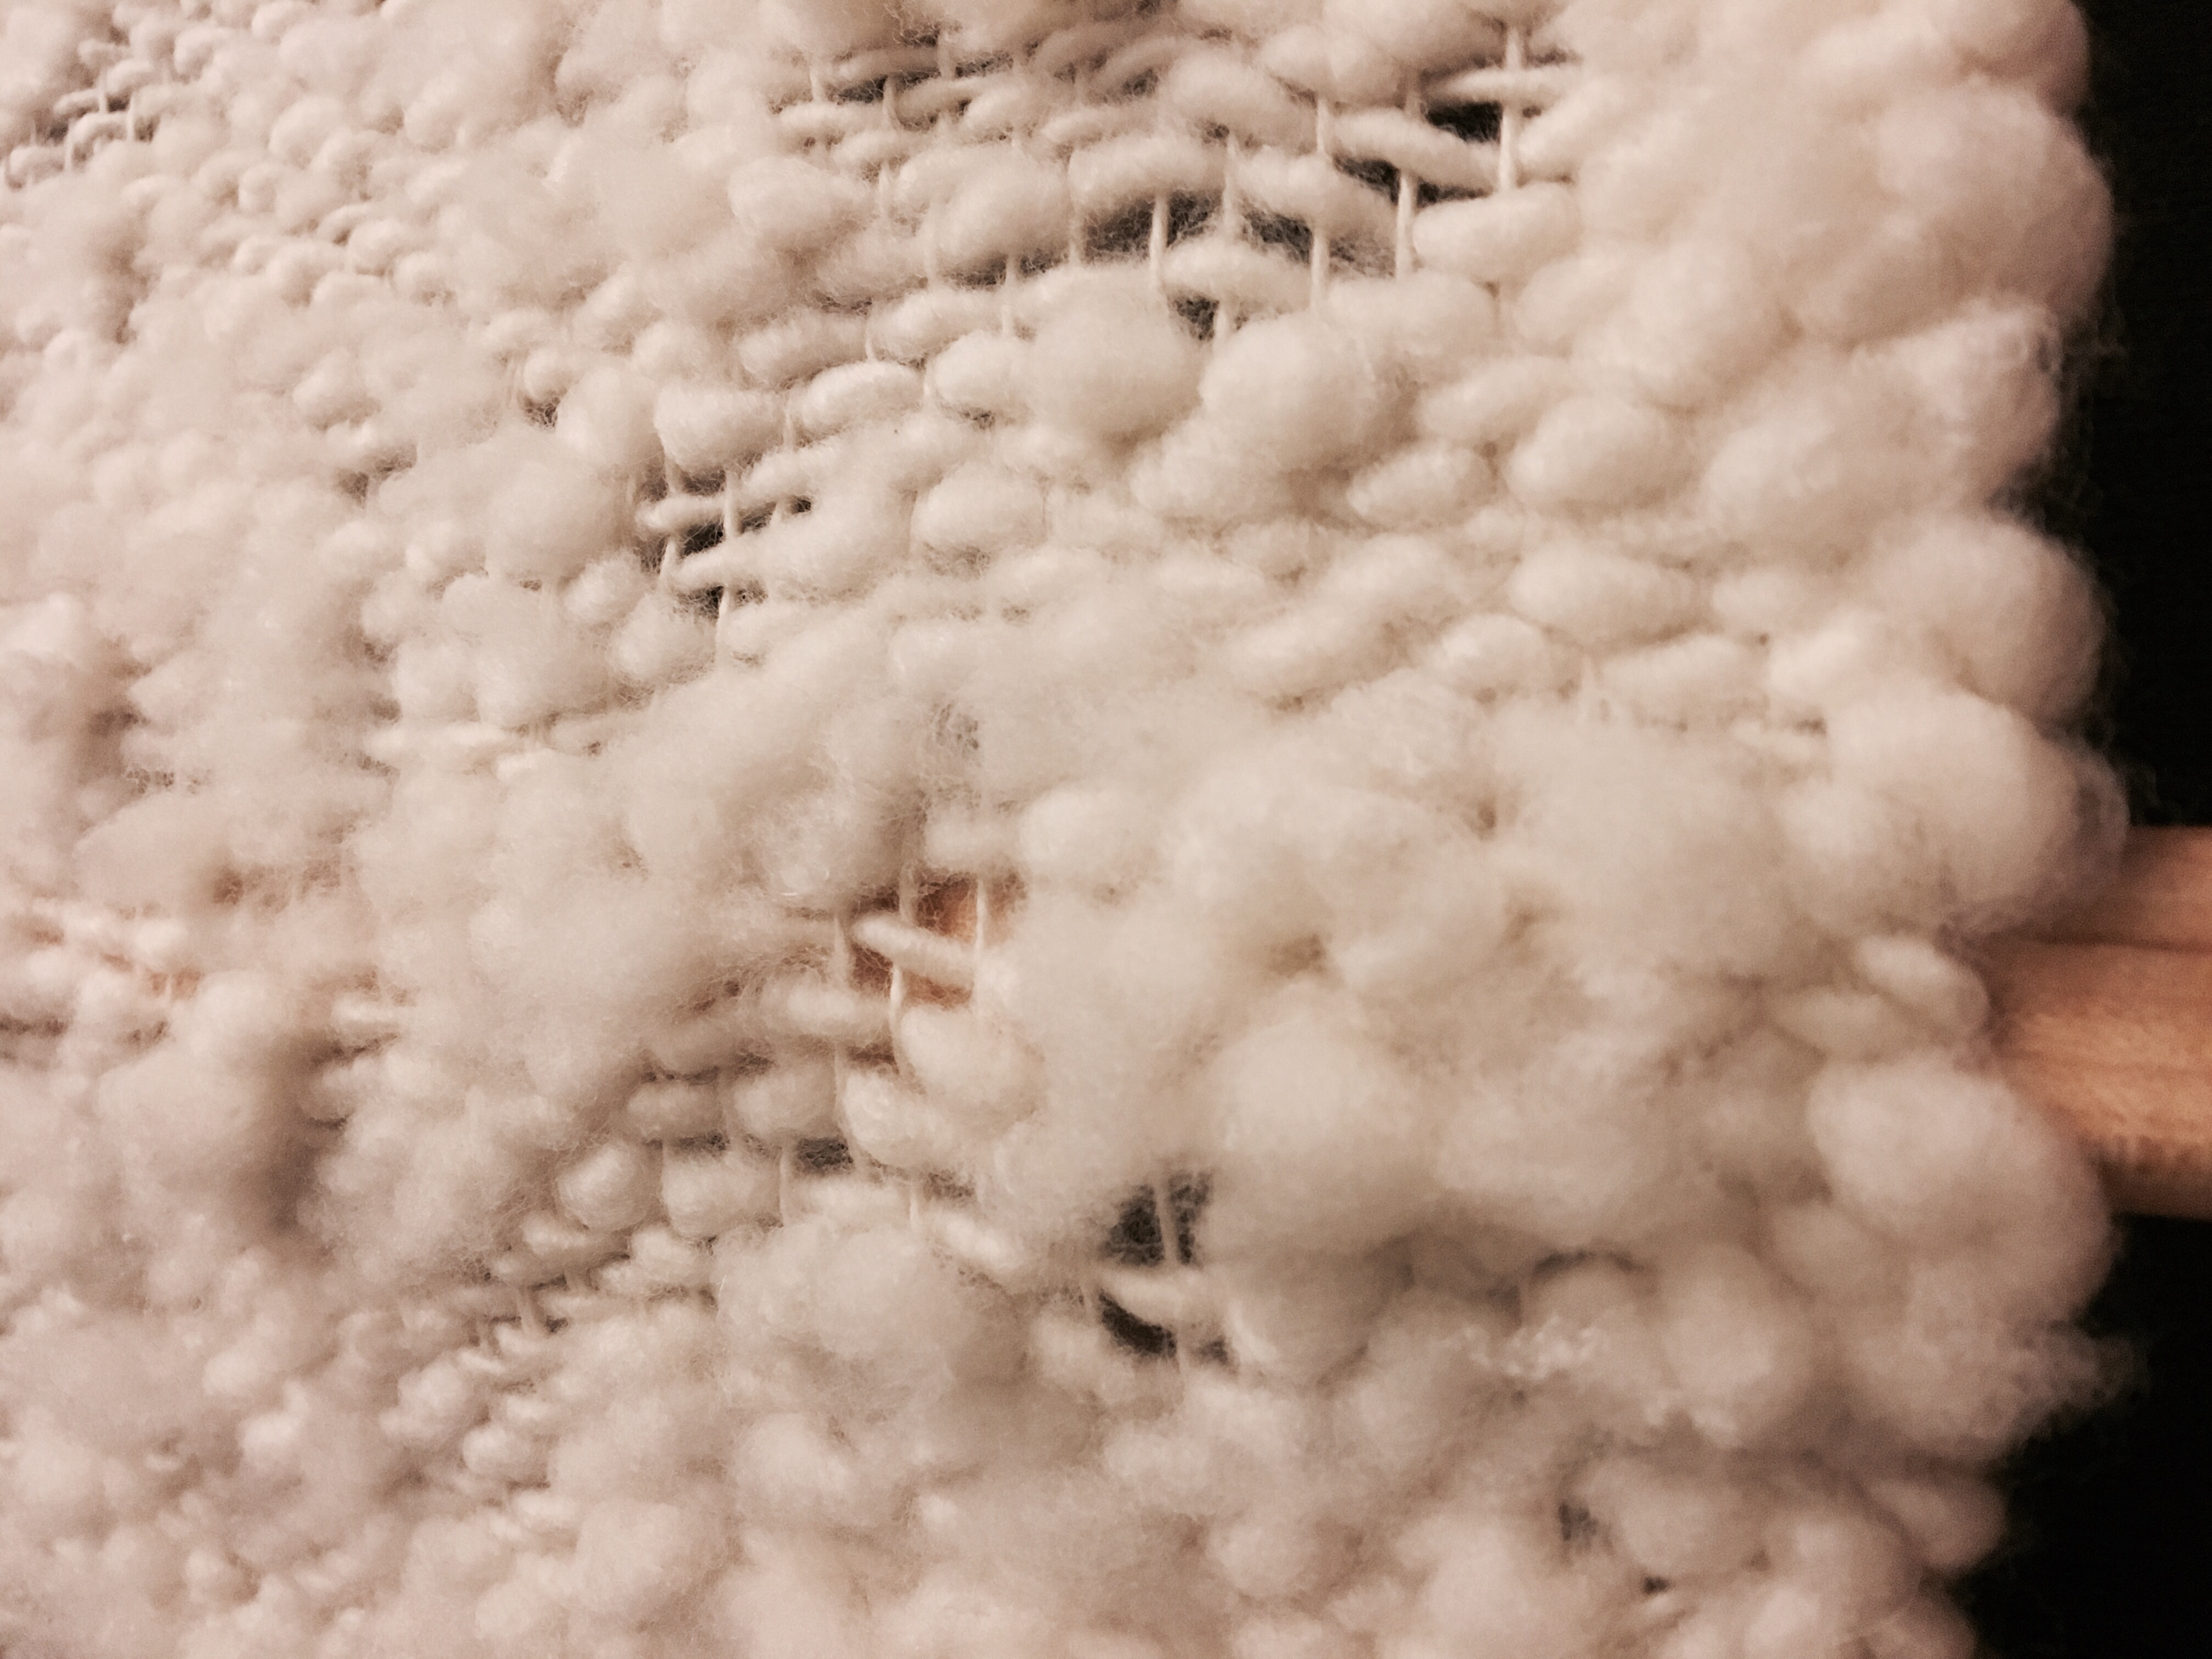
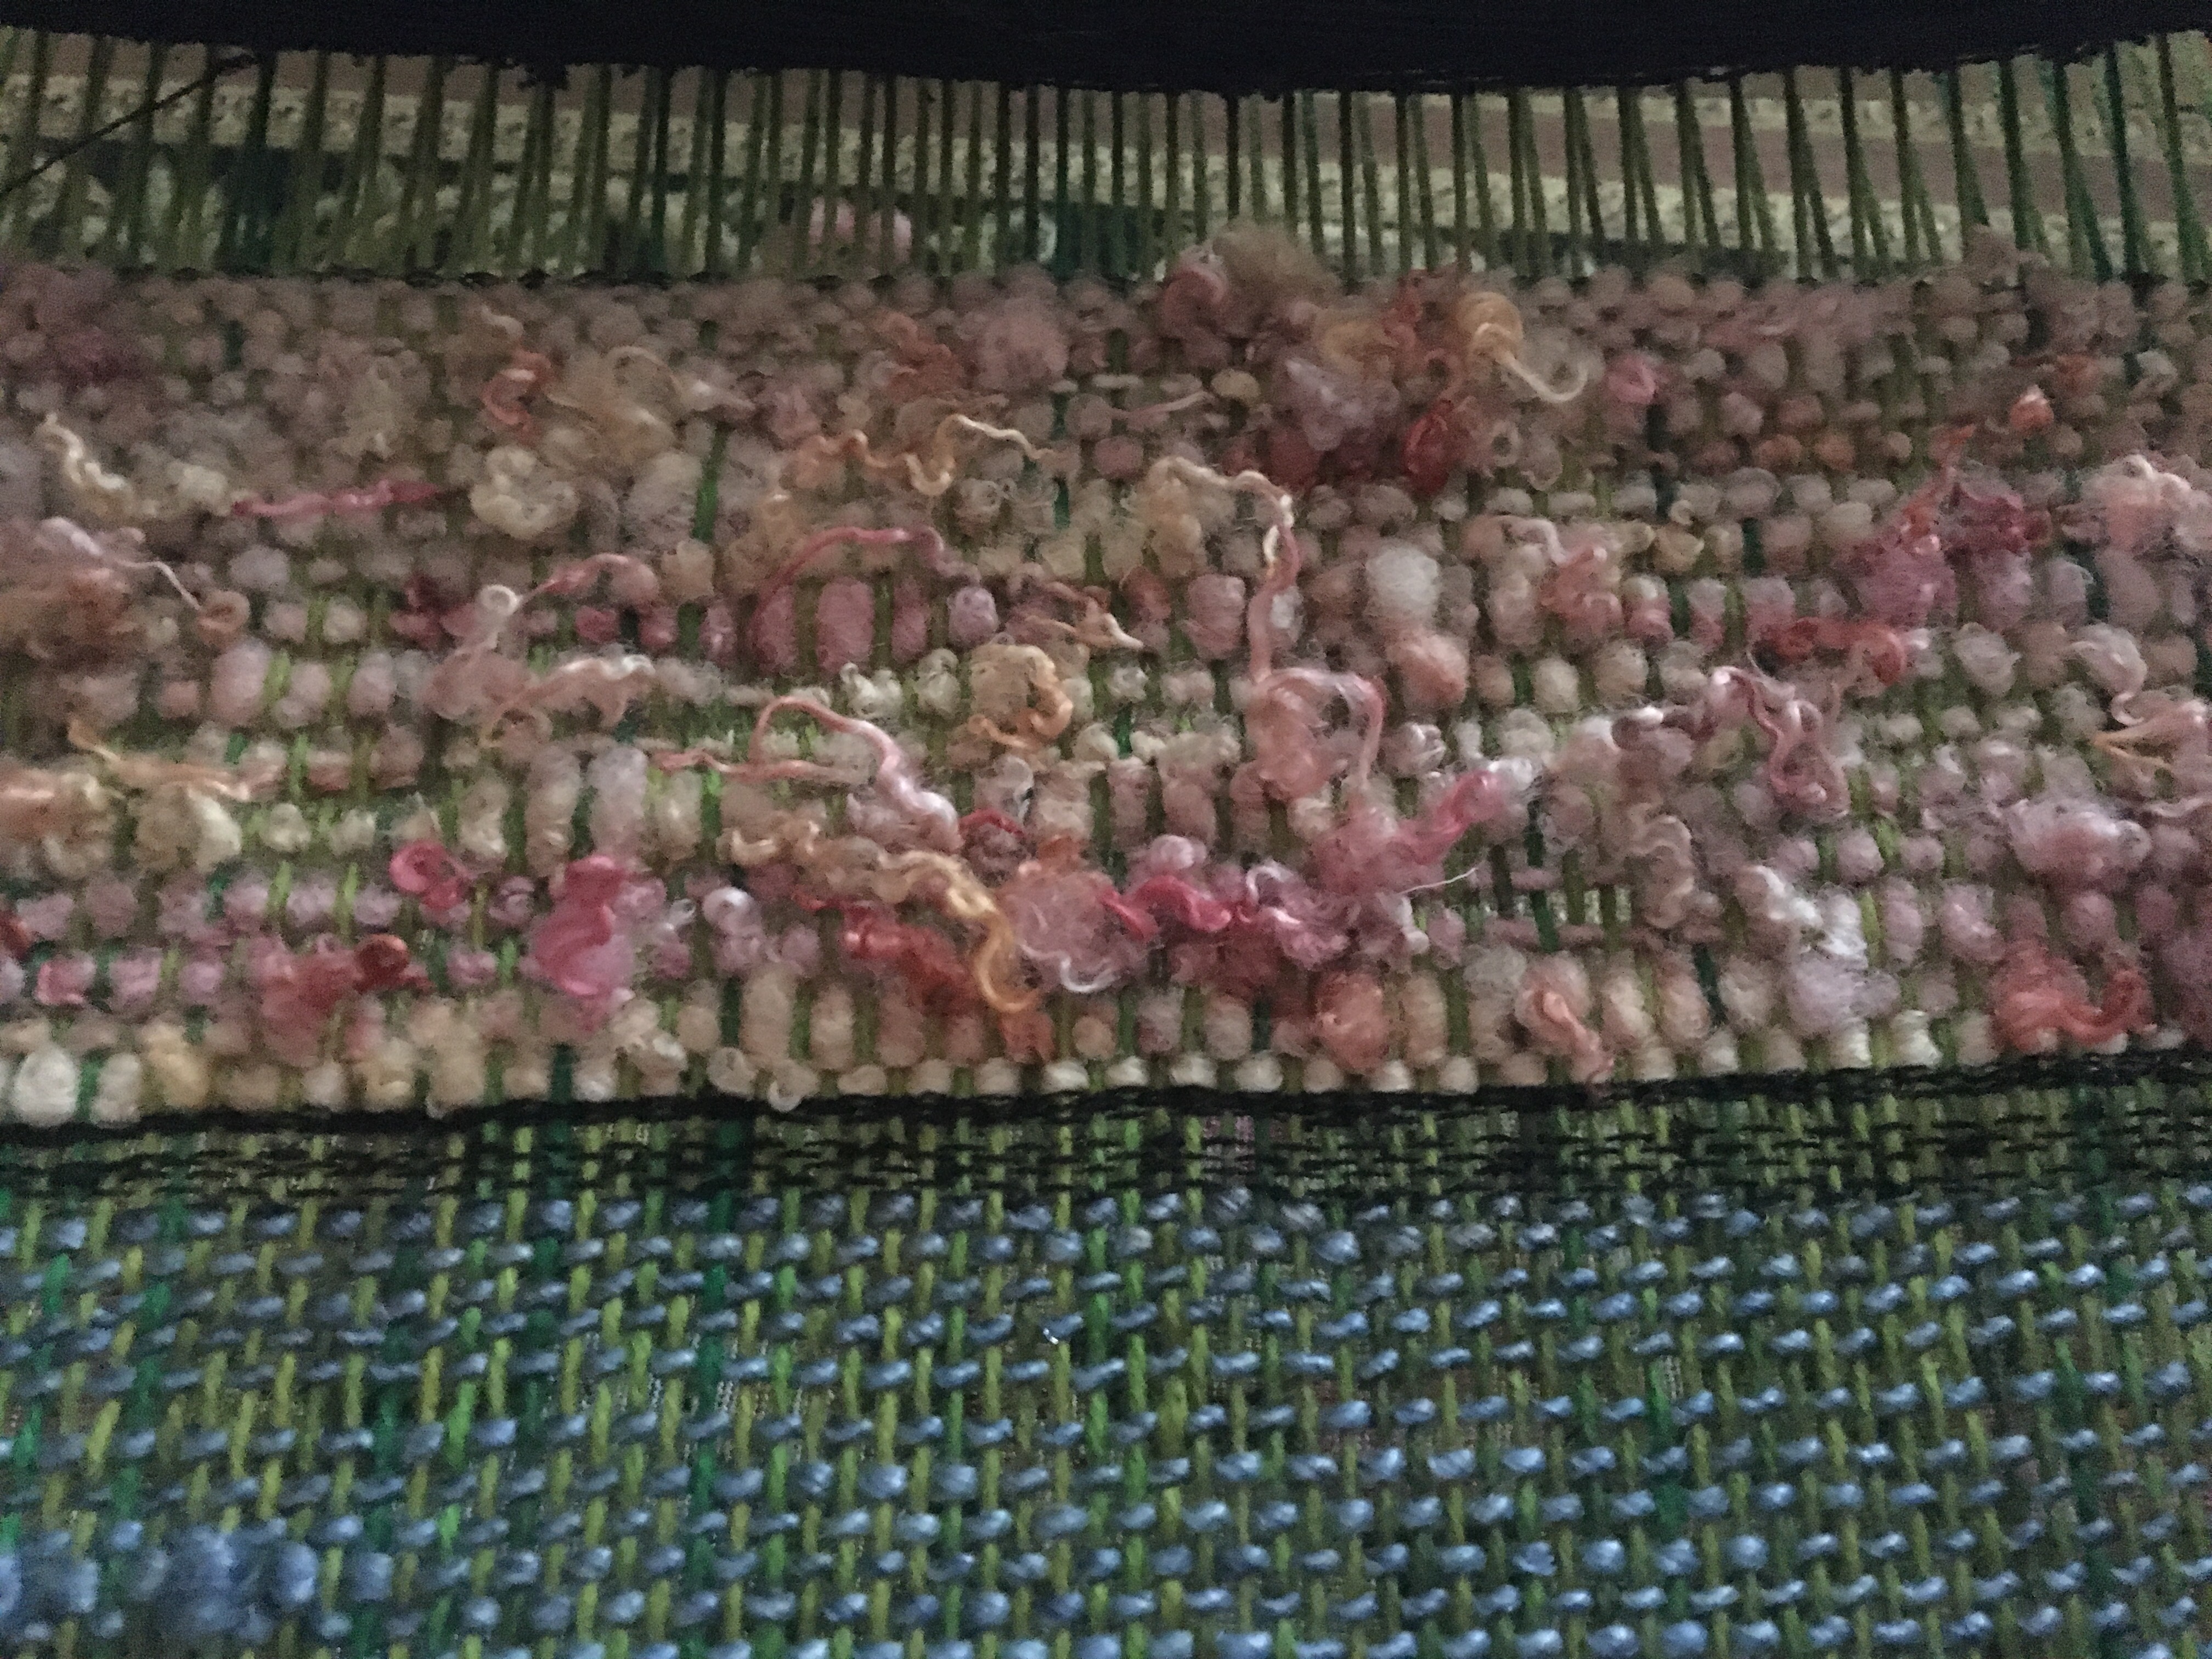
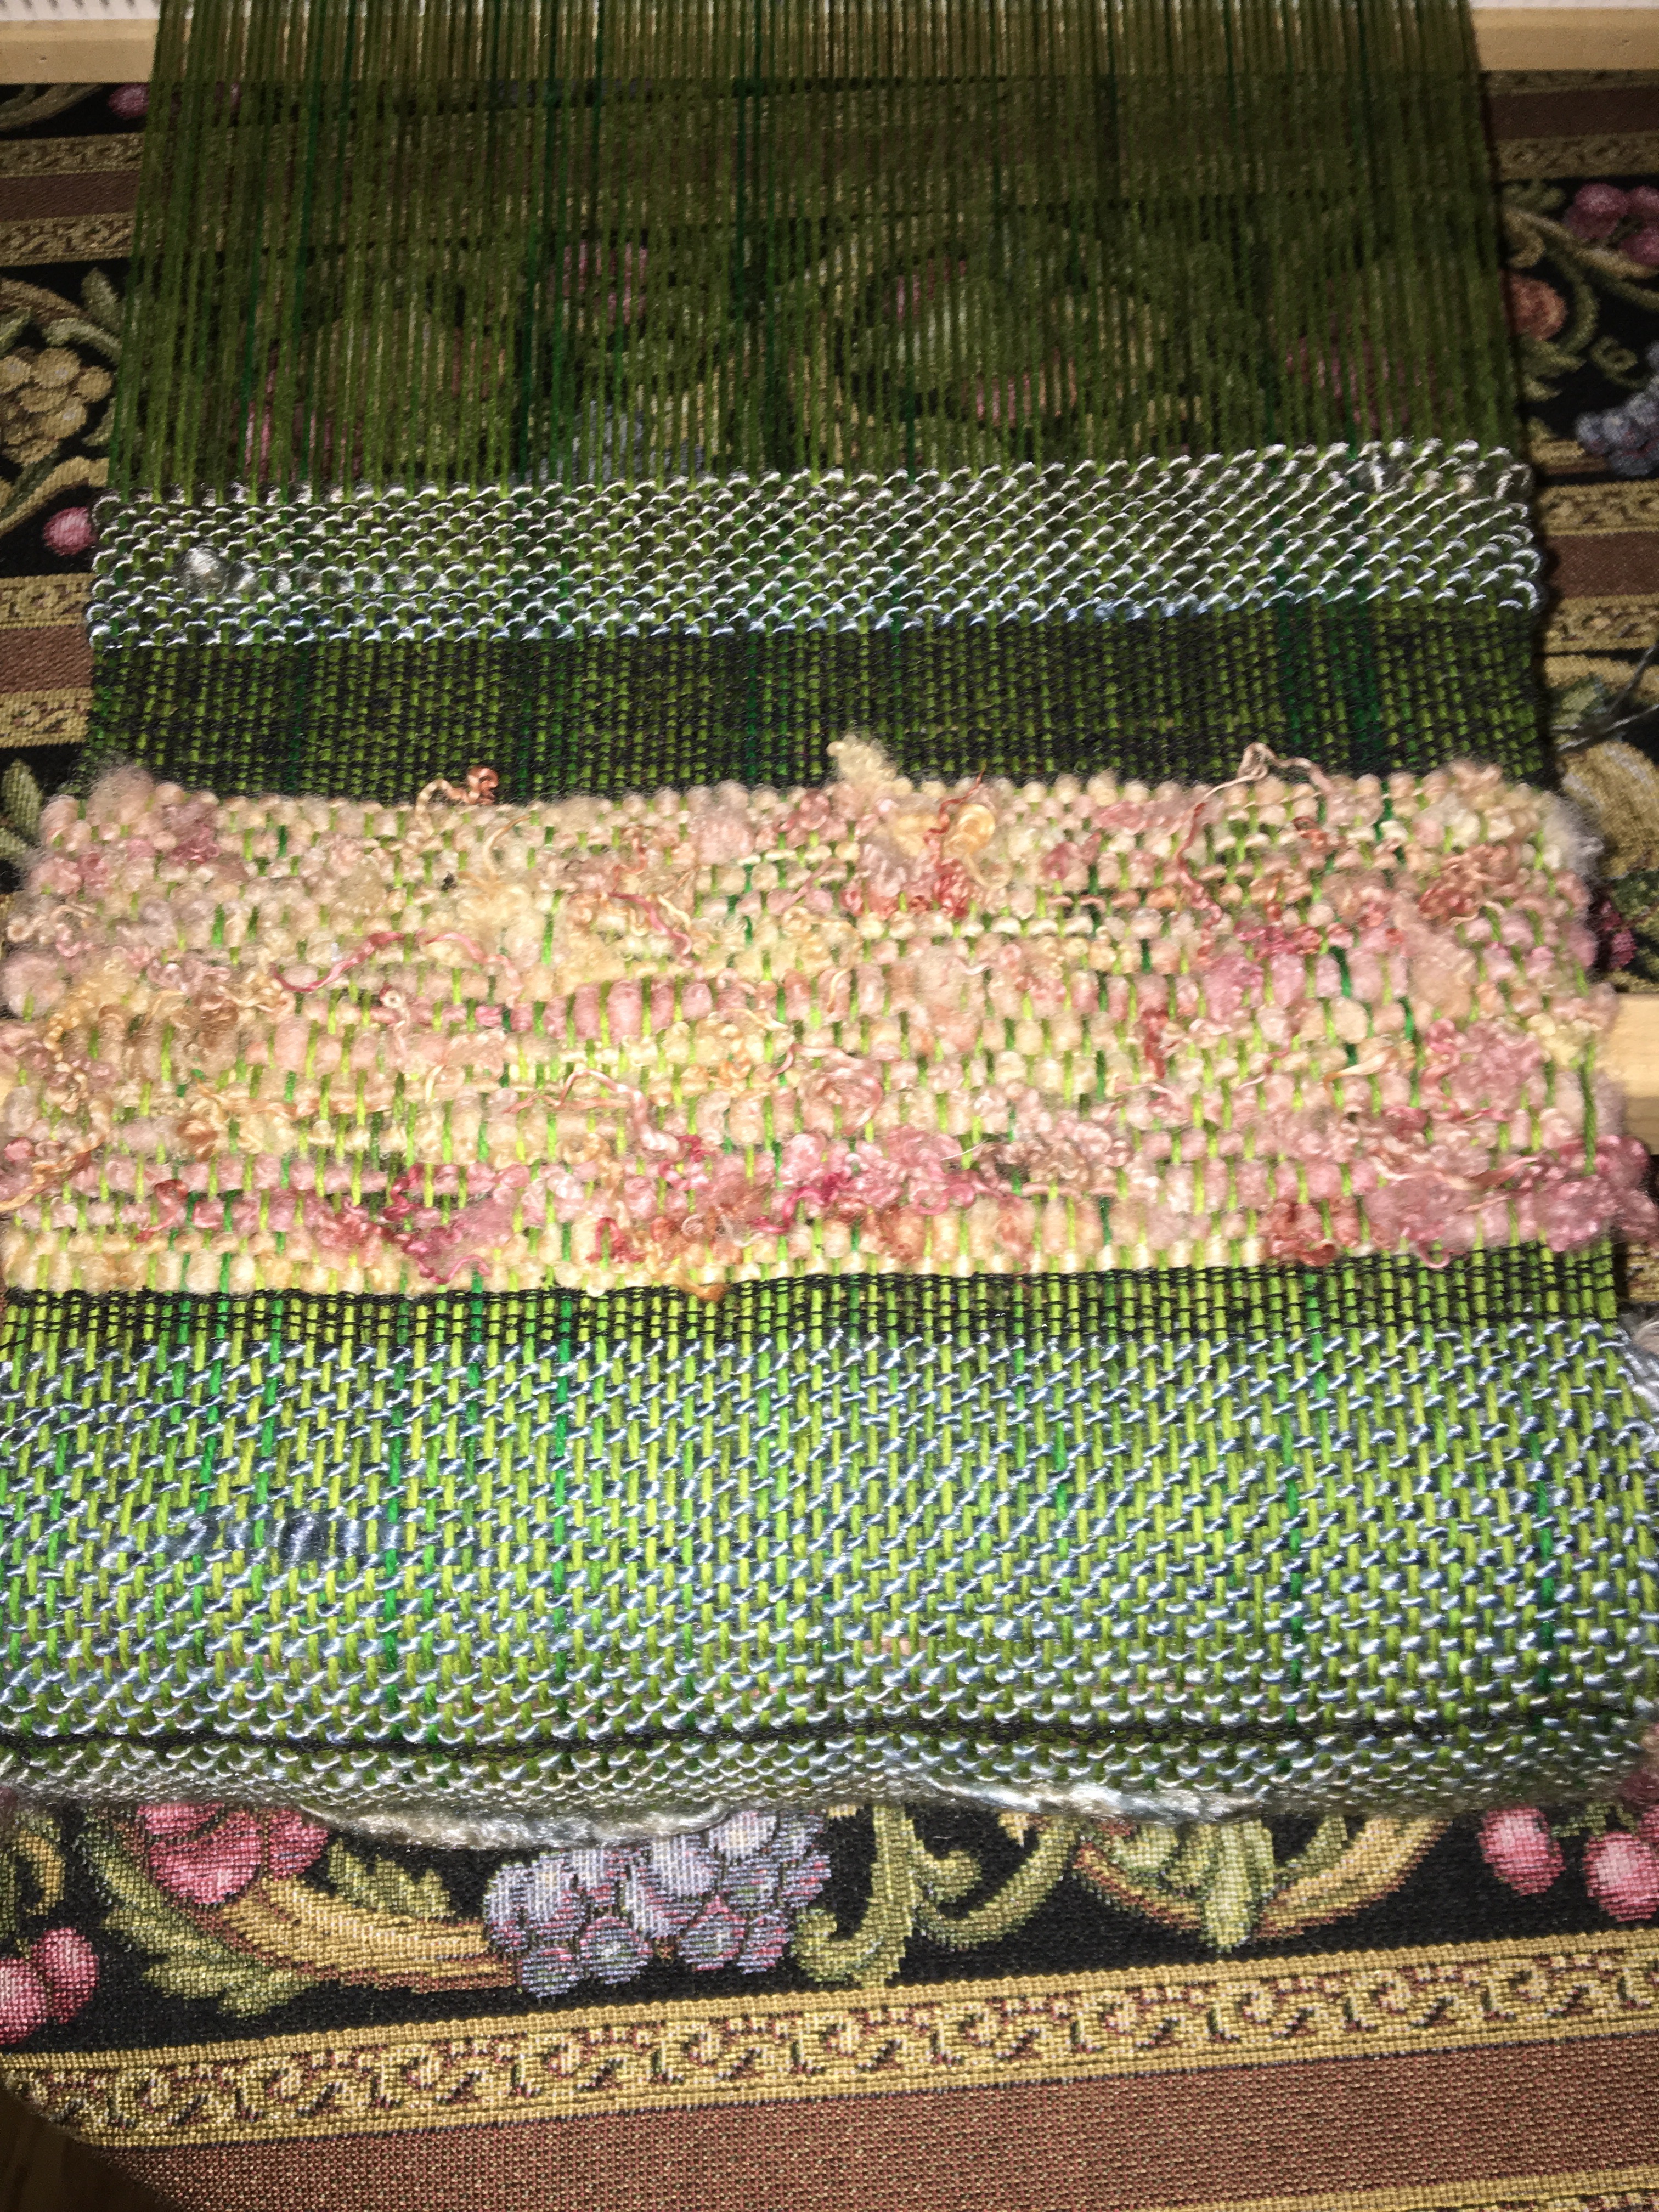
Pulling little puffs of the weft through the warp threads that had my favorite crimpy bits I wanted to show, as I went. Trying to keep things loose, airy, drapey, by not beating too aggressively.
The crimp I love was being maintained. The edges stayed relatively even. Puffs happened on both sides (front and back) equally.
With all the white, the curls and crimpy texture was the fun part of this yarn. I’m surprised I was able to power through and not get bored with all the white. When I look at all the progress photos they all look the same. I can struggle to get through a project that is all the same blah color.
I went through the handspun pretty quickly, and would stop weaving to spin a couple more skeins.
It is unreal to me how much yarn weaving takes up so quickly. I warped the loom on May 29. This shawl is 2feet by 6ft and used over 10skeins of yarn.
This has me thinking about future projects and really needing to be sure that I have enough to get through a project.
By the end I had started weaving much tighter in comparison to the looseness in the beginning. This is ok by me, as it is able to slide around to even out. But I can’t really tell. My husband pointed it out to me.
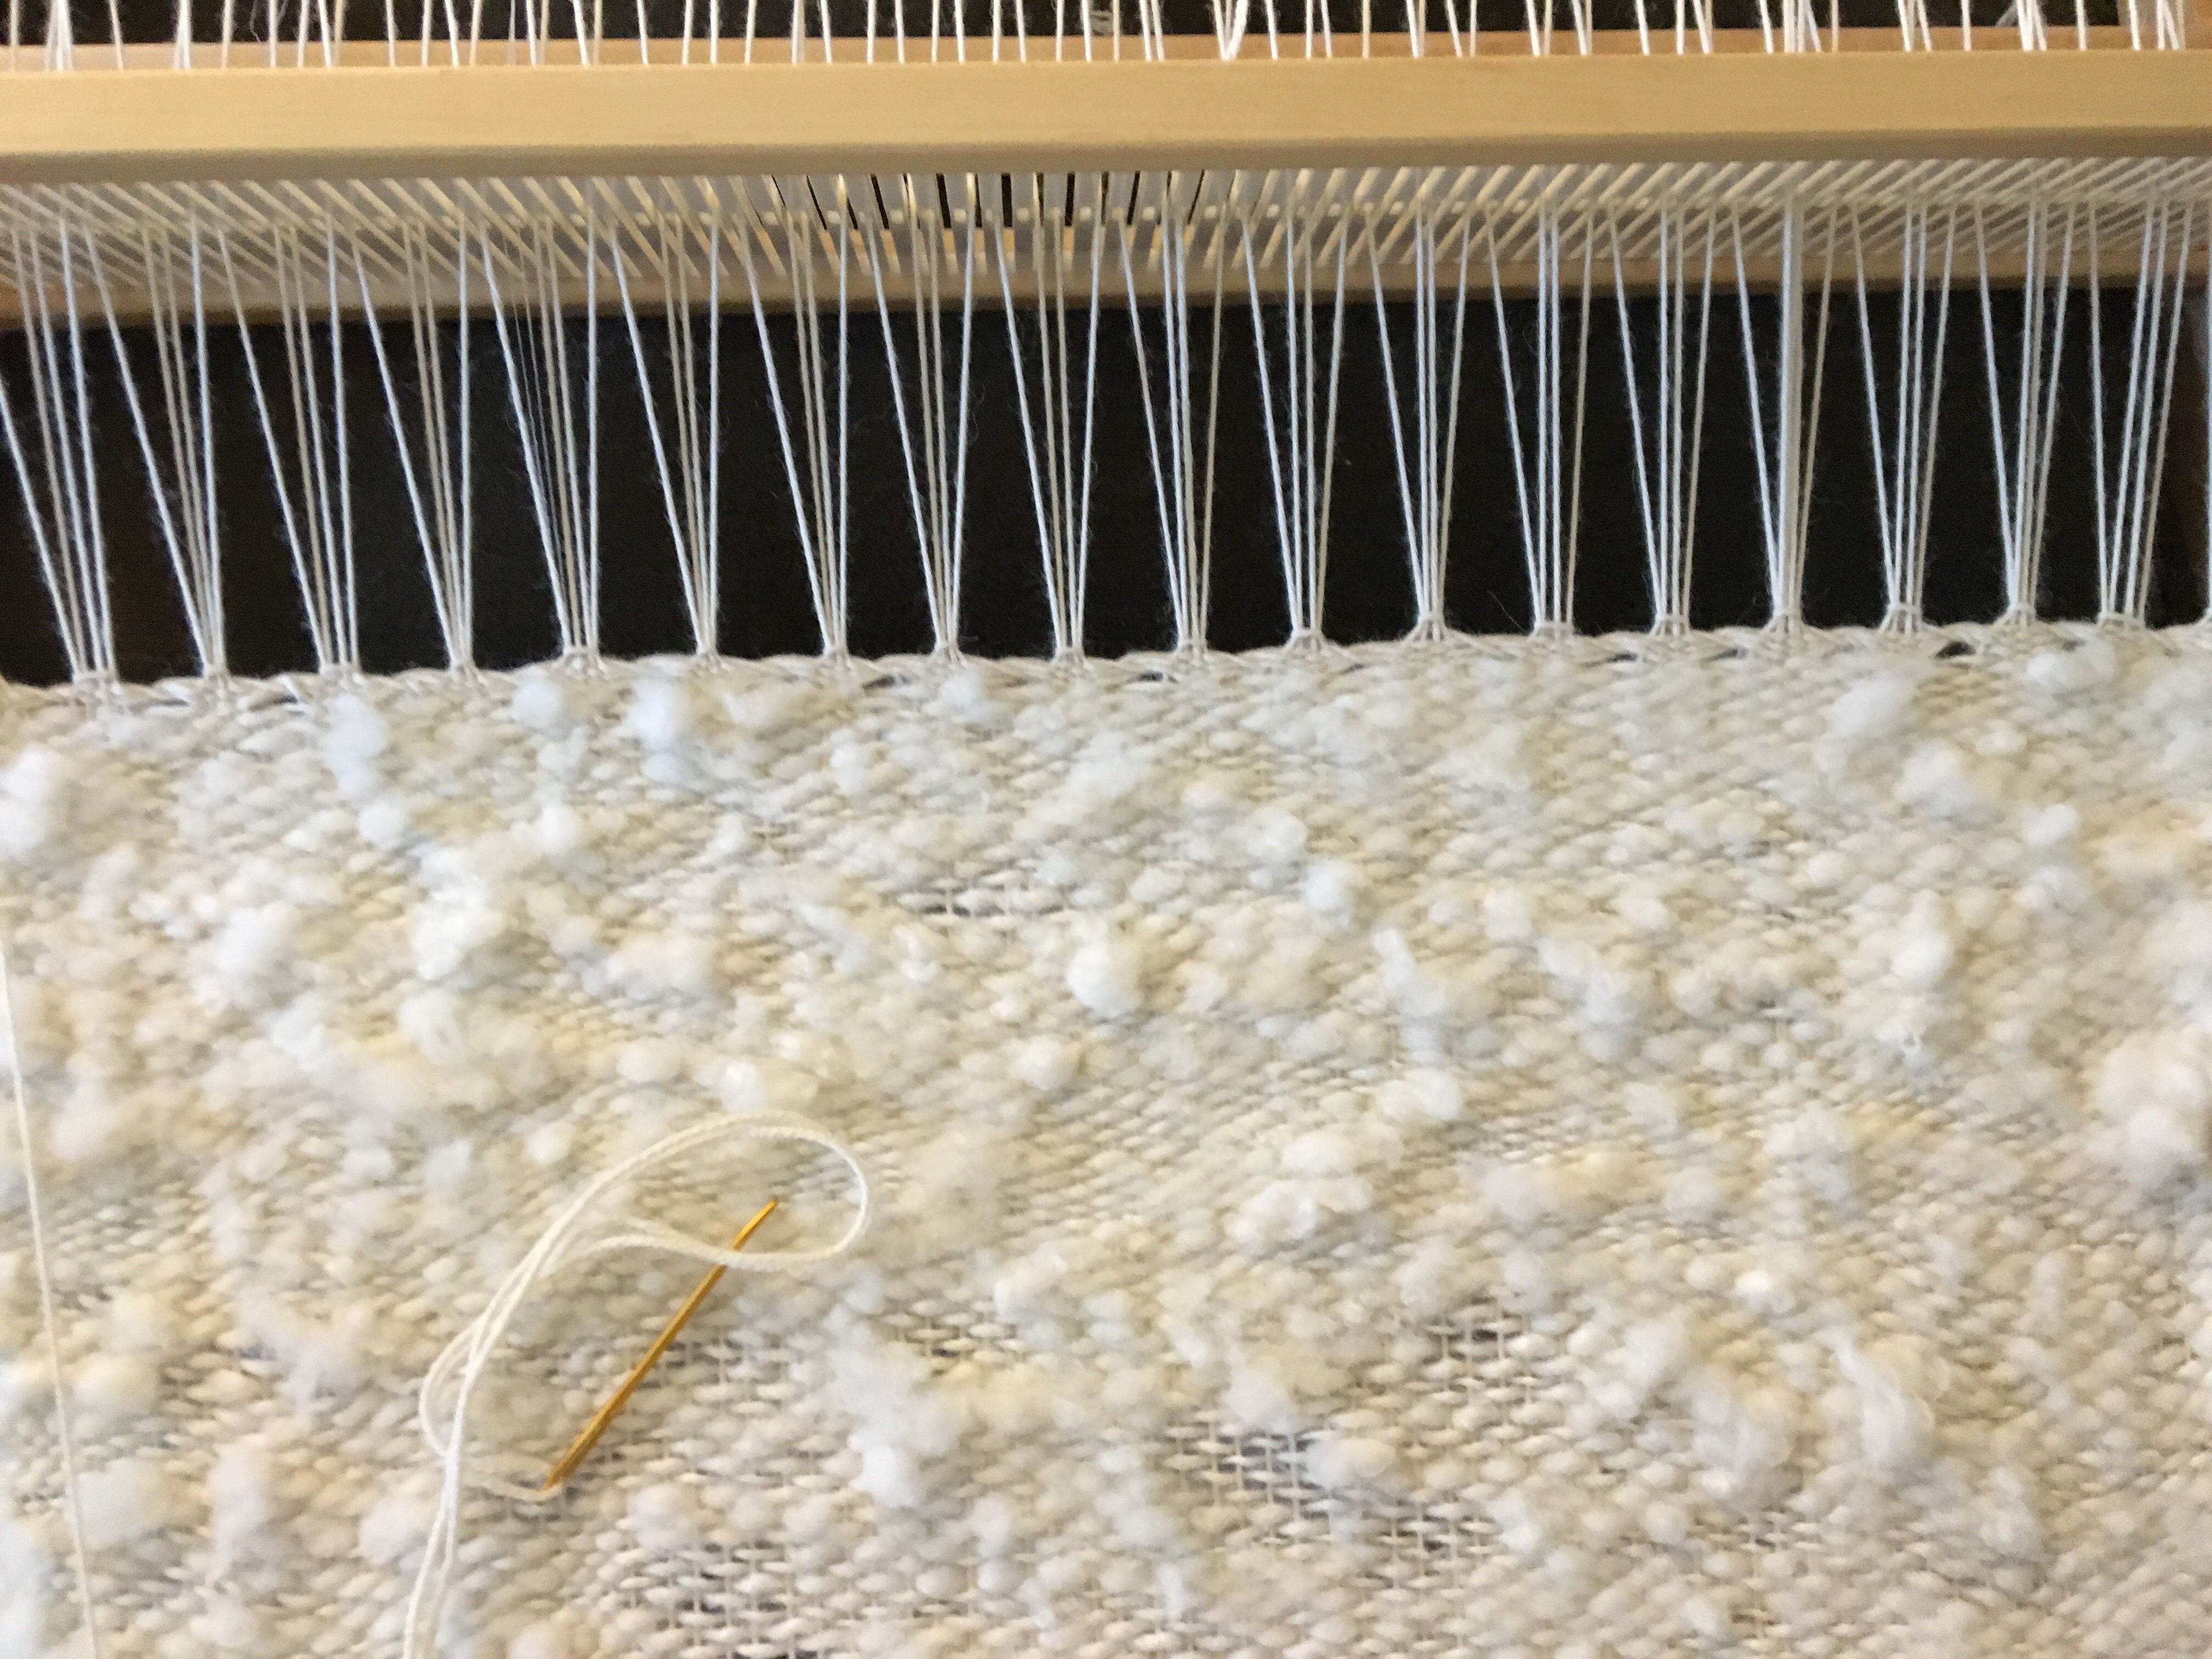
I tried a “new to me” way to end this project. Instead of a Damascus edge, I used hemstitching.
I much prefer hemstitching. This method is much easier for me. It’s easier because it’s still held tightly in place on the loom. Whereas, the other method I tried, it had to be cut first and then tied. As soon as it’s cut its floppy and moving around. I am really interested in all the different ways the ends can be done.
I also prefer the way this looks compared to the Damascus edge or the grouped tie off. This gives that little design element for a cute edge.
I’m really pleased with how it turned out. It would be pretty cool to have a blanket like this. I just don’t think it would get finished.
For my first sheep to shawl I think it turned out really nice.
It does feel like an accomplishment to take raw wool and process it, spin it, then weave it. Weaving is so easy and so fast compared to my knitting/crochet it almost feels like I’m cheating.
My husband said he really likes the way the loom looks when it’s all warped up with a project on it. I have to agree it looks almost like a musical instrument.
It was bound to happen. I mean, this is everything fiber arts, right?
My husband bought me a Schacht Flip loom for my birthday… Wait for it..
2 years ago!
I kept putting it off because I had only ever heard how hard warping would be. In the long run, believing this, may have helped. This idea I had built up in my head, of how difficult this was going to be, that when I mustered up the courage to take on the massive job of warping, I was pleasantly surprised with how easy it actually is. I did have some help from the people in Fibery Goodness group on fb. They talked me through any troubles. If you don’t know about them they are a great community.
And Fibery Goodness Facebook group can be found on Facebook Here
I had never taken a class on weaving. Everything I learned about weaving had come from YouTube. But the questions I still had, I was given answers in the Fibery Goodness group! Such great resource and people and classes in Fibery Goodness. I still don’t know the proper terminology for weaving. But, it is so much easier than I thought. Although, I have a lot to learn.
For whatever reason I had these preconceived ideas which I have since learned are not true, for me.
I thought I’d share those with you.
The following are myths I believed and what I have learned.
Myth – Warping is really hard
I followed directions from a video for direct warping with a peg. I’ve learned that warping is really easy. Considering it was a first time, I found it was pretty straight forward. Cutting the string at the end once removing it from the peg, was the tiniest bit nerve wracking, but they were already safe in their slots. The next time I have to make this cut, I won’t think twice about it.
Myth – warping will take longer than the actual weaving
The warping process took me 45 minutes to an hour. I have been weaving a bit each day for a week and I’m still not halfway. The steps that take the longest are bringing the yarn through each slot to the warping peg, and then when I was finished with the warping peg removing all those loops held by that warping peg, and cutting them. Rolling the warp threads closer to the loom, then taking one of the two pieces of yarn in the slot and hooking it with a special tool through the hole. It’s not fast, it’s not difficult, once you thread the first few holes, you get into a groove. Stick your hook in the hole, grab one thread from the slot next to it, pull it through the hole, NEXT! It becomes a process of doing one after the other and before I knew it I was at my last slot/hole.
Myth – lots of adjustments tying it on make sure it’s tight
It doesn’t have to be tight, it has to be even. The second you need to roll it on, you have to release a latch that completely loosens everything, but it will be rolled to the other side and that can make it as tight as you want. That’s why being evenly tensioned is more important than tight. Initially, I kept tightening each group of threads but I realized that tightness can be dealt with by turning the warp beam. It’s making sure it’s even so that when it’s turned it all turns together.
As far as I remember, I didn’t have any misconceptions about the waste yarn. Although, I am glad I used separate pieces. At the end after taking it off the loom, when waste yarn is pulled out, if I had to unweave one long string that would have been a pain, vs pulling out short bits, one row at a time
I enjoyed adding the waste yarn because I could see the warp yarn align itself to its proper place with every beat. I’ve seen regular yarn used for this but I wanted something bigger thinking it would be easier to retrieve at the end. People use cardboard strips, or rolled up paper towels, strips of fabric, I used a yarn that I made from cut up cotton tank tops.
Myth-Weaving goes by quicker then the set up aka warping
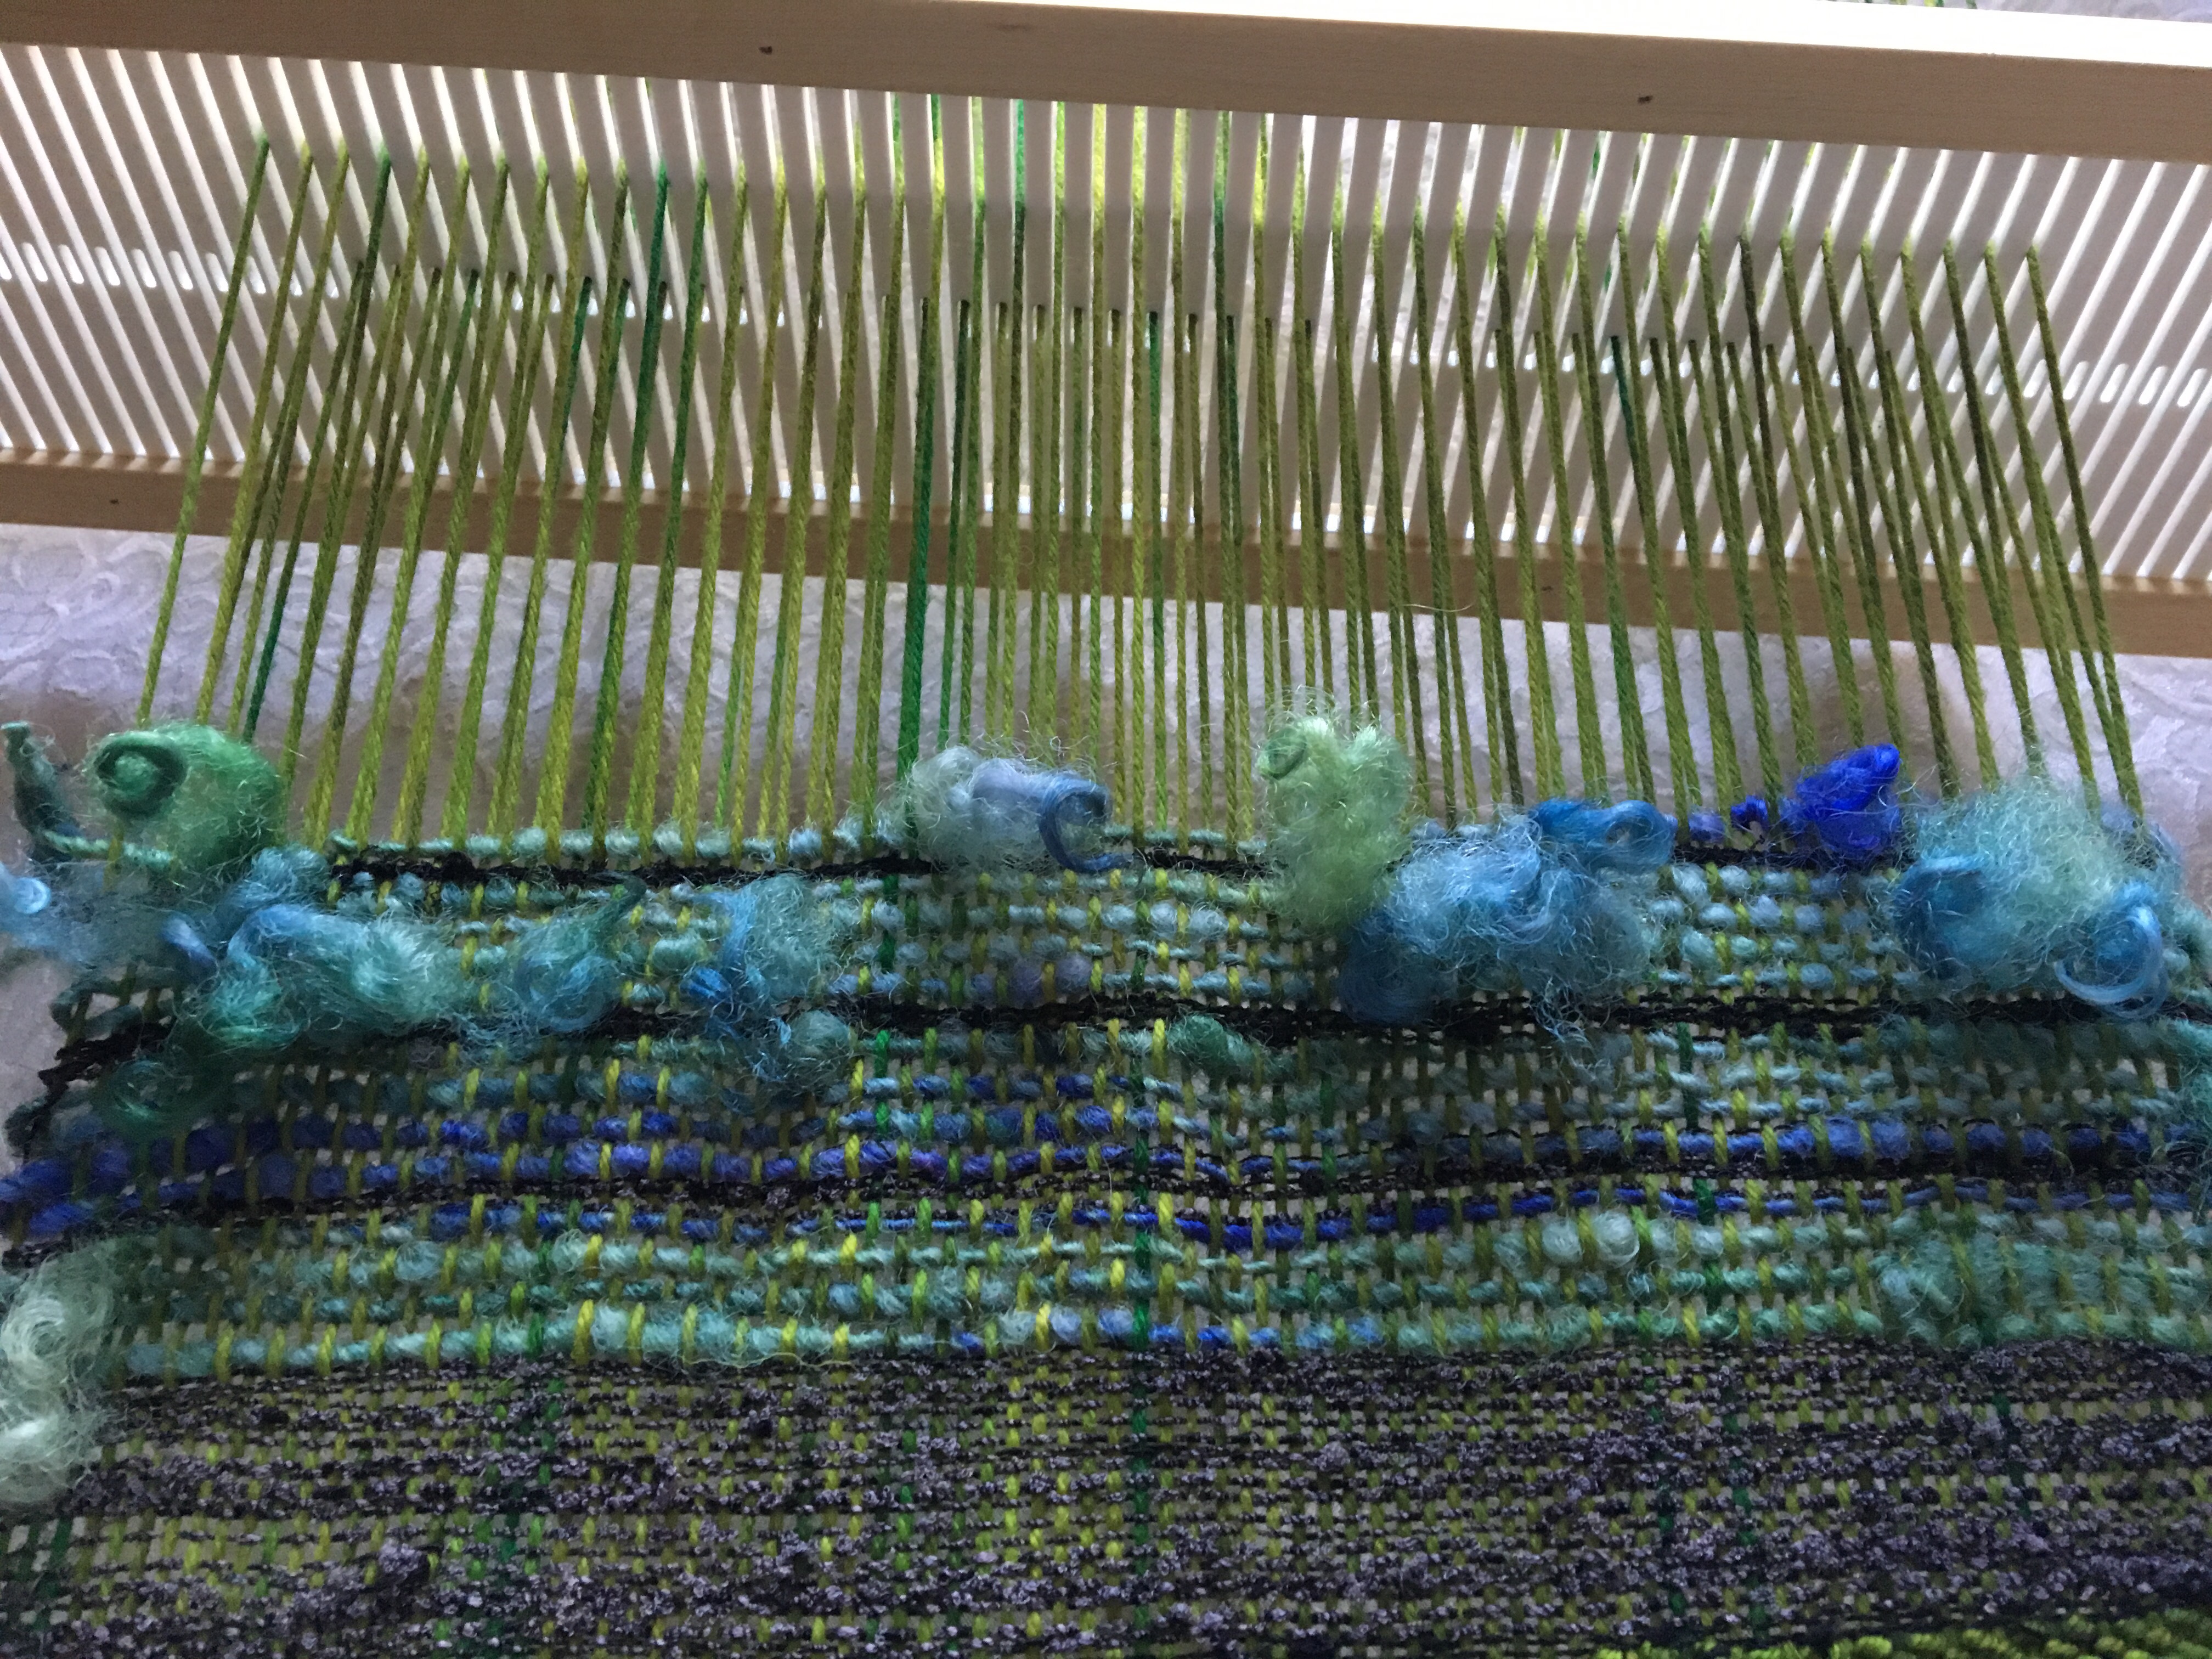
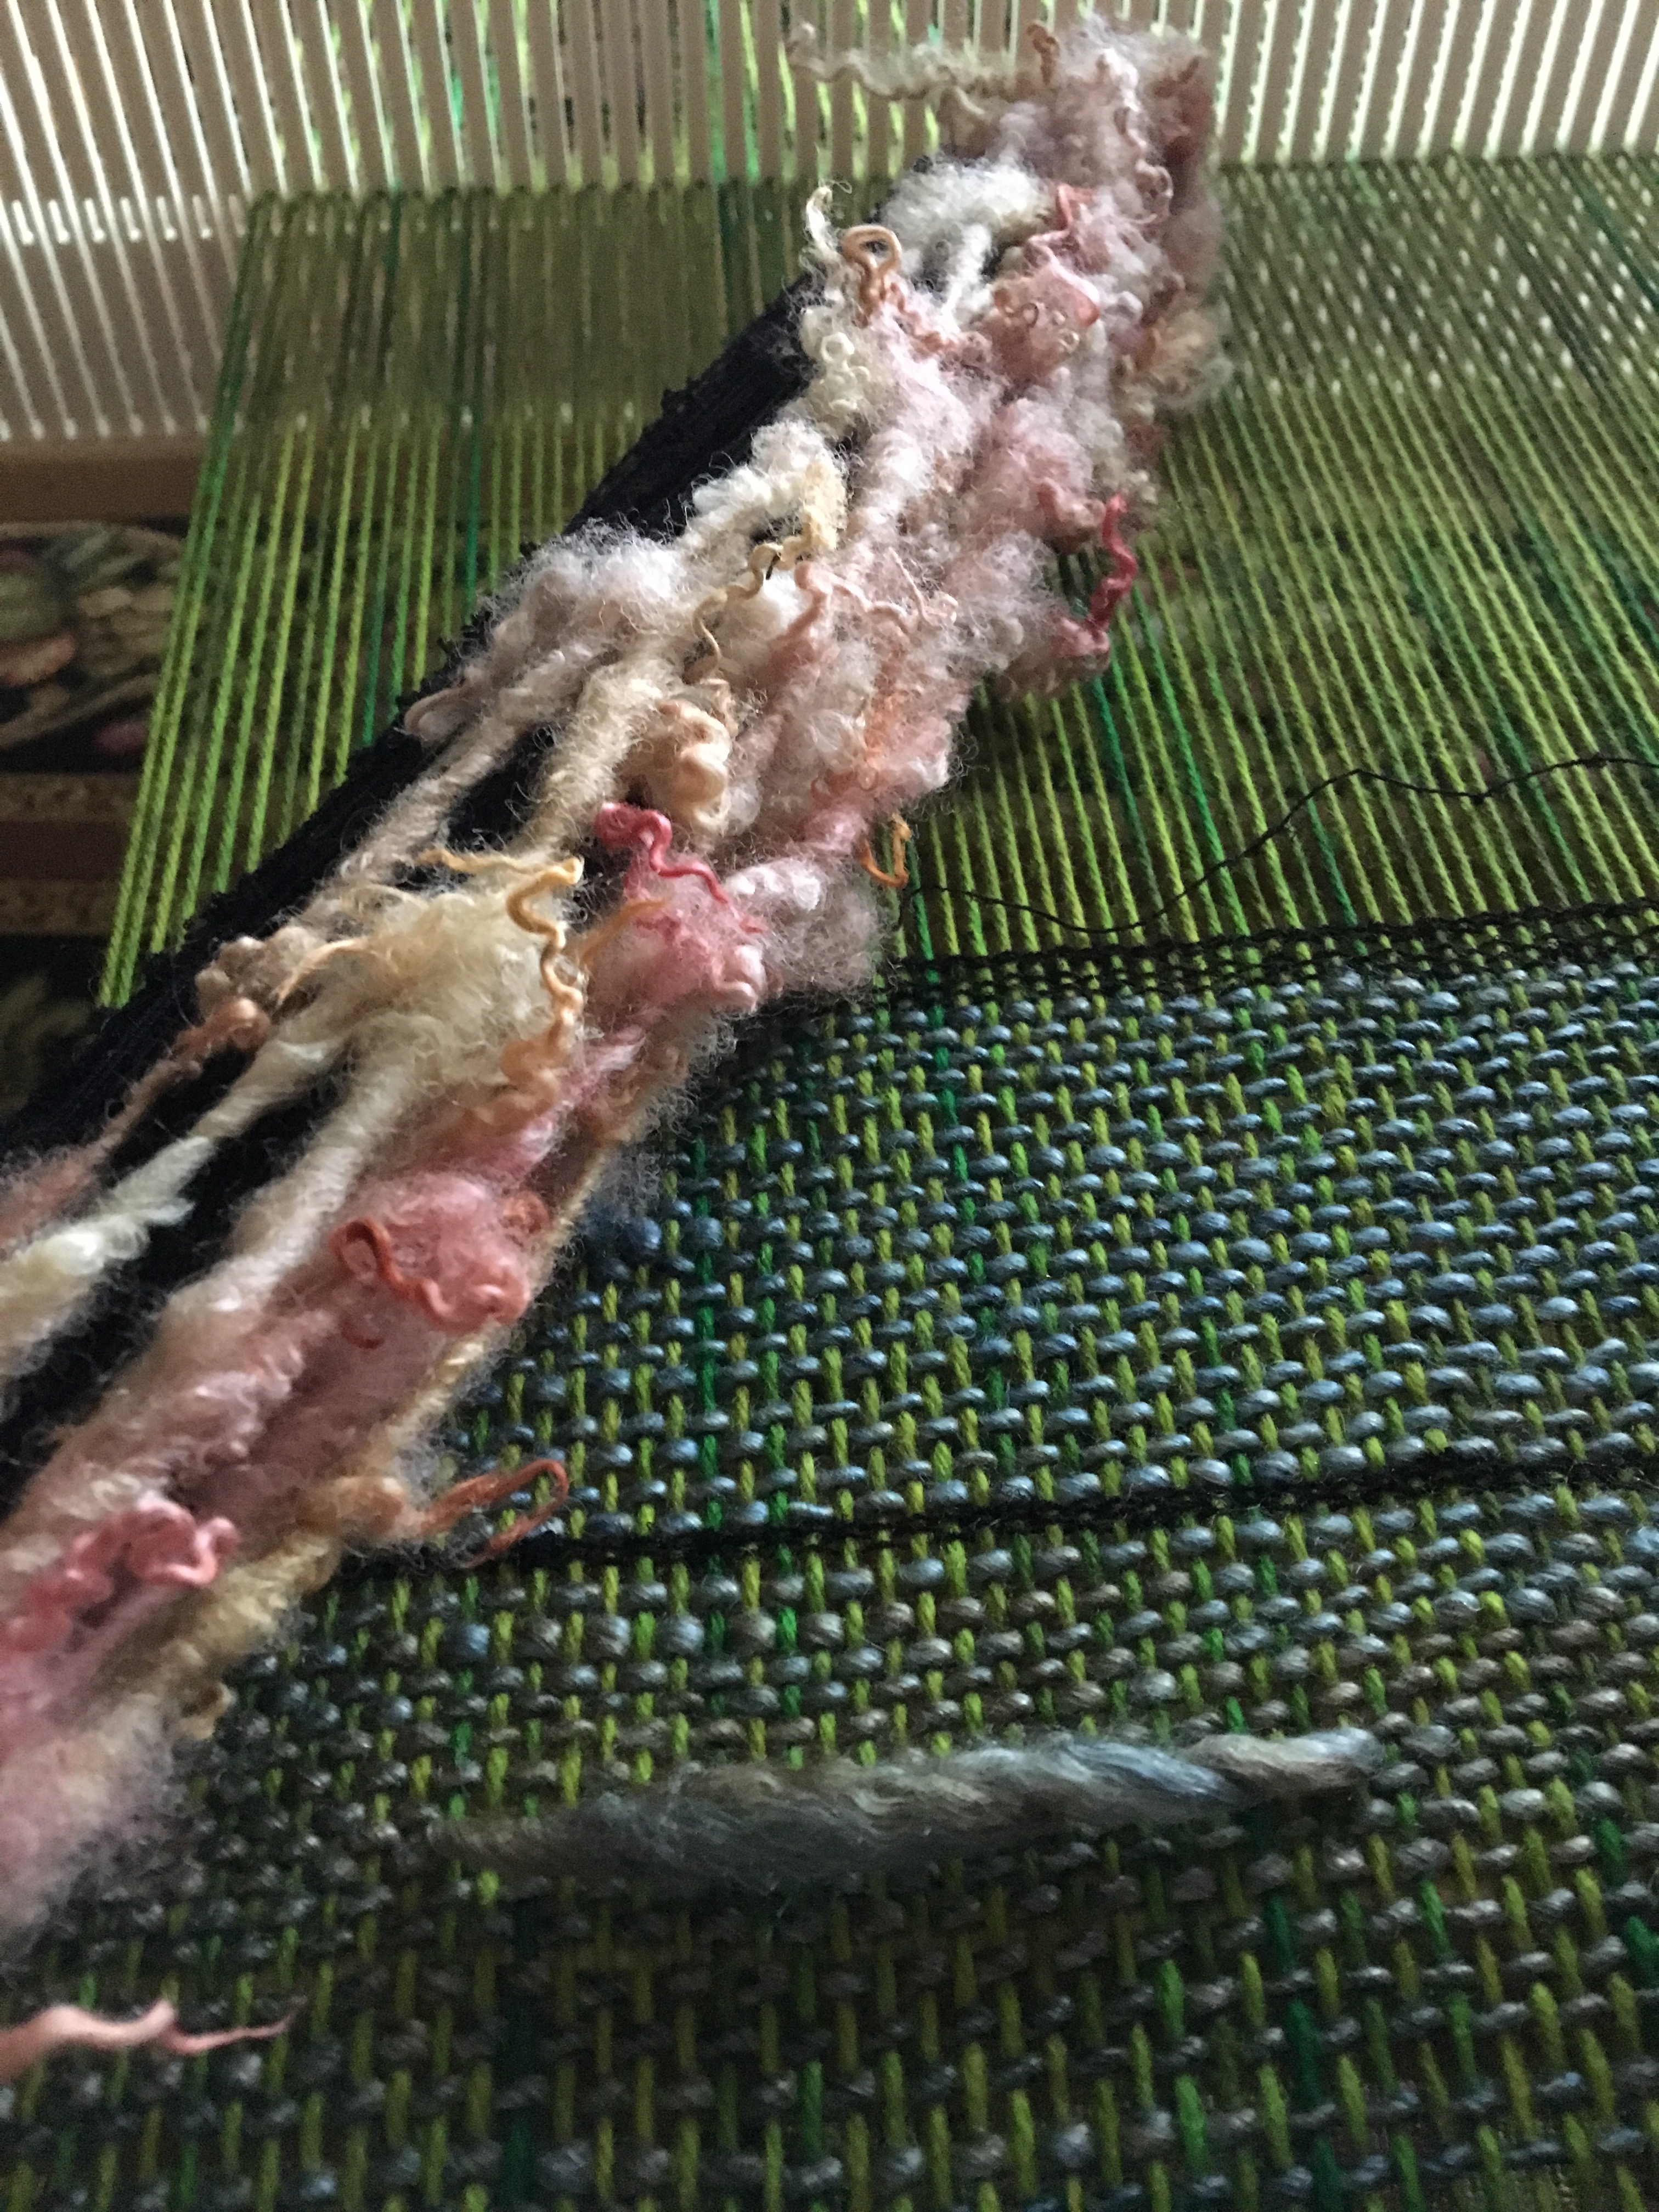
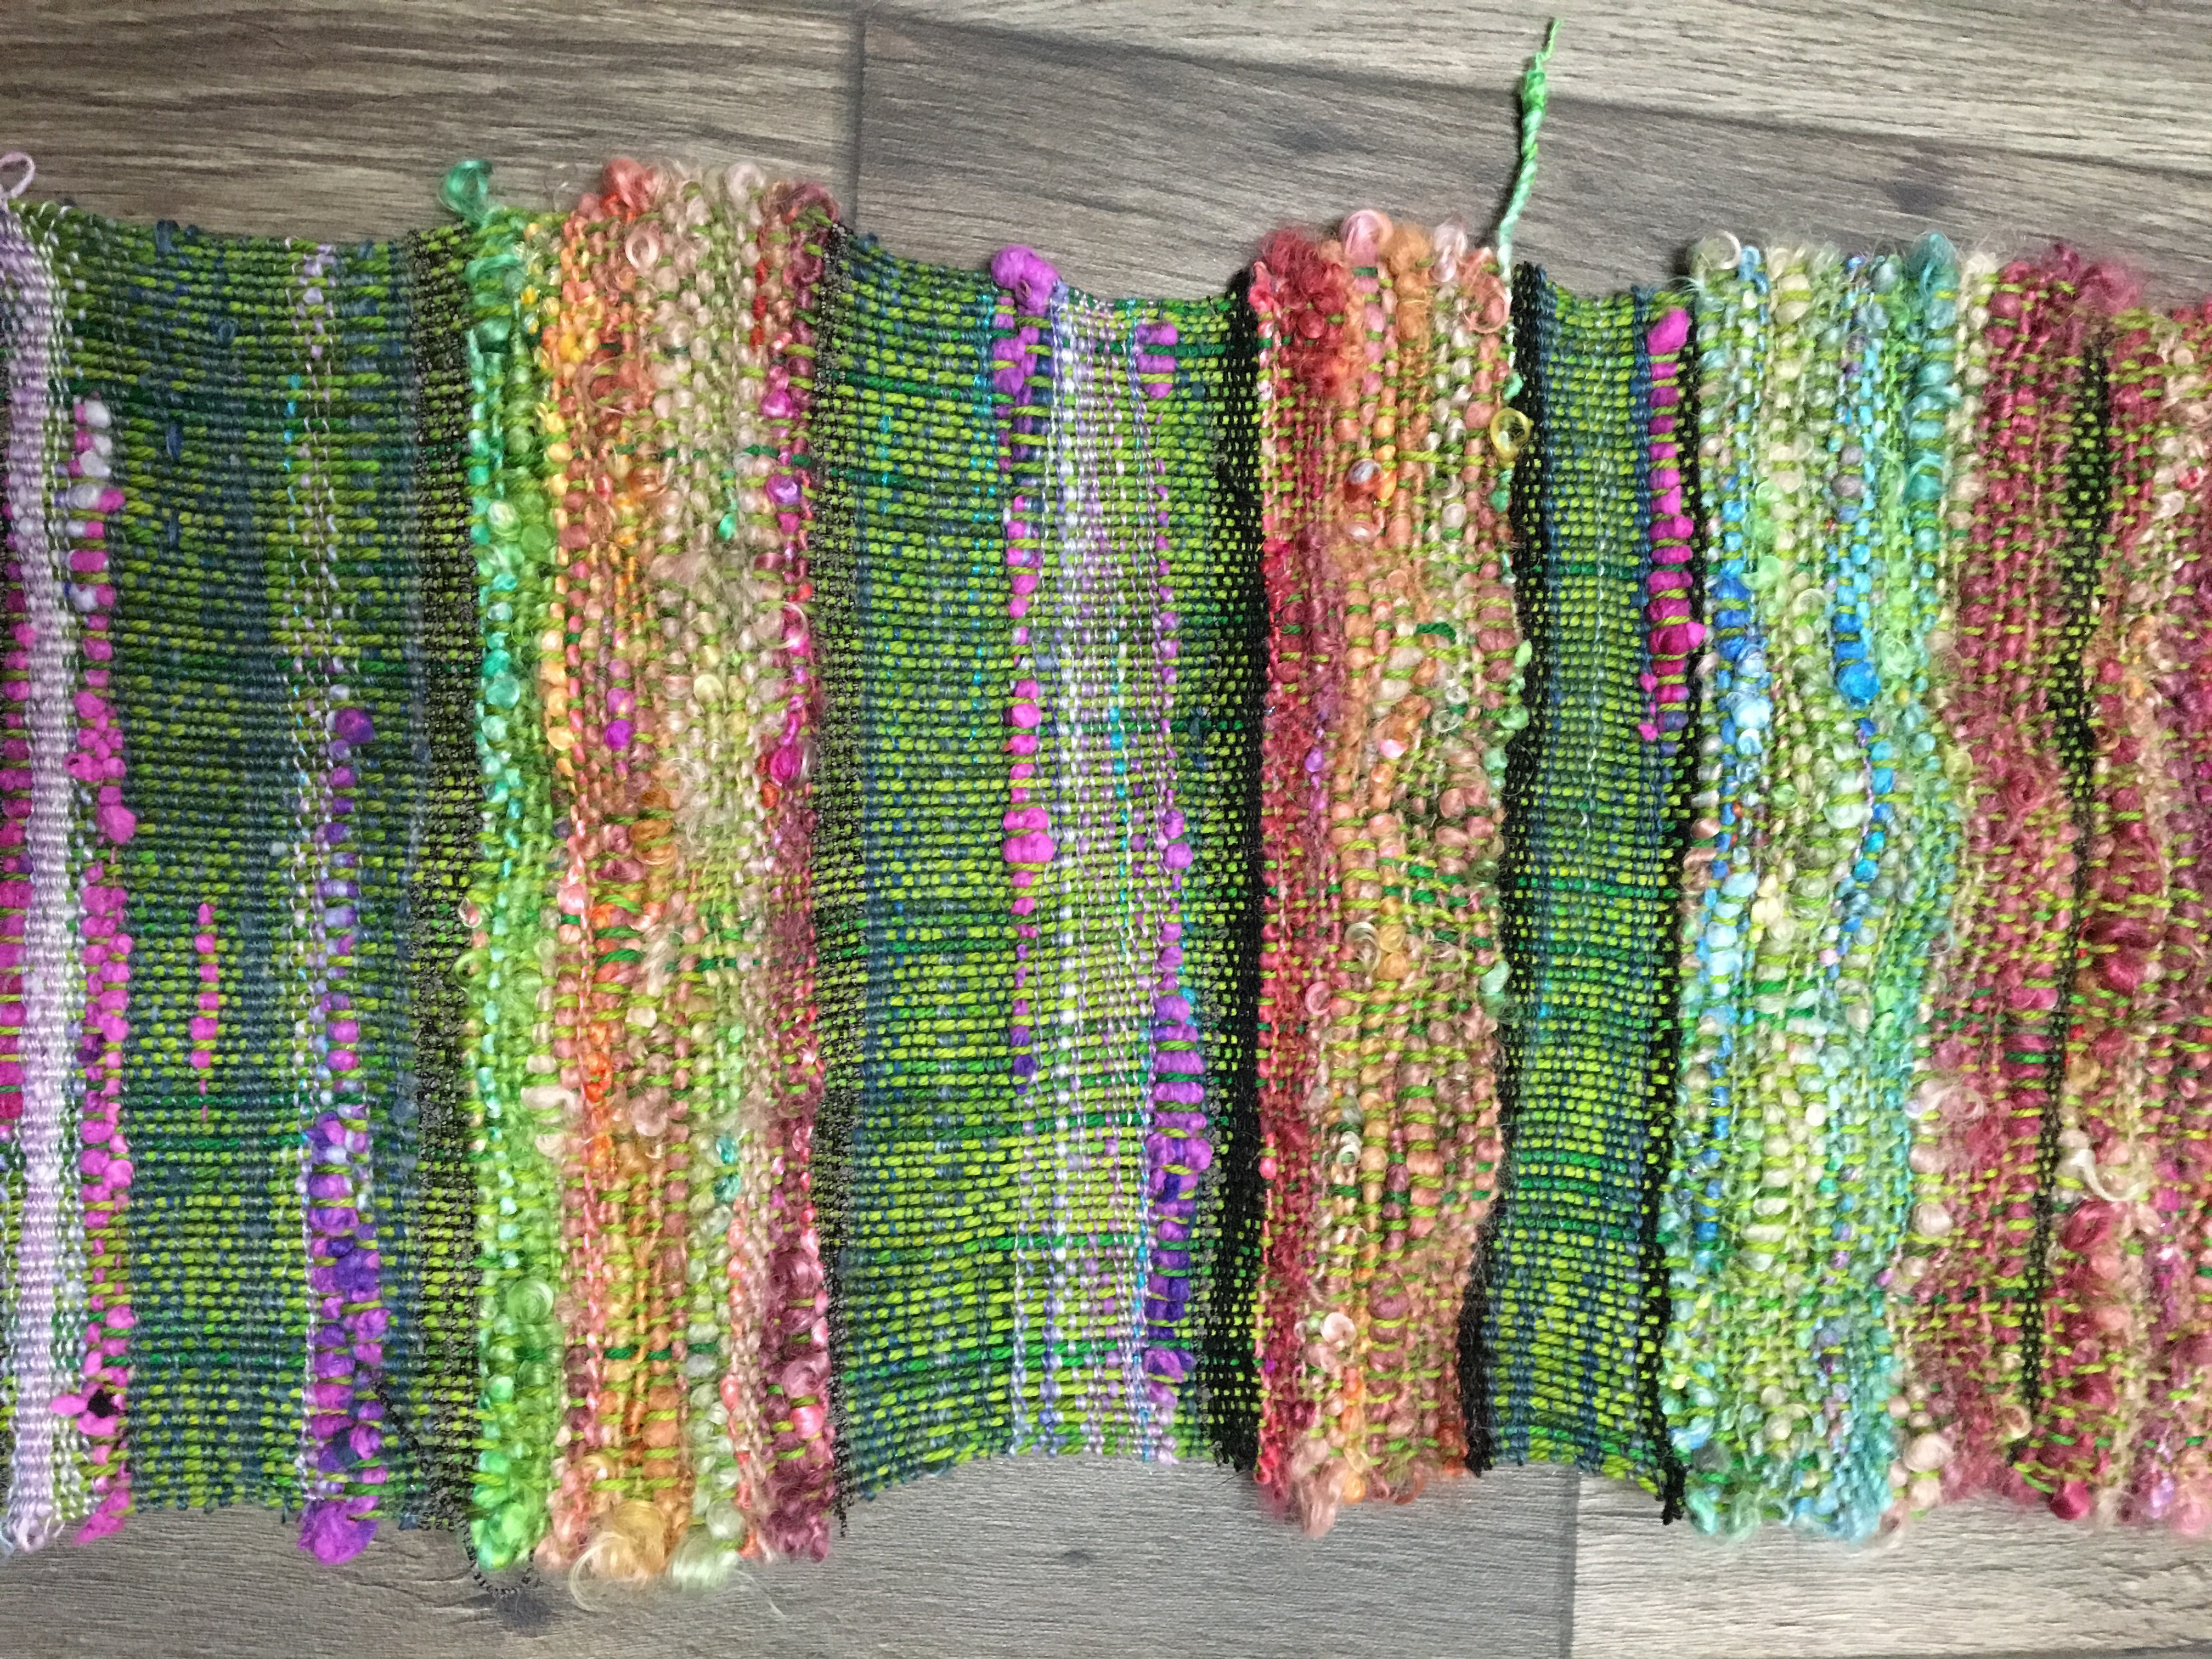
I thought warping was pretty quick and easy. I varied the thickness of my weft threads. Some were lace weight and some was chunky. Obviously, the lace weight goes a lot slower. The above black lace weight weft was only 2 inches of weaving and took longer then the whole warping process.
Even when I switched to a thicker weft it still took longer for me. Which I am pleased to have discovered. Weaving is definitely the fun part. I got a good week almost two weeks of weaving time everyday.
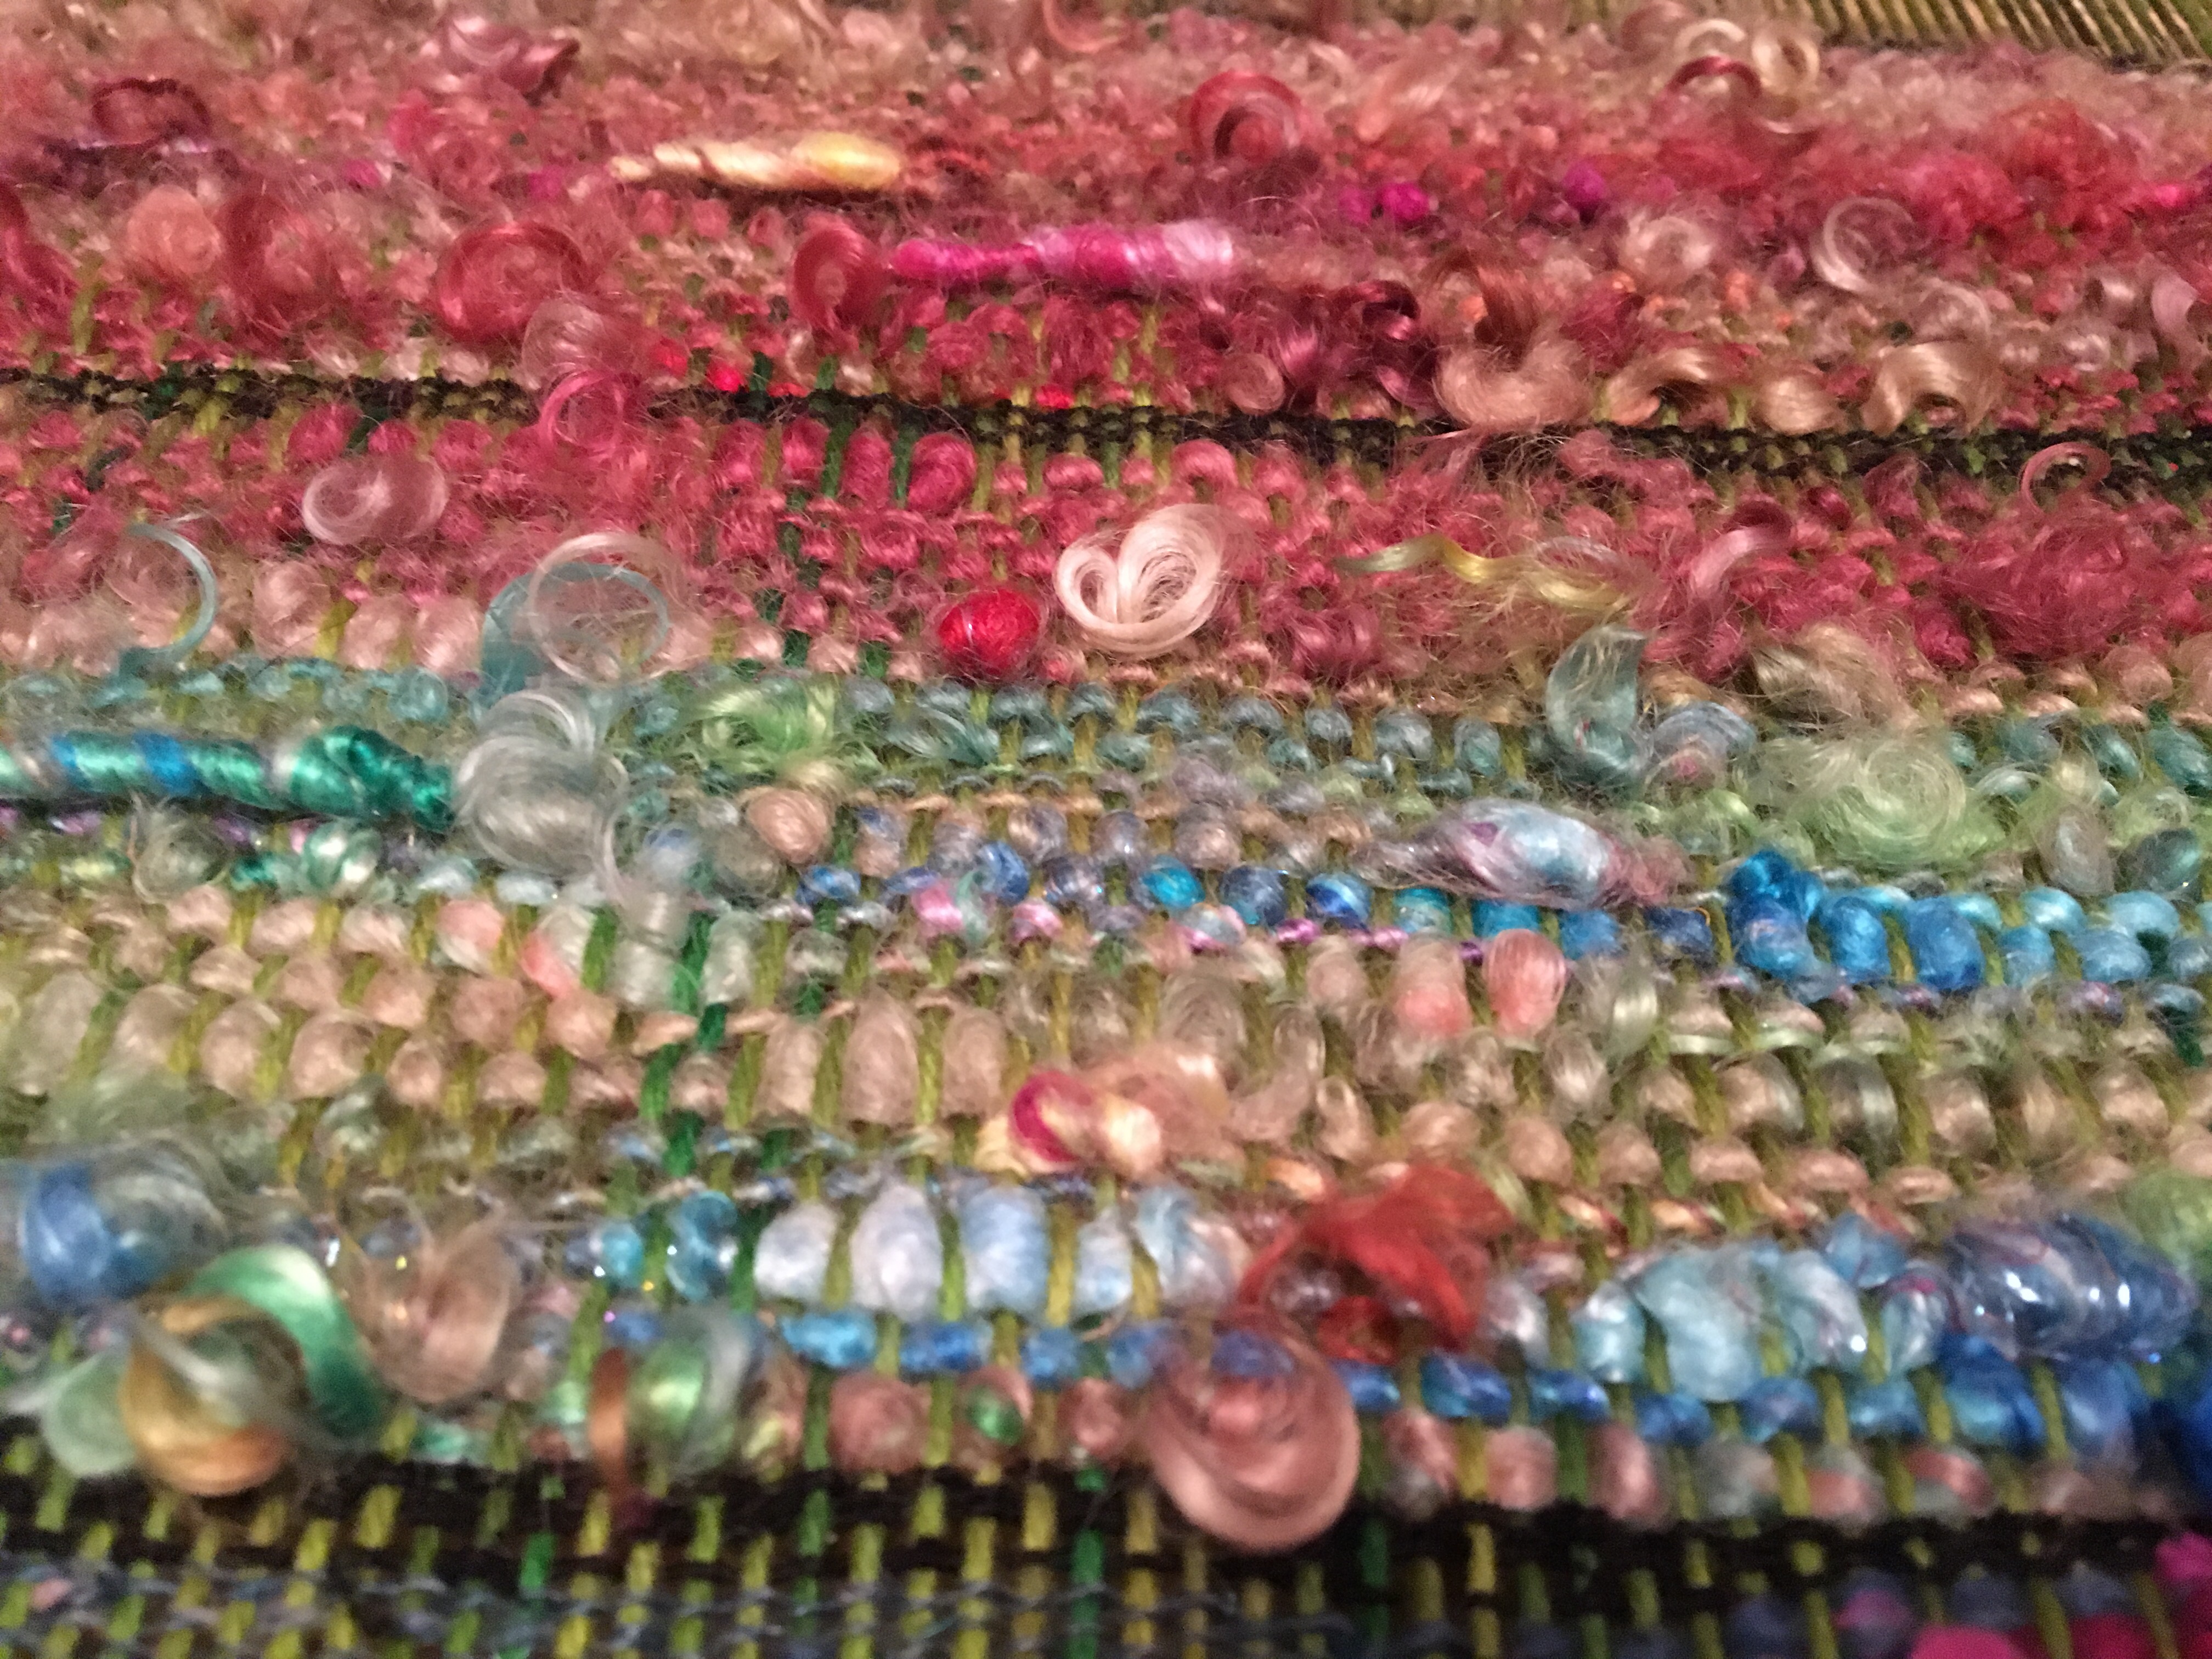
I also discovered how many different colors actually go with green. Weaving allowed me lots of color play that I never experienced with crochet or knitting maybe because it blends the color evenly throughout. Being over and under every thread. Whereas, with knitting or crochet it’s more color blocks.
I played with different textures, as well. Leaving favorite bits of handspun out of the woven fabric. Switching from silk hanky and silk noil, to mohair, to wool and tencel blends. From lockspun, to thick and thin, to a traditionally spun smooth single. It all worked.
I did end up signing up for a weaving class and wow!! I’m so glad I did!! I learned a bunch of fun techniques from an online weaving class given by Stacey Budge-Kamison of
Urban Gypz website she teaches a lot of cool tricks for art weaving, using handspun and art yarns, but actually showcasing them. The class was very affordable definitely worth every cent. She gives both written and video. Plus has a group on Facebook that is private in case people may have questions or want to share. It’s not your average weaving class. It’s the fun stuff. It’s art weaving tricks. It tips on adding certain things to showcase anything that might be important to you. She gives so many ideas. One can use a small loom, add things to weaving I’ve never seen, weaving to wear, wall hangings, pictures, not just yarn in a woven piece (get creative) and add it. That class got me really excited about the possibilities. I’m filled with new ideas. The same way art yarns have add ins…
Weaving can too.
We have basic spinning that can be learned and art yarns that can be learned.
Well this is fun and showcases ways to use art yarns for those special one of a kind woven pieces.
So far my knitting and crochet have been pretty vanilla but I want my weaving to be as free as my art yarns. For wearing, for fabric for accent pieces, and wall hangings. I already feel like weaving gives me a kind of freedom.
Again this is something I didn’t do much with crochet and knitting. Weaving gave me a new outlet and I didn’t start thinking his way, weaving spoke to me. I felt different when I was weaving m, I felt more free. I did use the same black silk lace weight thread all the way through my project to somehow tie everything in from beginning to end. But I’m not convinced it did. And that’s ok too.
Myth-as long as you have even tension and you use that angle before you beat, you will have even edges.
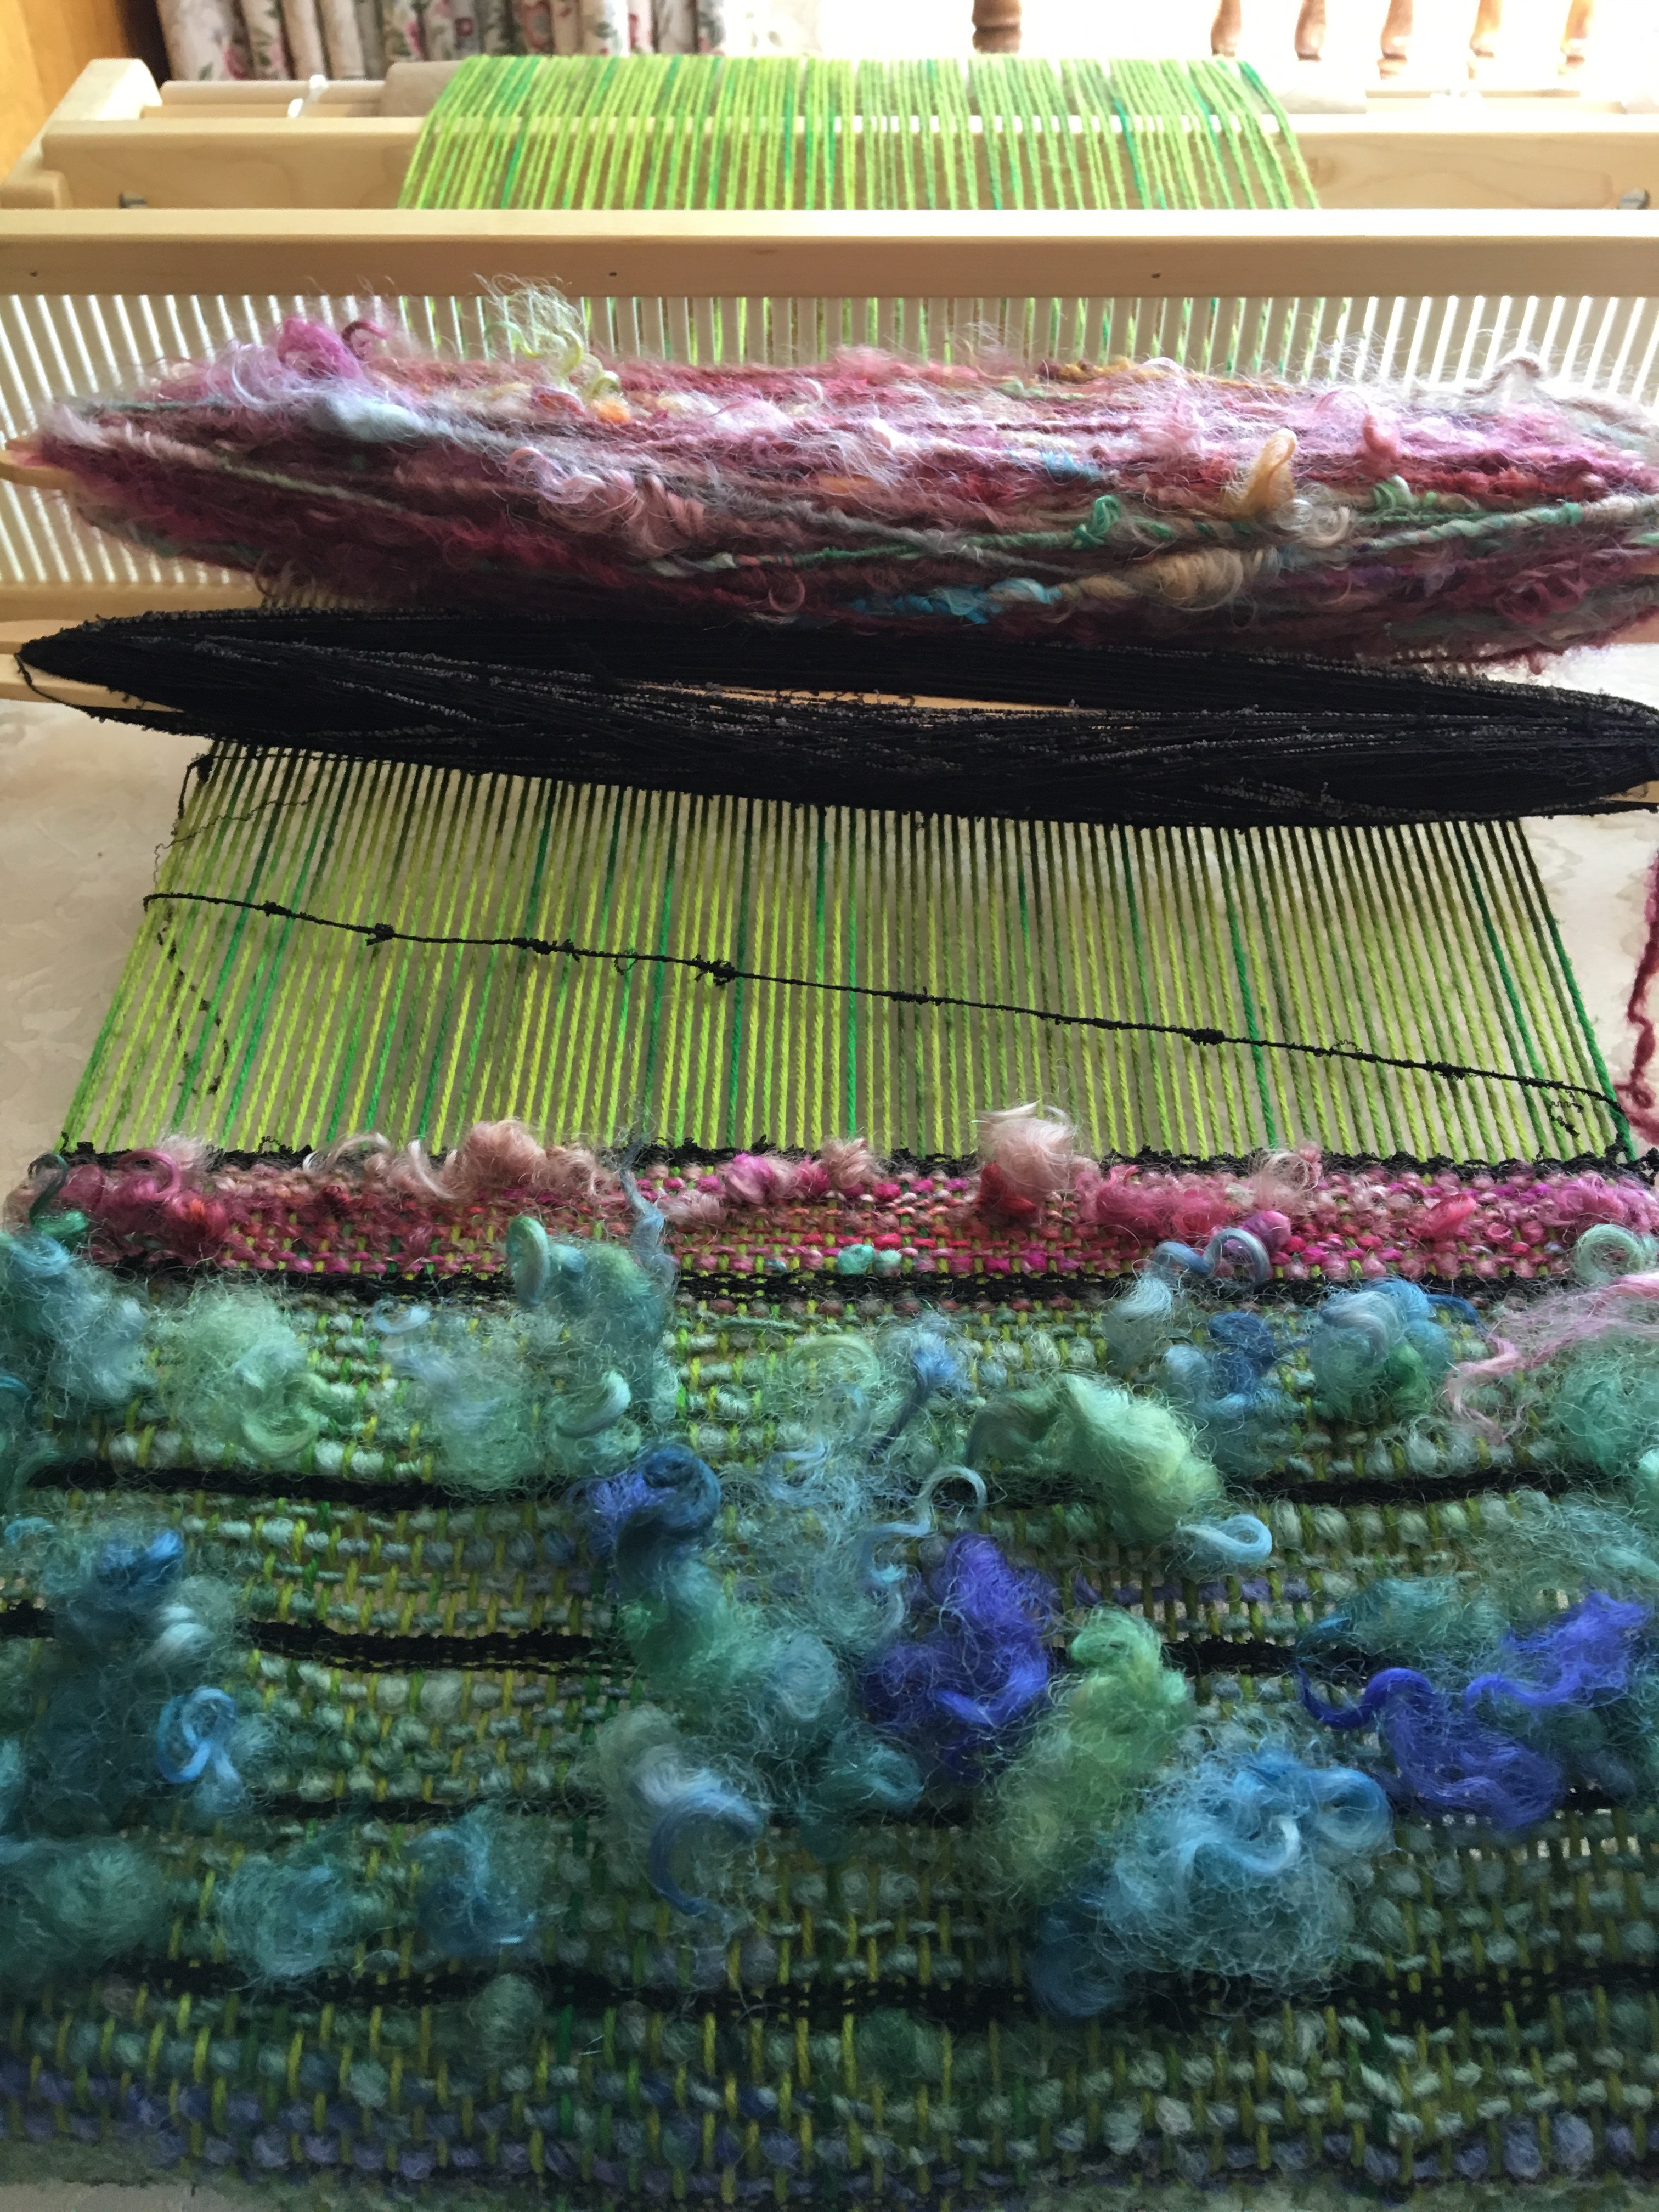
Well I really tried to do exactly what was shown in several videos and got nothing close to even. Now to be fair, I haven’t washed it at this point, but the pictures show how my edges go in and out. I don’t know if this is truly a myth yet. I’m ok with my edges for now. Being a beginner, it’s a weaving right of passage to have wonky edges. I have a feeling, that using thicker yarns, then thinner, then thicker yarns may cause different widths in the fabric and thereby uneven edges. I need to weave more and find out how that works. I’ll learn with each piece if there is any truth to my thinking regarding this.
I love the way weaving can showcase yarns!
I really had no rhyme or reason to this project. I wanted to weave my first project and experience what it was, to weave. I didn’t worry about perfection.
I didn’t worry about anything except carrying that black lace thread in certain places, throughout the project, to tie in the beginning with the end. I found that as soon as the fabric was wound onto the beam and I couldn’t see it, even with pictures, I wasn’t sure what it looked like. I couldn’t remember how thick each section was before I used my black thread again. At the end, I know I was using the black thread less often.
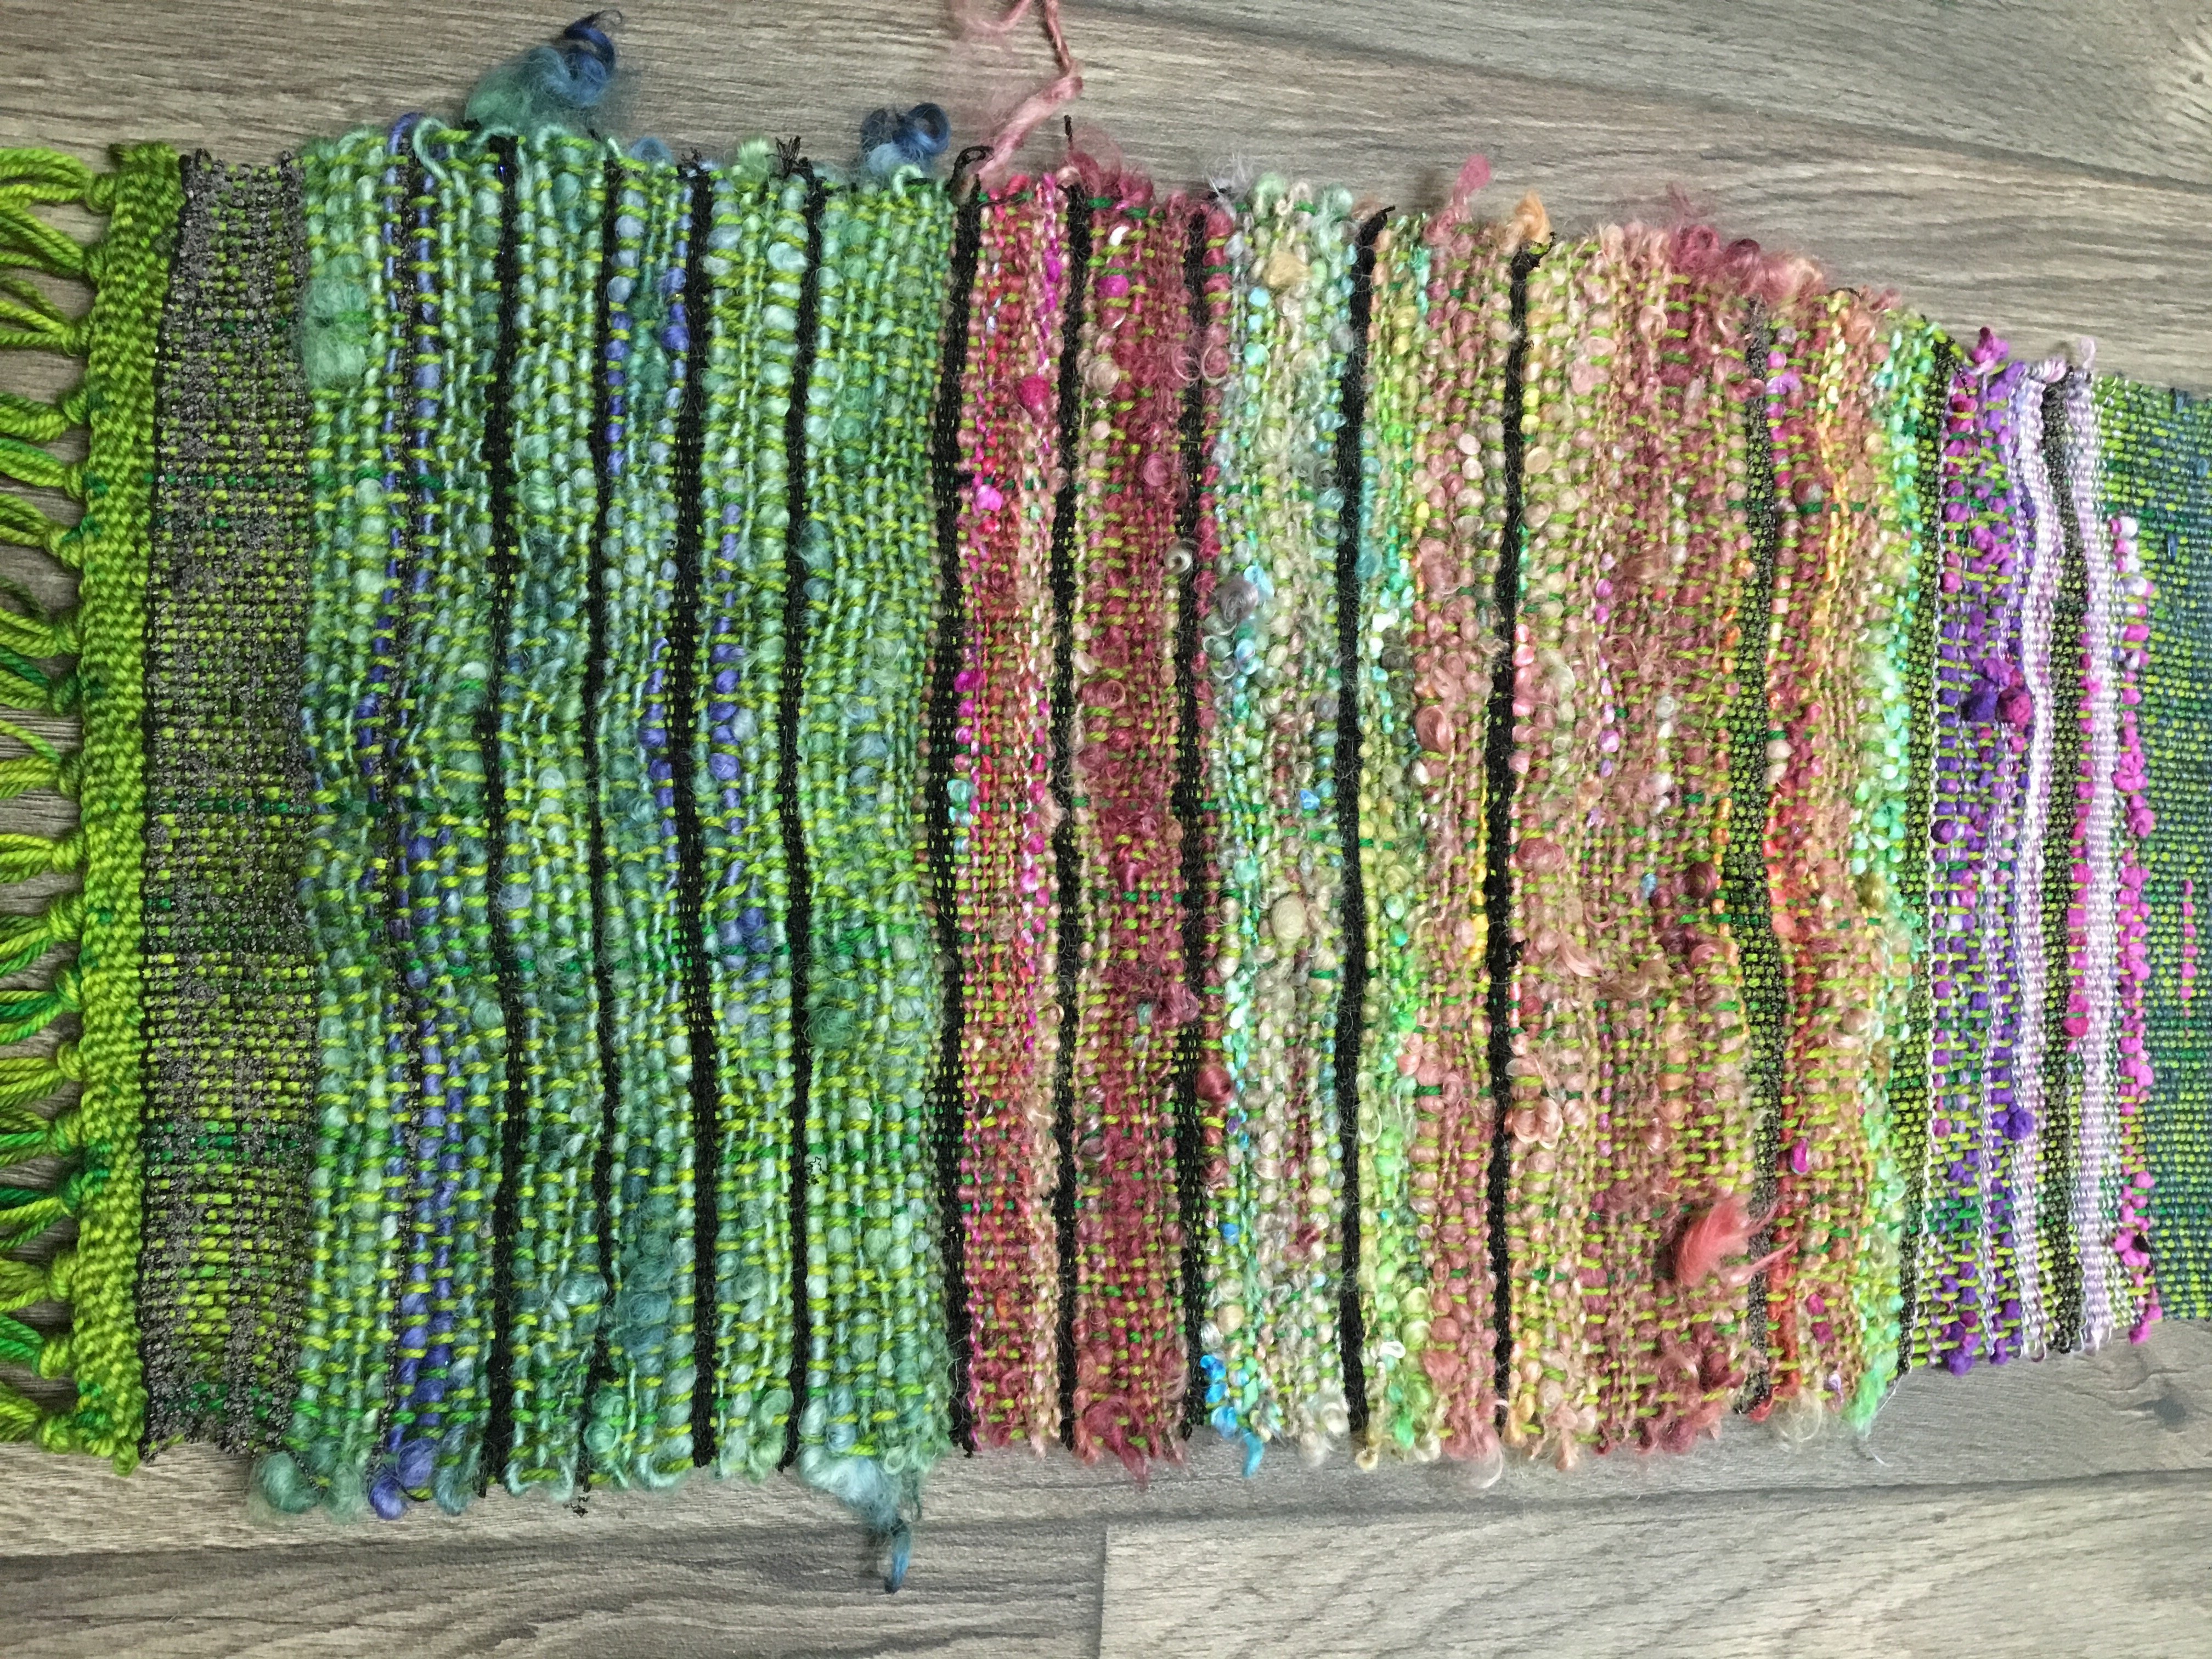
Another thing I did, was have any lock tips only poke through one side. So the side facing me is fluffy, and has fluffy, lustrous locks and sweet little lamb tips coming out. On the opposite side it’s smooth.
The same is true for any bits left out of the weave. These things only happen on one side. Leaving the other side to look smooth and pretty straight forward.
This piece is kind of like a mullet. All business in front and party in the back.
As it turns out, one end has more crazy lockspun where the other end has more smooth handspun.
If worn as a scarf, depending on which end you have in front or in back, it can look more business or more party.
Myth- weaving uses up a lot of stash yarn quickly
THAT IS NOT A MYTH! This is so awesome for busting through stash. If you have a crap ton of yarn, and crochet and knit as slow as I do, this can overnight make you realize….you just might not be at SABLE, like you may have thought you were!!! I know any one thinking about the possibility they are at SABLE, if you are without a loom, I can’t suggest enough to give it a try.
They have many looms that are pricey. But even trying a smaller inexpensive loom to see if this might be fun. An ashford sampler loom, a Schacht cricket loom,
Not to mention many people destash their looms at great prices when they upgrade. Look for those. Some Lys like mine even rent looms out when classes are taught. If you were in the slightest bit interested see what’s available to you.
SABLE = stash acquired beyond life expectancy
A loom is a gift for you but it’s also a major gift to your stash!! This scarf used 14 skeins of yarn!!!
Fourteen skeins of yarns!!!
Think about that a scarf!
I get to continue spinning, crocheting, knitting, to my hearts content, and weaving took 14 skeins from my stash in under 2 weeks! Next. Project I will take pictures of all the skeins I went through I had no idea how much I would have used!! Stash people that don’t have a loom… You may love this. I don’t have the saori, I didn’t make the big investment until I knew I’d enjoy it. For now this works I want to make fun stuff.
Ok so… I got to the end of my warp. I cut the edge free and did half of a Damascus edge (just one way across), and tied groupings of warp threads into a sort of fringe.
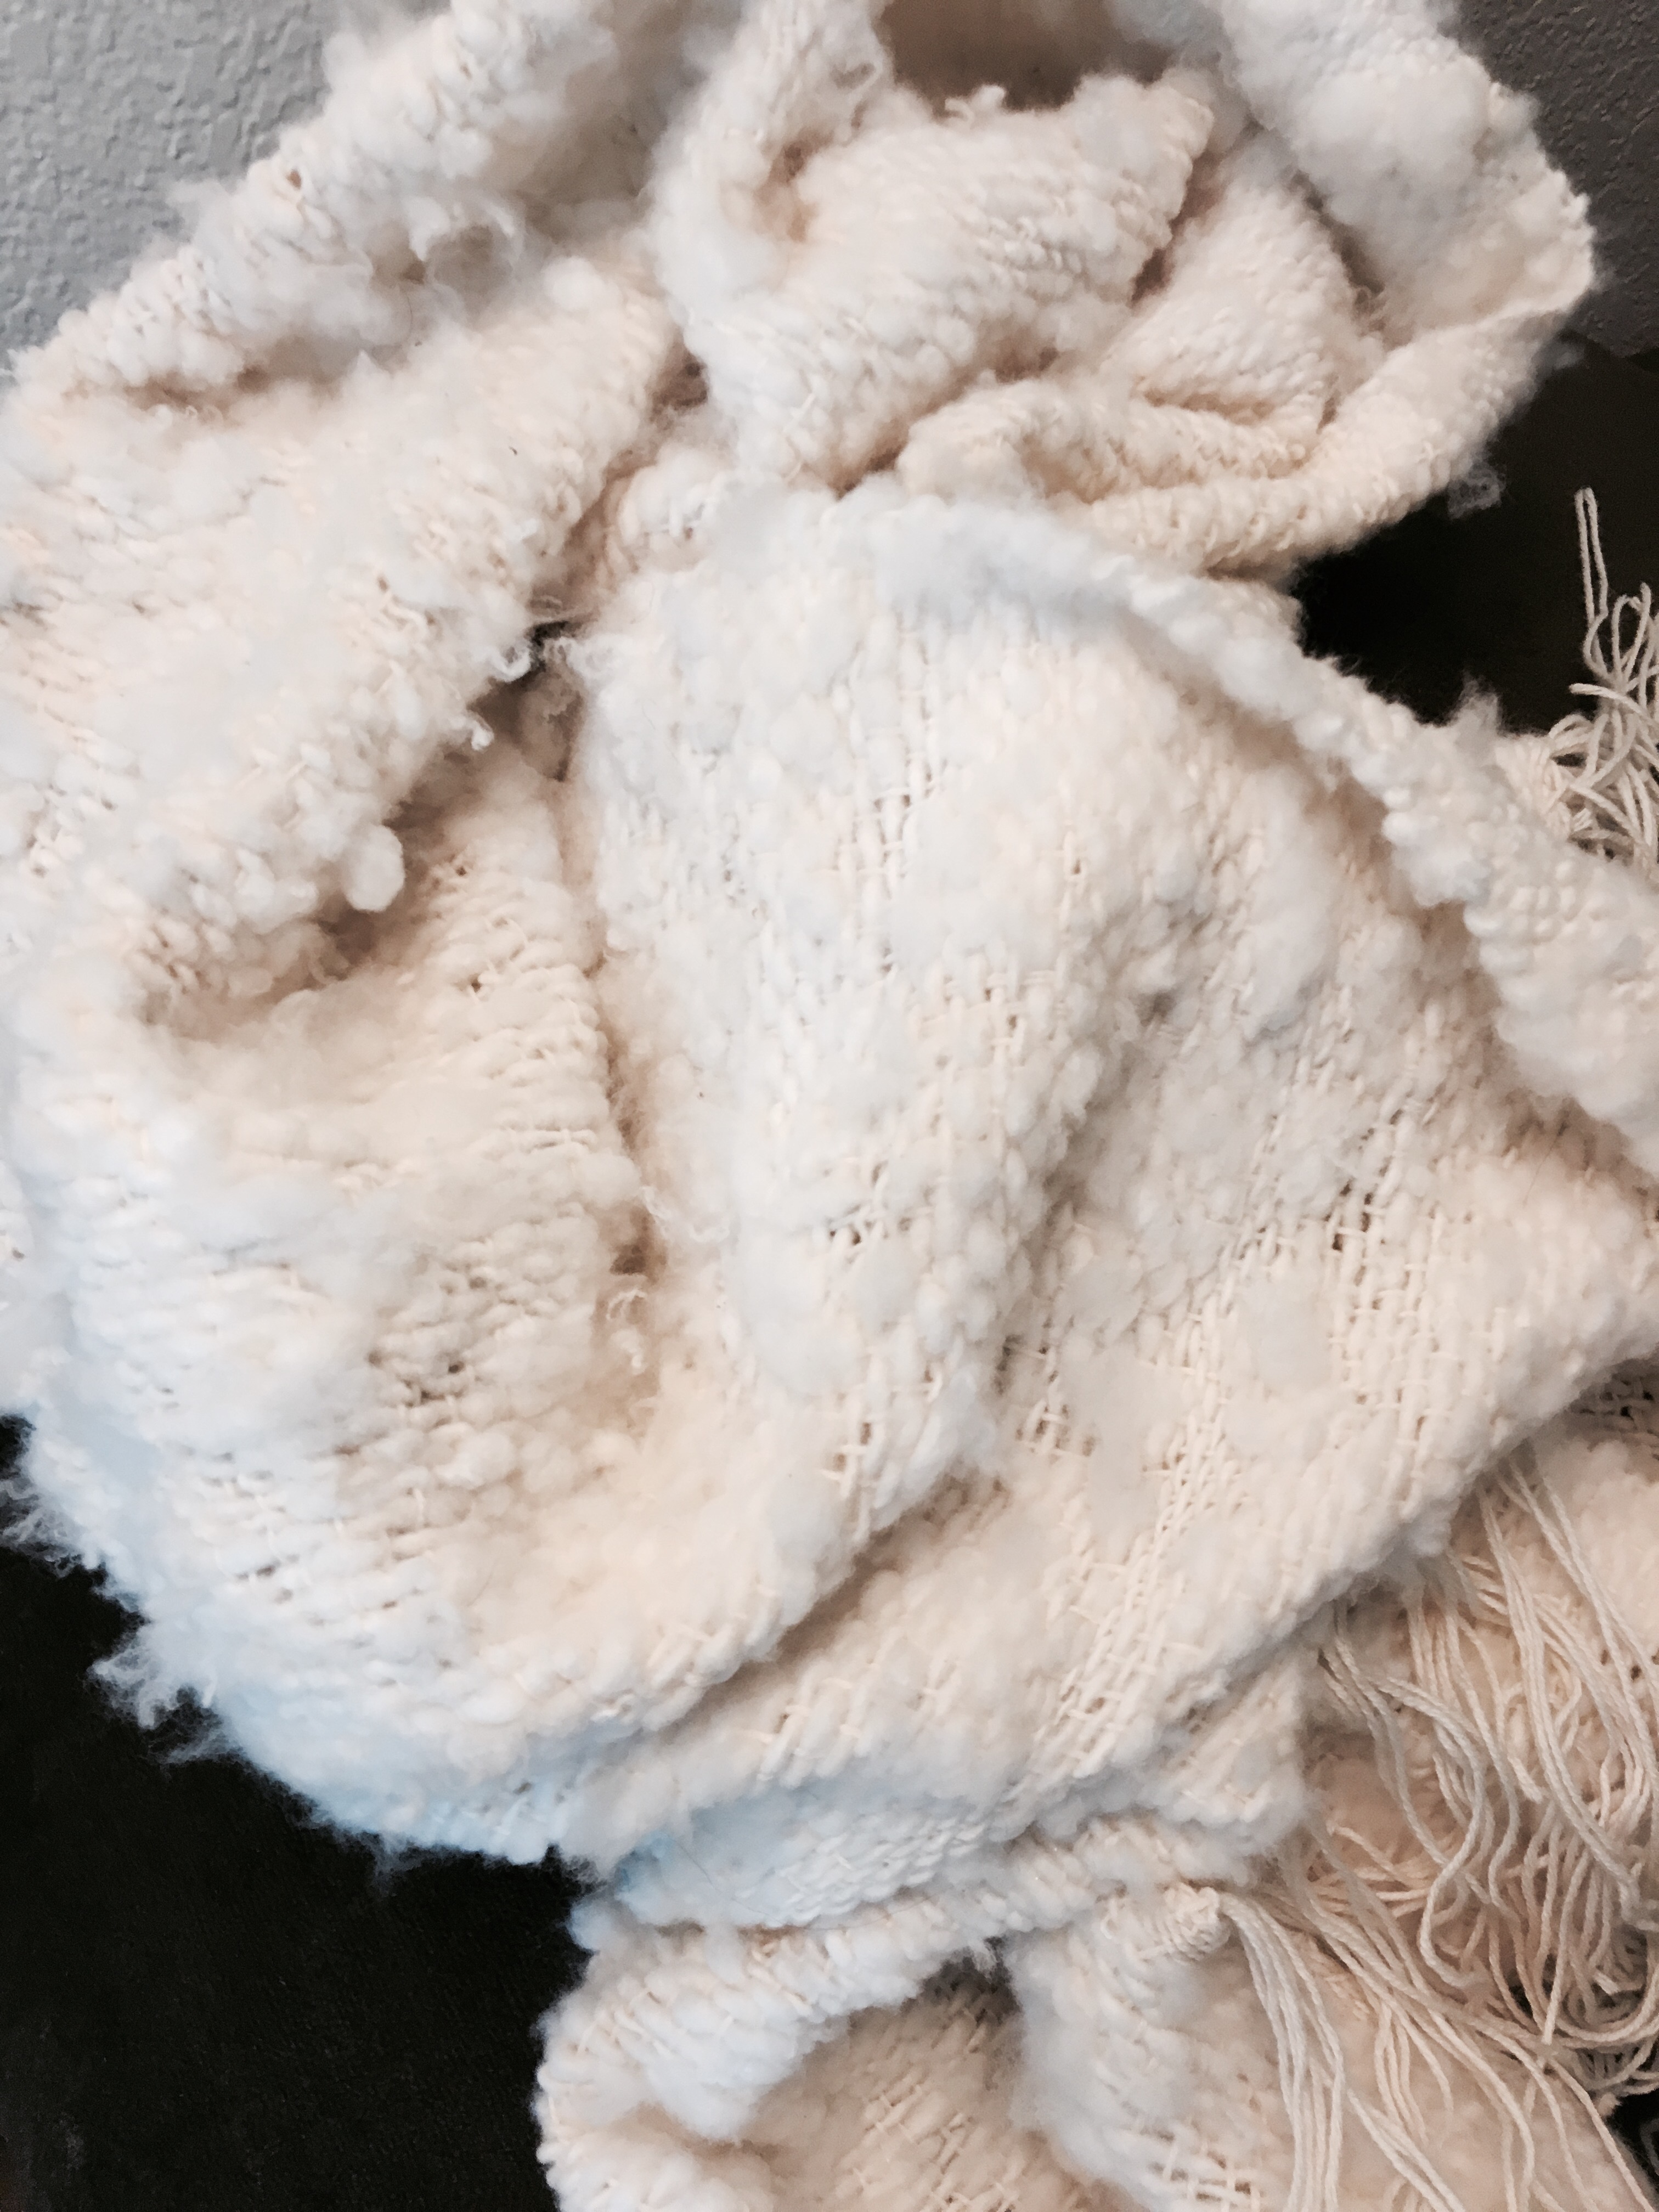
I have yet to wash it. Full it, get it wet, or whatever.
It feels rough and looks kind of a mess. I’m hoping for the magic that happens with this step everyone talks about.
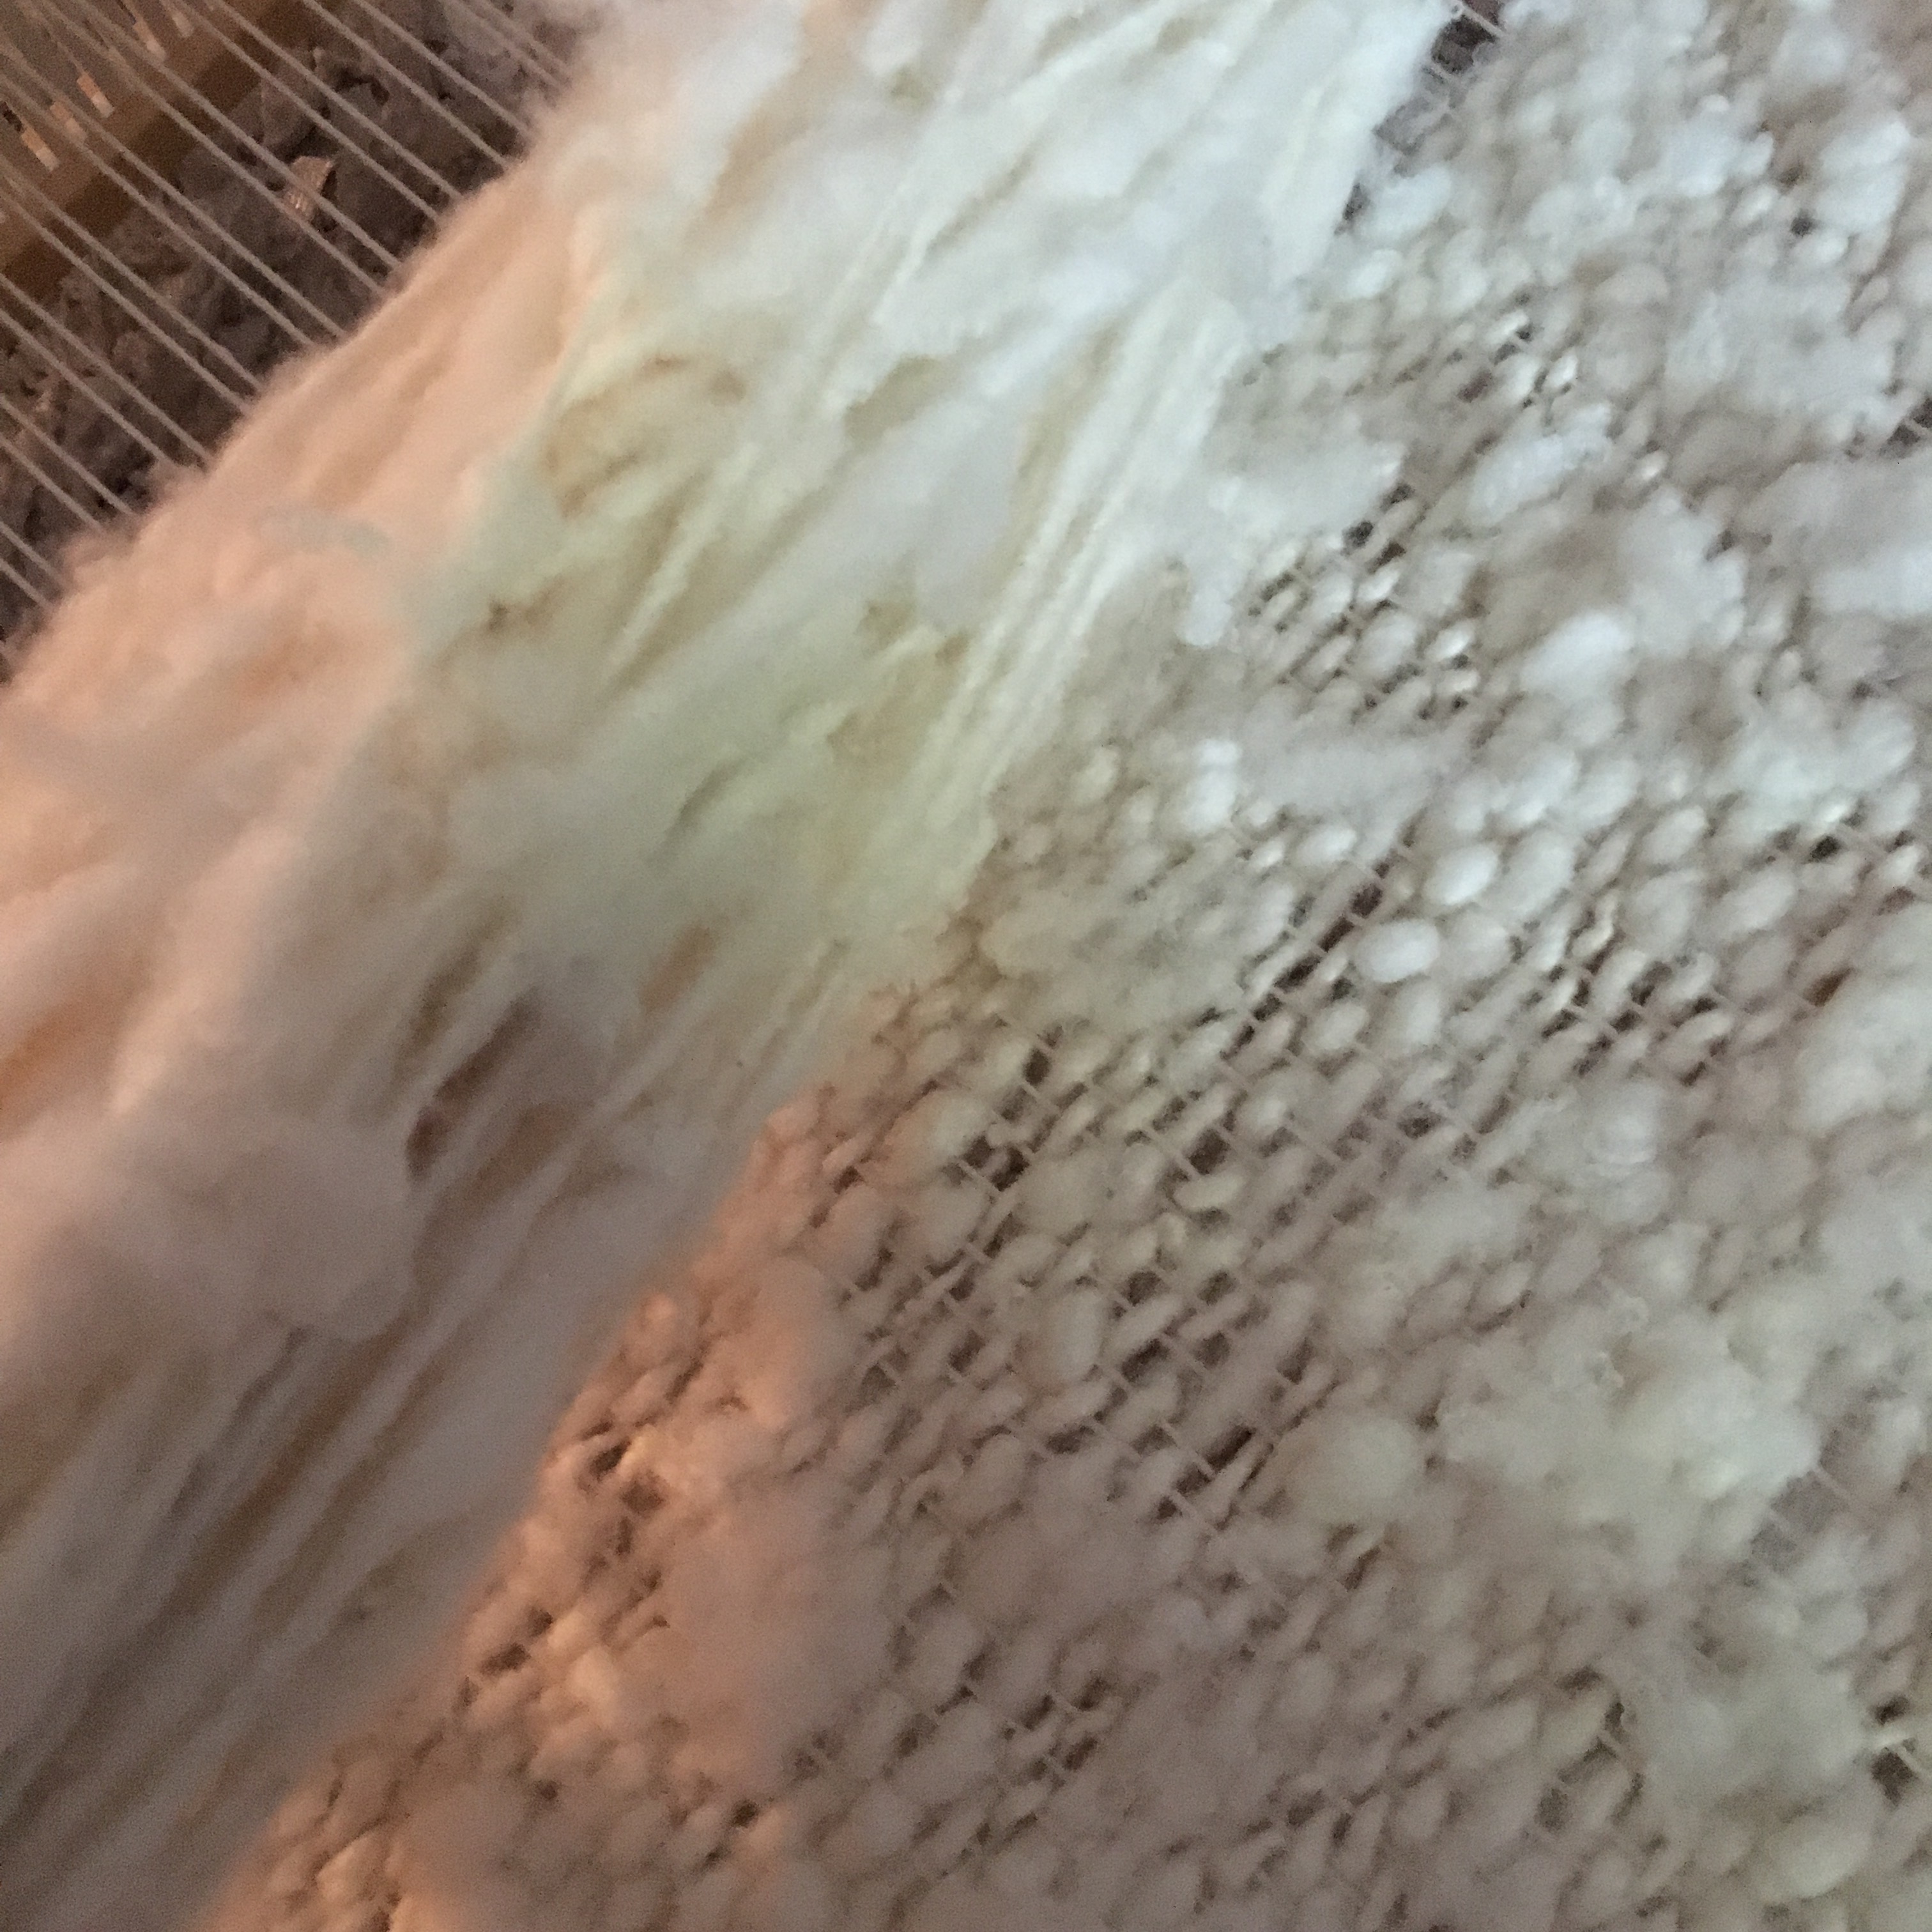
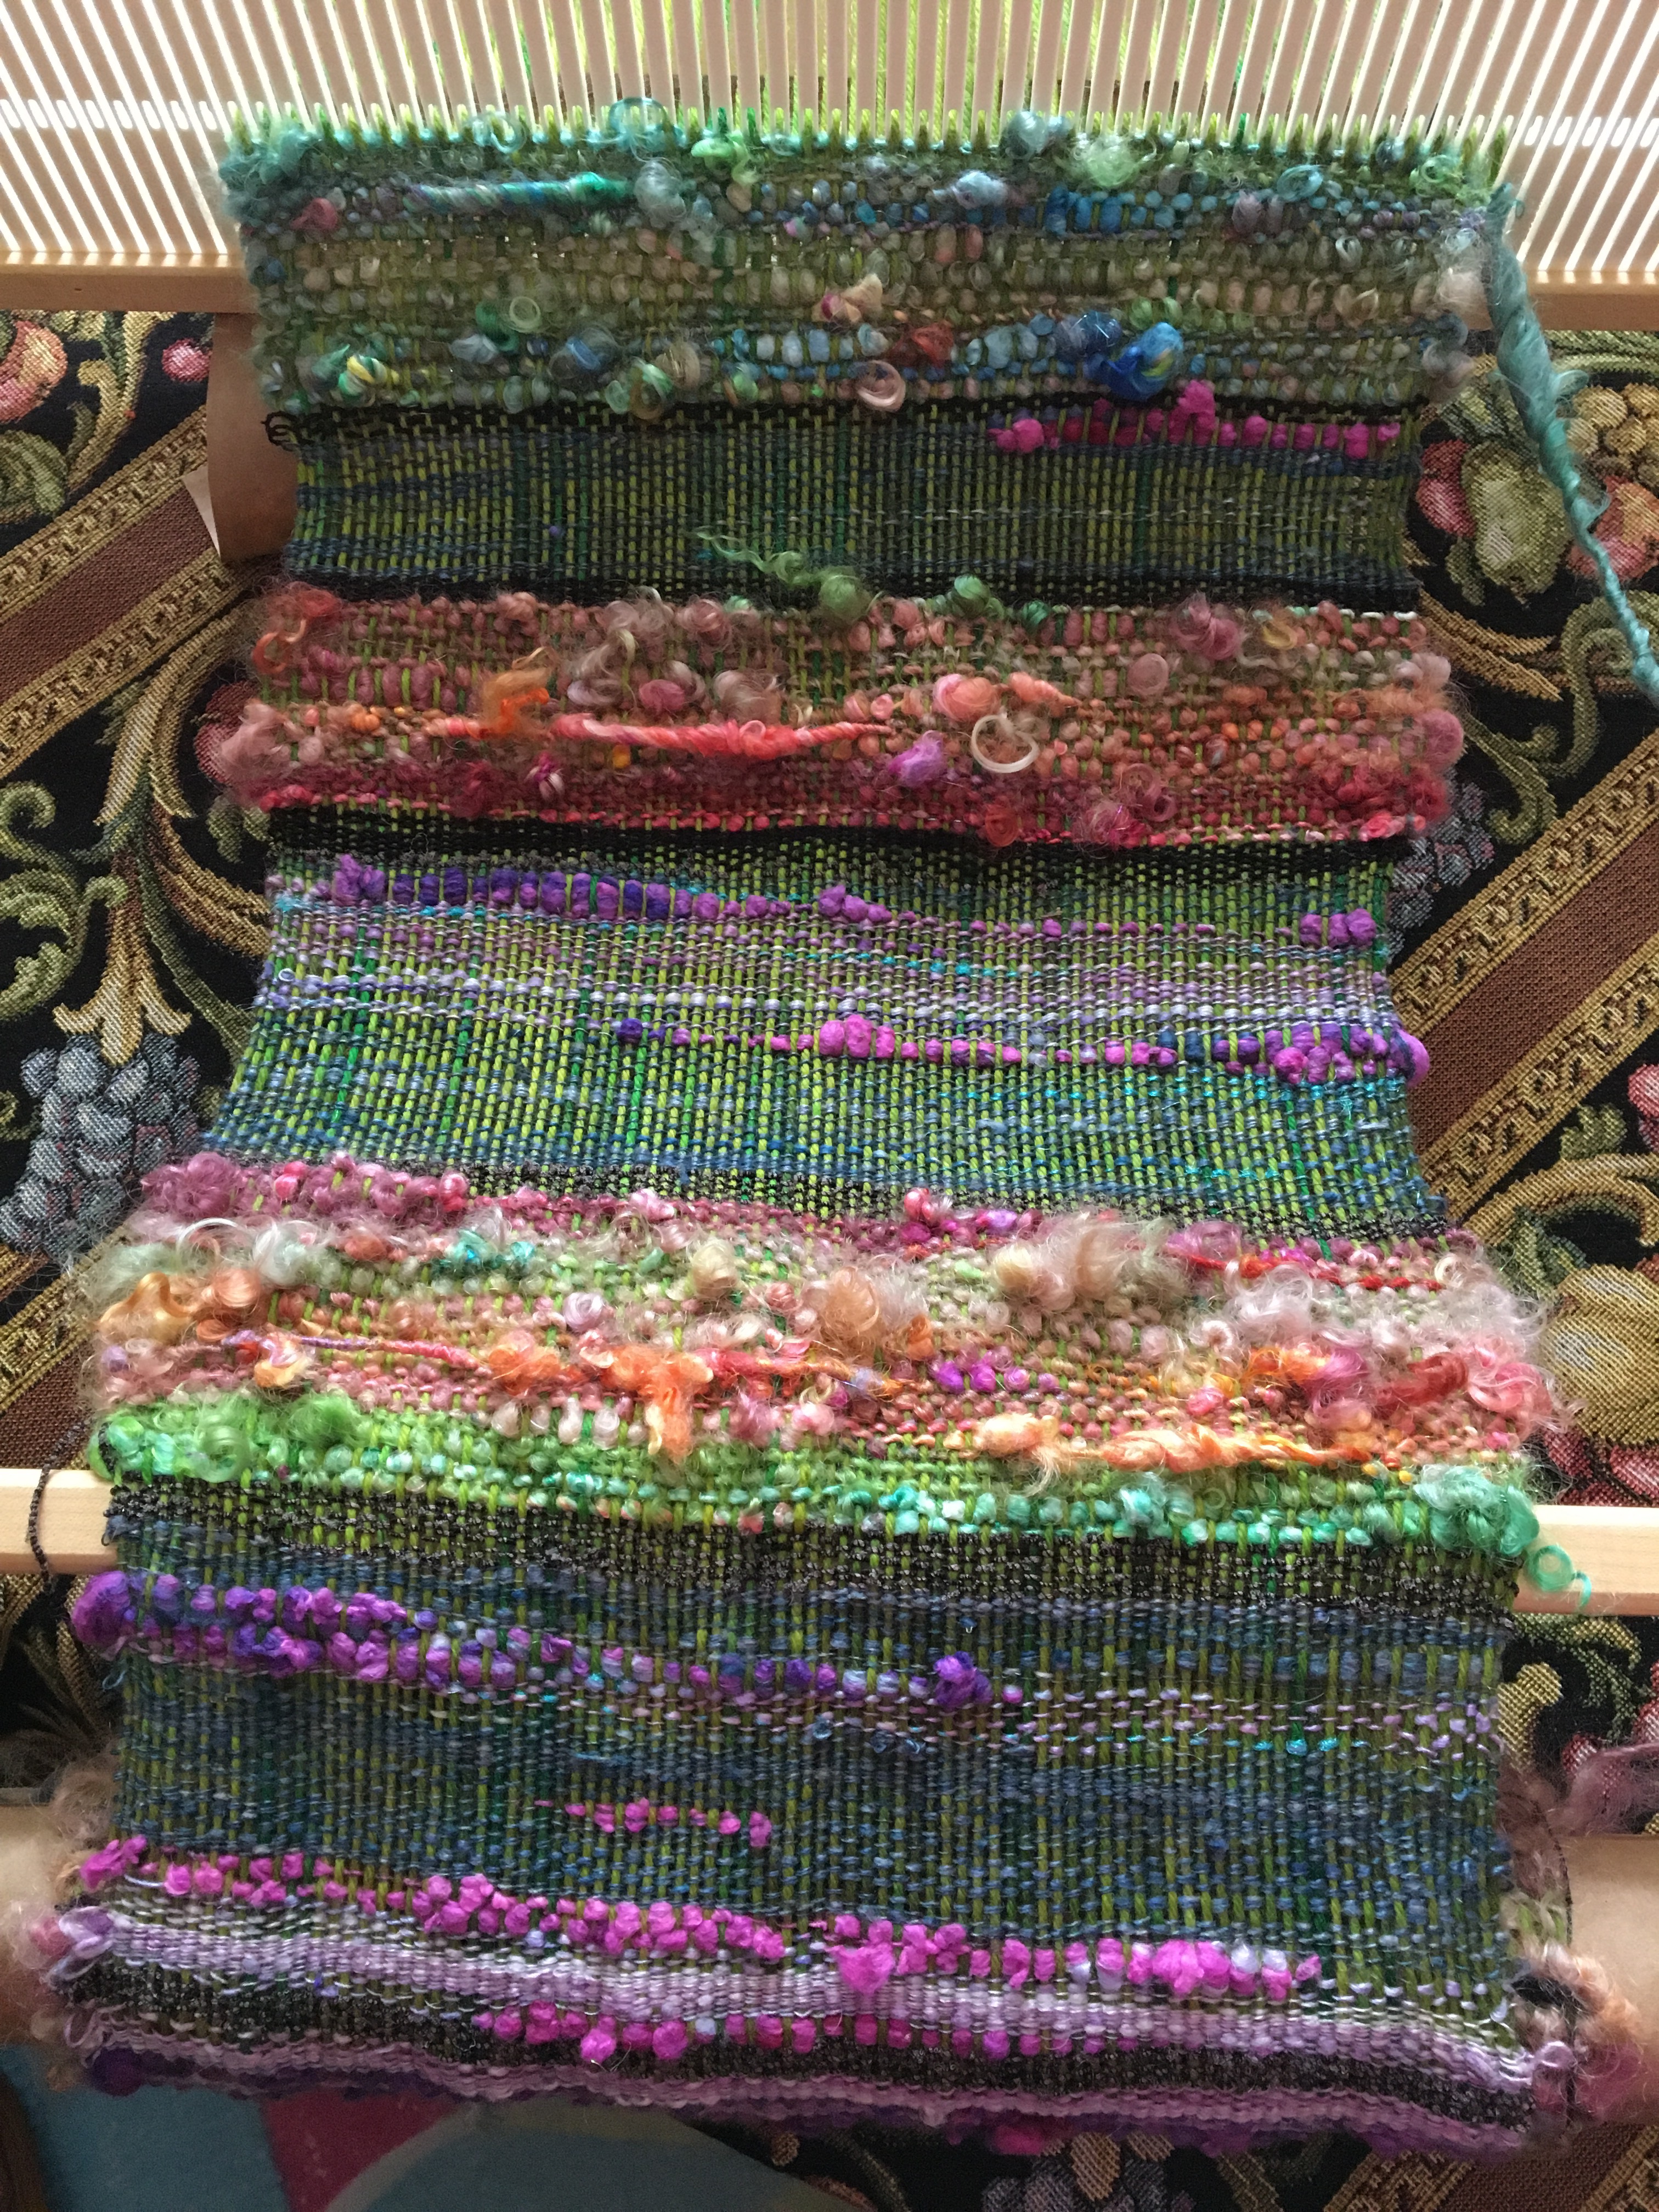
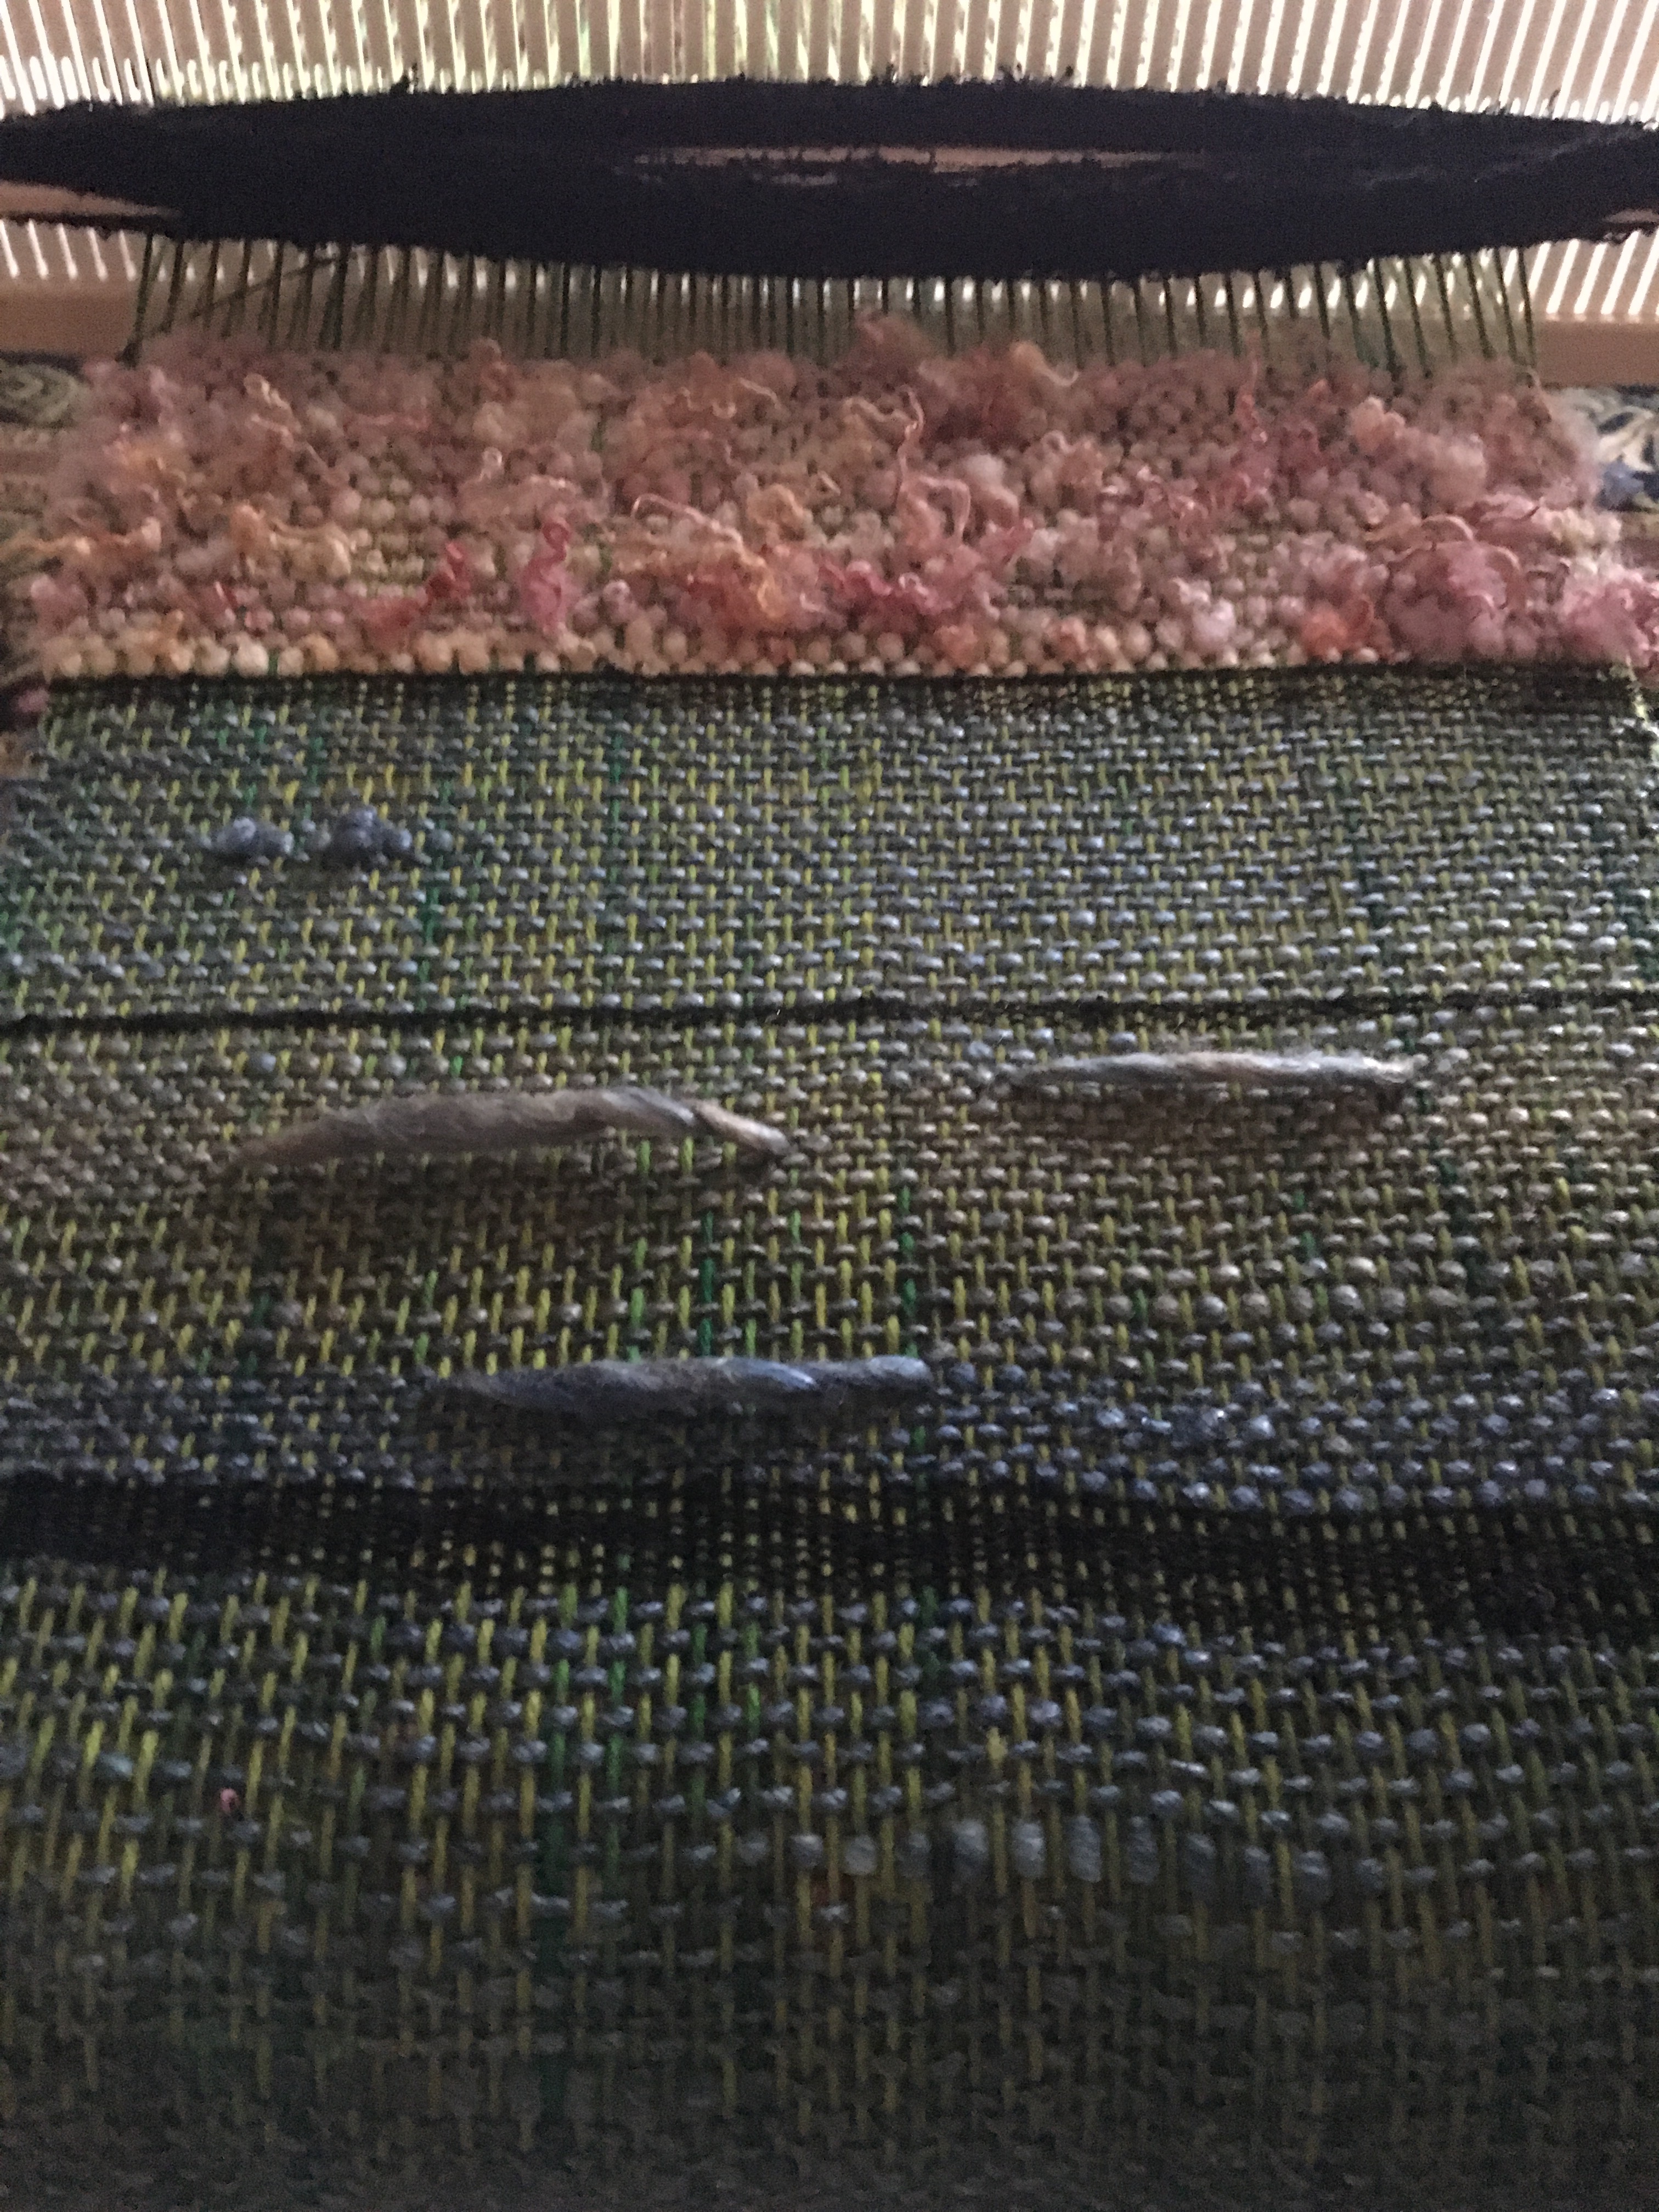
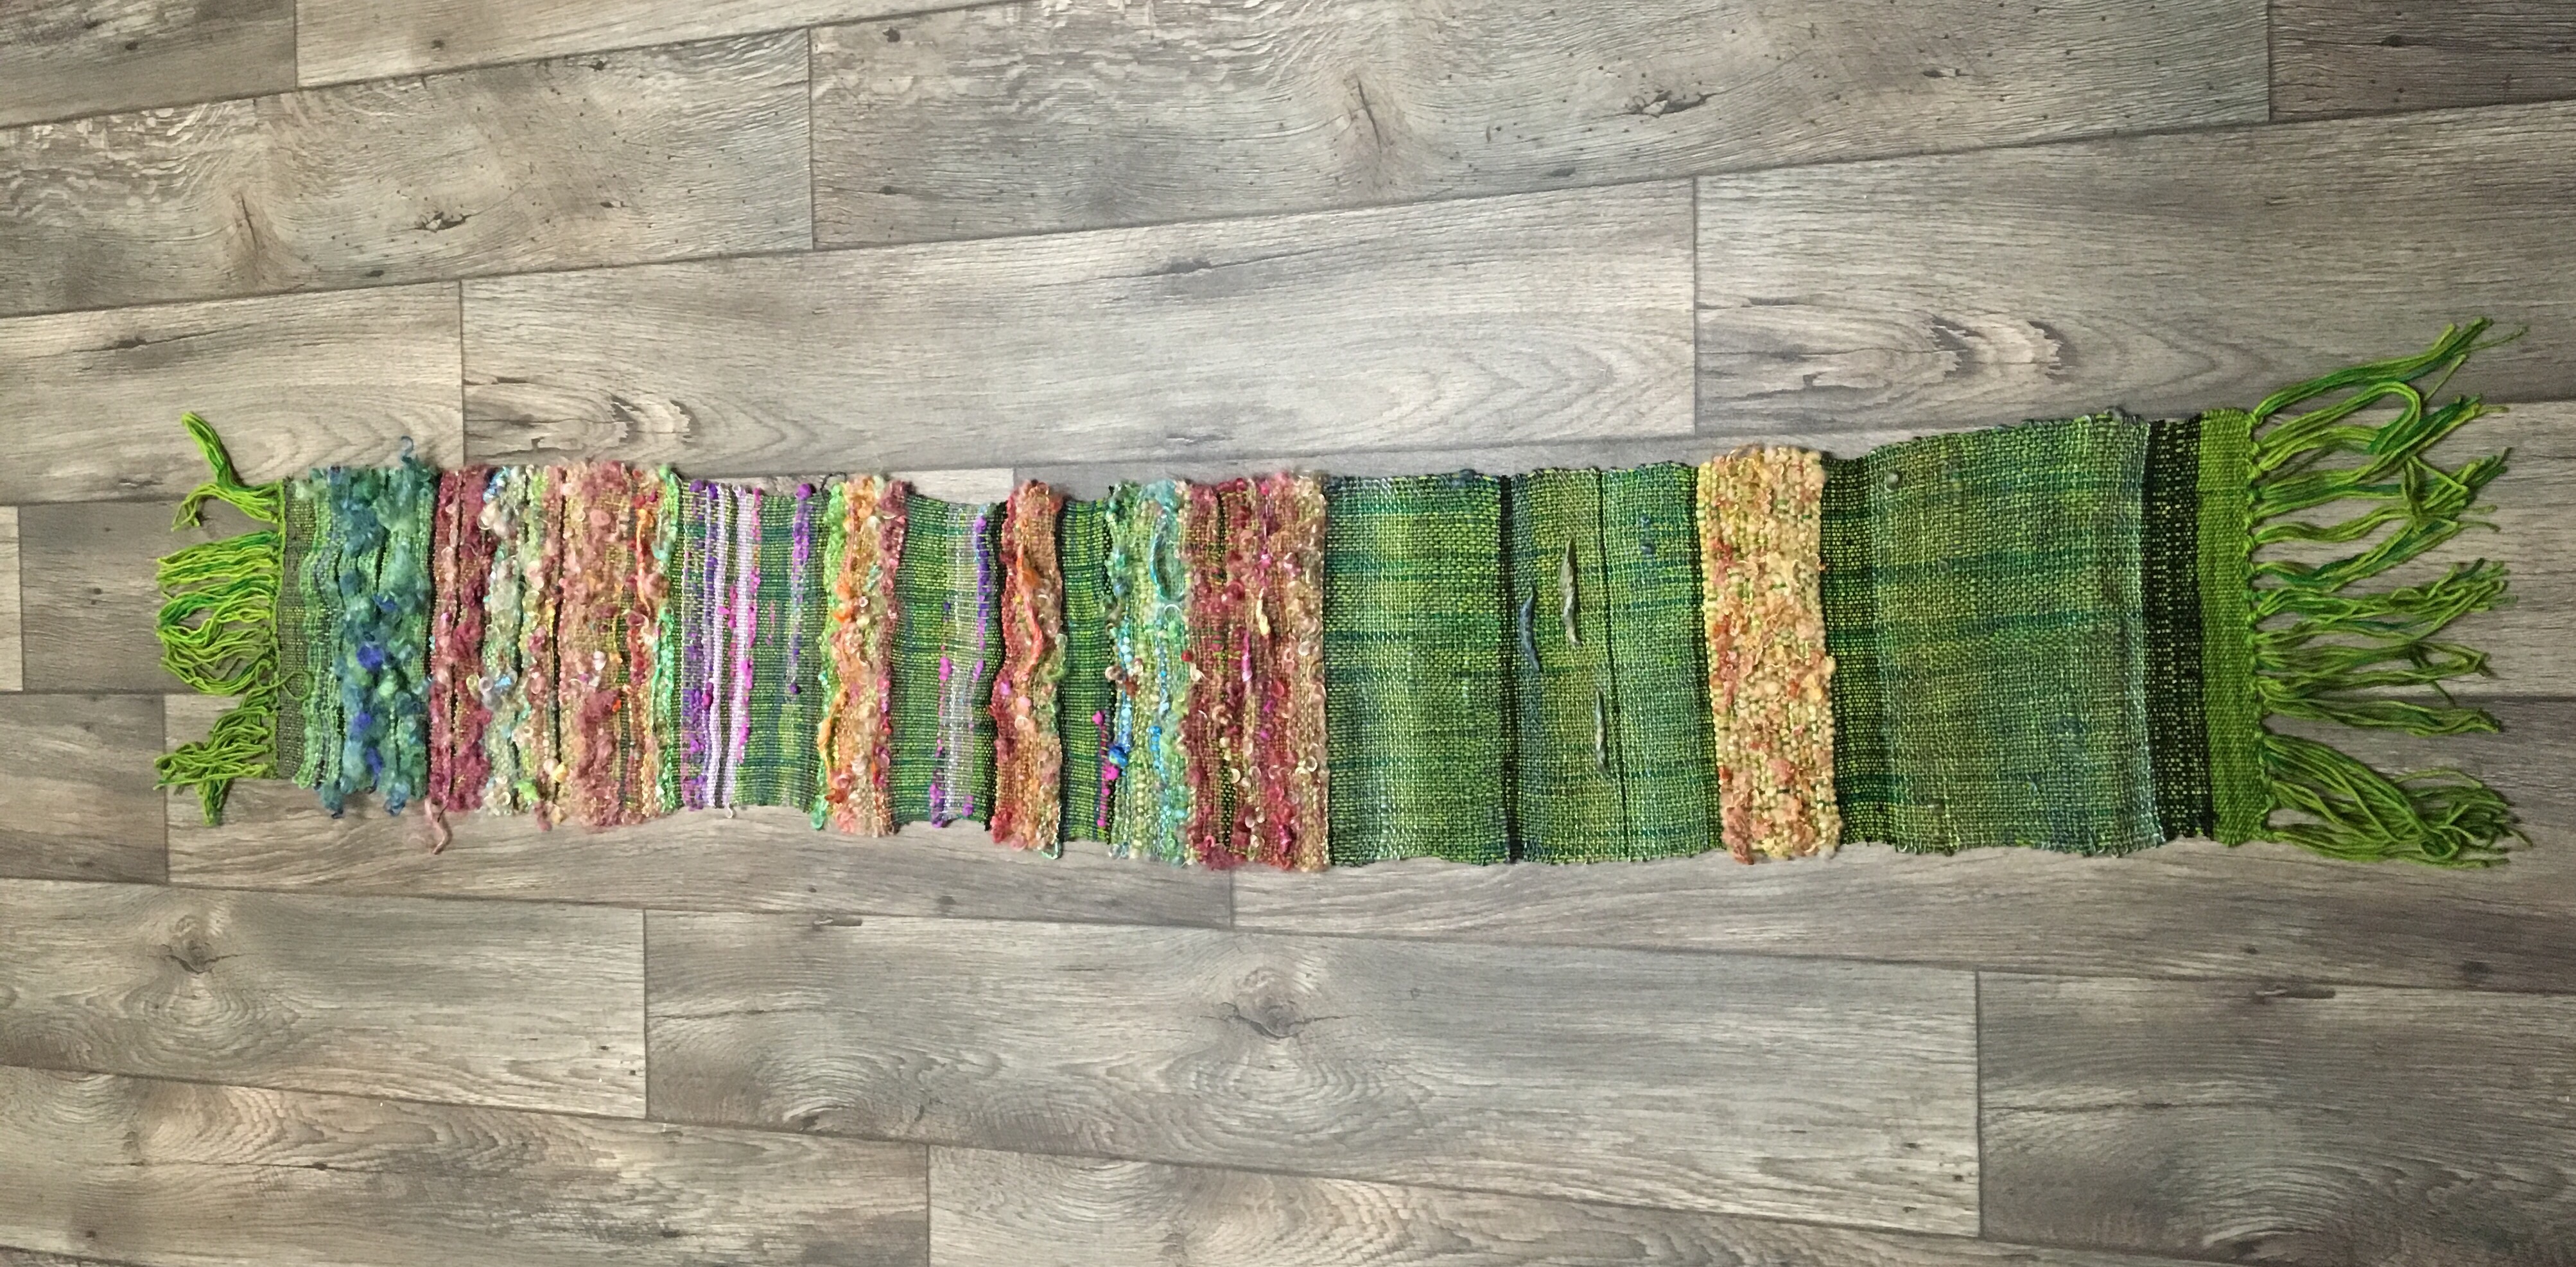
Here is the woven piece before fulling.
The fluffy side front
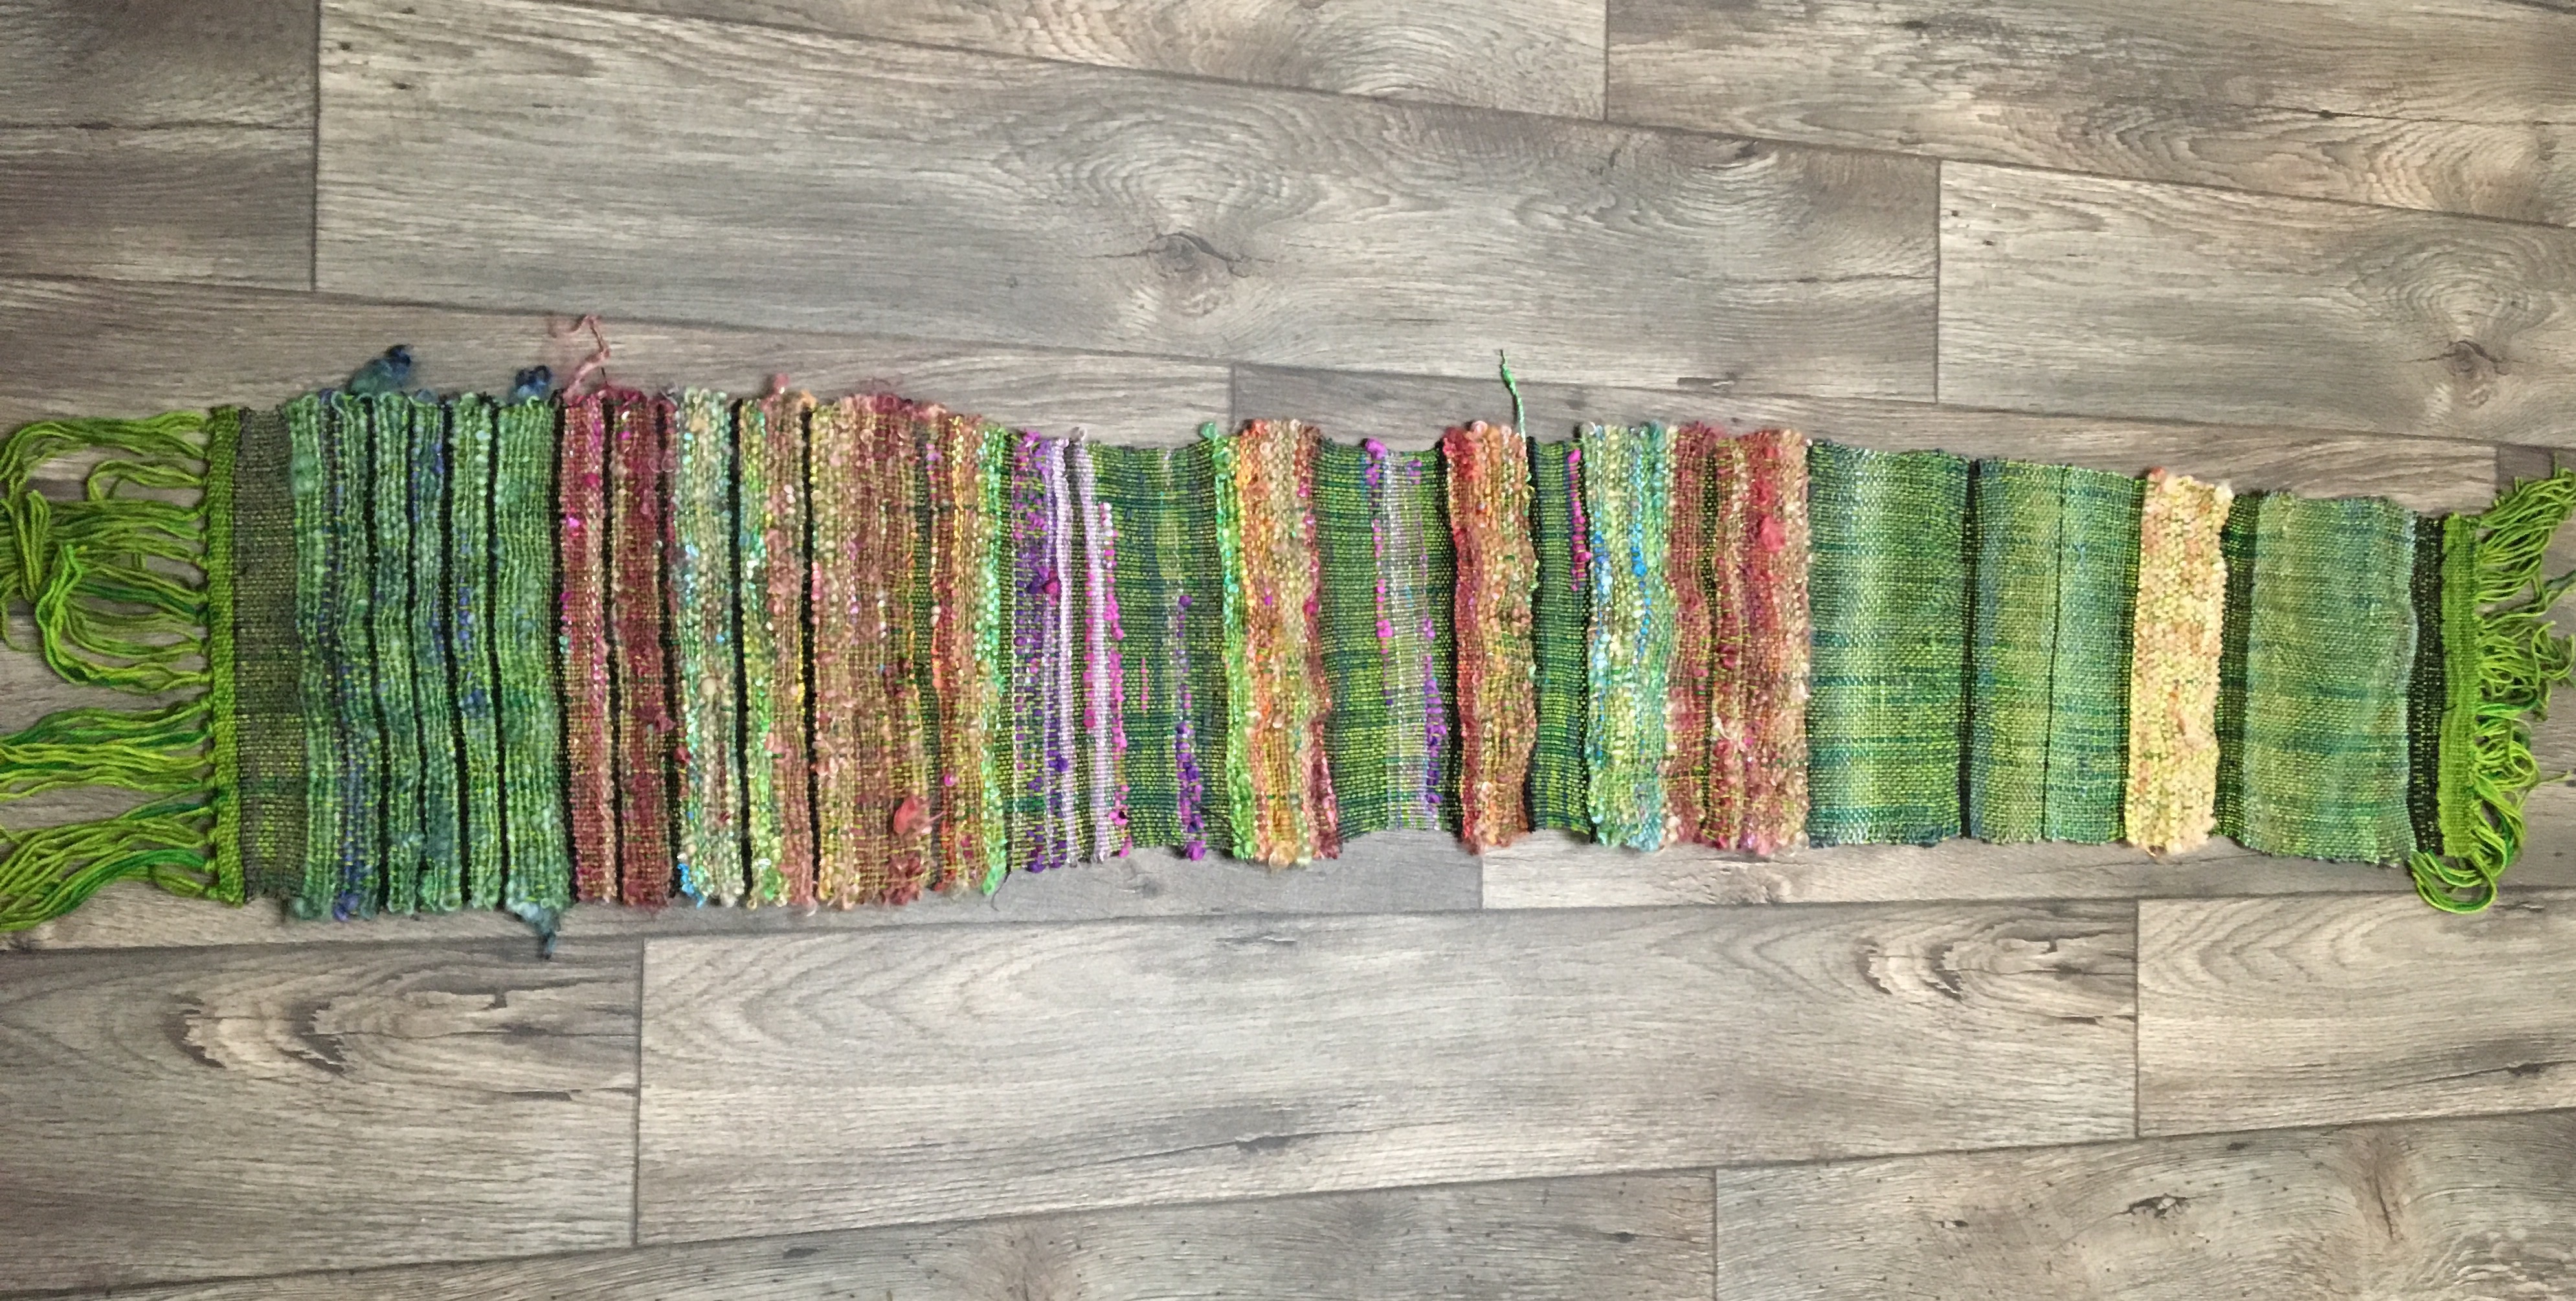
The smooth side back
Closer of the smooth side
Yea I don’t know how much fulling can/will help this much wonk but while I won’t expect much, I’m hopeful. 😊
All in all, weaving is pretty cool and my stash is thankful! And so am I for an awesome birthday gift from my husband!
I hope this will encourage people to try weaving. I know my first try at weaving isn’t a masterpiece by any means but have you seen my first handspun ?
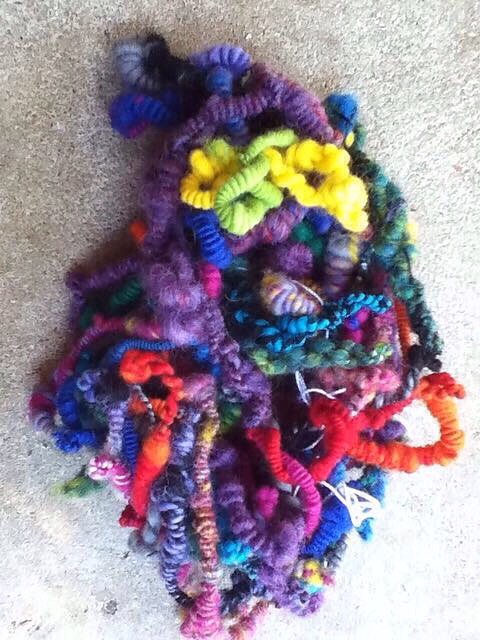
Here she is in all her glory.
No it wasn’t meant to be art yarn
This was my trying to spin a normal yarn.
Those aren’t coils. That is so overspun it won’t straighten at all and it is a hard rock.. If I threw it at someone’s head, they would be concussed. It could cause damage to sheet rock if thrown at a wall.
Even weighted after a soak and thwack…. Nothing. It doesn’t straighten out, it’s not usable. Can you believe that’s just wool? It is wool.
Some people saw it and say look at those coils and other art yarn techniques I’d never heard of at the time. That was not what I was going for. I thought I was spinning something I’d use hahahaha
It’s hilarious. But I could only improve from there and it’s funny now. I can’t say I’ve ever seen a first handspun quite this bad. Especially when I was hoping for a regular usable yarn. It was a great starting point because I could only go up.
I hope the same with weaving and I hope others will join me. Especially new weavers or yes experienced weavers. Fibery goodness has been wonderful and also if you are interested check out the art weaving class I took listed above.
I’ll post the woven piece once it’s finished. It needs those finishing touches.
Yet Another, scrapbox from Namaste Farms, so what keeps bringing me back to spinning the same thing over and over again? That’s just it, it’s never the same! Each scrapbox brings me something new to taste test, whether it’s a new fiber, add in, or technique (taught via livestream tutorial that is sometimes offered with the scrapbox purchase)…I am addicted. Too much of a good thing doesn’t exist where fiber is concerned, and these Scrapboxes, are a healthy dose of just that!!!
Prior to lock spinning and NF scrapboxes, my all time favorite was polworth commercial top. (I still love polworth)
That was out of merino, BFL, and polworth that I had tried, to that point. There’s just so much more to experience in spinning!!
Over the years, opening my palette, I’m finding I love other wool preps and fiber blends so much more! Years of spinning and I’m still only scratching the surface. A scrapbox keeps it fresh, inspiring, and fascinating because I experience another first, everytime.
My blog is transparent, I’m a scrapbox fiend, that’s pretty clear. But I learn more of what I like to spin everytime I treadle one of these onto my bobbin. (I want to spin a little bit of everything, I want to try it all) Each fiber has a quality that makes it beautiful and these scrapboxes let me experience more fibers, treats, techniques etc, all at once. So yes, I’m on a scrapbox kick because I get a lesson and experience in each one, not to mention… The way it’s dyed, the colors!!
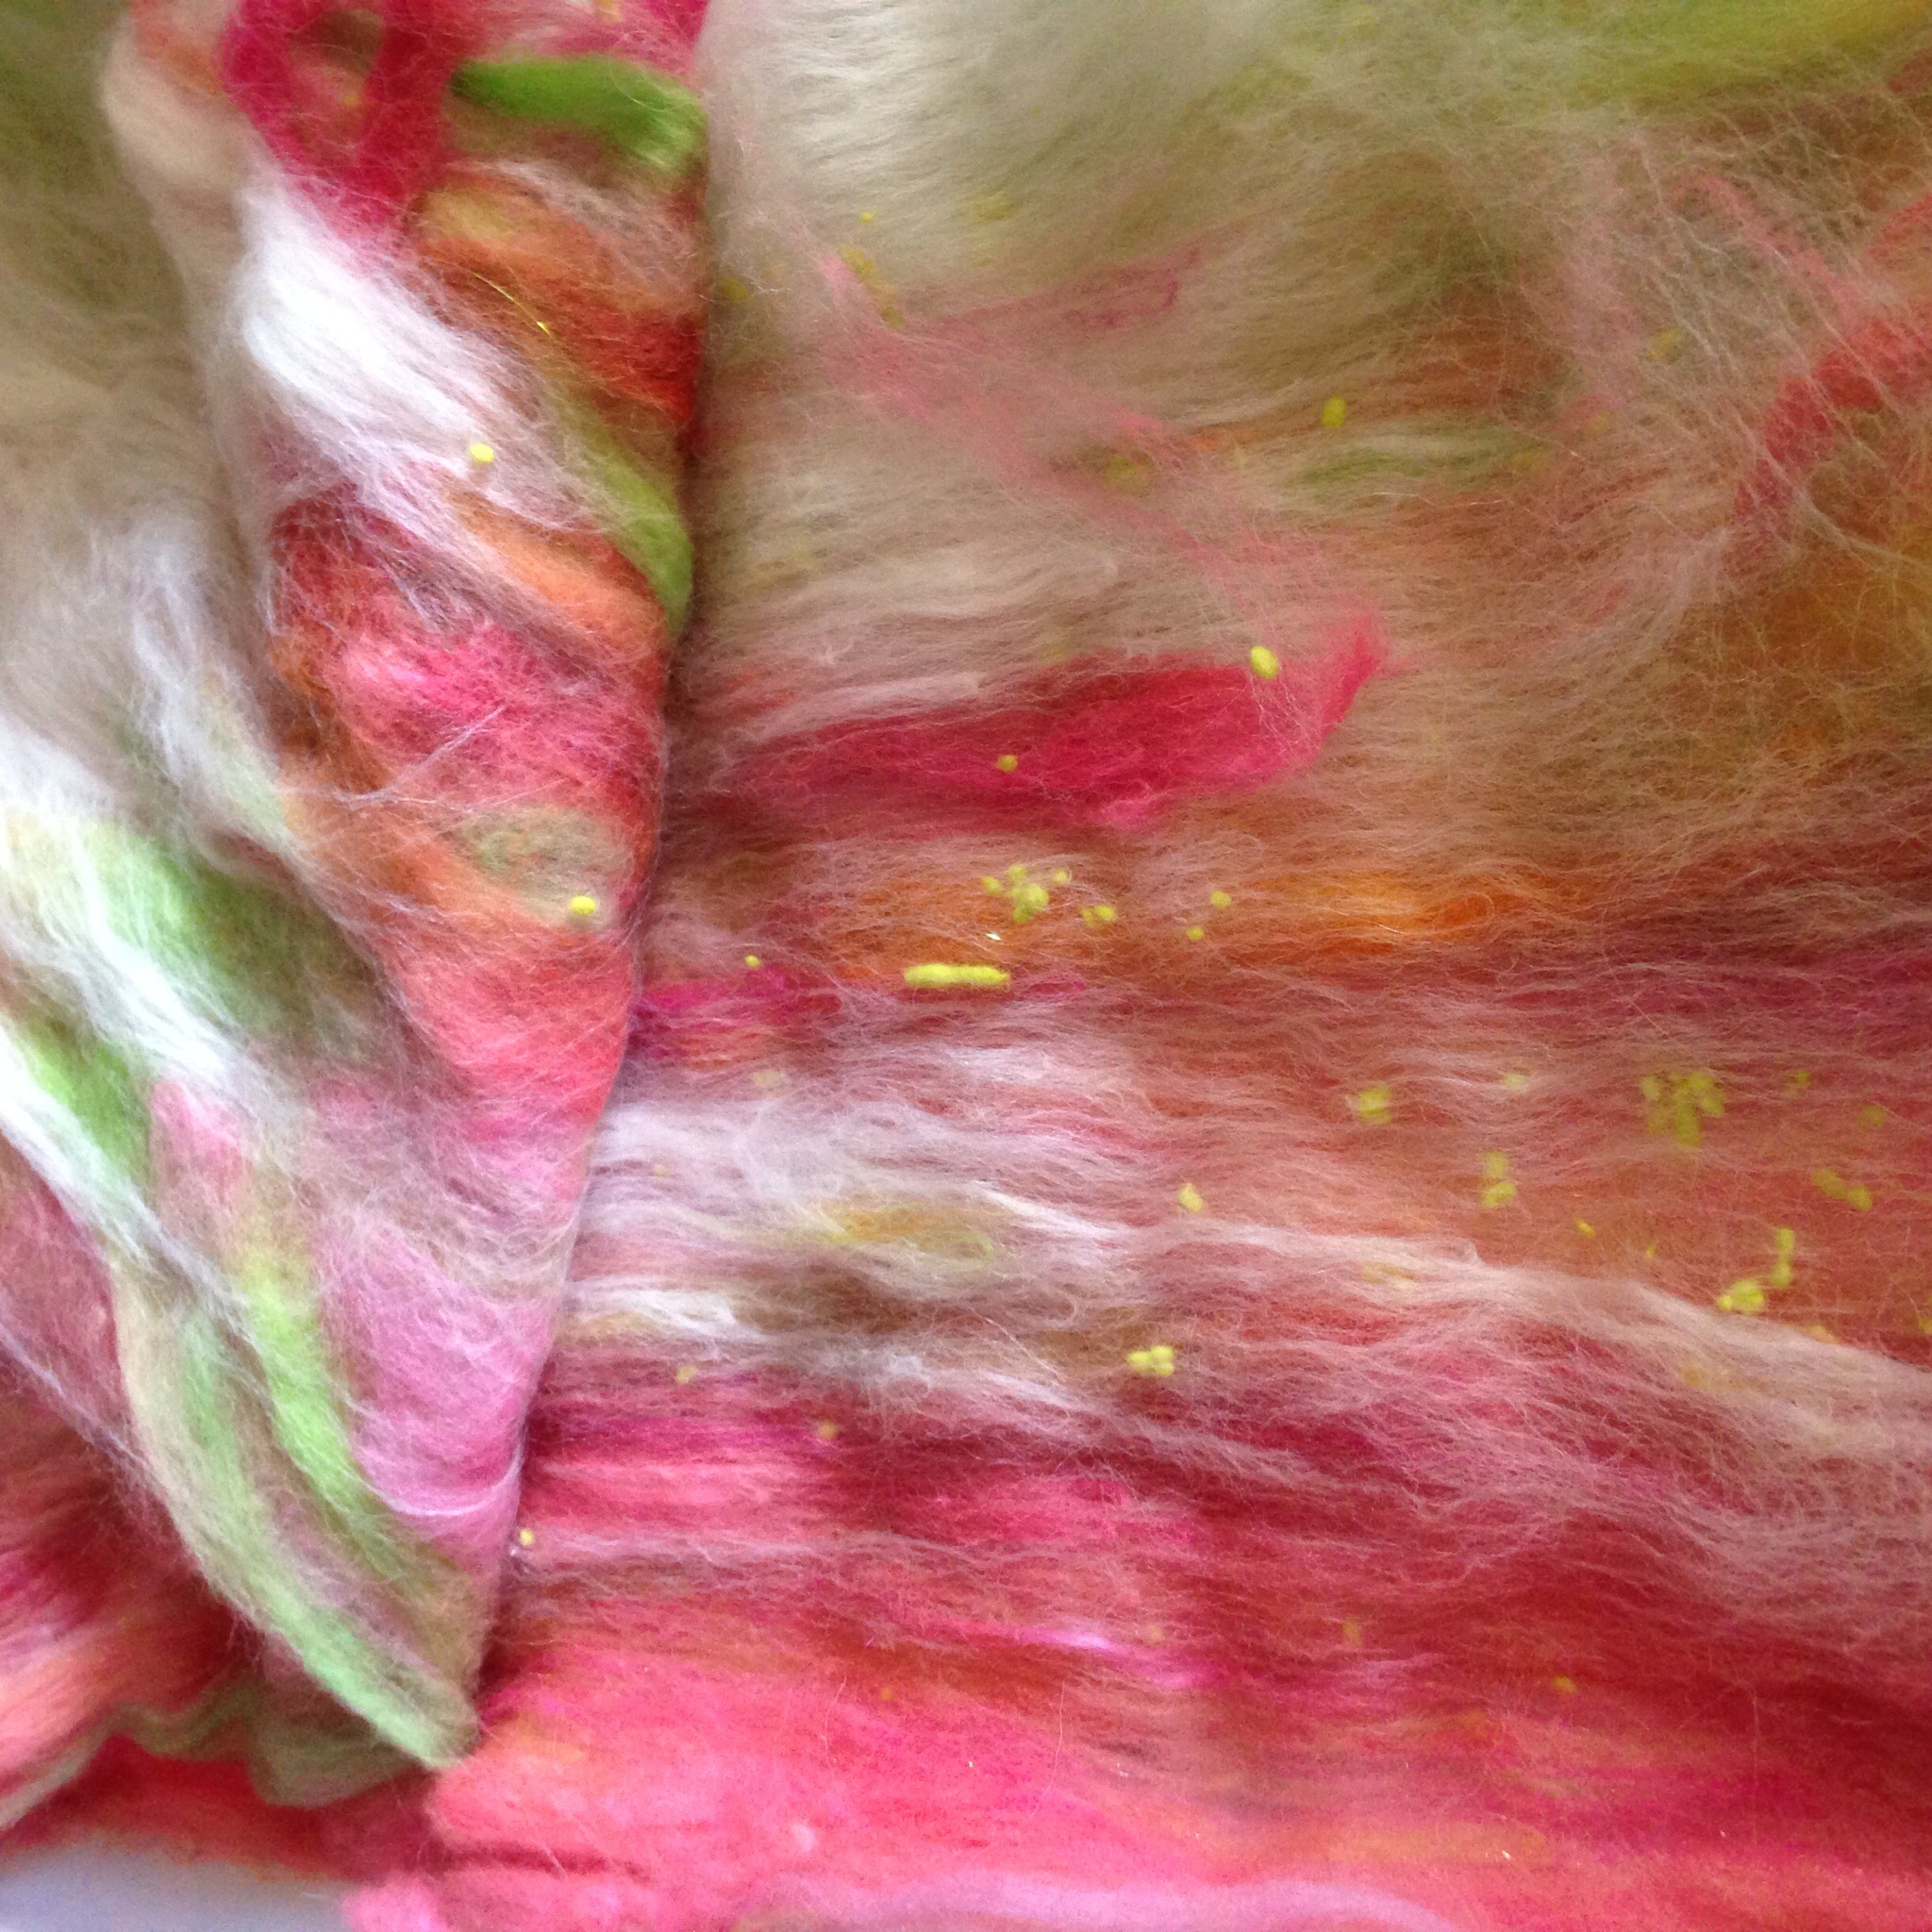
*swoooooon* there is nothing like beautiful color on fiber.
The color is what sucks me in, and then every discovery after, is bonus. I love when there is more then one color in the lock staple. I love when the tip is darker, or lighter or a completely different color then the rest of the lock.
Ive moved twice in the last 3 months, I might add, these are great during a move. When you need to spin, but your stash is packed. Order up one of these puppies and you are ready to go. Everything included for a fun and fulfilling spin.
I ordered some extra Angelina, in different colors, during a purchase from namaste farms. That is the only extra, I added to this kit. I didn’t need it, as this box came with a bunch of novelty add ins, but why not? I love sparkle.
Angelina in blaze, violet, blue, copper… Love sparkle
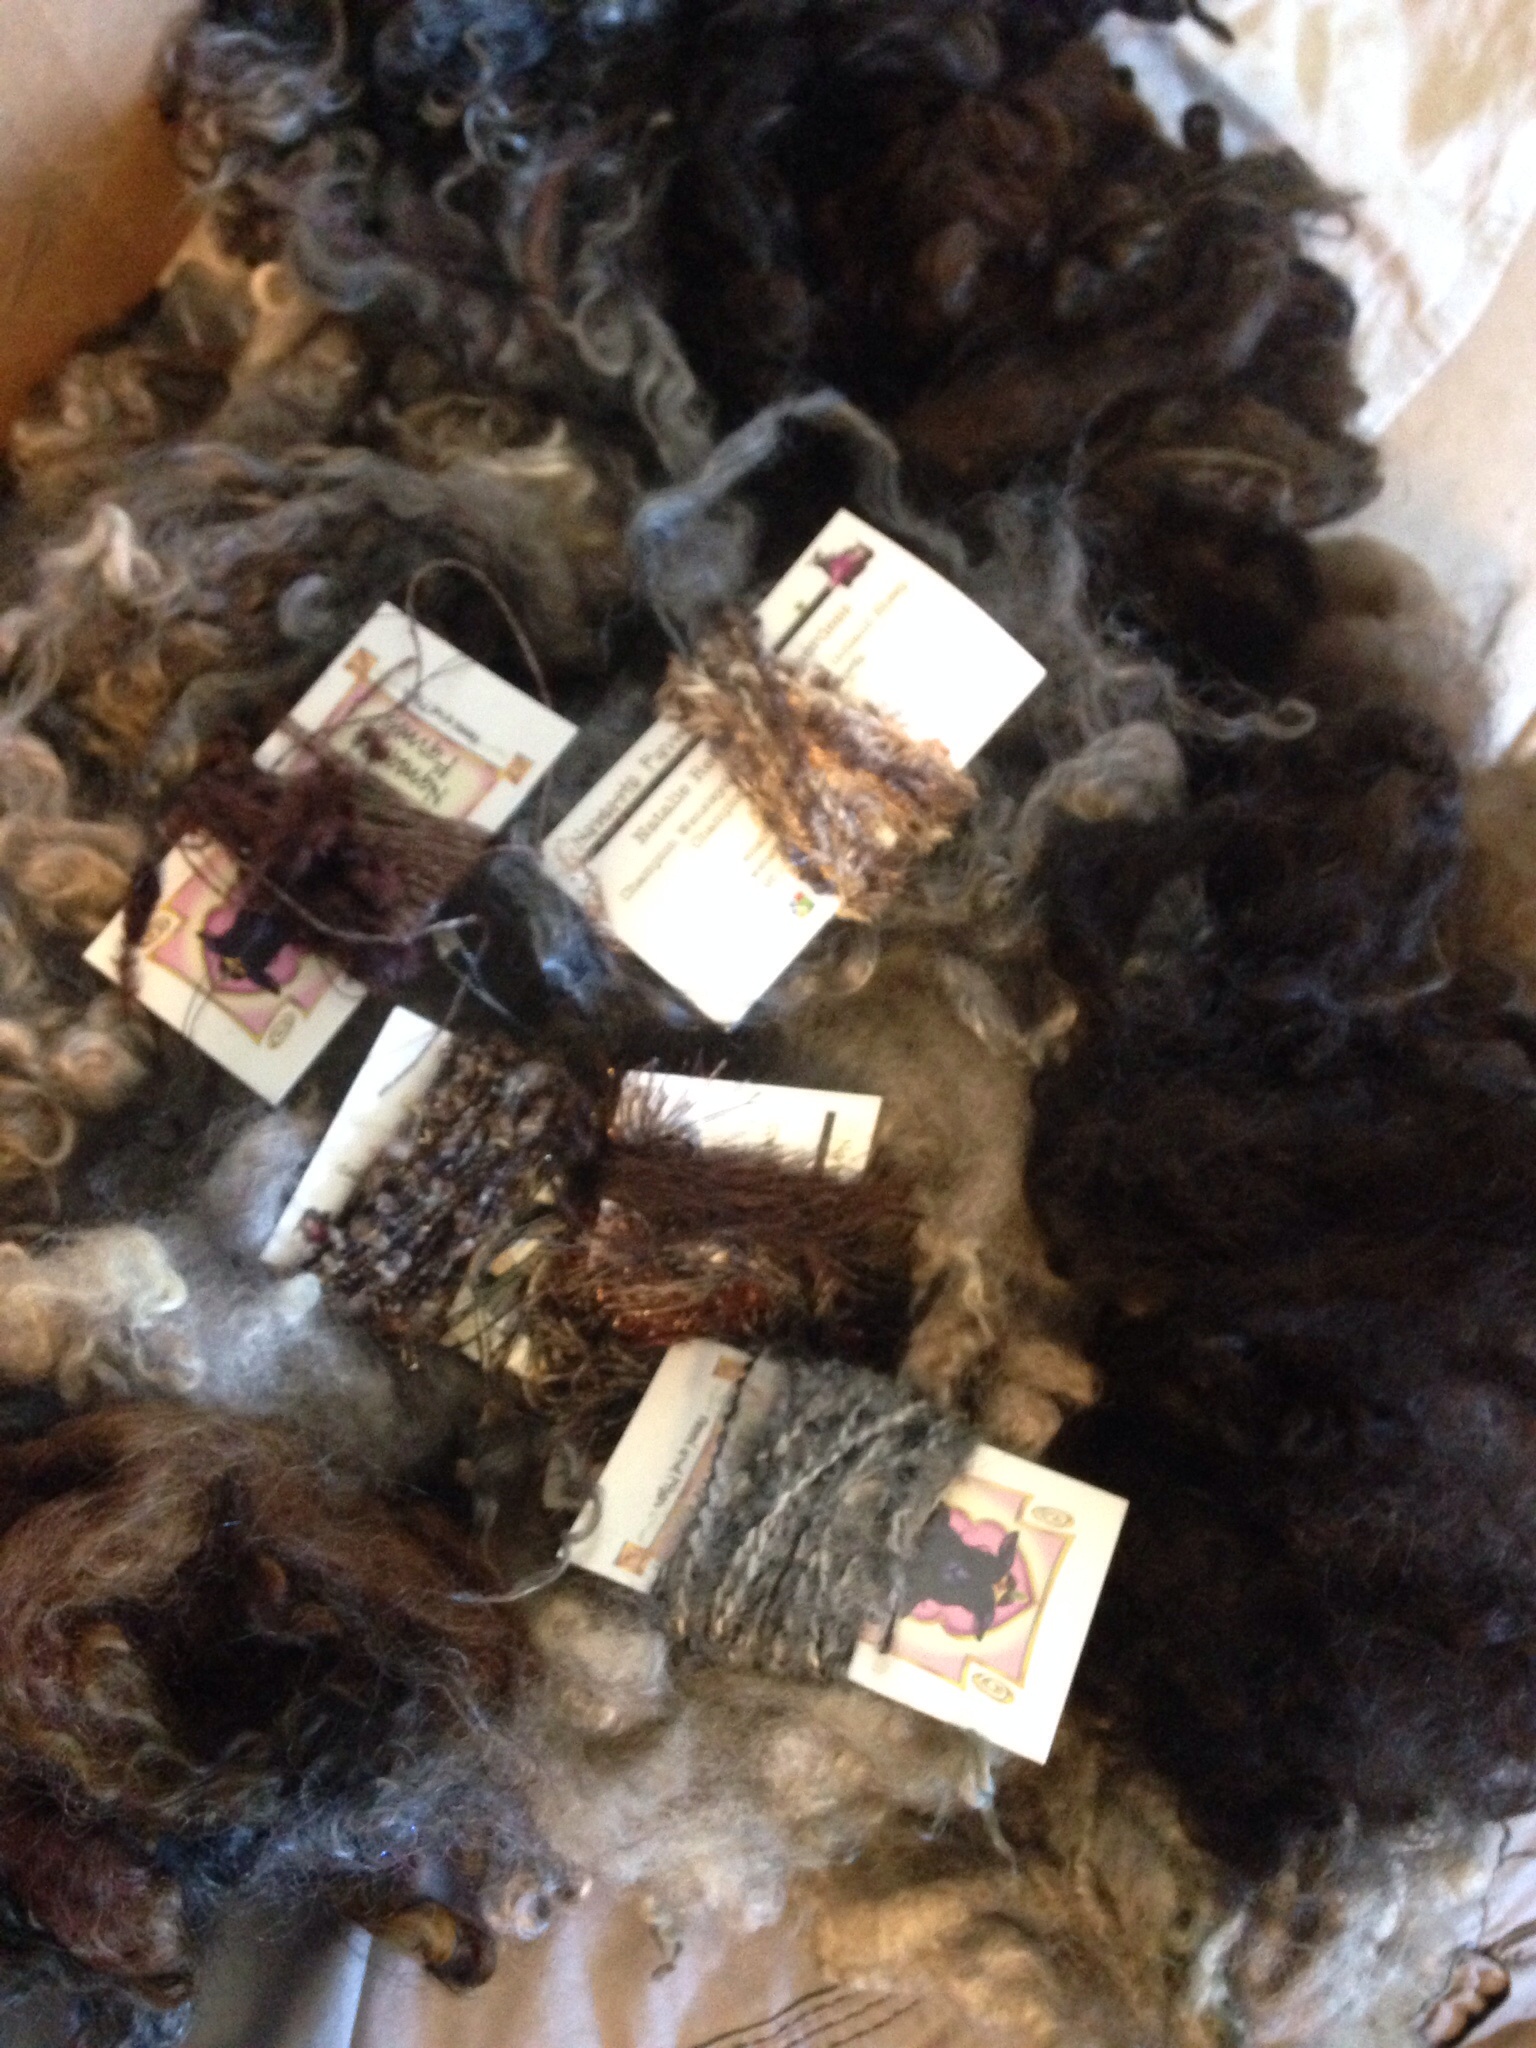
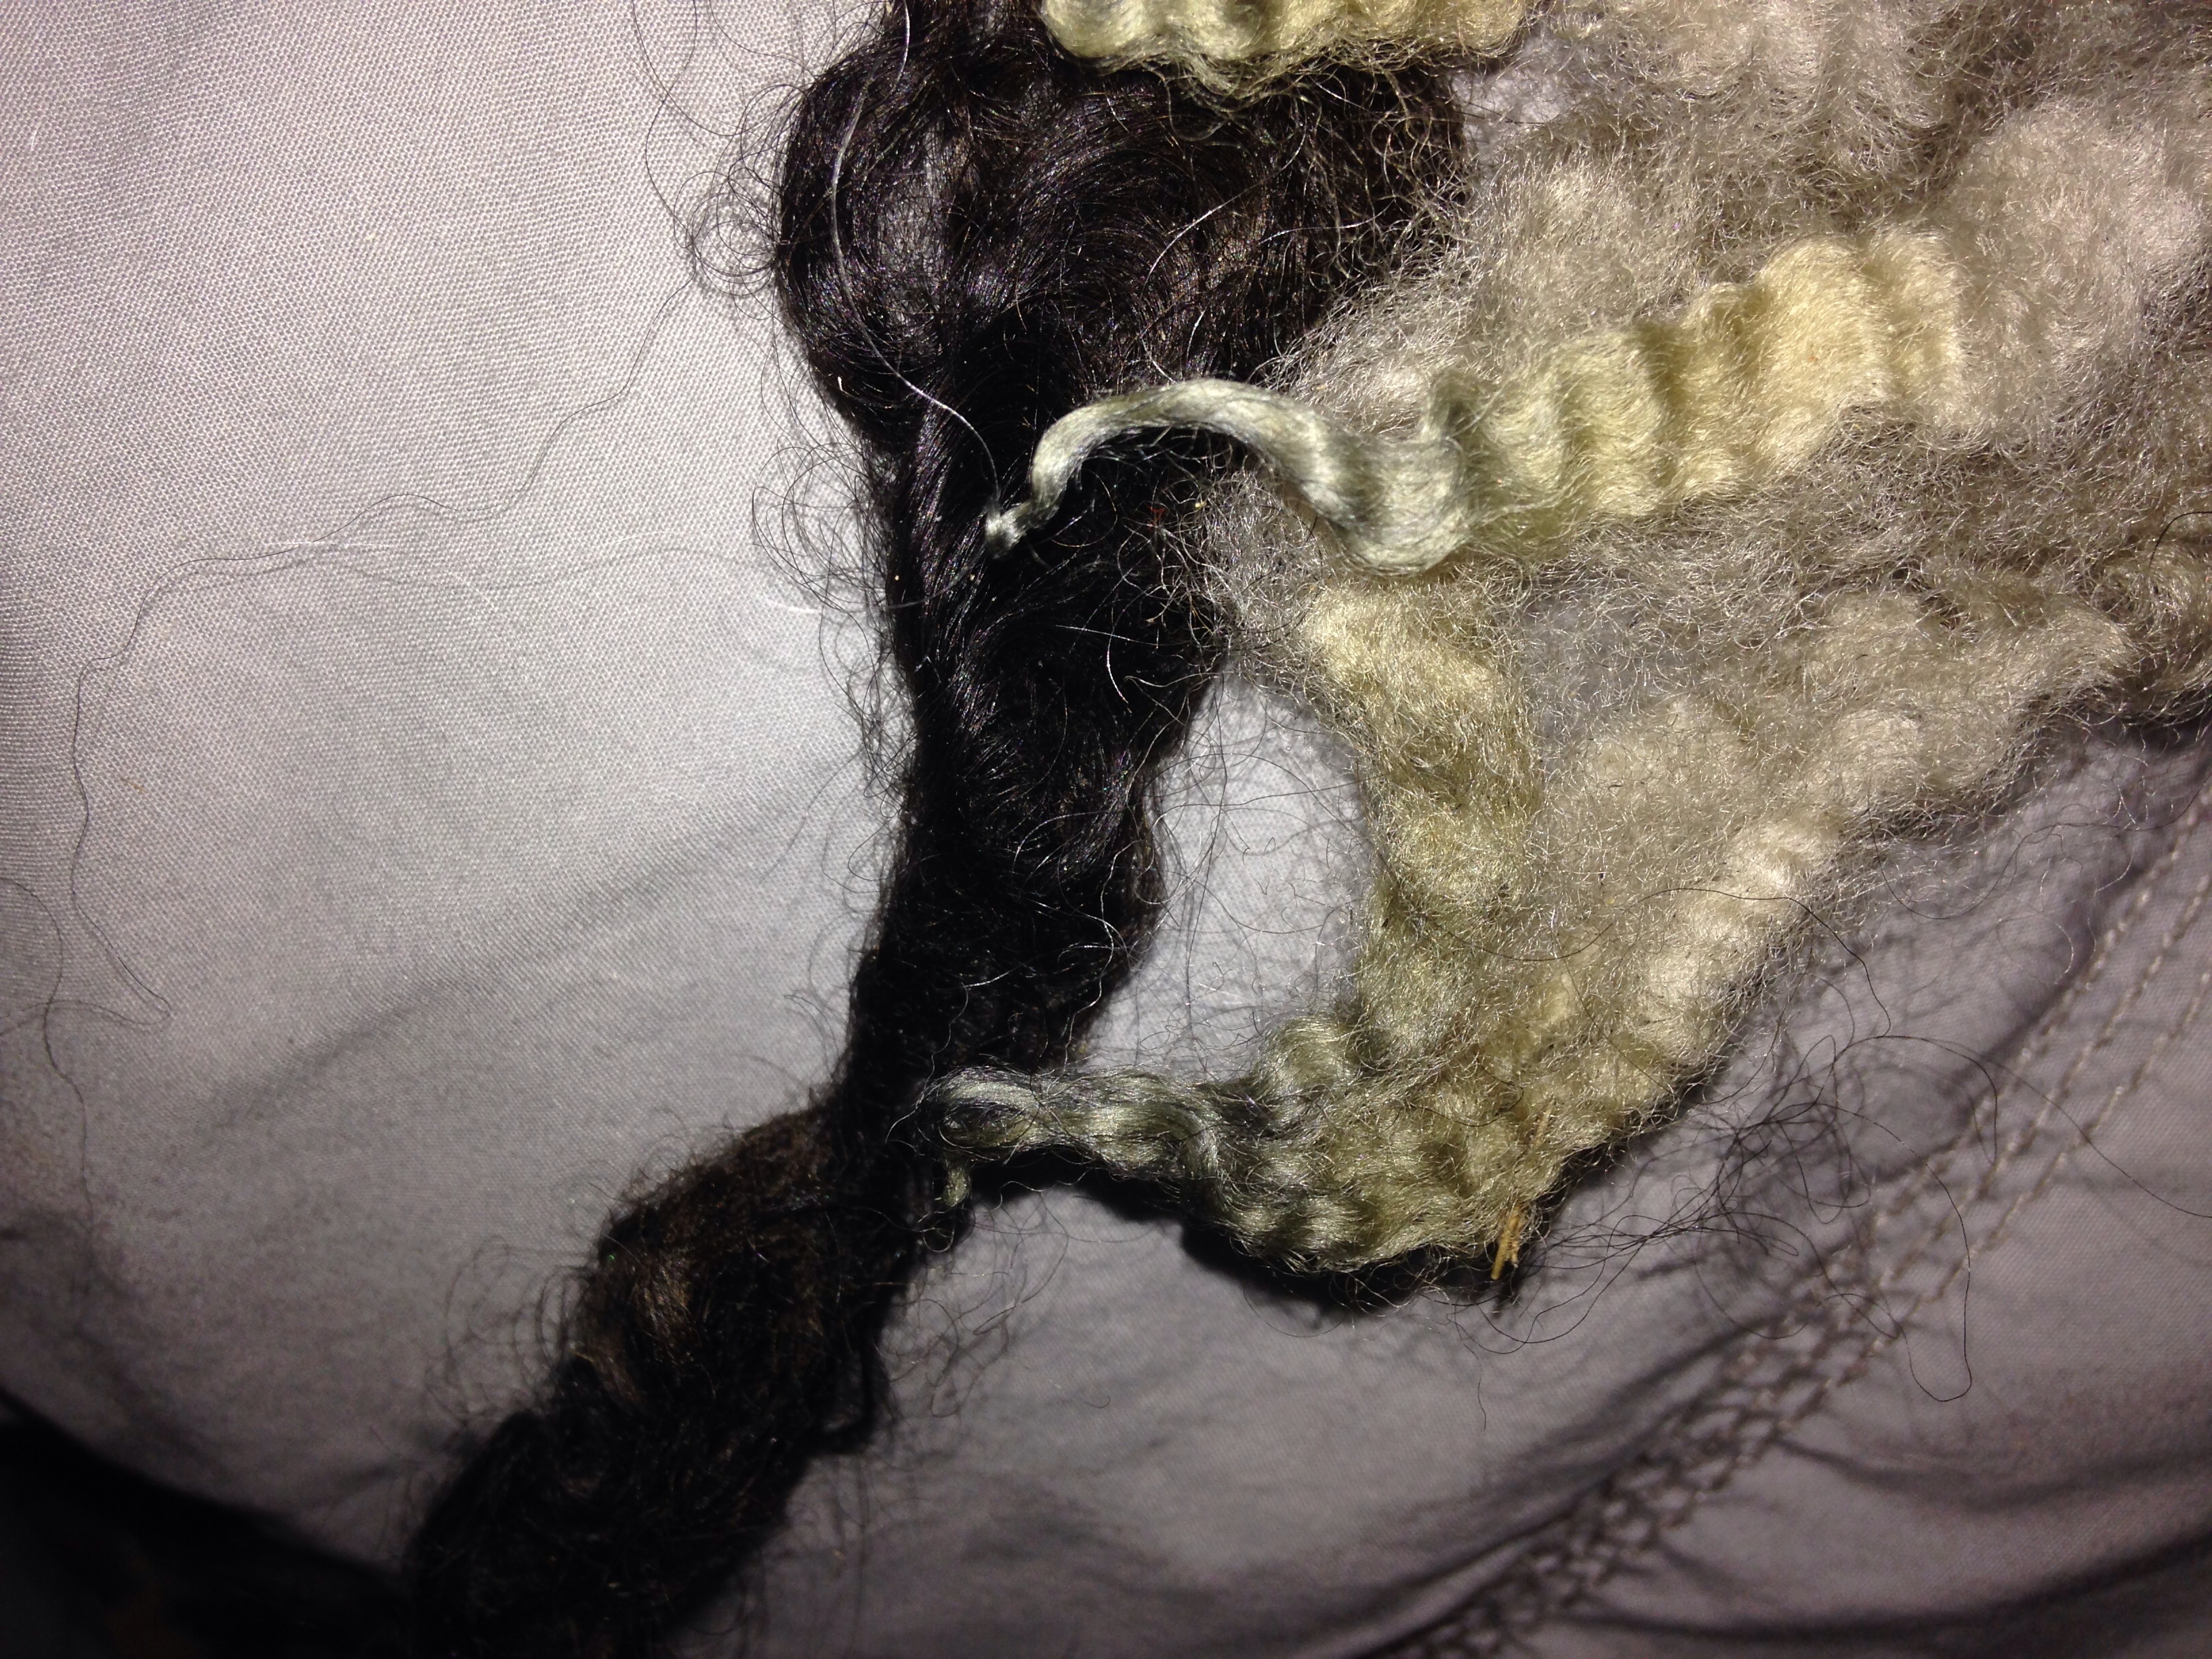
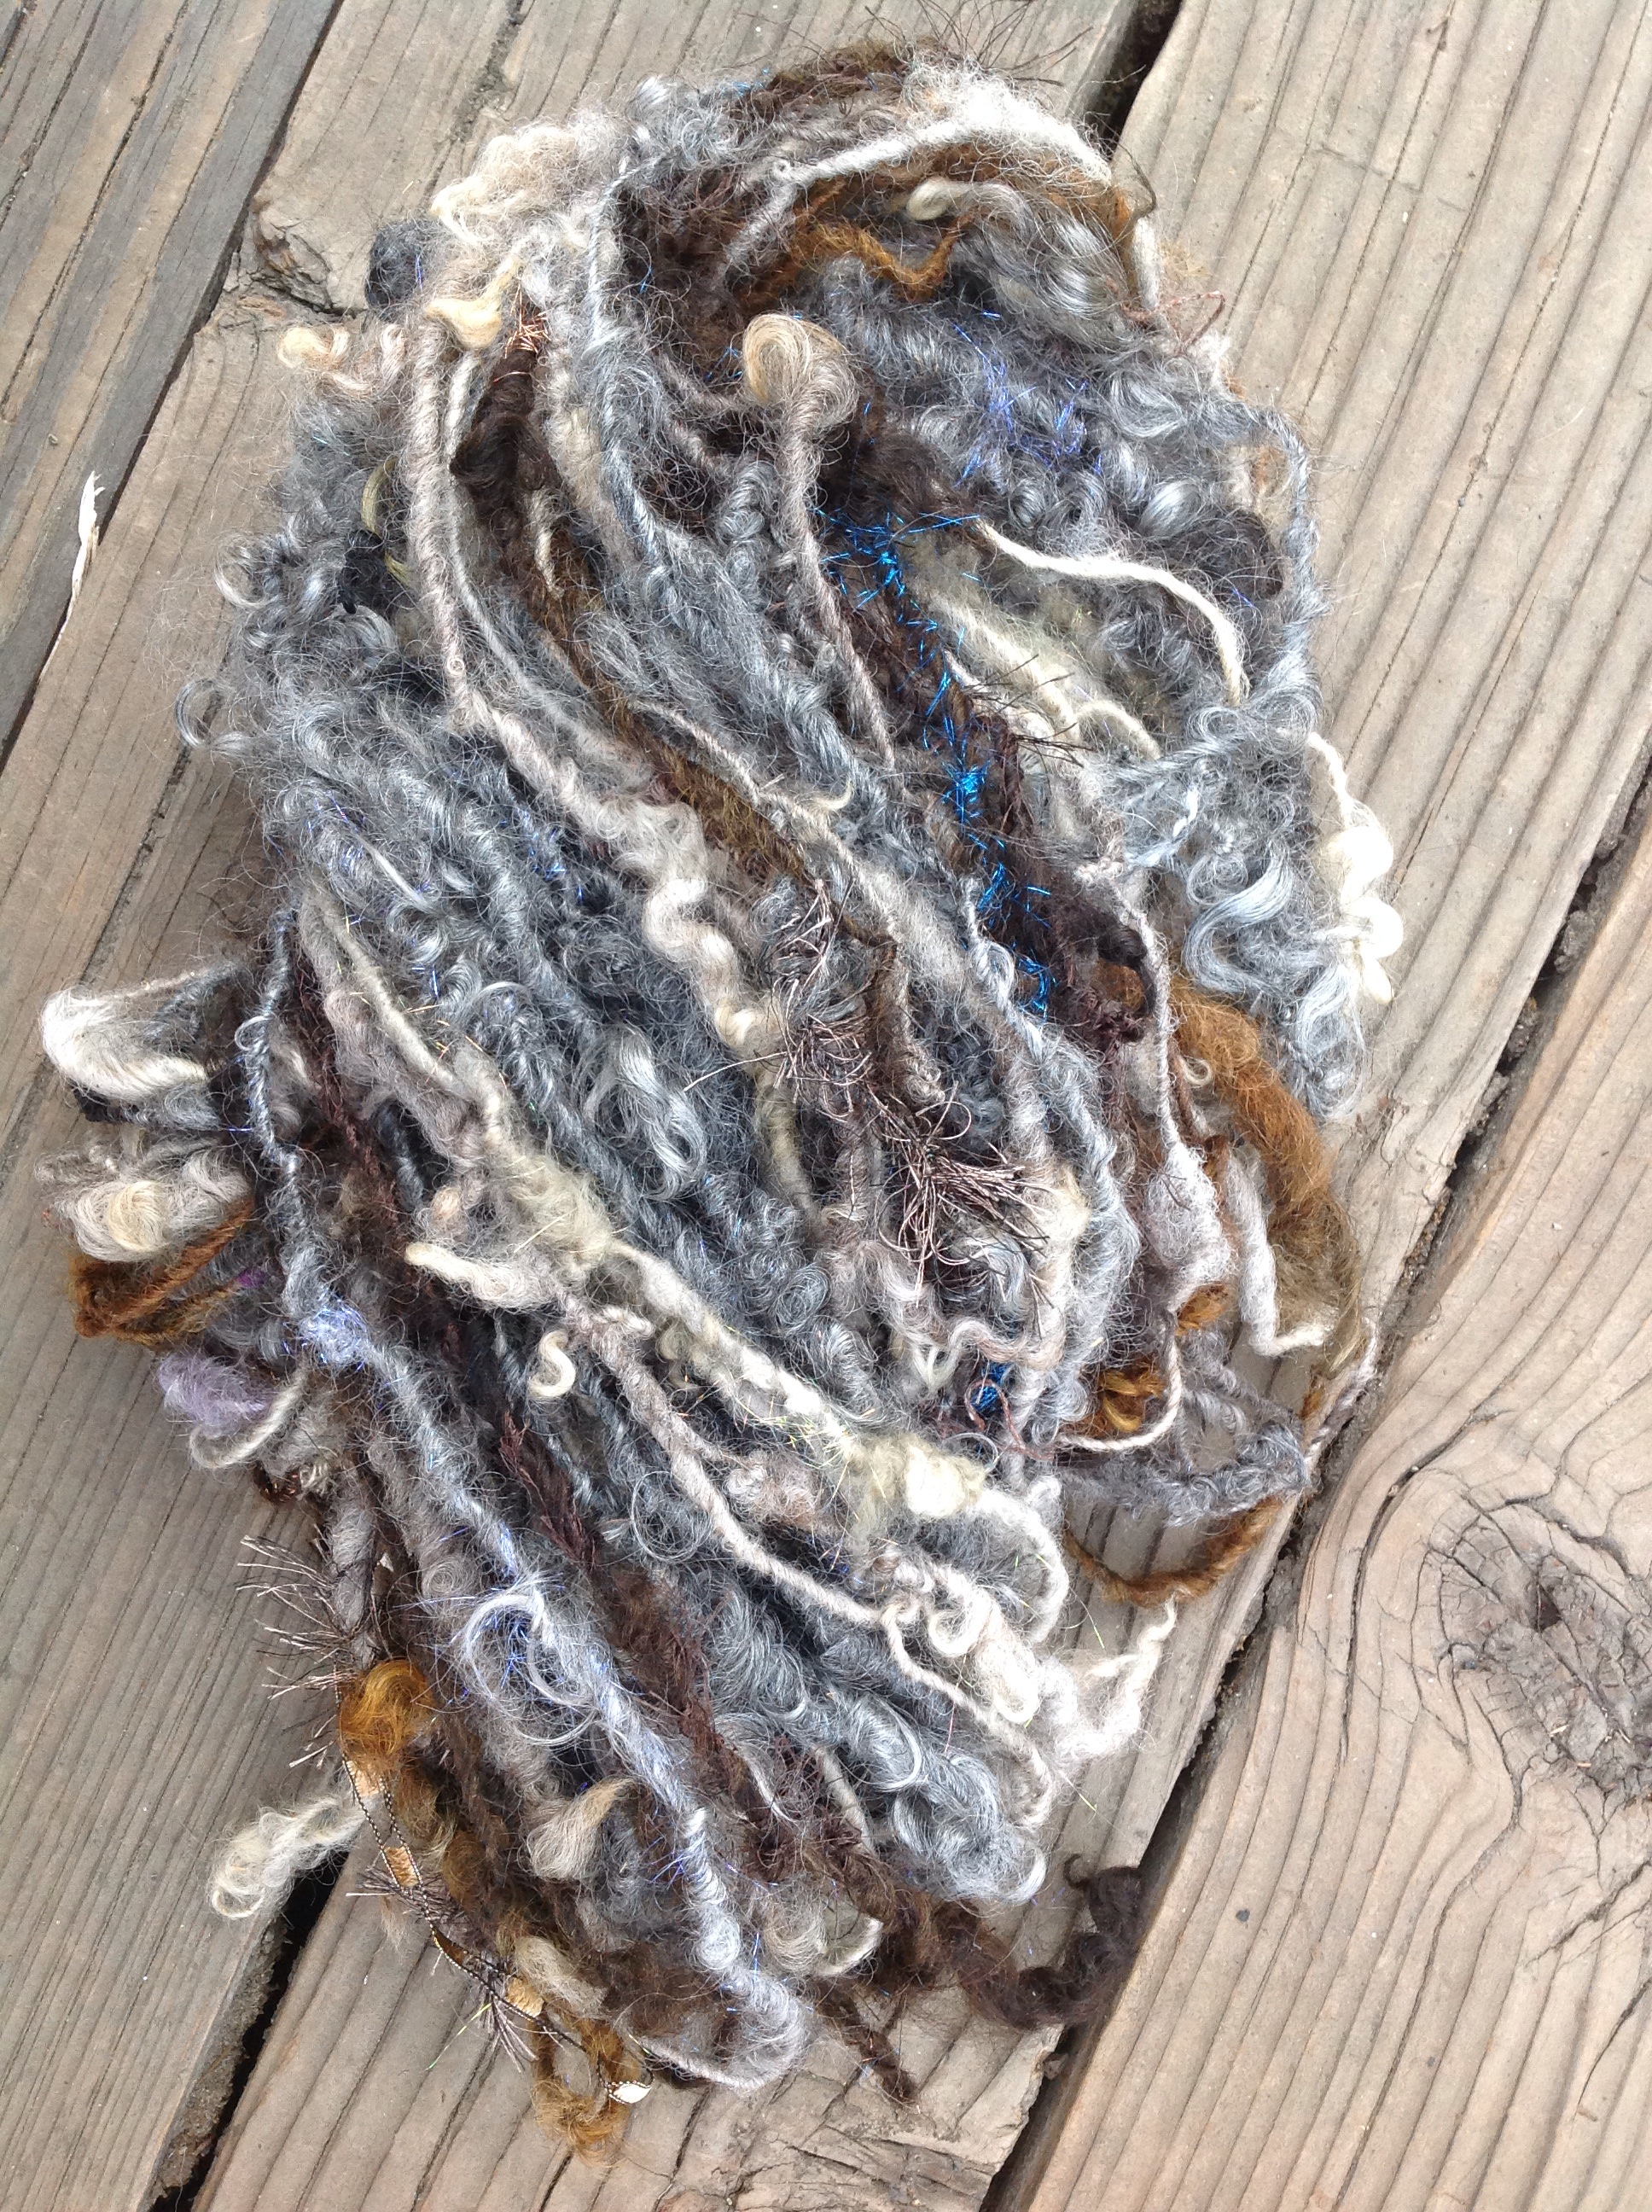
The Mink box, is dyed in neutral or natural colors. The taupe is worthy of special mention, it’s amazing. At first glance, you think it looks gray, until you have it next to gray, and then you see it’s not gray at all, but truly taupe. It’s gorgeous.
Taupe locks Exmoor/merino cross
The taupe locks are dyed on an exmoor/merino cross bred fleece, so they have a soft sproingy crimp, with a curly tip. A new breed and fleece type for me. Really really cool wool!! A must try!
Mink fiber and add ins
In addition to the color taupe, this box came with, fibers in all natural shades from light to dark. The taupe, actually, was originally a white fleece. It’s amazing for how natural all these colors look, they were dyed to be this way. This box came with colors from light gray, deep steel gray, cream, tan, beige, lighter medium browns to rich dark chocolate browns, some that seem to look black but in the sun, will show more depth and reveal other colors like deep mahogany. The tints of color, all mesh and put together make a gorgeous yarn. They look so natural to have been dyed. I think the steel gray mohair, was the original fleece color, but again, having been dyed so expertly, it’s hard to decipher in this scrapbox what is dyed vs originally grown that way on the animal.
Colors of mink
The add ins were several different novelty yarns and threads.
Three different colors of especially soft eyelash yarn, the good stuff, high end. Another was a golden train track or ladder novelty yarn. Now I say yarn, but it’s not what one would think of as a traditional yarn, more like novelty ribbon. It’s special, whatever it is. Several different threads in all neutral colors, matching the dyed fibers found in the scrapbox. All different (neutral/natural) tones and textures. A gray fuzzy halo thread, and a smooth brown with a little golden metallic sparkle.
Autowrap addins
One of my favorites, was the Habu textile thread in chocolate brown that appeared to have what looks like fat, soft furry caterpillars crawling across every few inches.
There were, well over, ten different add in threads, that came with the fiber. Each thread came in one long length, but I chose to cut them in shorter lengths for my purpose of use. Adding a touch here and there
Spinning goodies ranged from mohair, to long wools, to medium and fine wools. All variety of different fibers that inspire, with the many different staple lengths and textures. From crimpy, soft, fluffy and sproingy to light reflecting luster with ringlet curls, silky smooth to the touch, all in beautiful neutral shades.
As mentioned earlier, some of namaste farms scrapbox purchases come with a livestream tutorial. Prior to spinning Mink, I had the chance to watch one of these Livestream tutorials, held by Natalie Redding.(a lucky replacement for a namaste farms blogtalk one evening)
In this livestream episode, she shows several different techniques, while spinning the kits contents. Since she does this live, viewers can ask any questions, or request to “please show that again”, or “what ifs”, or “how would I”?
Anything really. These live tutorial spinning sessions are invaluable.
To quote Natalie, she knows how to spin “a balanced, light, lofty single.” And let me tell you, she does it well. Many many hours, many many skeins of practice makes perfect.
She referred to herself as a “one trick pony” spinner, as this, light lofty single, is the yarn she spins. With respect, I fervently disagree with this sentiment. With regards to Natalie’s spinning, this couldn’t be further from the truth, she is no “one trick pony”!!!
You won’t see MORE ways to spin a single ANYWHERE ELSE…
She shows more ways to
-spin a single,
-style a single,
-add something to a single
-all the while, keeping it stable, balanced, and freaking awesome.
Natalie demonstrates techniques that are unique and priceless. Sharing her proprietary knowledge, thereby, adding inspiration and tools to my own spinning repertoire. She is an intuitive spinner and is able to translate how she gets from point A, to point B, clearly. She is an excellent teacher. It is very difficult to spin a thick yarn, that’s light and airy. Even more difficult, is to keep it a low twist single, without it falling apart. If you have the chance to see and touch her yarn in person, it’s incredible. I got this chance in her booth at Lambtown 2014 held in Dixon, Ca. Photos of her yarn are incredible, but in person, you can feel the stability and just how weightless it is, it just boggles the mind. Seeing a bunch of her handspun skeins together, I realize how many options there are to spin a single. She is constantly formulating something new and different, forever changing and adding options available to a spinner. It never gets old.
I’m enthralled by the skills and amount of new content I learn. The above link is one of many recorded past spinning sessions. She always has new techniques and a new style yarn. Recent spin sessions, show several different techniques while spinning a single. On her livestream channel, one can find older posts where she has plied skein sessions, and even sheep to finished project. She shares many proprietary techniques exclusive to her. I feel very very lucky to have her share so openly, to help other spinners like myself.
A few examples of tips and tricks, would be, how to add a small puff of very short stapled fiber, and secure it to the single, by taking just a few long stapled fibers of longwool and essentially plying over those short bits locking everything in place. Brilliant!
Adding plied strength to a single where it otherwise may have been weakened! That was huuuuge for me. Major a-ha moment!
She’s shown several things to do with add in threads, like tucking one side in making it in invisible and allowing the other half to fly freely, much like a long lock. Or another technique, allowing the addin to auto wrap and hide both sides of the string within the fiber.
Another technique that blew my mind was how to lock “something” in (a curl, a long lock, or how to spin a lock of fiber, the cut end in the single without a trace but leave out the perfect curled tip she wants to show) with a tug of fiber up toward the “something”she wanted secure, sometimes wrapping the tugged bit with fiber, sometimes leaving it as is, depending on the outcome she was aiming for. These techniques were just a few she shared and I have never seen them before anywhere. Because Natalie is an intuitive spinner, she spins fast, but when teaching, is able to slow it down significantly while giving a detailed, step by step, explanation of exactly what she is doing.
After watching this I was excited. I got to spinning straight away. This yarn is the coolest Ive made.
It’s natural colors are subtle, but all the add ins, autowraps, different fibers, textures, techniques, sparkles, etc etc etc I mean,
This handspun has so many elements of interest… It’s a special skein and one that I am really proud of. With so many things going on in this yarn, the natural colors of the dyed fiber tone it down, and it works. It’s wildly complex but sophisticated. I’m still learning color, I love me some bright rainbows, neon aqua and hot peach, but my wardrobe shows I’m a fan of plain black and white,of blue jeans. So to make a neutral yarn with this much fun going on, it kinda blew my mind. This is the styling of a yarn, I’m talking about, that I didn’t know played a part.
I can’t recommend enough, to watch, Namaste Farms tutorials.
Coming up, she is also doing spin in labs/ classes with http://www.fiberygoodness.com hosted by Spin Artiste creator – Arlene Thayer and Woolwench – Suzy Brown.
Check the fiberygoodness website for further information on all the spinning inspiration and classes they offer. The gallery of handspun made by students is motivational eye candy.
I’ve signed up for one of the fibery goodness labs by on November 19 with Namaste Farms. I barely got in, as these classes sold out In minutes for months in advance. Keep an eye out for more!
Mink and Shanghai
Awww I love spinning… I imagine how impressed our ancestors over thousands of years would be, to see what we are making today… Spinning is such an intricate art, as is the wool that is grown today. Animal husbandry is an artform. The constant quest for perfection over centuries, to bring the best fiber, to hand spinners and the textile industry. Especially, with the latest in AI science, and the ability to bring the best genetics from across the globe. We are so fortunate to be spinners today. The progress is monumental and something to be revered. The hard work of our shepherds and shepherdess’s to bring about such a superior product is truly an art in itself. This isn’t nearly as recognized as it should be. This is where spinning begins, and our handspun art as spinners, is made possible. I appreciate them and all their efforts to bring nothing but the best fiber. I love to grab a handful of dyed locks and just play. I could do this for hours… And I do,
as often as I can.
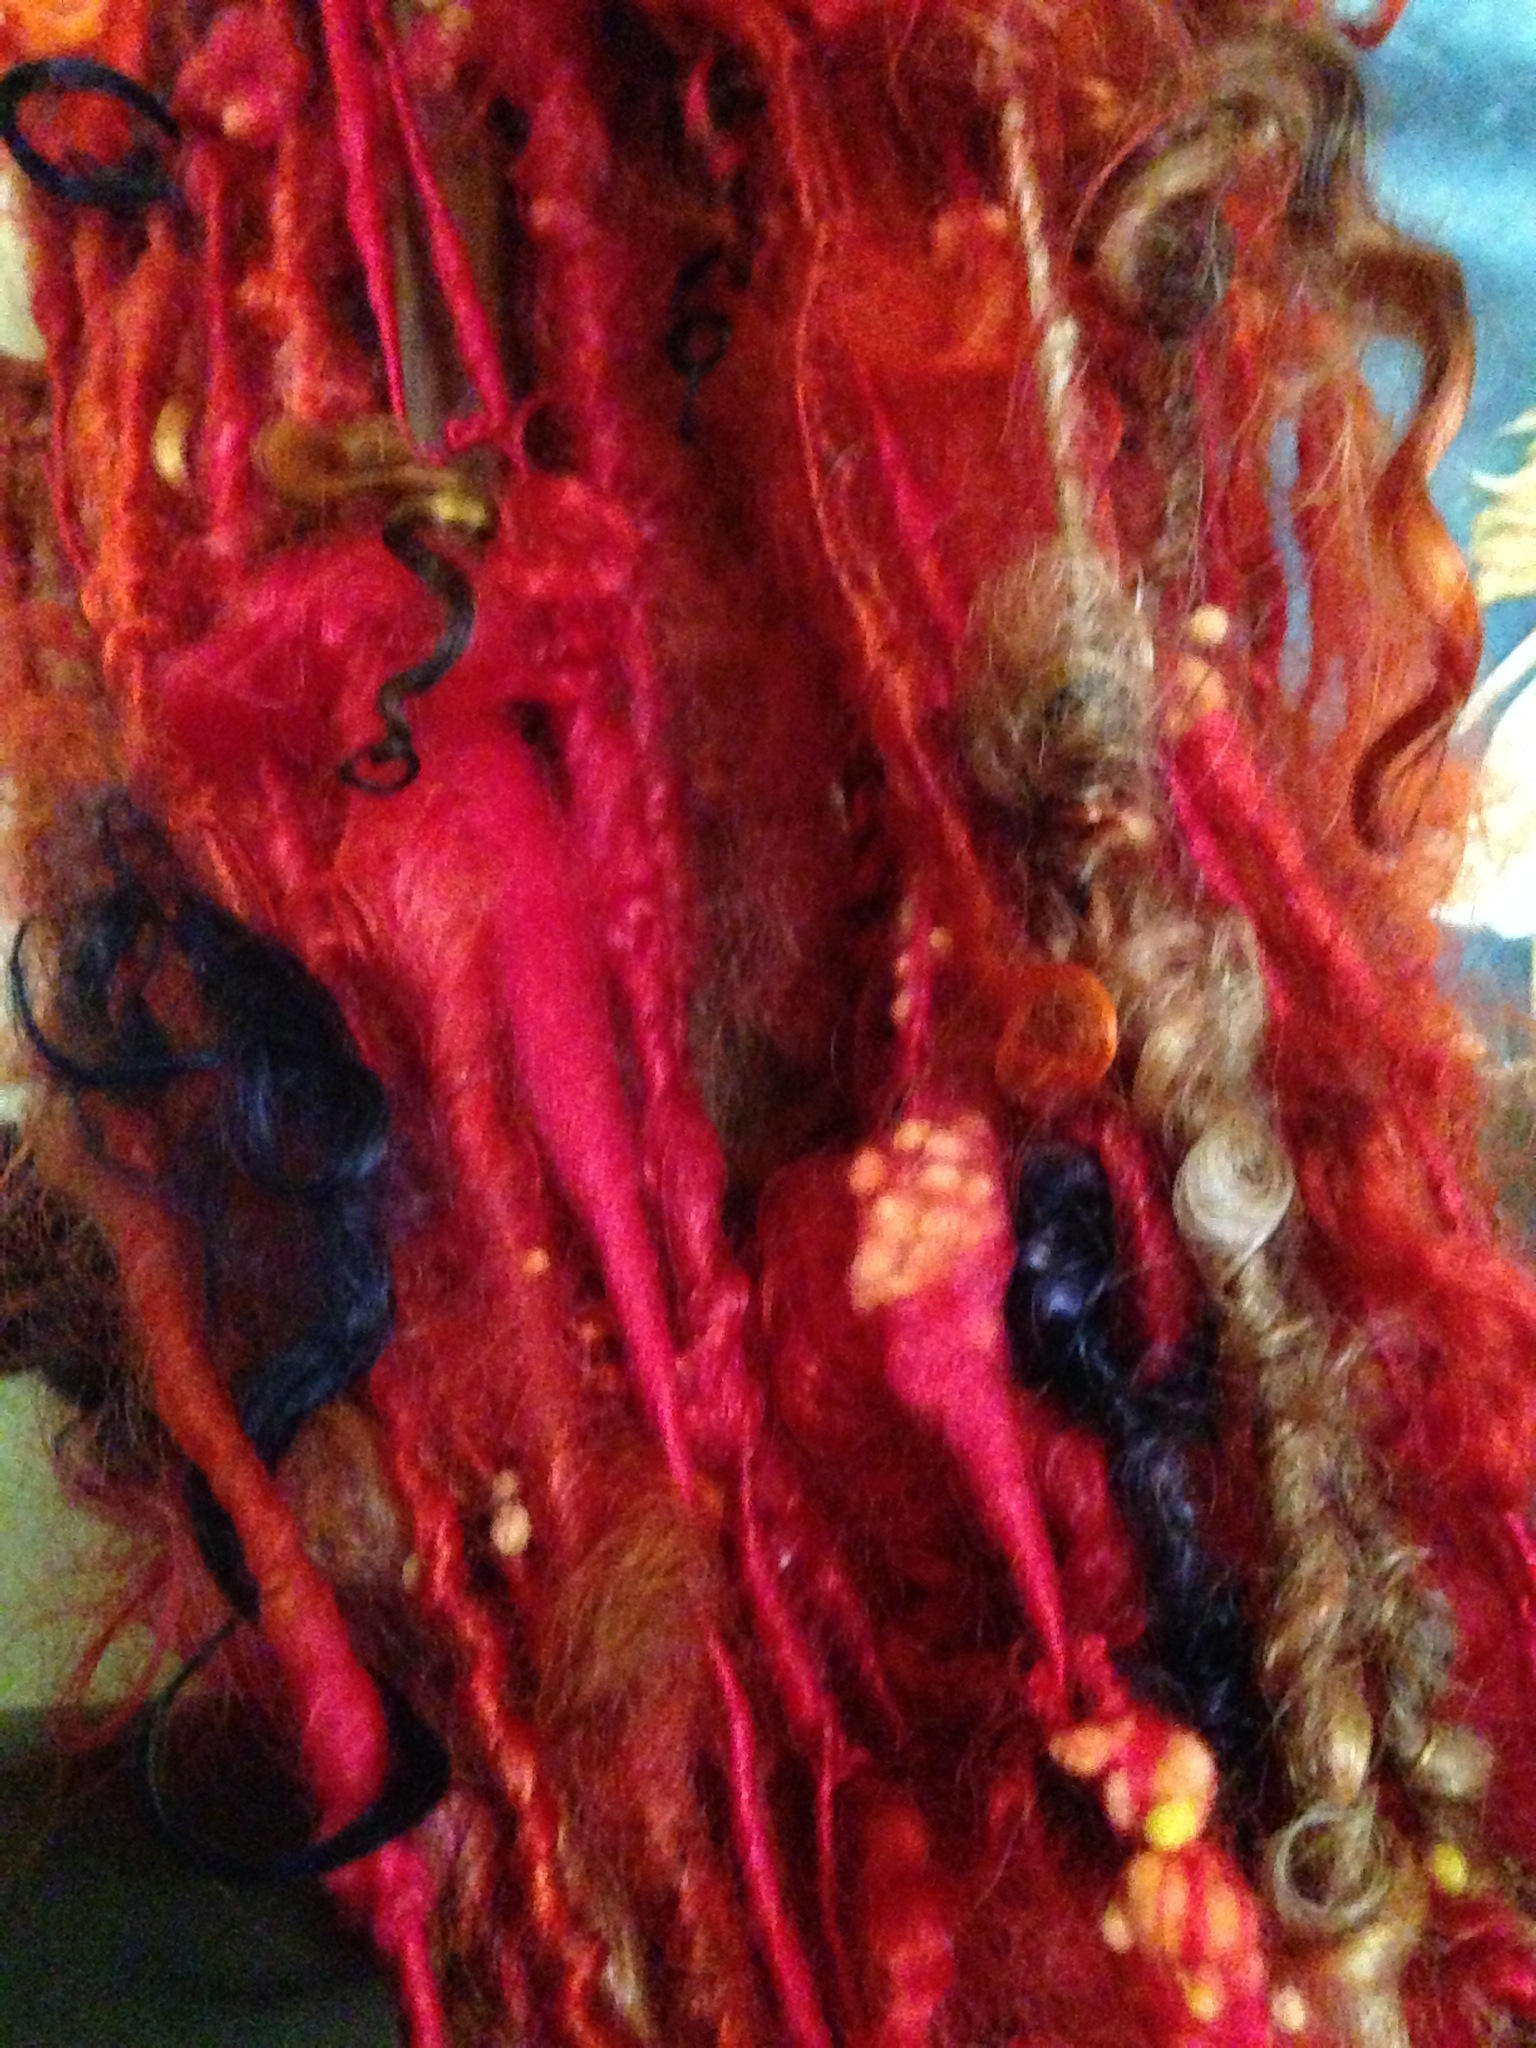
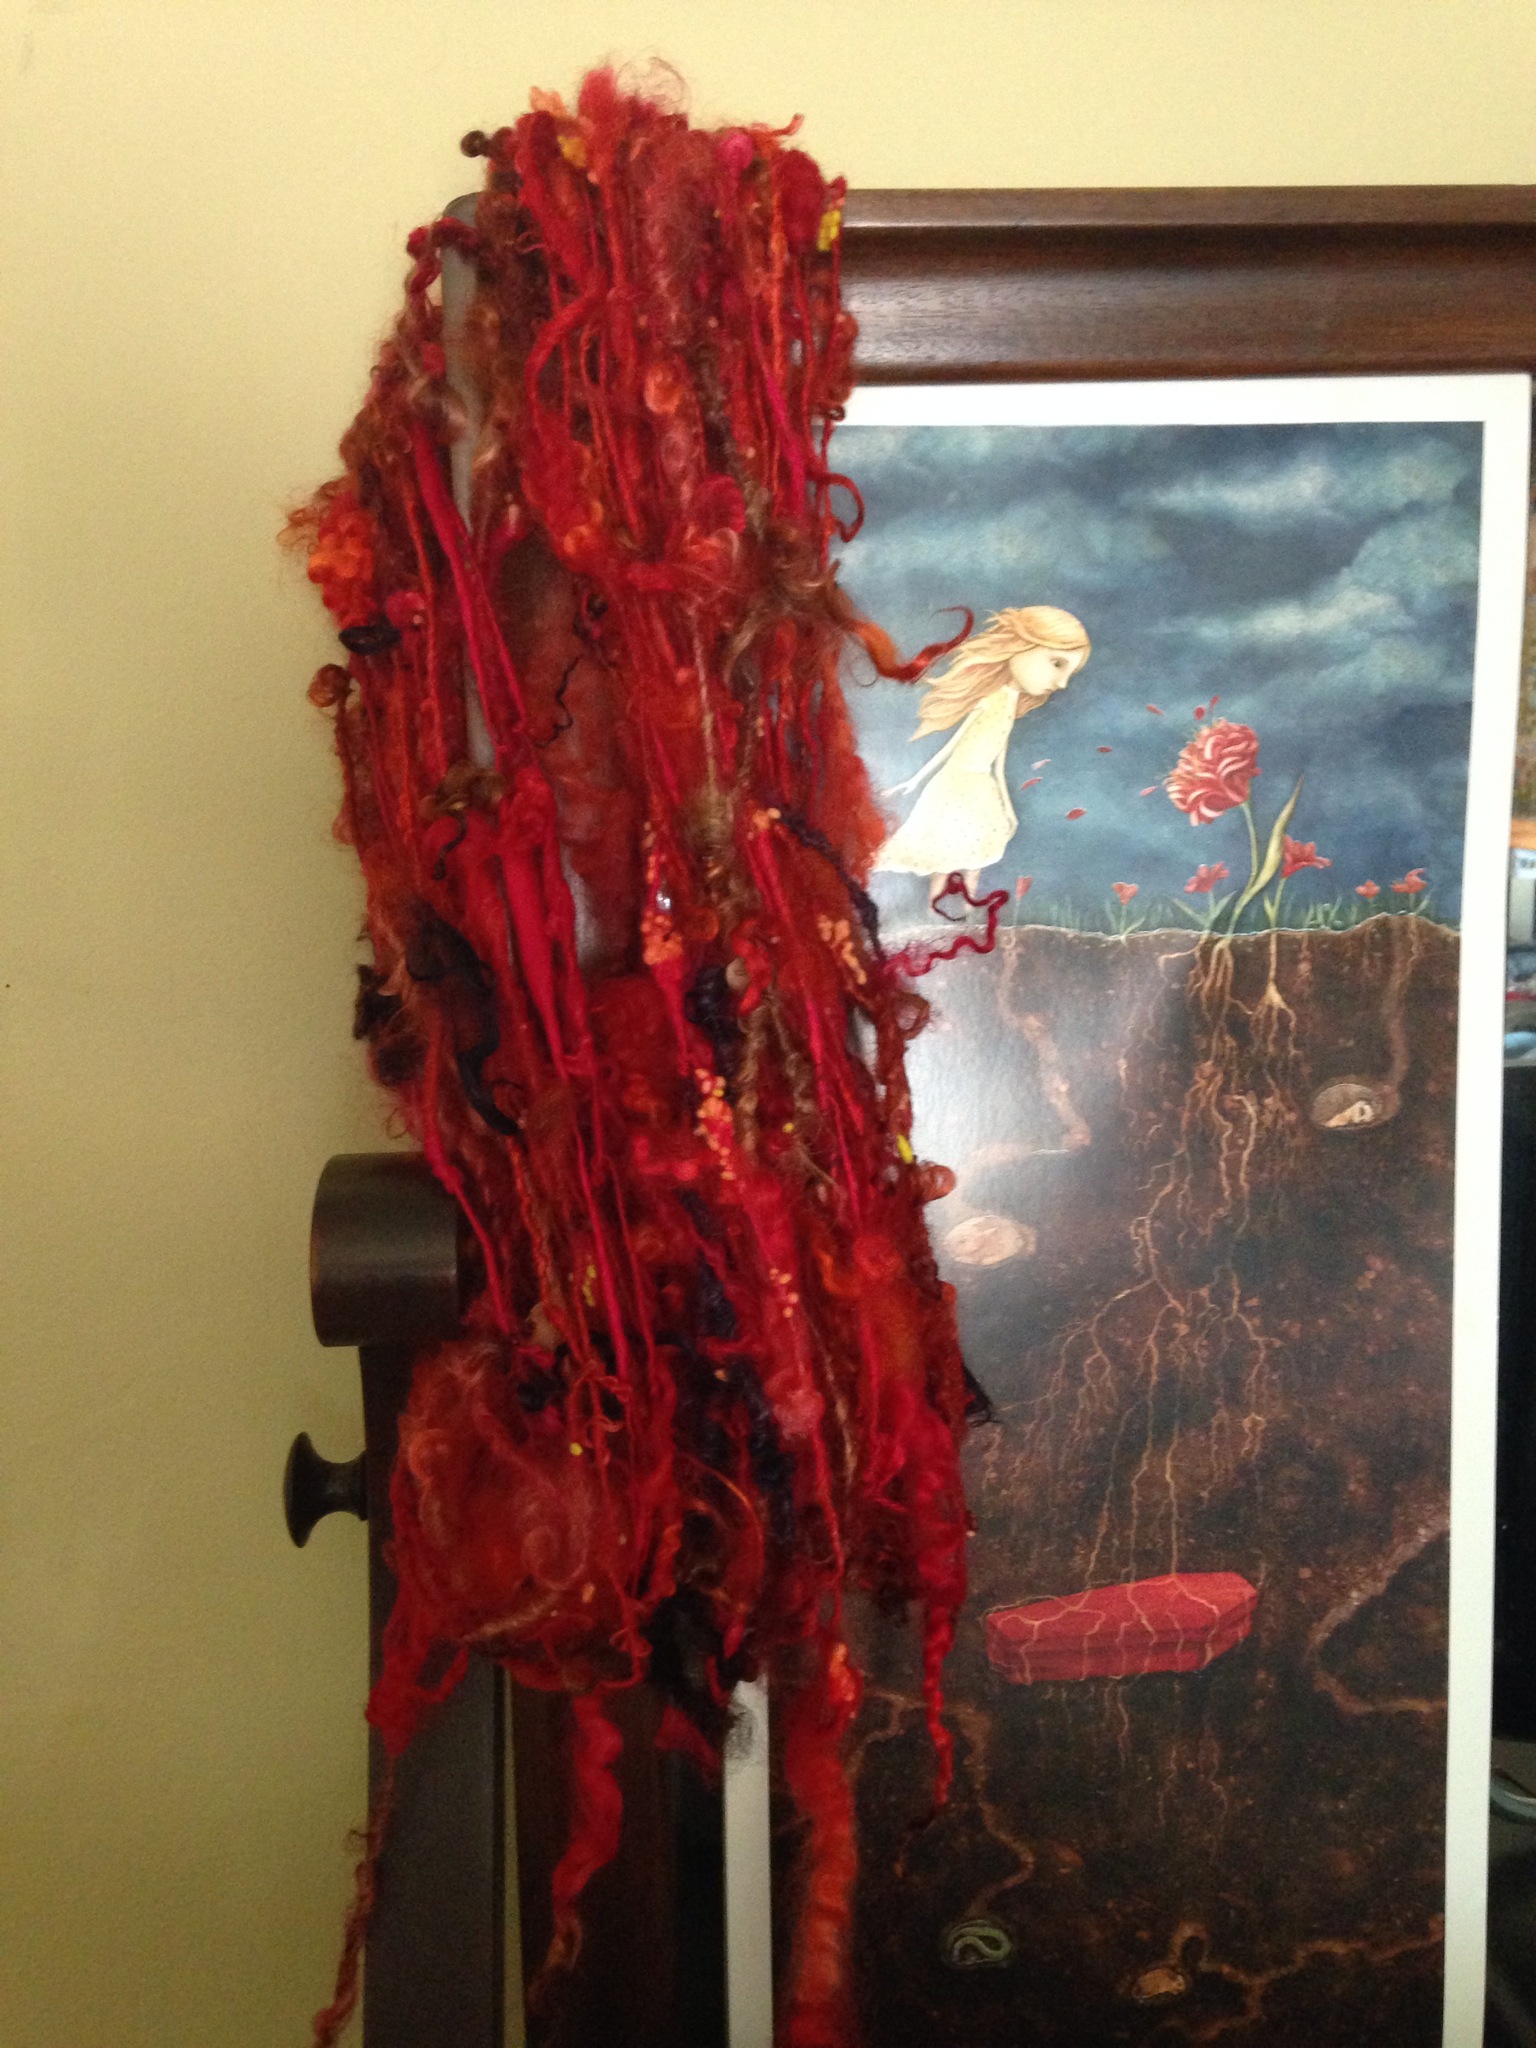
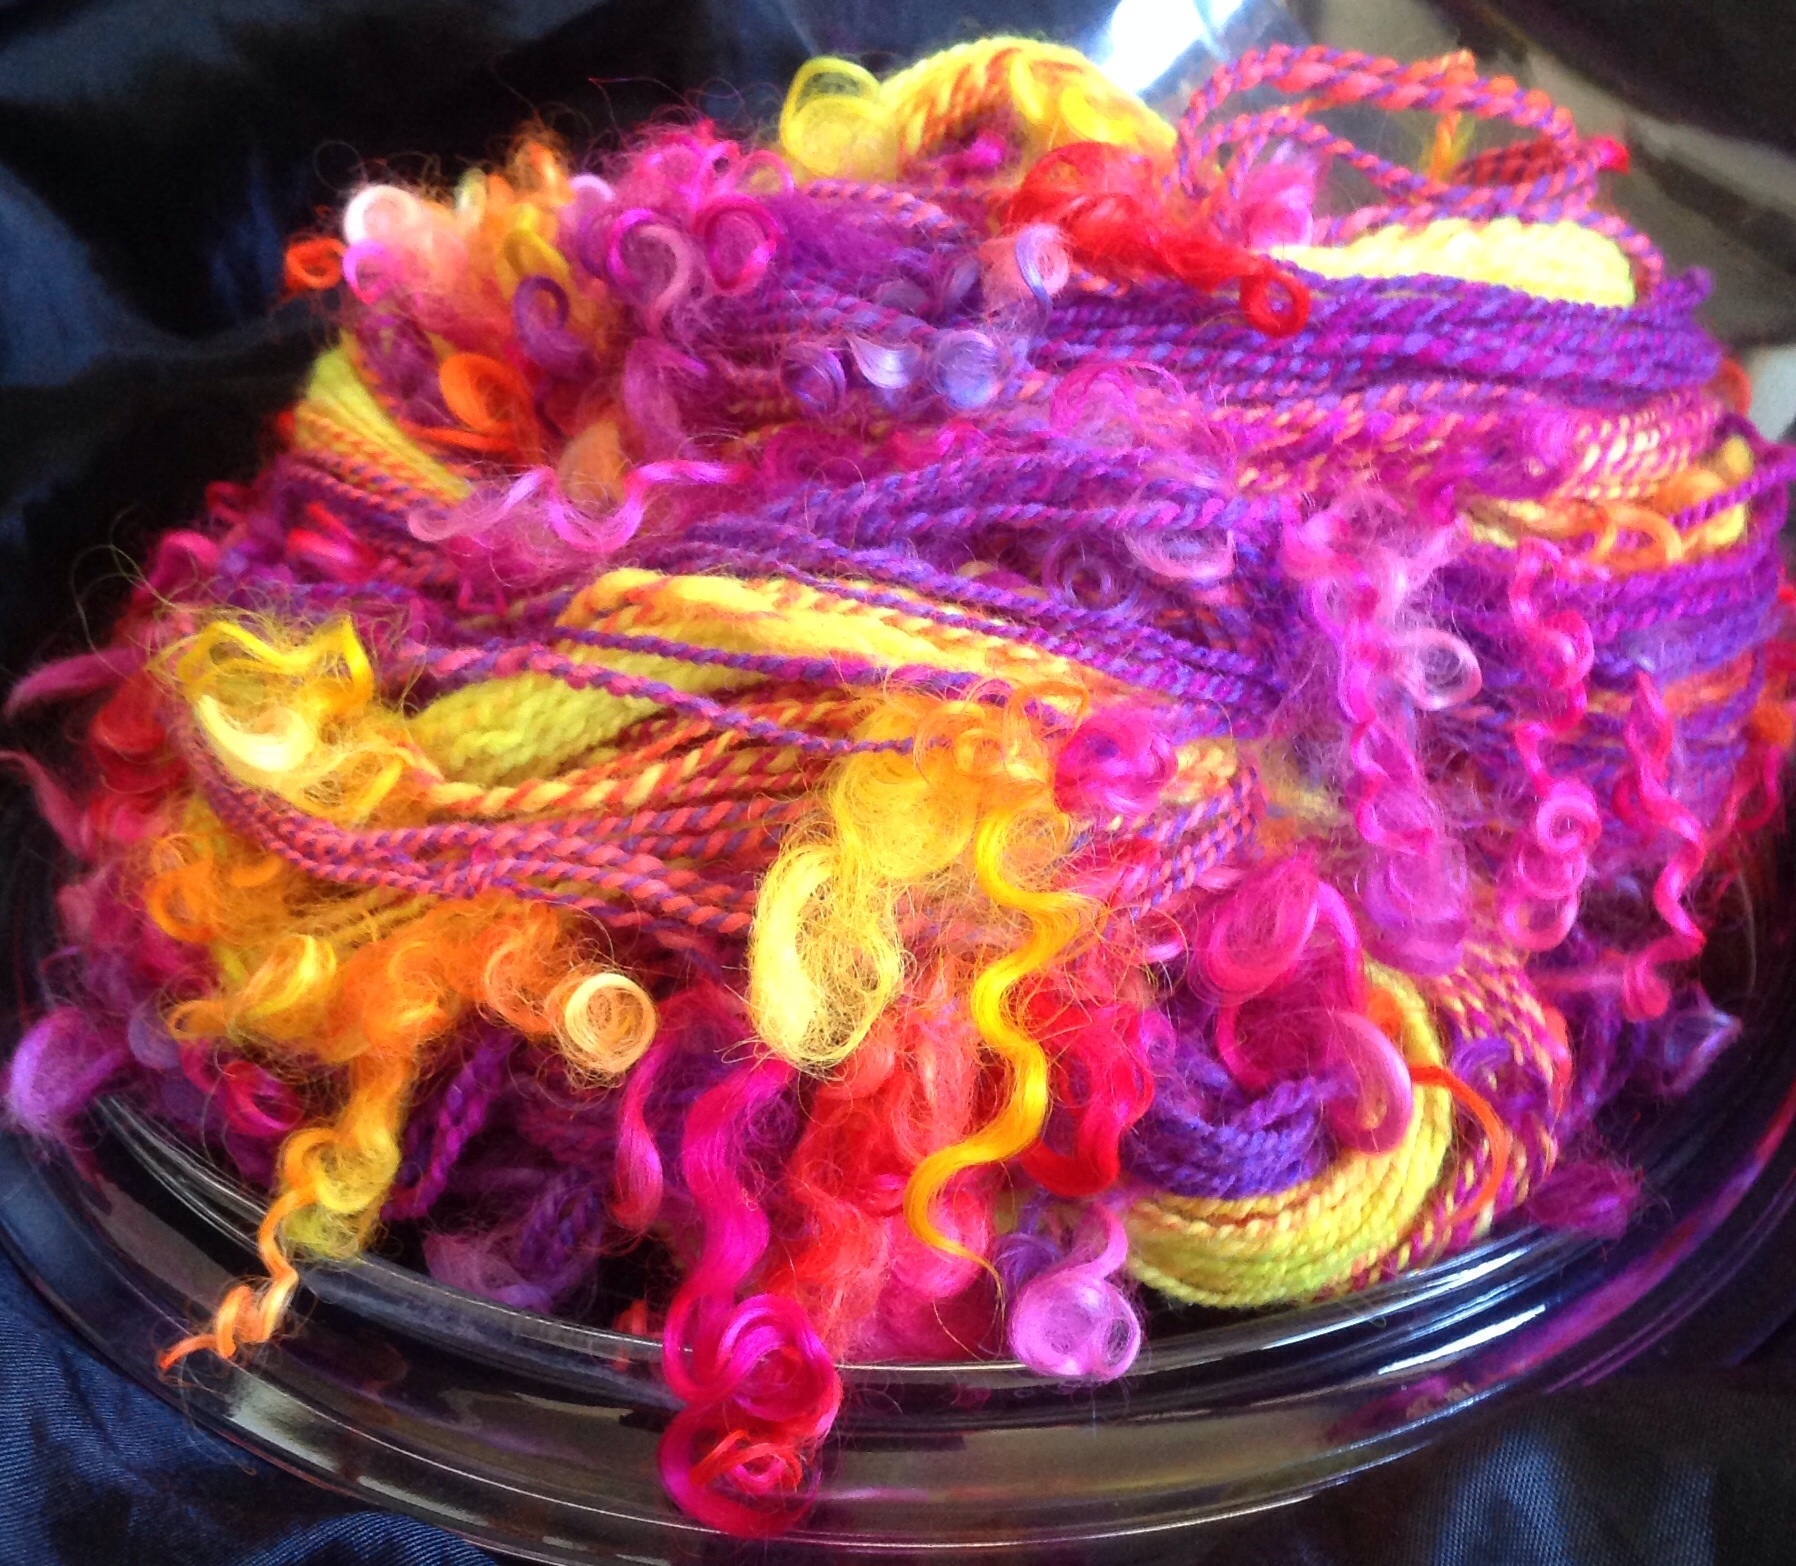
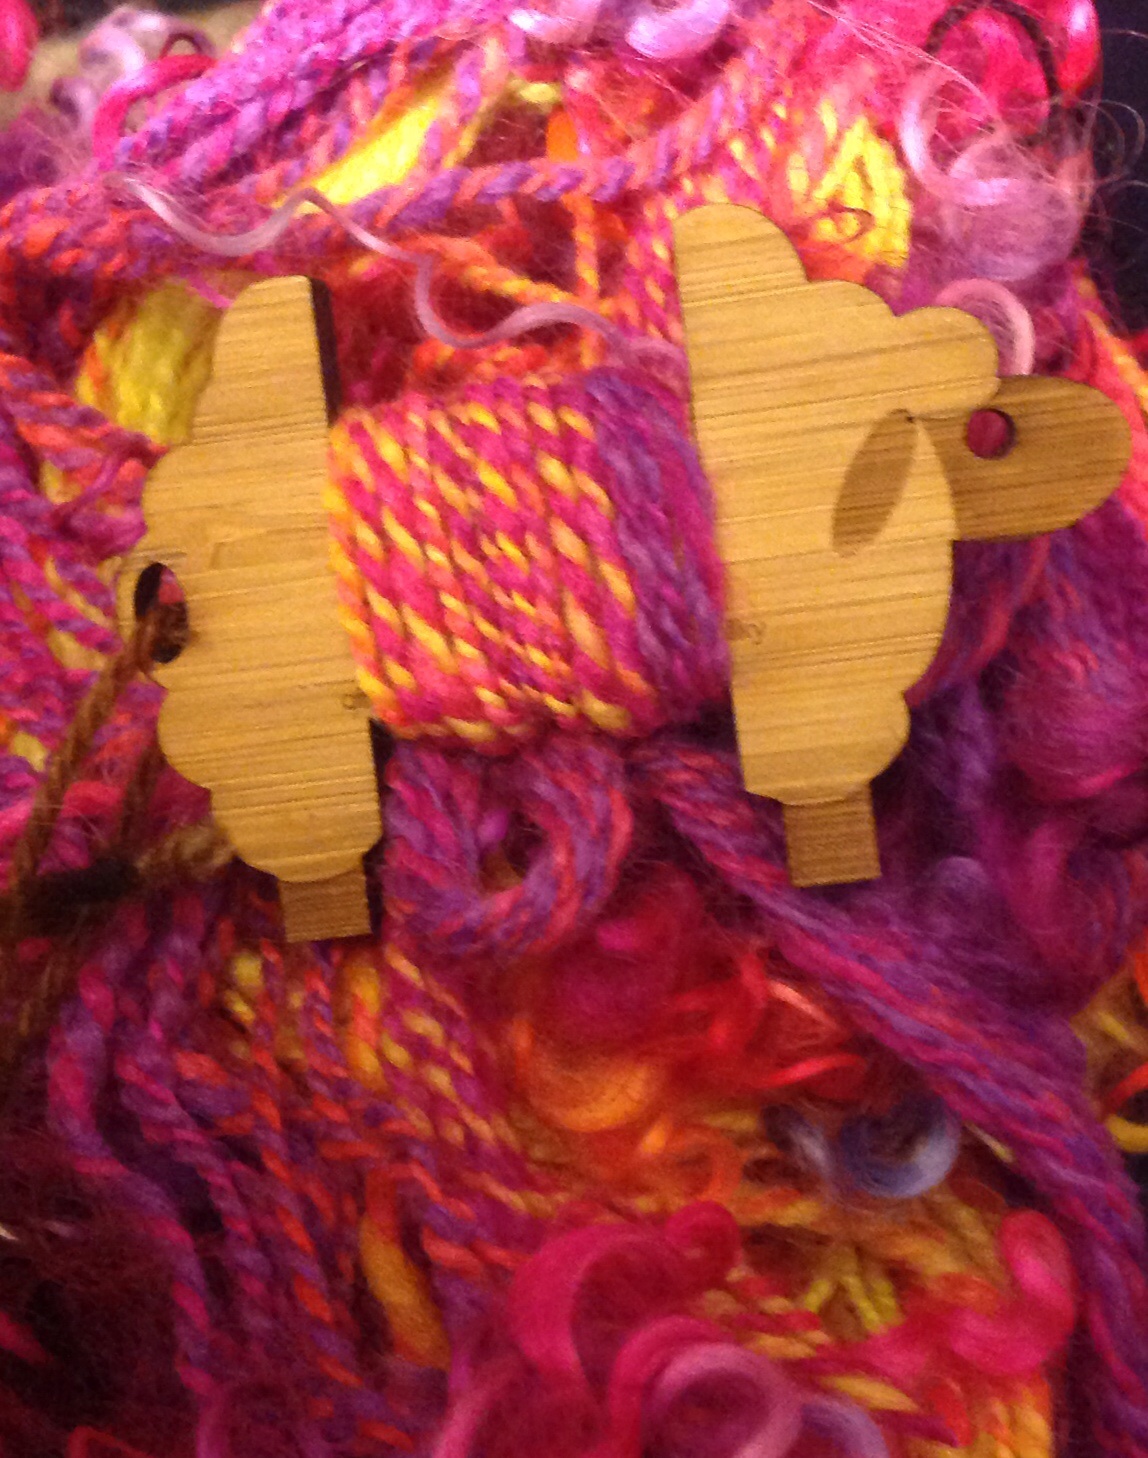
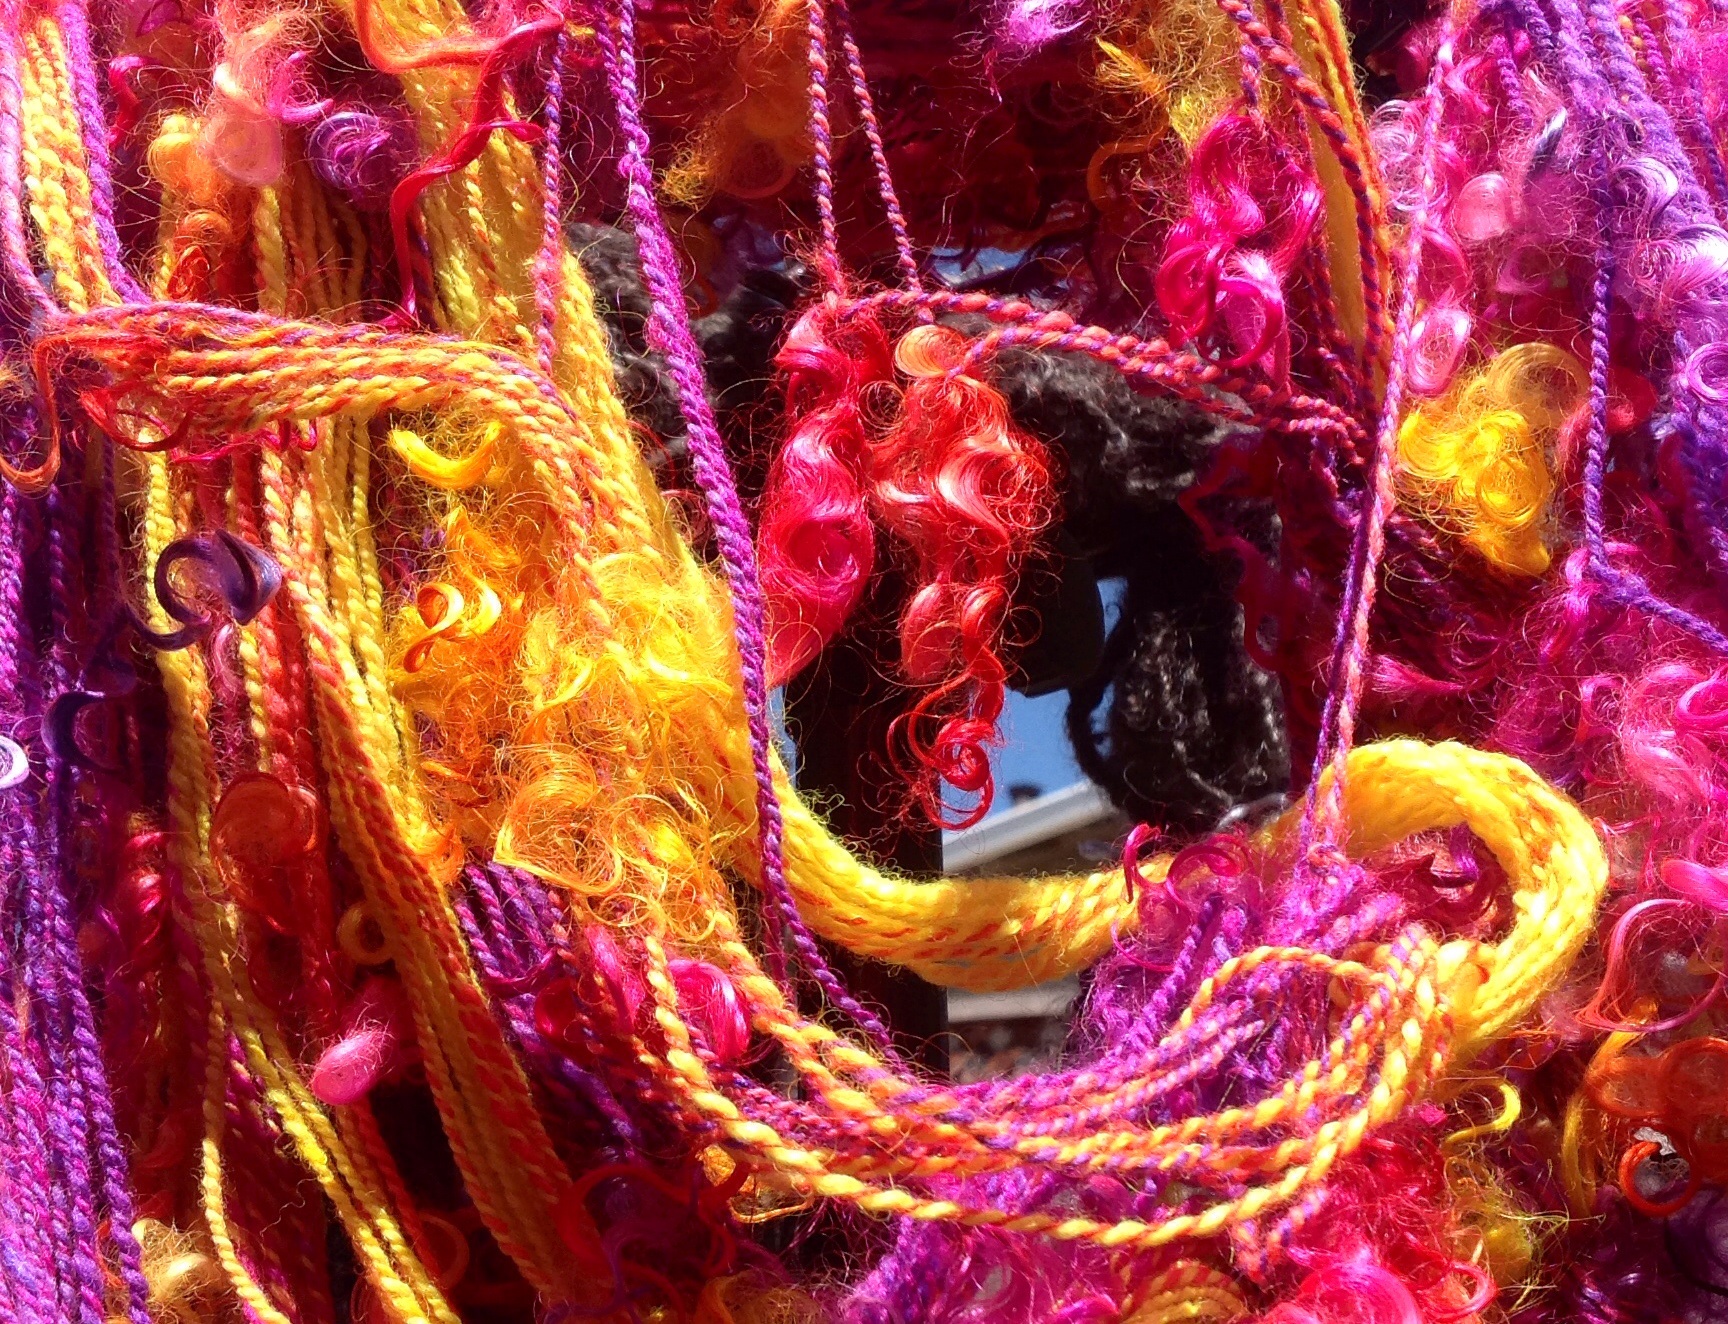
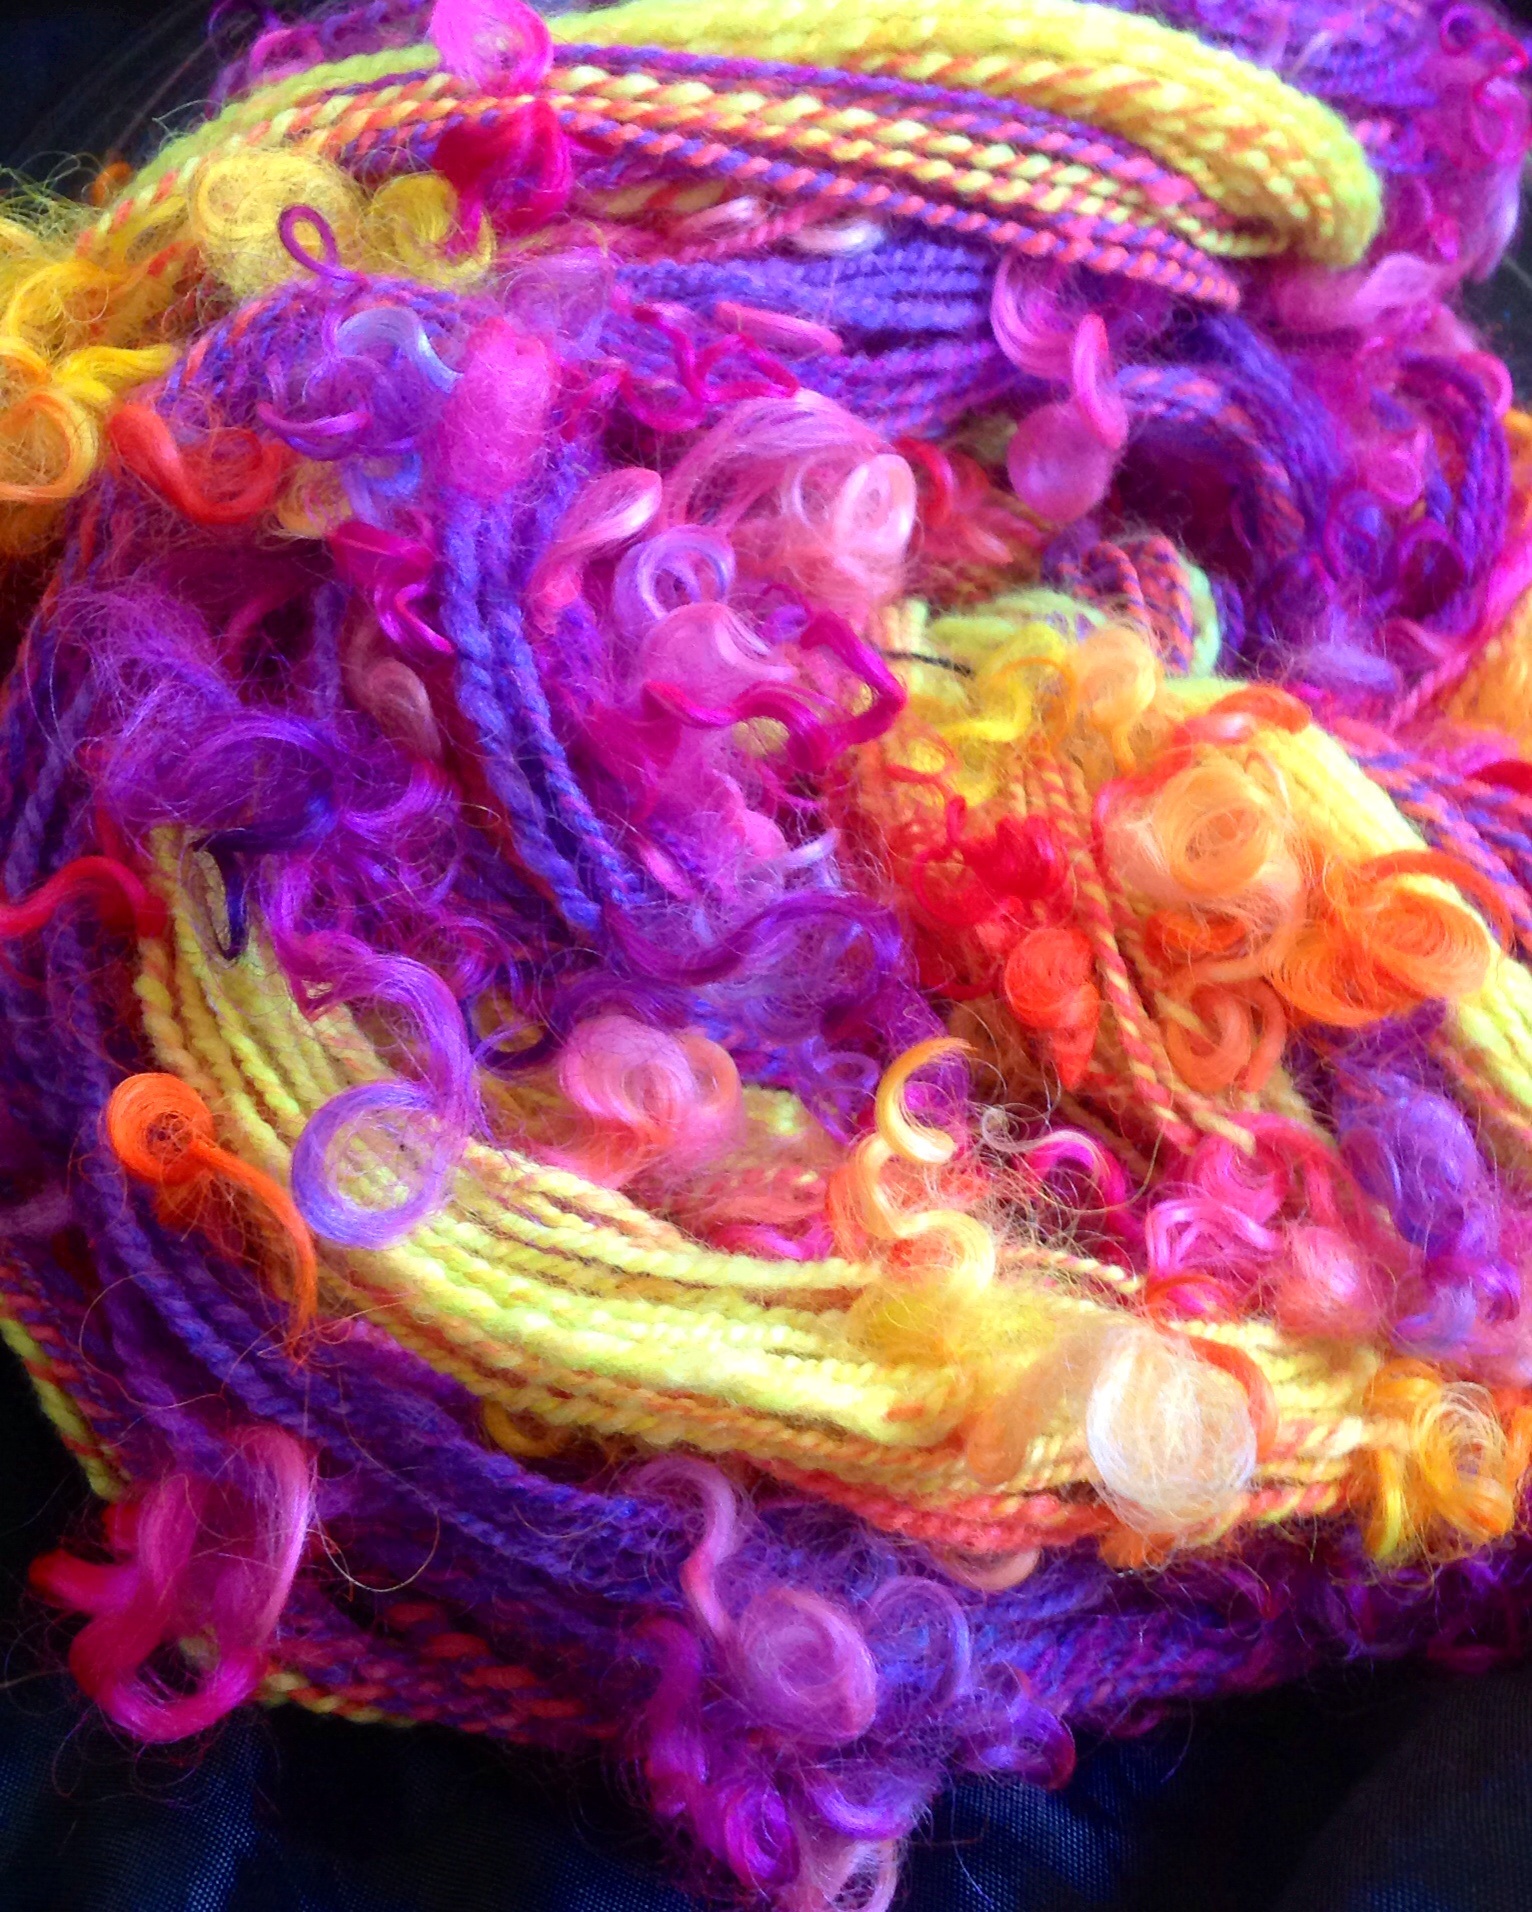
I love the insanely rich reds of Shanghai…. This yarn was a ton of fun to make, new things tried, and even more awesome… I conquered! This yarn is soft and the color makes my eyes turn into cartoon hearts when I look at it 🙂I bought this treasure, the Shanghai scrapbox, from
http://www.namastefarms.com.
It came with such insanely bright colors, it was impossible to photograph, the eye candy reds would blow out no matter how I seemed to set my camera.
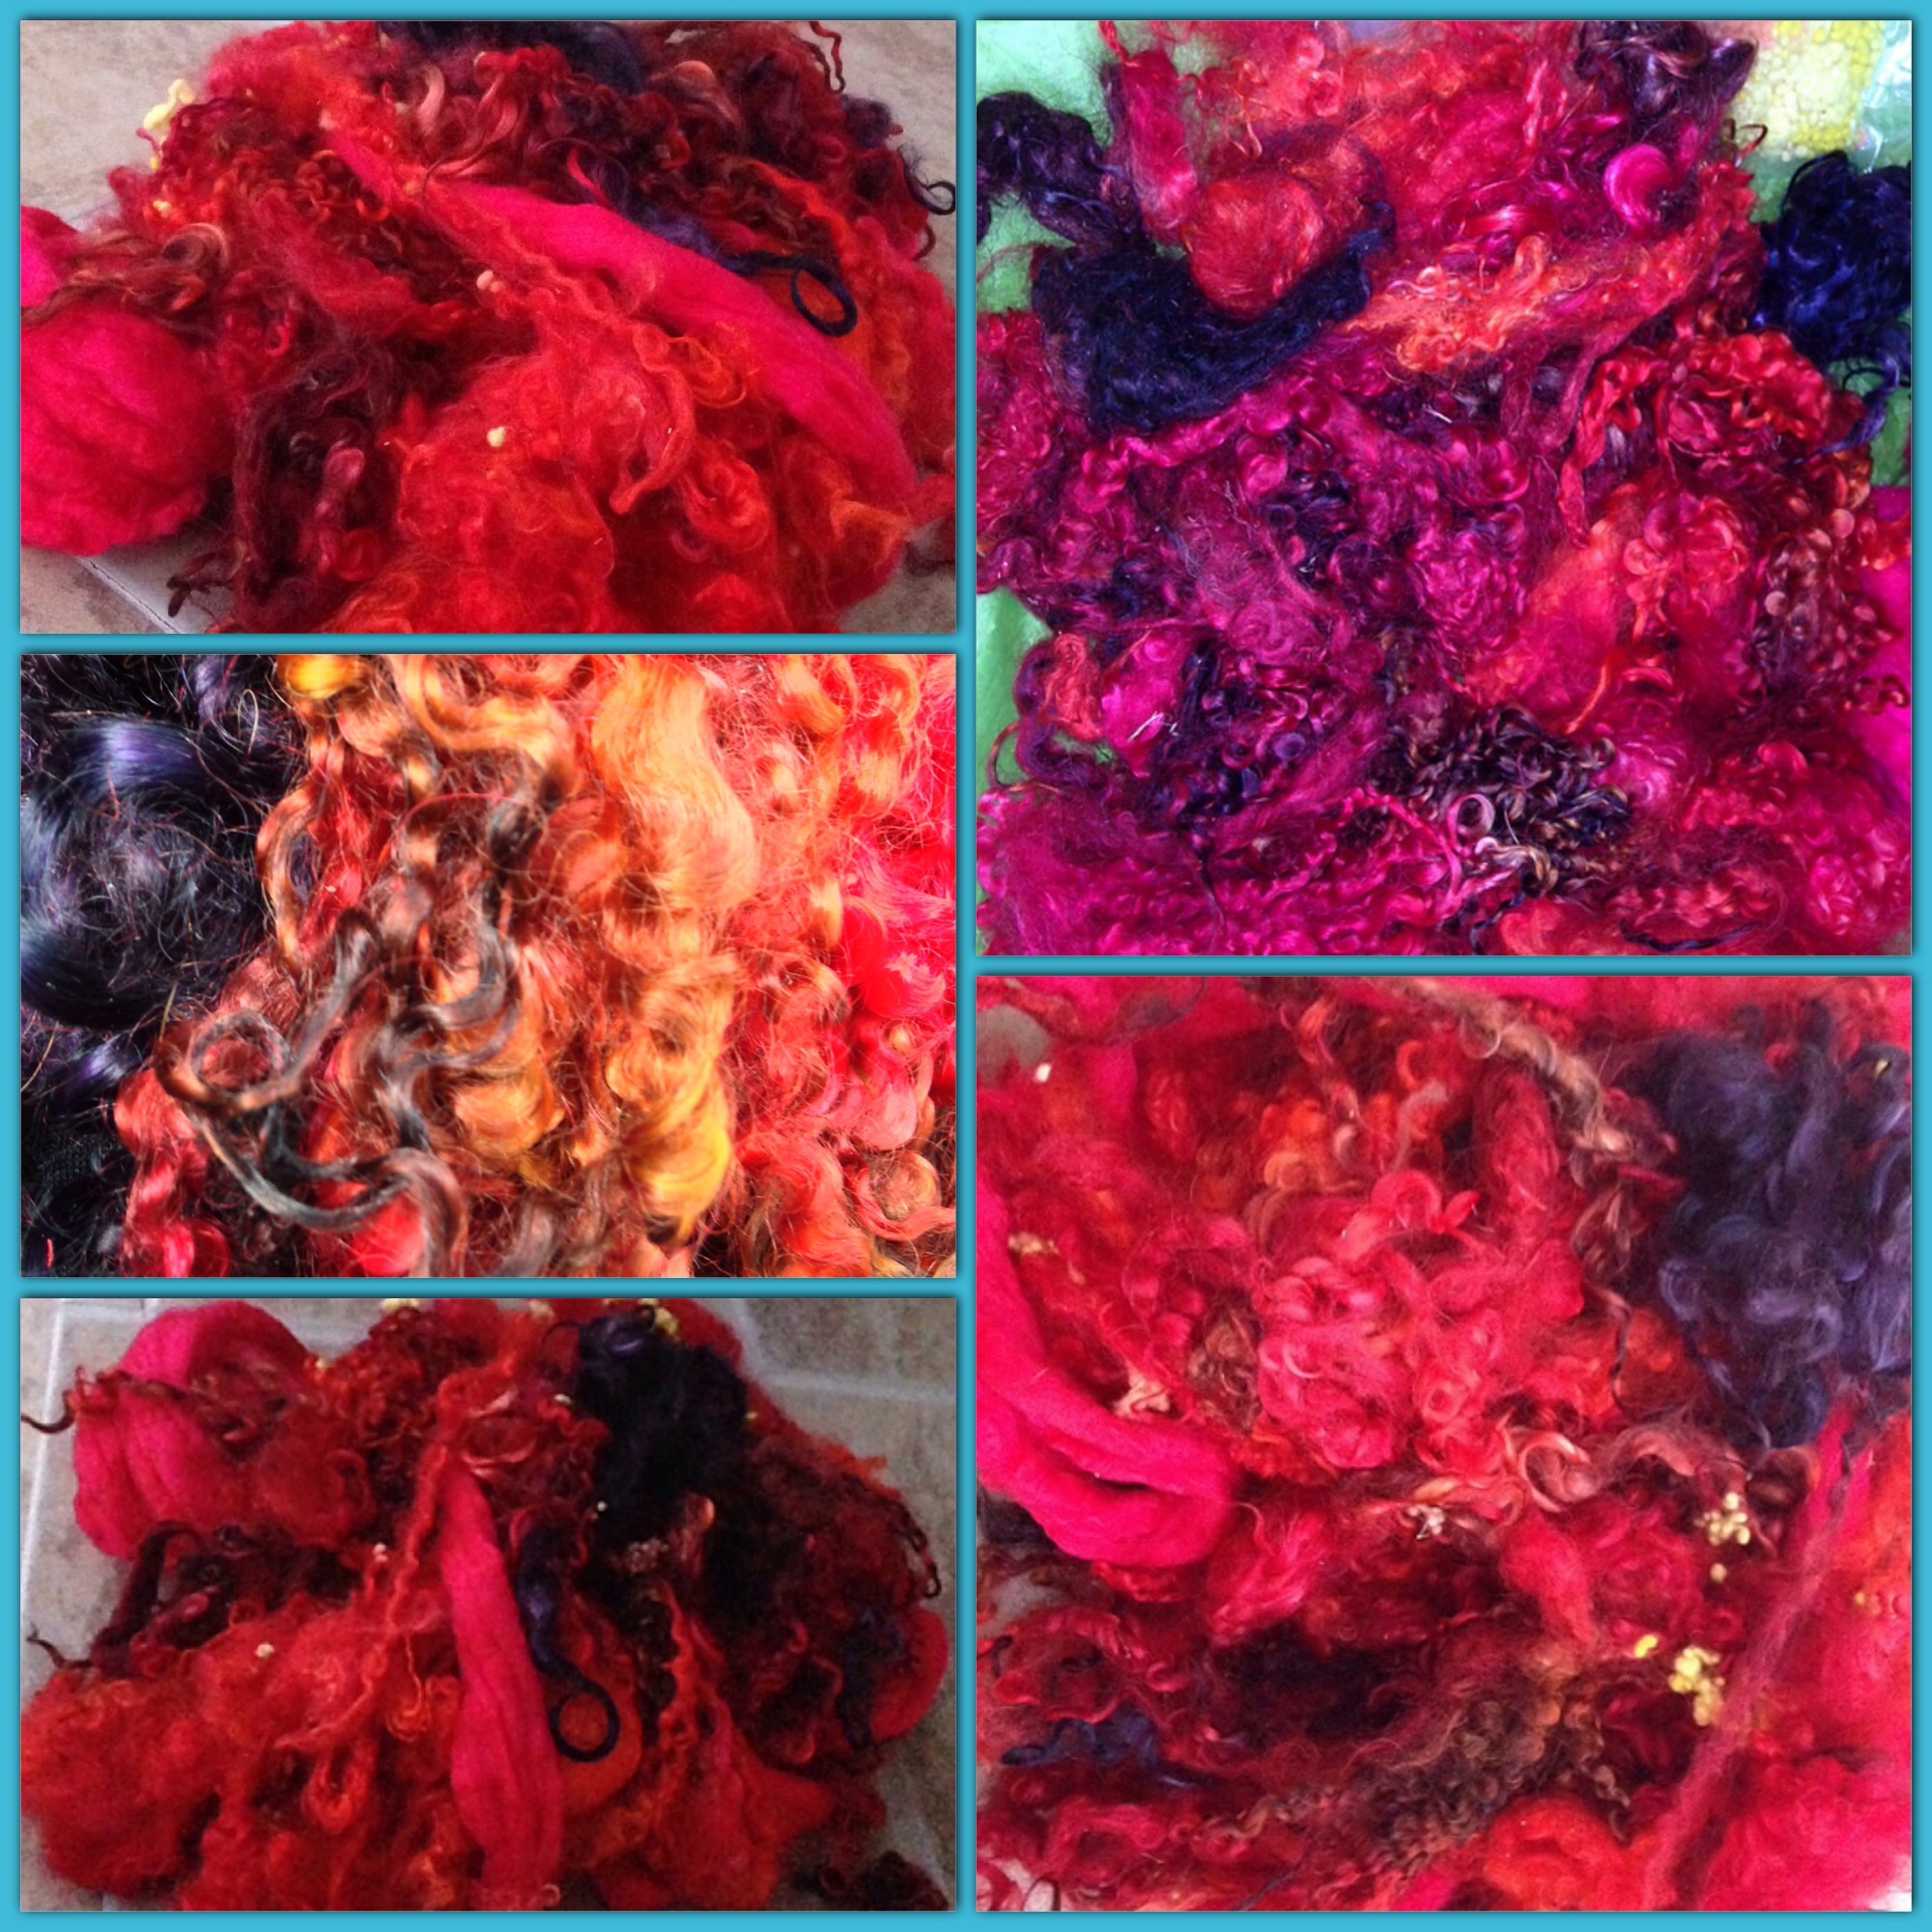
Very hard to photograph these colors. Pictures of this don’t give justice to the experience in real life, it’s beautifully intense…Even in low light settings it seemed to glow. Shanghai came in the most amazing reds, so bright, so deep, I couldn’t resist spinning it next, in spite of the other scrapboxes, in queue. Reds, bright pumpkin oranges, burnt oranges, blacks, and some few locks that were such a deep dark purple it looked black but in the sun a slight purple hue could be seen.
The locks were incredibly long and full of luster. The curl structure was beautifully intact for tail spinning. There was teeswater, some individual locks dyed in several colors on one lock, going from light to dark. The silkiest mohair that begged to be softly spun in poofs. There was a healthy serving of orange and yellow wool nepps. It also came with a couple ounces of a brilliant red silk/merino top. This top was so soft and gorgeous.
This scrapbox was dyed a work of art. I’ve never seen a red quite like this, and I’m in love with it. All the other colors in this package just magnify and perfectly compliment the depth of saturation in this fiberI tried several new techniques with this yarn with the help of livestreams Natalie taught. I added my wool nepps then, using the top, spun a very shear web over the nepps, securing them from flying off. This allowed me to hold several nepps onto the single and yet they weren’t covered so the colors could be seen. I loved the interest this added to the single in between the long locks that hung.
I used just a few of the longer fibers to secure shorter staple curls, like an invisible ply, I loved this new to me technique and found it to be a brilliant way to avoid the need for a second ply, as I wanted to keep this yarn a single. I did my first ever thick n thin, using this top and was successful.
There was so much fiber it filled my jumbo bobbin and I had a ton of fiber still left over. I’ve decided to start saving bits leftover for a future “kitchensink” skein.
My shanghai single came off the bobbin pretty well balanced pre soak, and I only had a slight half twist at the bottom. After a shock in some hot and cold water to help stabilize and slightly, very slightly, felt those fibers, I have no doubt my skein will hang straight and balanced. Which would be another first for me, a balanced spun single.
These scrapboxes along with the tutorials on livestream really are incredible. Not only opening my toolbox of techniques, but I can proudly and confidently say, I’m becoming a better spinner with bad ass looking yarn! It’s always easier when the fiber is amazing.
Handspun adventures 7/16/2014 Scrapbox Edition Water Lily
Water lily handspun finished yarnNamaste Farms ‘scrapbox’ edition posts will be seen, more than once,in different themes as my collection is growing….
These are such a treat…
So far, I have Scrapboxes in themes, California Goldrush, Woodstock, Coral Reef, Perfect, Tiffany Renessaince, Shanghai, and more coming….
So, bringin it back to the Namaste Farms Scrapbox in Lily.
Now, the “Scrapbox” name was actually inspired by, her adorable rescued dog Scrappy, and his cute face is pictured as part of the logo.
Namaste Farms Scrapbox Logo – with the beloved mascot Scrappy *scrapbox logo belongs to Namaste Farms*What comes in these scrapboxes is just that, very generous portions of scraps. A little bit of this and a little bit of that. Each scrapbox has it’s own personality and we get a teaser photo of colors, showing some of what one might find in these boxes.
Having more than a few of these, I’ve never been disappointed. This was the 1st one I spun up. I chose to start with the
Water lily inspired scrapbox.
Water Lily teaser photo *photo belongs to Namaste Farms used with permission*
Please note the pink ball of novelty yarn on the left, does it look brain textured to you? As you see, the teaser photo doesn’t show what all came, there was much more, that’s what I love most… the surprises I don’t see until I open the boxIt came with several different fibers, locks, rovings, beads, thread, novelty yarns, nepps, sparkle (both Angelina sparkle and firestar) and more. I used everything but the beads and didn’t use all of a pink pencil roving. Each box has different fibers, different add ins, and tons of inspiration.
These scrapboxes are like being given your cool friends stash for one hell of a deal. Because, in fact… They are being made from Namaste Farm, (Natalies) stash, which includes, the late, brilliant, Janice Rosemas, stash.
Both ladies, made high end yarns for personal use and sale.
I love other people’s stash, hee hee, and the stash that’s being shared here, is exceptional, and special. Truly, I have lots and lots of stash, no shame here, I love my stash, and I won’t apologize for any wool piggery, should I be accused. Having recently moved, my cleverly stashed away stash and it’s abundant size was more clearly revealed to me. It was contained and had a place, but I will say I hauled a lot of wool to the new pad.
When it comes to the scrapbox, it’s not like buying a braid or a batt. Though a scrapbox may contain scraps of each of those.
In terms of value, these boxes can’t be weighed in ounces (although the due to the variety of fibers, the add ins, that range from fancy feathers, to lamp work beads, long locks, etc etc)
I cant really list what is in each scrapbox as, it’s never the same, and feels more like a surprise, almost as if one was in a club. Opening the box, is sooooo fun. Everytime I get a new one, it’s like my birthday… Sure, I know the color theme I ordered, but what else comes, are extra surprises and plenty new to me, things to try.
If I collected each of these items in just one box separately…. I’d easily be a few hundred $$ in, and the boxes allow one, such as myself, to sample a hefty skein amount of different items. Scrapboxes currently seem to run in the $30-$40 range generally, this includes shipping in United States. Shipping to Canada is an extra fee.
I did purchase one in the $40 range(California Goldrush), that box had high end fibers, like cashmere, angora bunny, etc and addins like vintage beads and gold. Yes, real gold. Which, I never would have even thought to try, but gold leaf actually sticks to the fiber and just meshes in, wrapping around fibers perfectly….. Ok I’m getting off track, that’s another box for another handspun adventure… It just amazes me how creative people are when it comes to handspun! Ok, Back to talking the water lily scrapbox.
Texture novelty plied fluff nepps
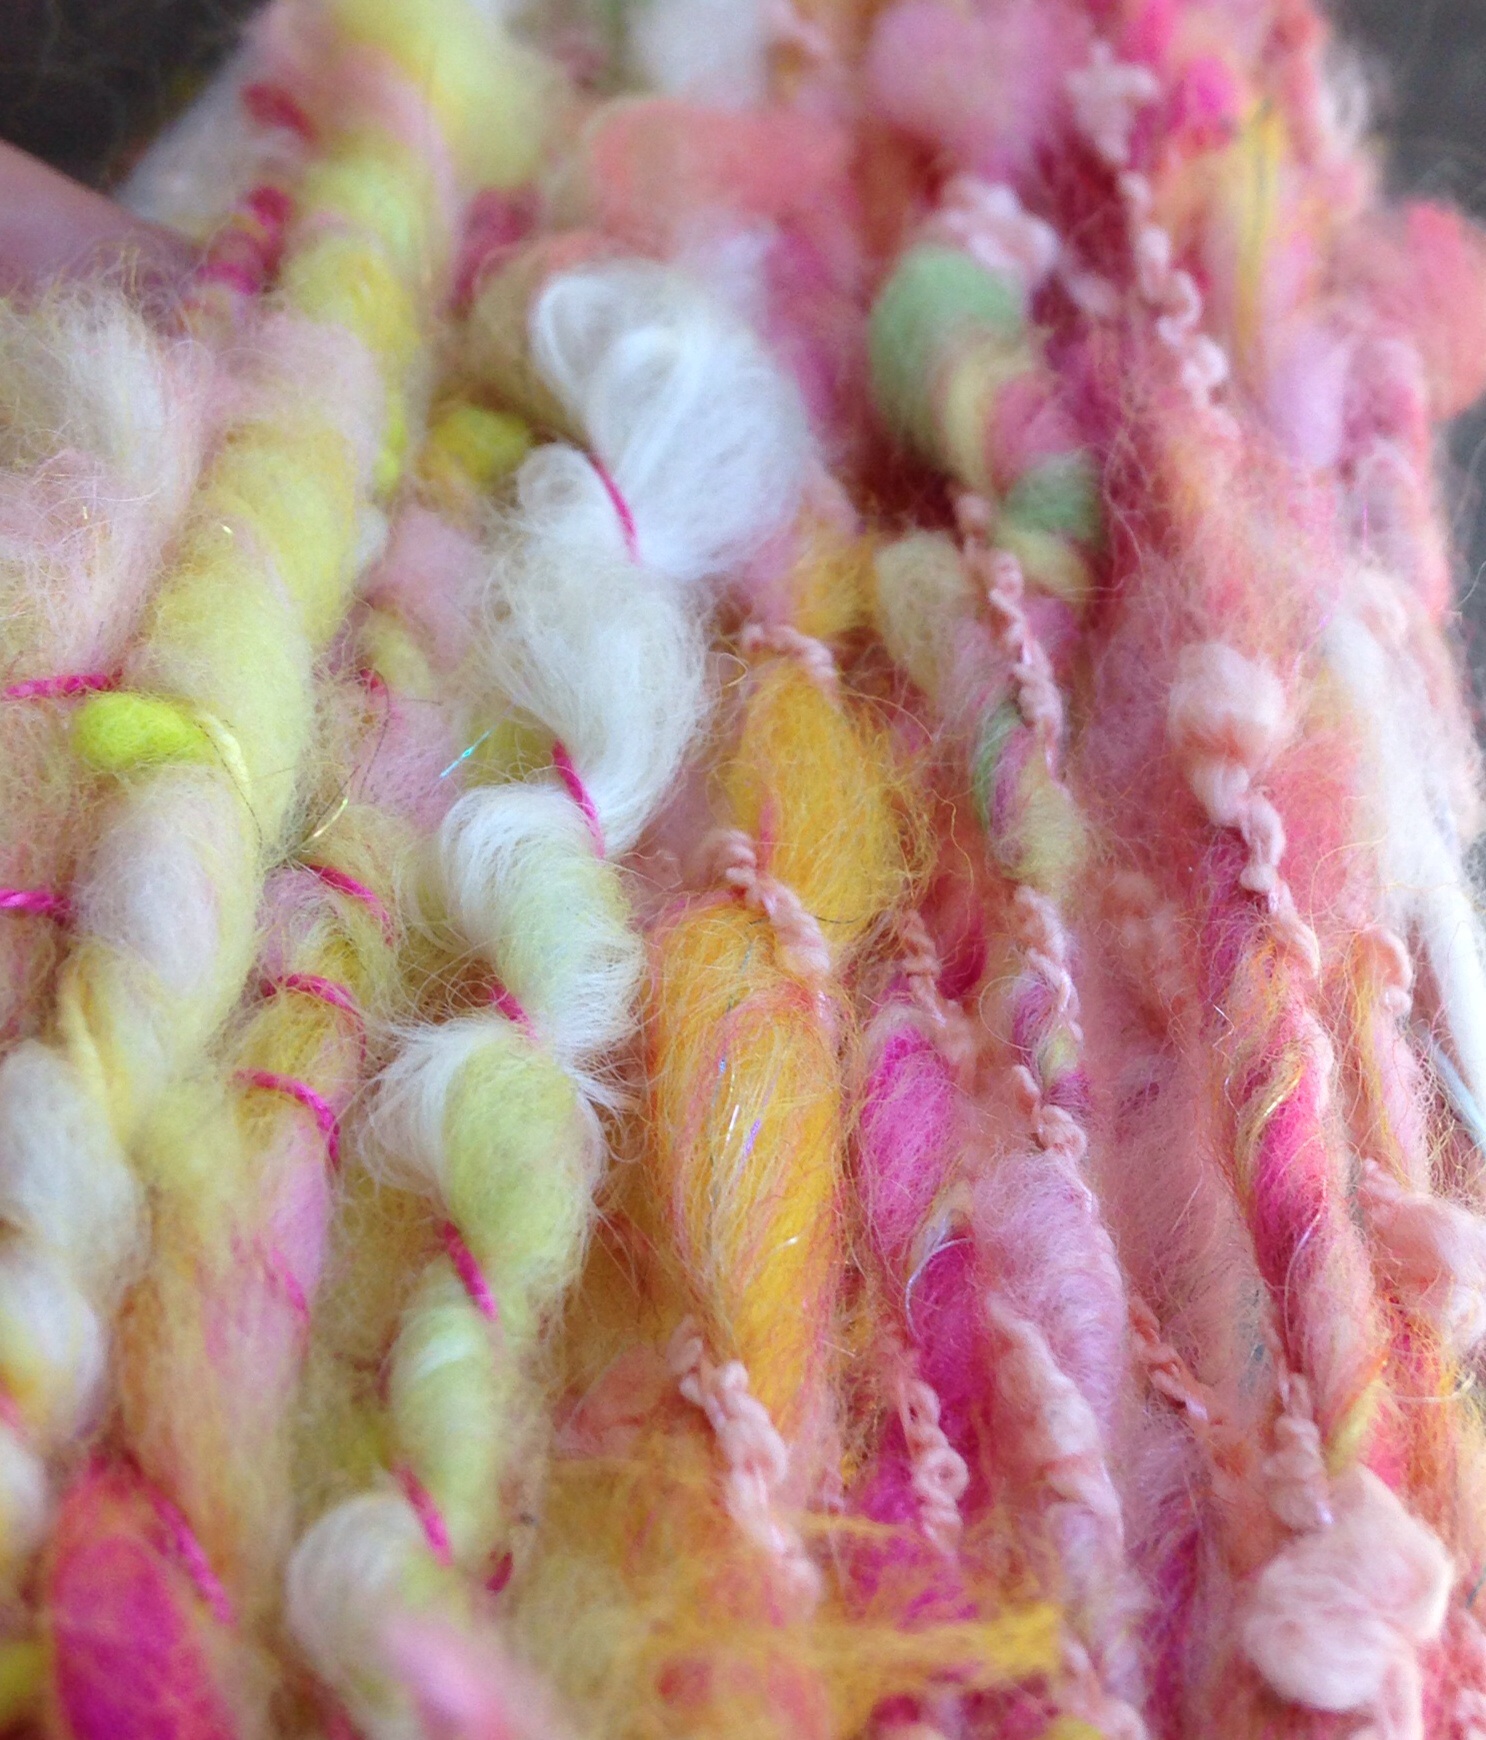
Water lily handspun
Seeing what others are doing with their scrapboxes and fibers have inspired me. I’m getting more fun out of spinning artisan yarns. At the very least I wanted a fun, fluffy spin. Because the fibers are dyed and ready to go, I decided to card them together, in a way so that it might create color stripes.
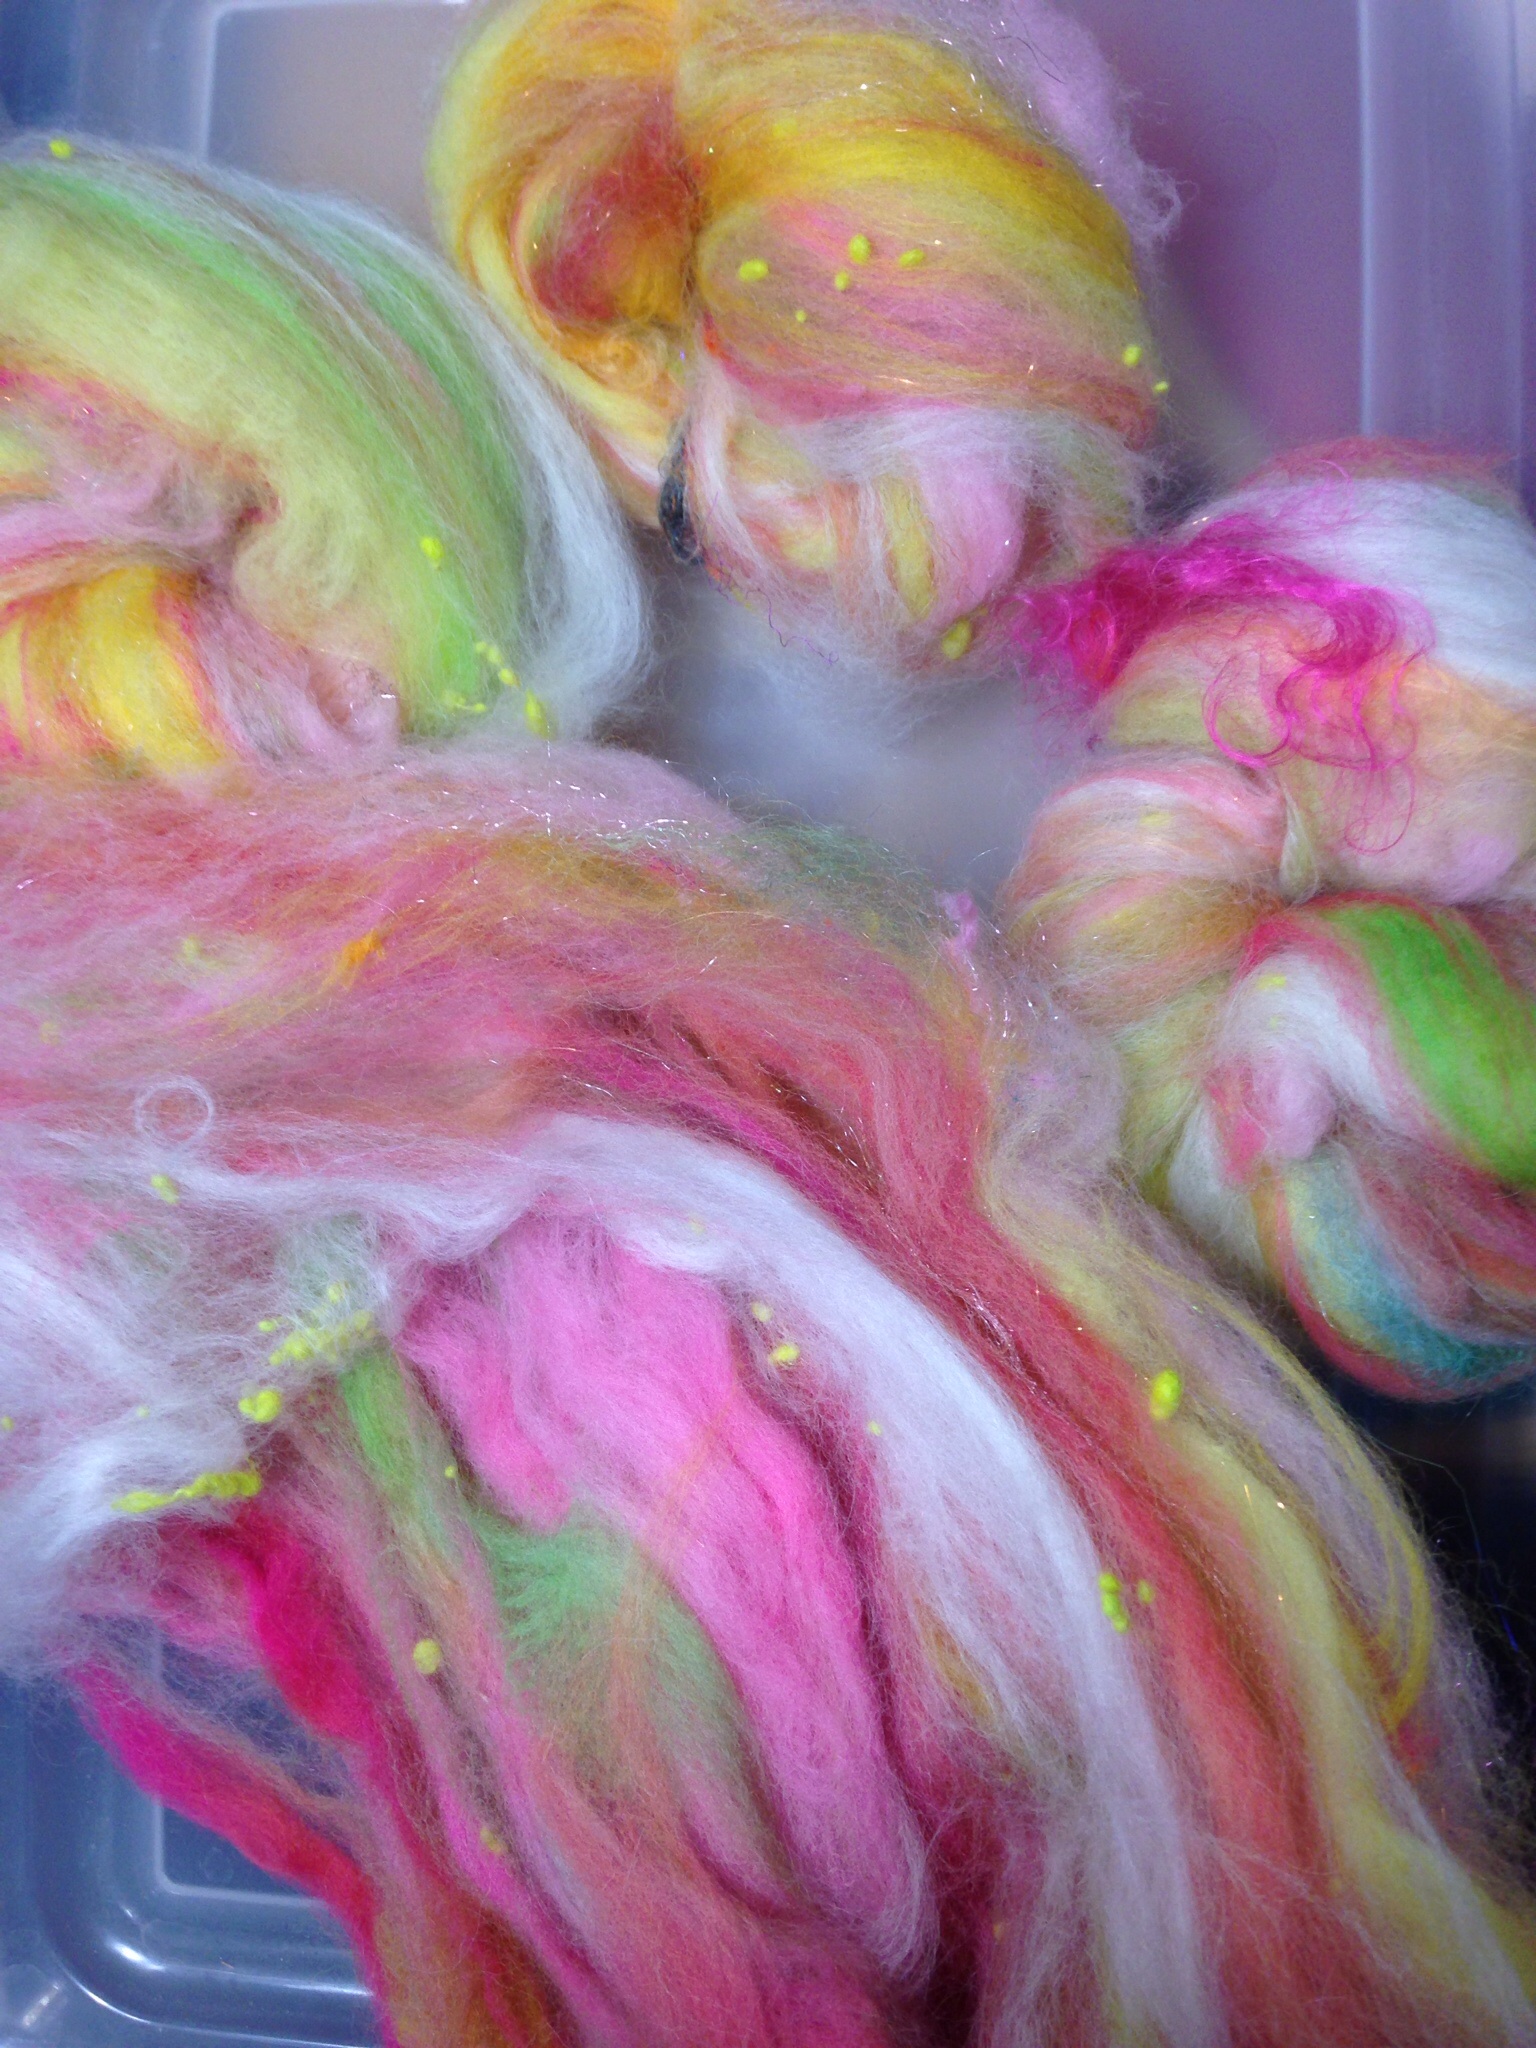
Water lily drum carder playThe lily scrapbox color theme had lots of color.
Different shades of pink, peaches, oranges, whites, deep golden rods to bright yellows,water lily pad leaf greens, a lighter pink novelty yarn, dark pink thread, pieces of a pink handspun made of something silky, different types and colors of sparkle that matched the wool.
I honestly could not say all the varieties of fiber included in the box, as there were many different types, some softer than others, some pencil roving, some lock form, some fine wools, medium and luster wools. There were beads that I decided not to use this time, and I added in with the Tiffany scrapbox to use later.
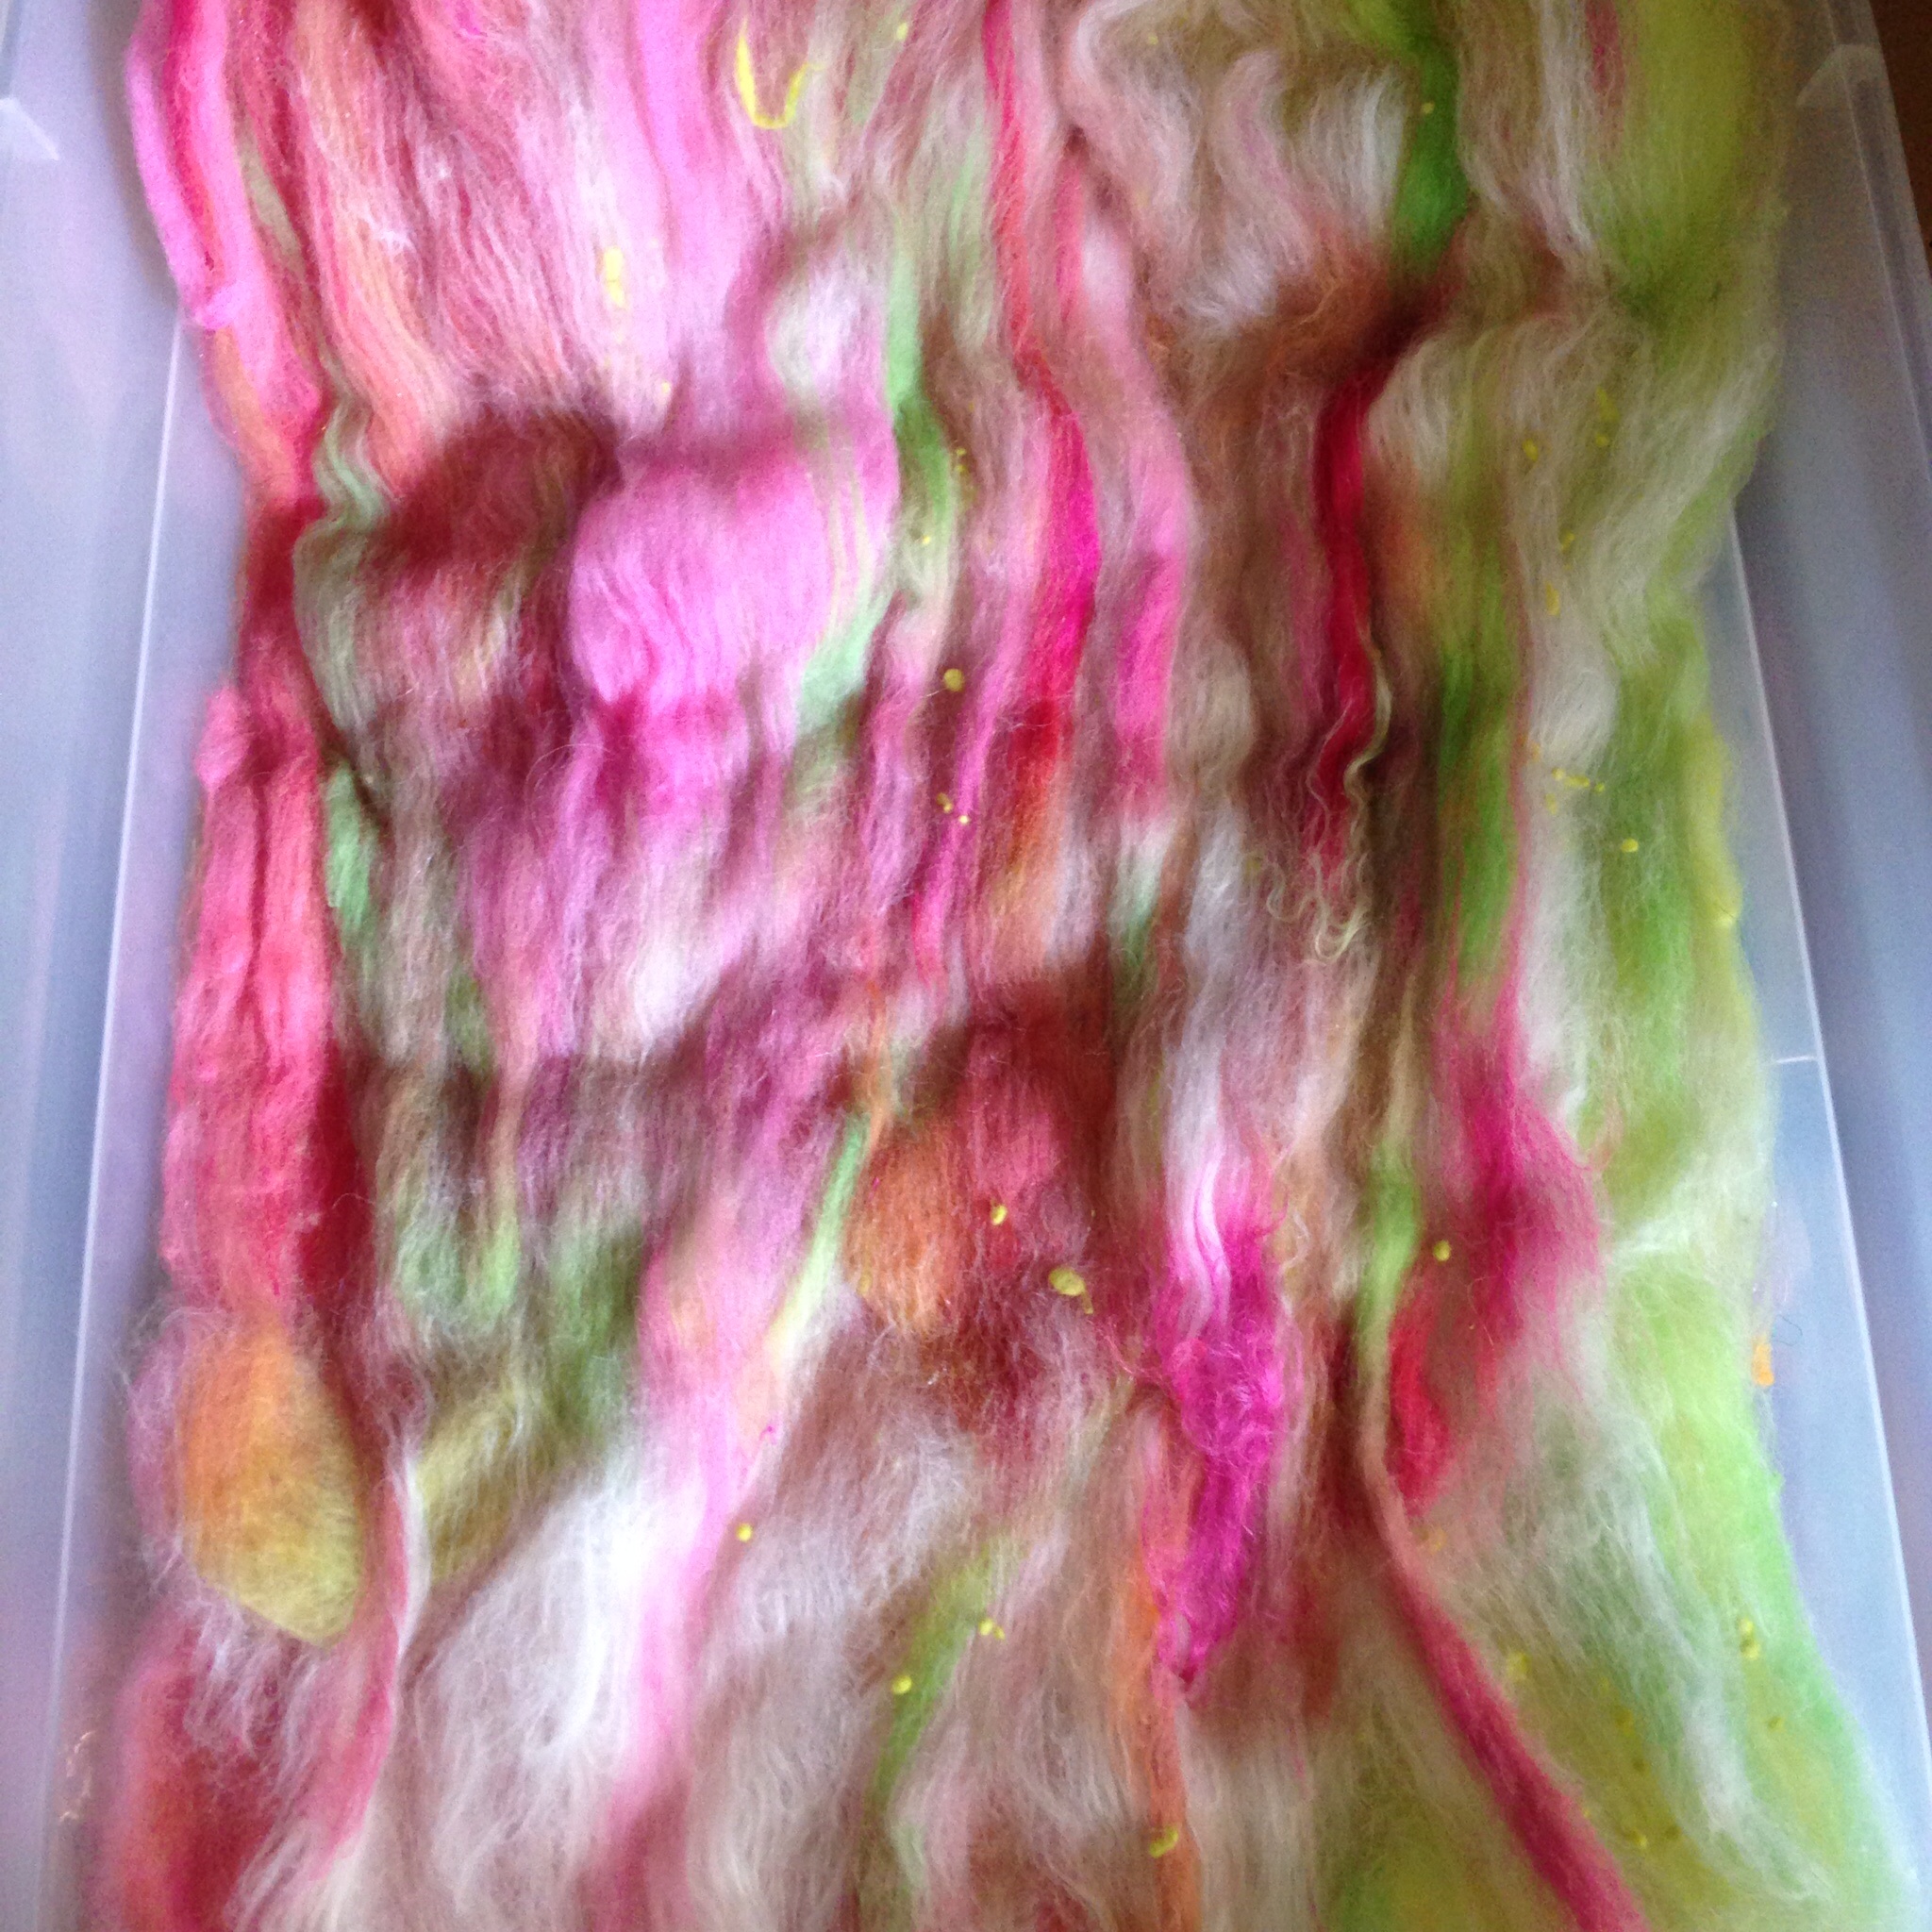
First taken off the drum carder
With lily, I decided to make a batt, and then turn that into a roving with most of the fiber. Each color in its special place, sparkles, nepps, Angelina, silks…. Etc I made specialty fiber addin in woolsandwiches, lastly, I painted on the carder with the locks to keep the curl, straight to the large drum, instead of at the licker in drum. Once that was finished, I took the batt off, the outside was beautiful, I peeled back a layer and inside it hid more treats of color for me.
Batt layers peeled back to reveal inside
I decided to strip the batt, just started at the top and split straight down, then gently drafted the batt strip into a roving exposing what the batt was hiding inside.
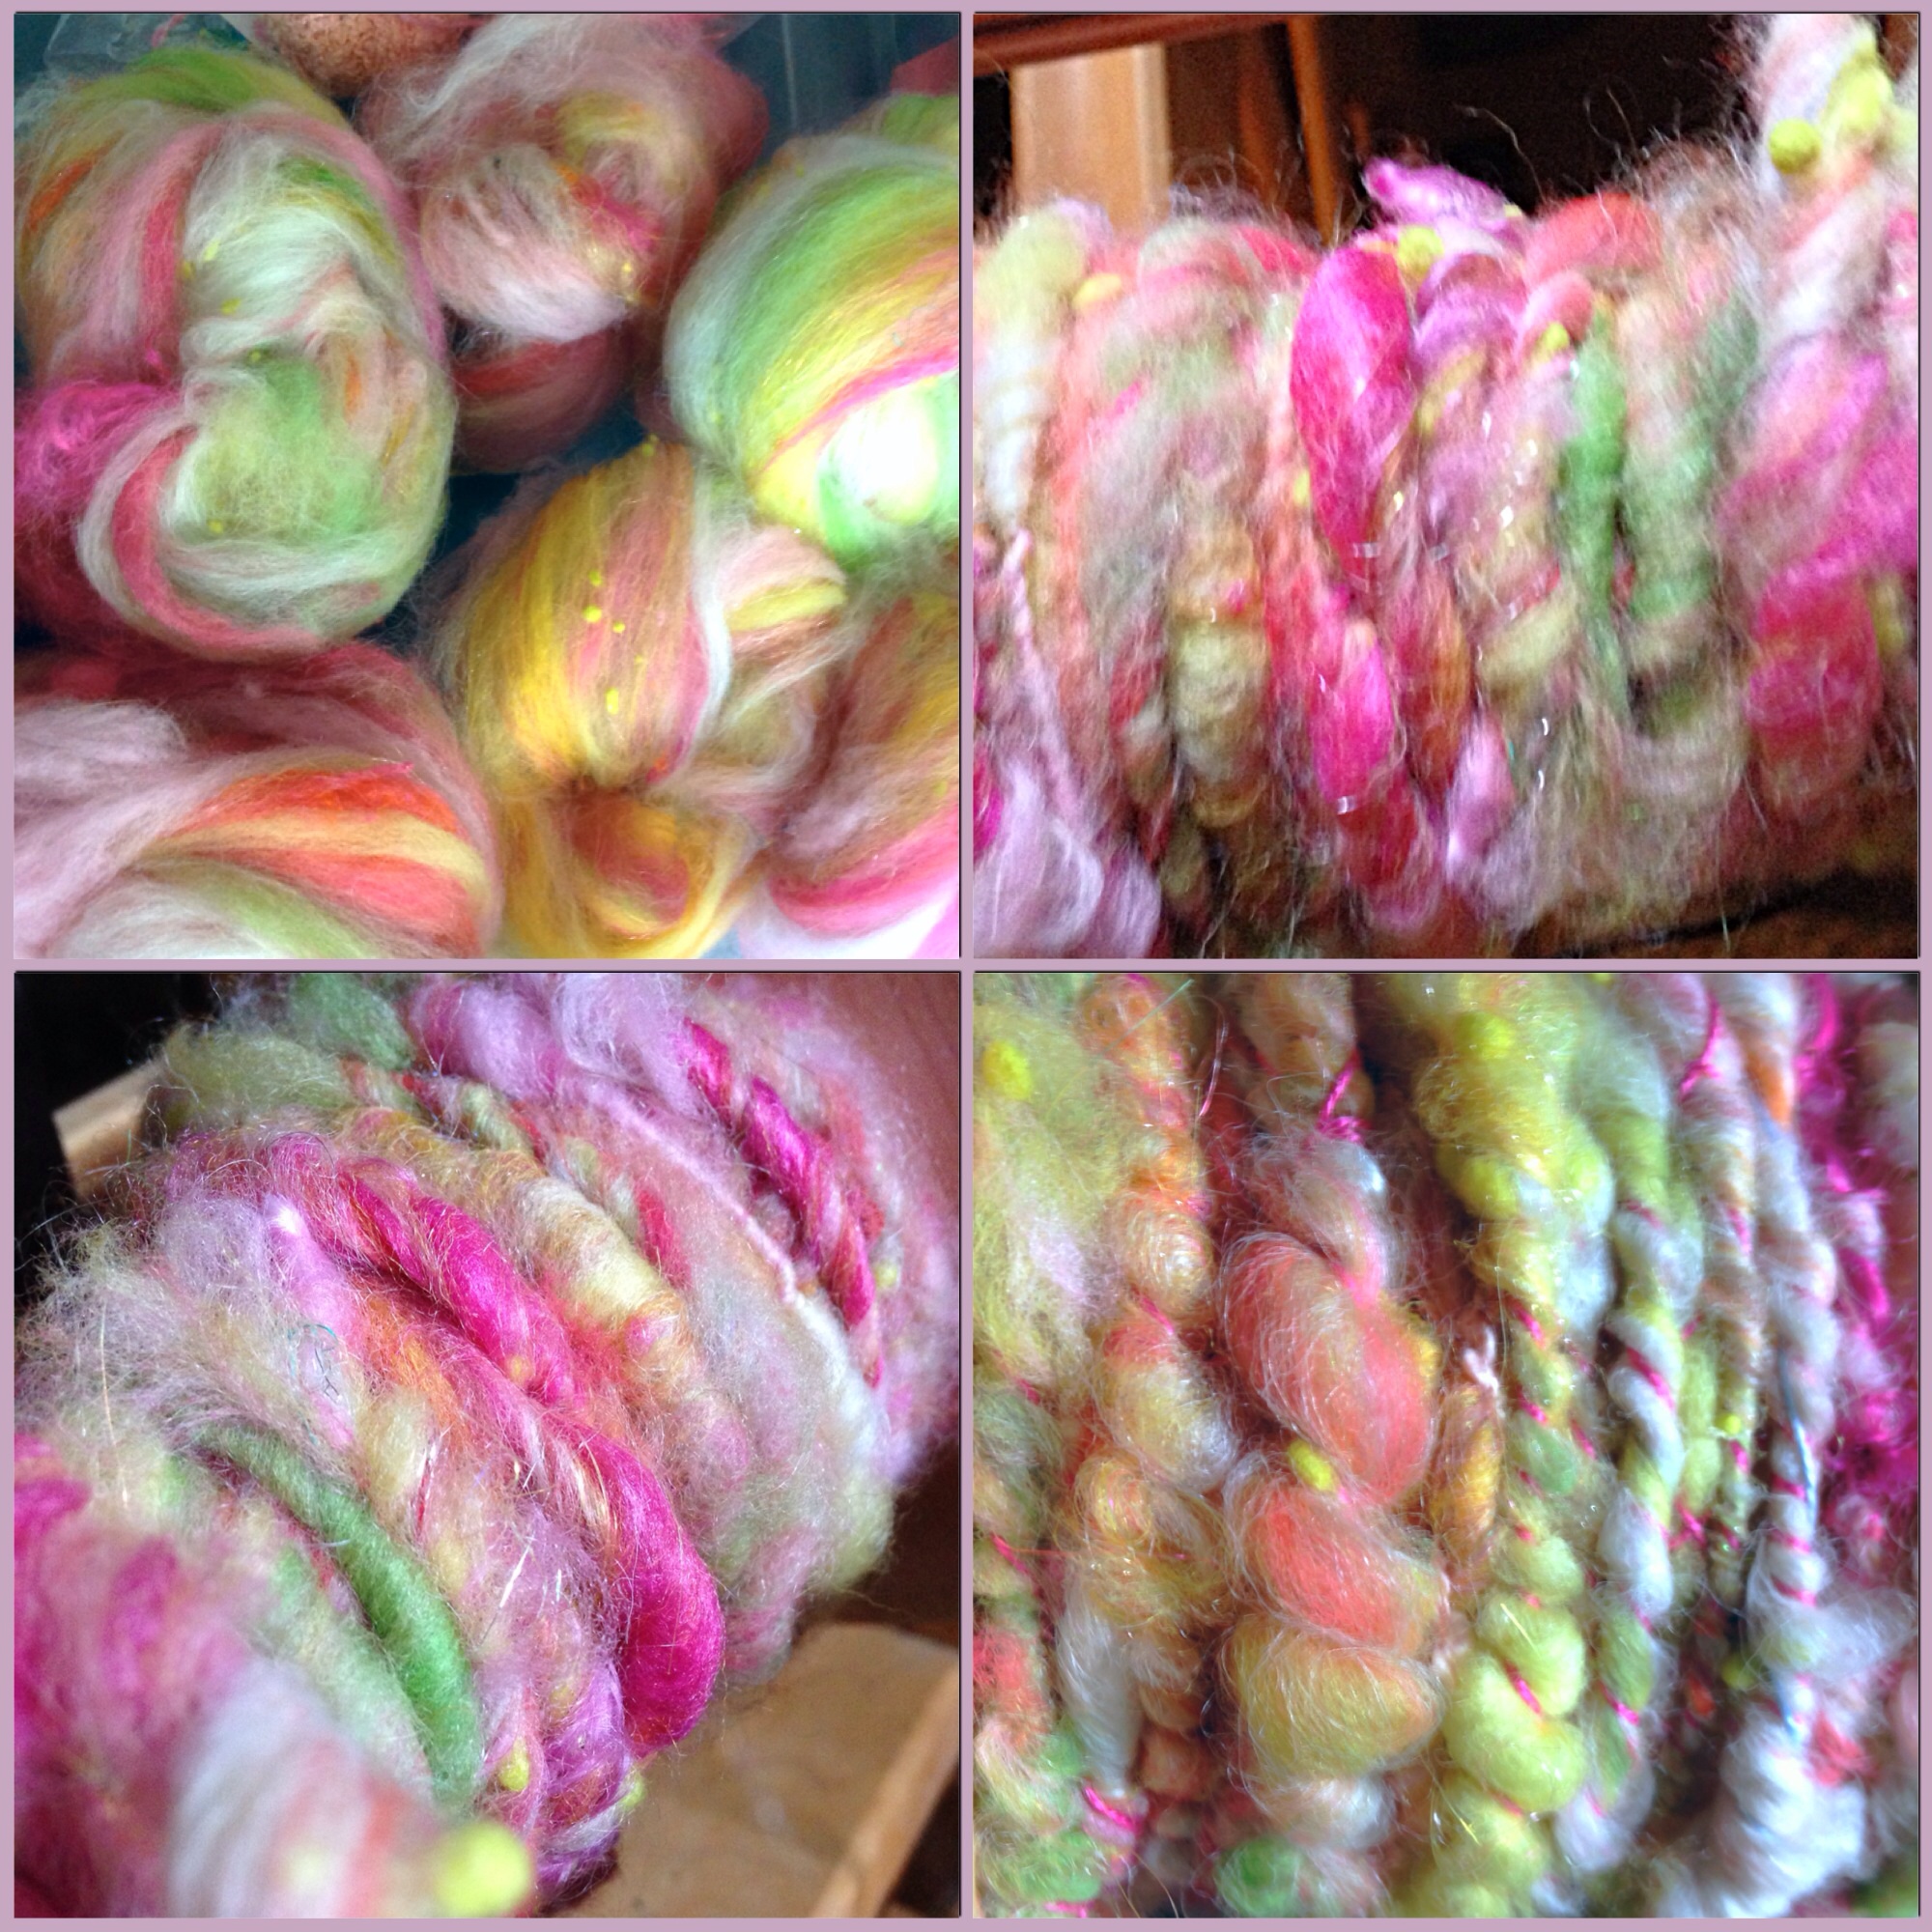
Once finished drafting my strip,I rolled it into tidy nests, ready to spin.
Tearing my batt into strips to draft into something more manageable Water lily nest ready to spinI used my Matchless spinning wheel, with the jumbo head and bobbin, to allow for more fluff to pass through the orifice. I tried a new to me method, pulling fiber left and right, keeping my best to stay at a 90° angle (aka, coreless core spinning). In the very beginning, I was slow with my hands and quick with my feet, overspinning, getting some unwanted kinks. I slowed my treadling, made some adjustments, and settled into the motions my hands were making.
This was my first ever try spinning nepps. These little felted wool balls, like cupcake sprinkles, except for a fibery treat, to my surprise… didn’t always stick. Some of them actually shot out like bee bees. As I spun, nepps, softly shot at my pups napping beside me…I didn’t expect that, and neither did they. After a few misfired nepps, the dogs got up to lay, safely, elsewhere hee hee.
As far as the nepps go, when they do stay in, they look really neat, especially, the nepps being in a different color then I was currently spinning. Nepps are going to take me some practice getting use to, but fun nonetheless. I wonder if my homemade nepps will be different since they aren’t yet the hard wool balls, but rather, the tiny soft curls.
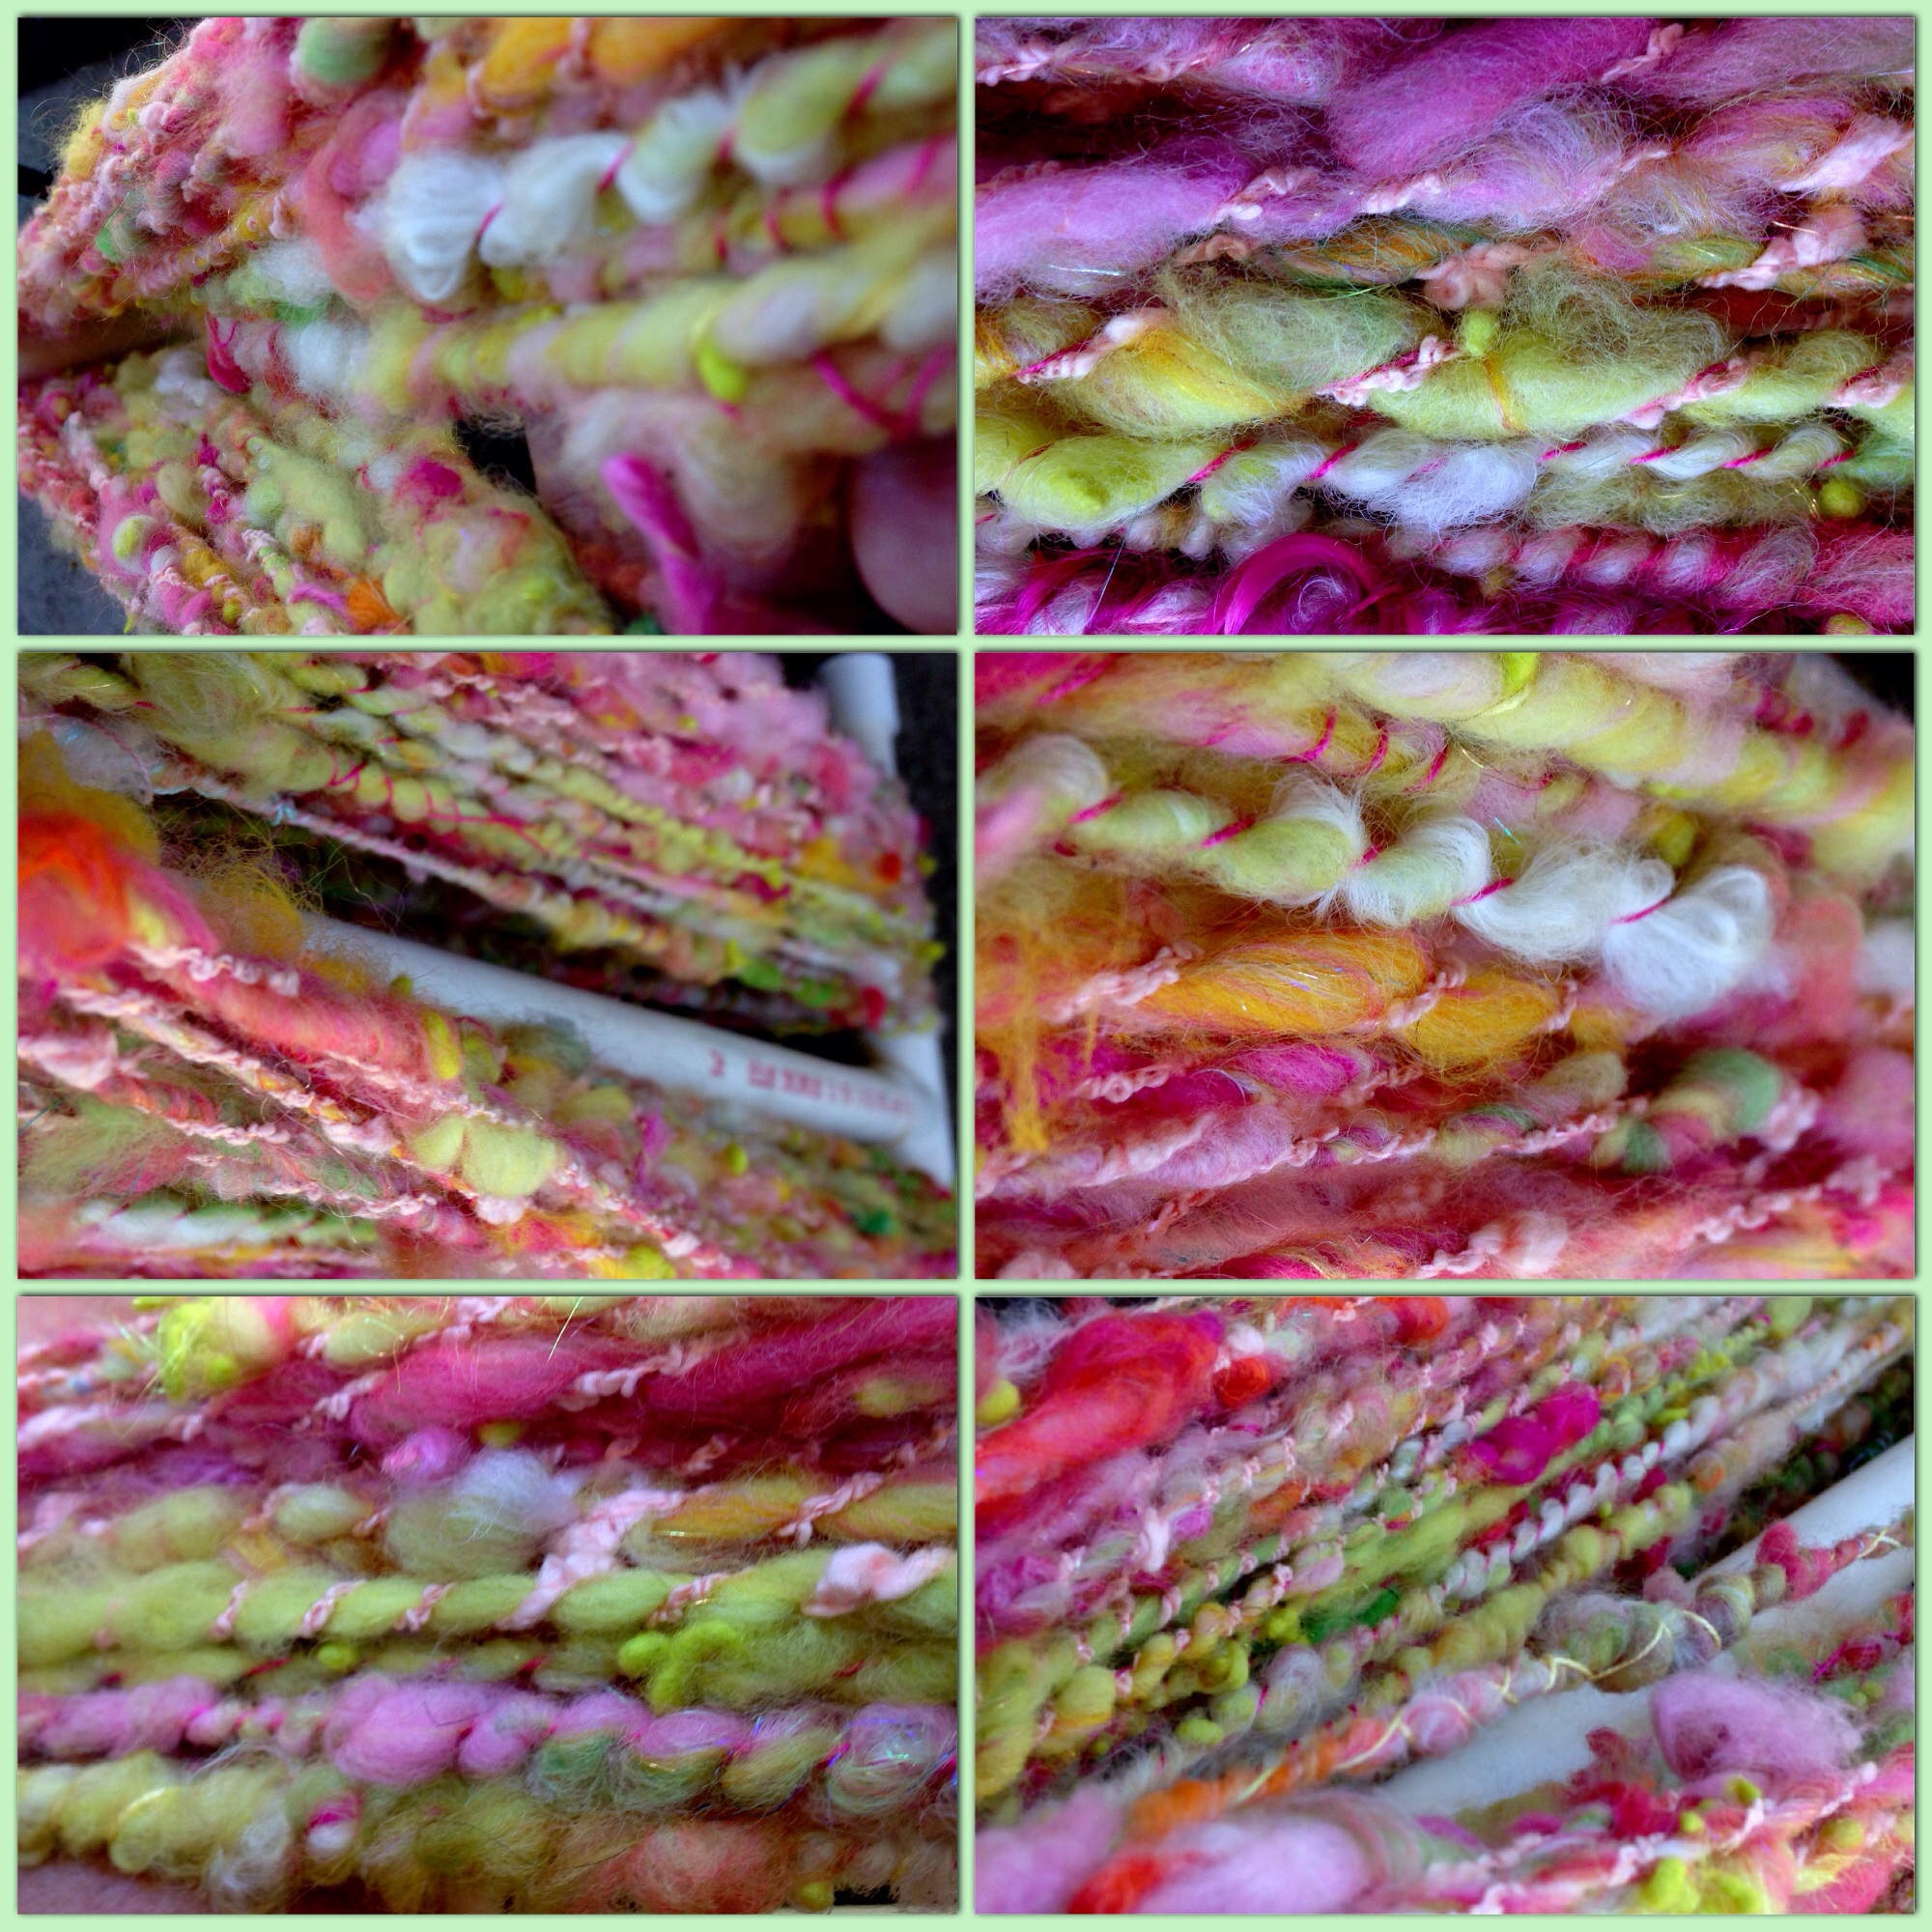
Nests, singles, plied on bobbin, sprinkled with neppsOnce plying, I started with the novelty yarn, wound in the ball. It literally had texture, that looked like a brain to me. That one ball of brain yarn was in the teaser photo for this scrapbox, as seen above, and I had to have it. Come on, brain yarn, everyone?! You have to understand my intrigue.
Once on the niddy noddy, you can see different pliesOnce the brain yarn did it’s job, I switched to, the bright dark pink thread. Which landed in lighter parts of the single I was plying, making it really pop. I love thread plying. I love the way it looks, the way it makes the other single look more puffy, and how it can stack next to each other making a faux bead, plying with thread gives handspun a completely different look, that I love. I switched next, to another thread, that was pastels in pink blue and green, all the colors in my scrapbox. Until I reached the end of my plying.
I looked at my bobbin, and I wasn’t quite sure. Had I done the fiber justice? Was it a good yarn? Was it pretty? If one were to look under my ravelry.com account (trishys)
They would see, mostly two or three ply yarns, that I’ve tried my hardest to be consistent WPI. The whole artisan yarn, tailspun, lock spun, add ins, has always intrigued me, and in fact what started my spinning to begin with. Seeing yarns that were, more than yarn, it was art! Just gorgeous and fun and showed off the fiber. I wanted to do that. Learning to spin these years, handspun is an art form itself, and I have so much still to learn and experiment and try. I do consider myself a spinner, a real spinner, and a good spinner at that. Spinning a yarn like this… is very new to me and I am loving it.
I still love my regular (more commercial looking)handspun. It’s easy for me to make now or more natural. It’s relaxing, I can do it without thinking. But I needed to try the luster packed locks, those beautiful curls that flow exactly the way they do on the animal. Exactly, like they do on the dancing rock star, sporting some fringe!
So, I am not shy about the fact my yarns that tend to be more on the artsy side, may not be as up to par as I would like them to be….BUT
considering I’m on a new wheel, my matchless with the jumbo bobbin, and new mediums from nepps to gold to true long, and I mean long, teeswater locks, I’m giving myself a little break from the perfection I’d strived for making yarn those first years.
Truth be told, my first ever handspun, looked like art yarn only because it was so overspun, it coiled onto itself and even soaking, thwacking and weighting it while drying did NOTHING TO HELP STRAIGHTEN IT. I’m not sure I’ll ever use it, mainly due to how good it feels to see how far I’ve come.
In any case, my lily scrapbox handspun…
Water Lily Scrapbox I always compare my handspun to others, I love other peoples handspun, no two the same. Some, simple, and new, some with purpose for a project, while others just spin with nothing in mind but letting the fiber decide what it’s going to do, some better then others, as it’s just intuitive, while others have to really work at it. I consider handspun to be a true art. Much easier to make with excellent fiber, but it’s all awesome.
I decided to let my finished yarn rest on the bobbin for a day, and when I took it off…..
I must say I was pretty dang pleased with myself. It was well balanced, it was light, airy, fluffy, and I can’t wait to spin the next scrapbox.
It’s so hard to choose what comes next, since I have a feeling that with each spin I’ll get better and I want to save the special favs for the last.
The other problem with that is…. Each scrapbox is a favorite.
I’m also right in the middle of a major move, guess what was the last thing packed, and the first unpacked… Of course, my fibery goodness, how else is one to keep there sanity.
If you do get a chance, I highly highly recommend picking your favorite color and making the purchase if you haven’t already.
Scrapboxes can be purchased here http://namastefarms.com/purchase-scrapboxes/
A little about why you see so much of namaste farms…?
Plain and simple.
She knows good fiber, she doesn’t mess around with anything that is going to cause frustration, like excessive vegetable matter, felting (that wasn’t meant to be felting)cotting, she is honest to a fault, about her wares and she stands behind her product. If it doesn’t meet her standards, she refuses to sell it, taking the loss. She sets the bar high when it comes to fiber. There is a reason she sells out so quickly and has such a following who love her fiber!!
If someone is unhappy, then she takes it back, no problem. She is definitely a fiber favorite of mine, that’s no secret,
I have several other favorites, you will hear of them too.
I have the stash to prove it
lots of fiber vendors, dyers, and artists, I want to share. These scrapboxes are just so inspiring…
Happy spinning
Everytime I spin something new, I will make a handspun adventure post. Some posts will be “an edition” as they are part of a certain collection, or from the same vendor, or same prep, or maybe a club. When I find something I adore, I’ve ended up collecting quite a few. To give examples of said collections, there will be Namaste Farms Scrapbox Editions, Loop! bullseye bump editions, Corgihill Farms editions, Beesybee’s Bfl/seacell edition (I have a thing for the seacell and properties of fiber made of seaweed-which of course I will expand on in that post) etc etc.
Case in point there will be a loop bullseye bump edition
Handspun adventures are just that, my experience, the fibers used (if I know, sometimes, it’s a complete mystery), the fibers prep. The method it was spun, to achieve desired effect.
This handspun was a new to me method, out of the book, The Spinners Book of Yarn Design by Sarah Anderson, with the method called the crepe chain ply. Fiber used was Politically Incorrect Fibers -std ball
If it’s a longterm project, such as spinning a fleece for a sweater, these will all fall under handspun adventures, but to help clear things up, I will add “the edition”, as well as, the date.
My newest “handspun adventure” was, I recently moved, and my nicely put away stash, was revealed to me. I’ve amassed quite the amount. I insisted it be the last thing to be packed and leave, and the first thing to be unpacked at the new destination. I drove my spinning wheels one at a time, they always called “shotgun” and were given special treatment, as any life-force needing protection would in my car.
Ashford Country Spinner, who had called shotgun, buckled in safe for the road trip. Can you believe this wheel also in it’s life traveled from Montana to Las Vegas, and when I took it from Las Vegas, it was dismantled and taken as a carry-on… Do you know the size of this wheel? This was no small feat
Lol. Remember, these wheels get named. I love my stash dearly, so naturally, I would not let anyone else “haul” it to the new location, except myself.
I was heckled a little bit. I was asked, “was I afraid they’d break my wool?”
What can I say, the stash told me it wanted to ride with me. Don’t take it personal. So, that is exactly what happened, I packed, hauled and unloaded my stash and fiber tools with the utmost care, and made damn sure, none of my wool “was broken” in the move. It did however, make me acutely aware of how much stash I have. And umm, it’s definitely not all up in ravelry. It’s more than I expected, I will say this though…. The hidden stash, or rather, the stash that wasn’t where the normal stash was…. Well, It fit in, where the rest of the stash was, no need for hidden stash locations and guess what.. There is still more room… Hee hee, that’s right, so I can tell you, I know I will get more, there is no denying it. Being I have space yet to be filled. Awesome, awesome news, for any fiberholic.
I would love to thank Judith Mackenzie McCuin for her tip on storing fleece in 5gallon buckets. Such an awesome tip!
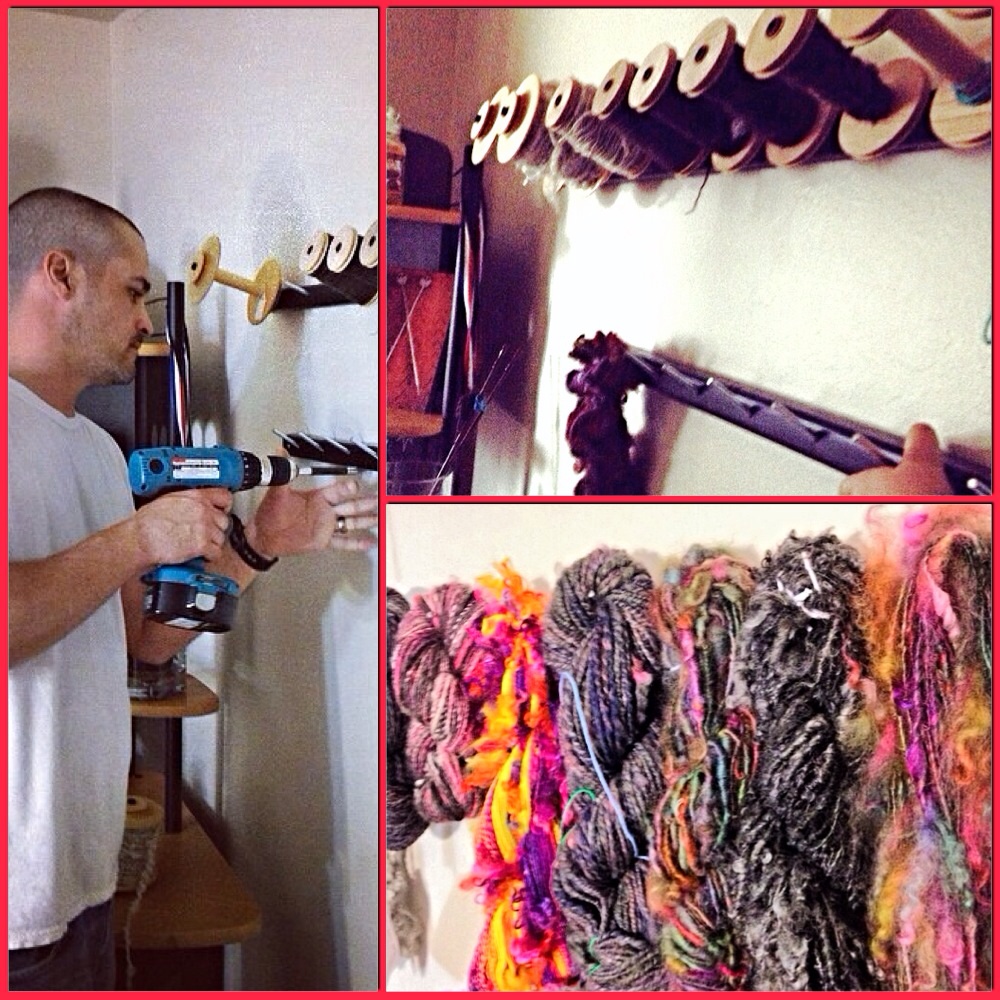
Most of all, I’d love to thank my husband. He has a hobby as well… Music. Which he has quite the stash of his own, several guitars (a hundred million guitar picks), a few bass guitars, drums, electric keyboard, pedals, beat machine, recording unit thing. Whatever… I totally get it!! The understanding why he needs 4 plus guitars, even though he can only play one at a time.? I soooo get it. They each have a different purpose, so he doesn’t question why I need several different wheels and spindles, fiber tools, fibers, they do different things. I’m fortunate he has a passion, much like myself. He built me handspun and bobbin wall display/holders. That happened to clear up a lot of fiber stash storage. Allowing me to store resting/waiting bobbins, and to display finished handspun, probably clearing up the most space in my stash storage.
Hubby building me bobbin and handspun wall unit – he is the best. Wait until you see all the other fiber tools he has made
Its a a perfect match. Him and I and our passion for our hobbies. Music and fiber are a match made in heaven. Everything was moved safely, and we are making the most of our new home and the space we have. Although, this handspun adventure was of a different kind, it was an experience that needed to be documented.
Very soon I will be posting another handspun adventure… Of the edition kind. My first Scrapbox.
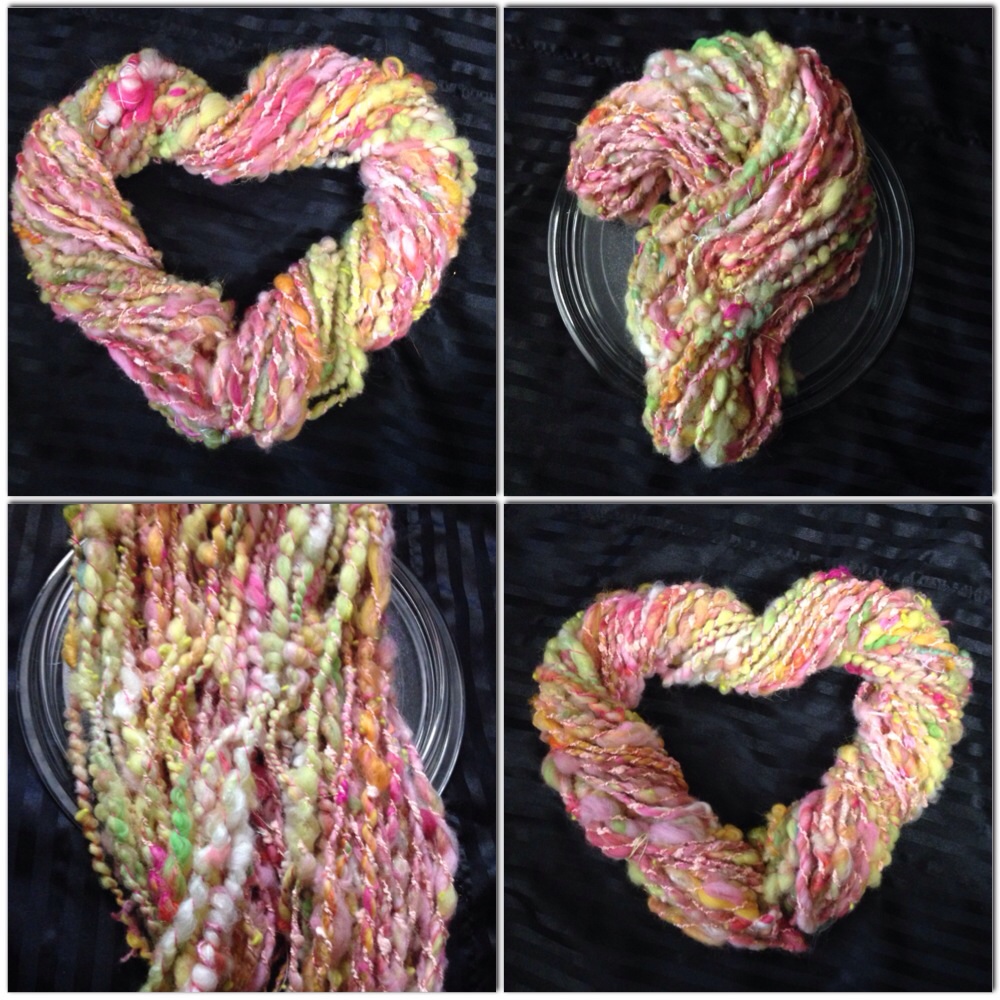
Neon sunset polworth silk with teeswater curl add ins
214 yards of happyThis handspun is made with Blue Barn Fibers polworth/silk rolags in the neon sunset colorway. With teeswater curl add ins, also from Blue Barn Fiber, in the neon sunset colorway.
I did end up with some barberpoling while plying, however, when woven or knit up I think the barberpoling will help the transition when moving from one color to the next. It is actually pretty finely spun pre soak, which came out to a 13-14WPI off the wheel.
Pre soak 13-14 WPIPolworth has an amazing way of poofing up after a soak and set.
Drying in the sun – that luster in that lock in the middle is indicative of why I love an amazing teeswater… Teeswater top vs teeswater locks, is a completely different experience. I prefer the lock, for sure.Which ended me up with a 10-12WPI yarn, stuffed consistently with the teeswater locks throughout.
post soak 10-12 WPI that polworth really fluffsI left a long beginning and end to the yarn without any locks. Ultimately, the idea of a thinly woven scarf is what I have in mind for this very special yarn.
I love how the colors are so incredibly bright. The purple melts into pinks, into neon peaches once mixed with the tangerine orange, and finally into a bright happy yellow. The way I chose to spin one rolag to the next, matching up the rolags colors, end to end, giving it longer color repeats. I see it being the perfect weft. I ended up with approx 214yards with 2oz of the rolags, and 1oz of teeswater, which didn’t play a part in the yardage the way it was used.
On the niddy noddy214 yards is quite a bit to work with…
It’s serendipitous the day I finished this handspun, is the day I get notified that my loom is shipping. What are the odds, that as I’m winding this yarn on my niddy noddy, after months of spinning it, is exactly when I find out my Schacht Flip loom is on it’s way? (The loom was ordered from schacht before my birthday may 10th, and an month and a half later it’s on it’s way)
I’ll need to practice a little on the loom prior to using such a special yarn, which is fine, as this will give me time to think about a warp.
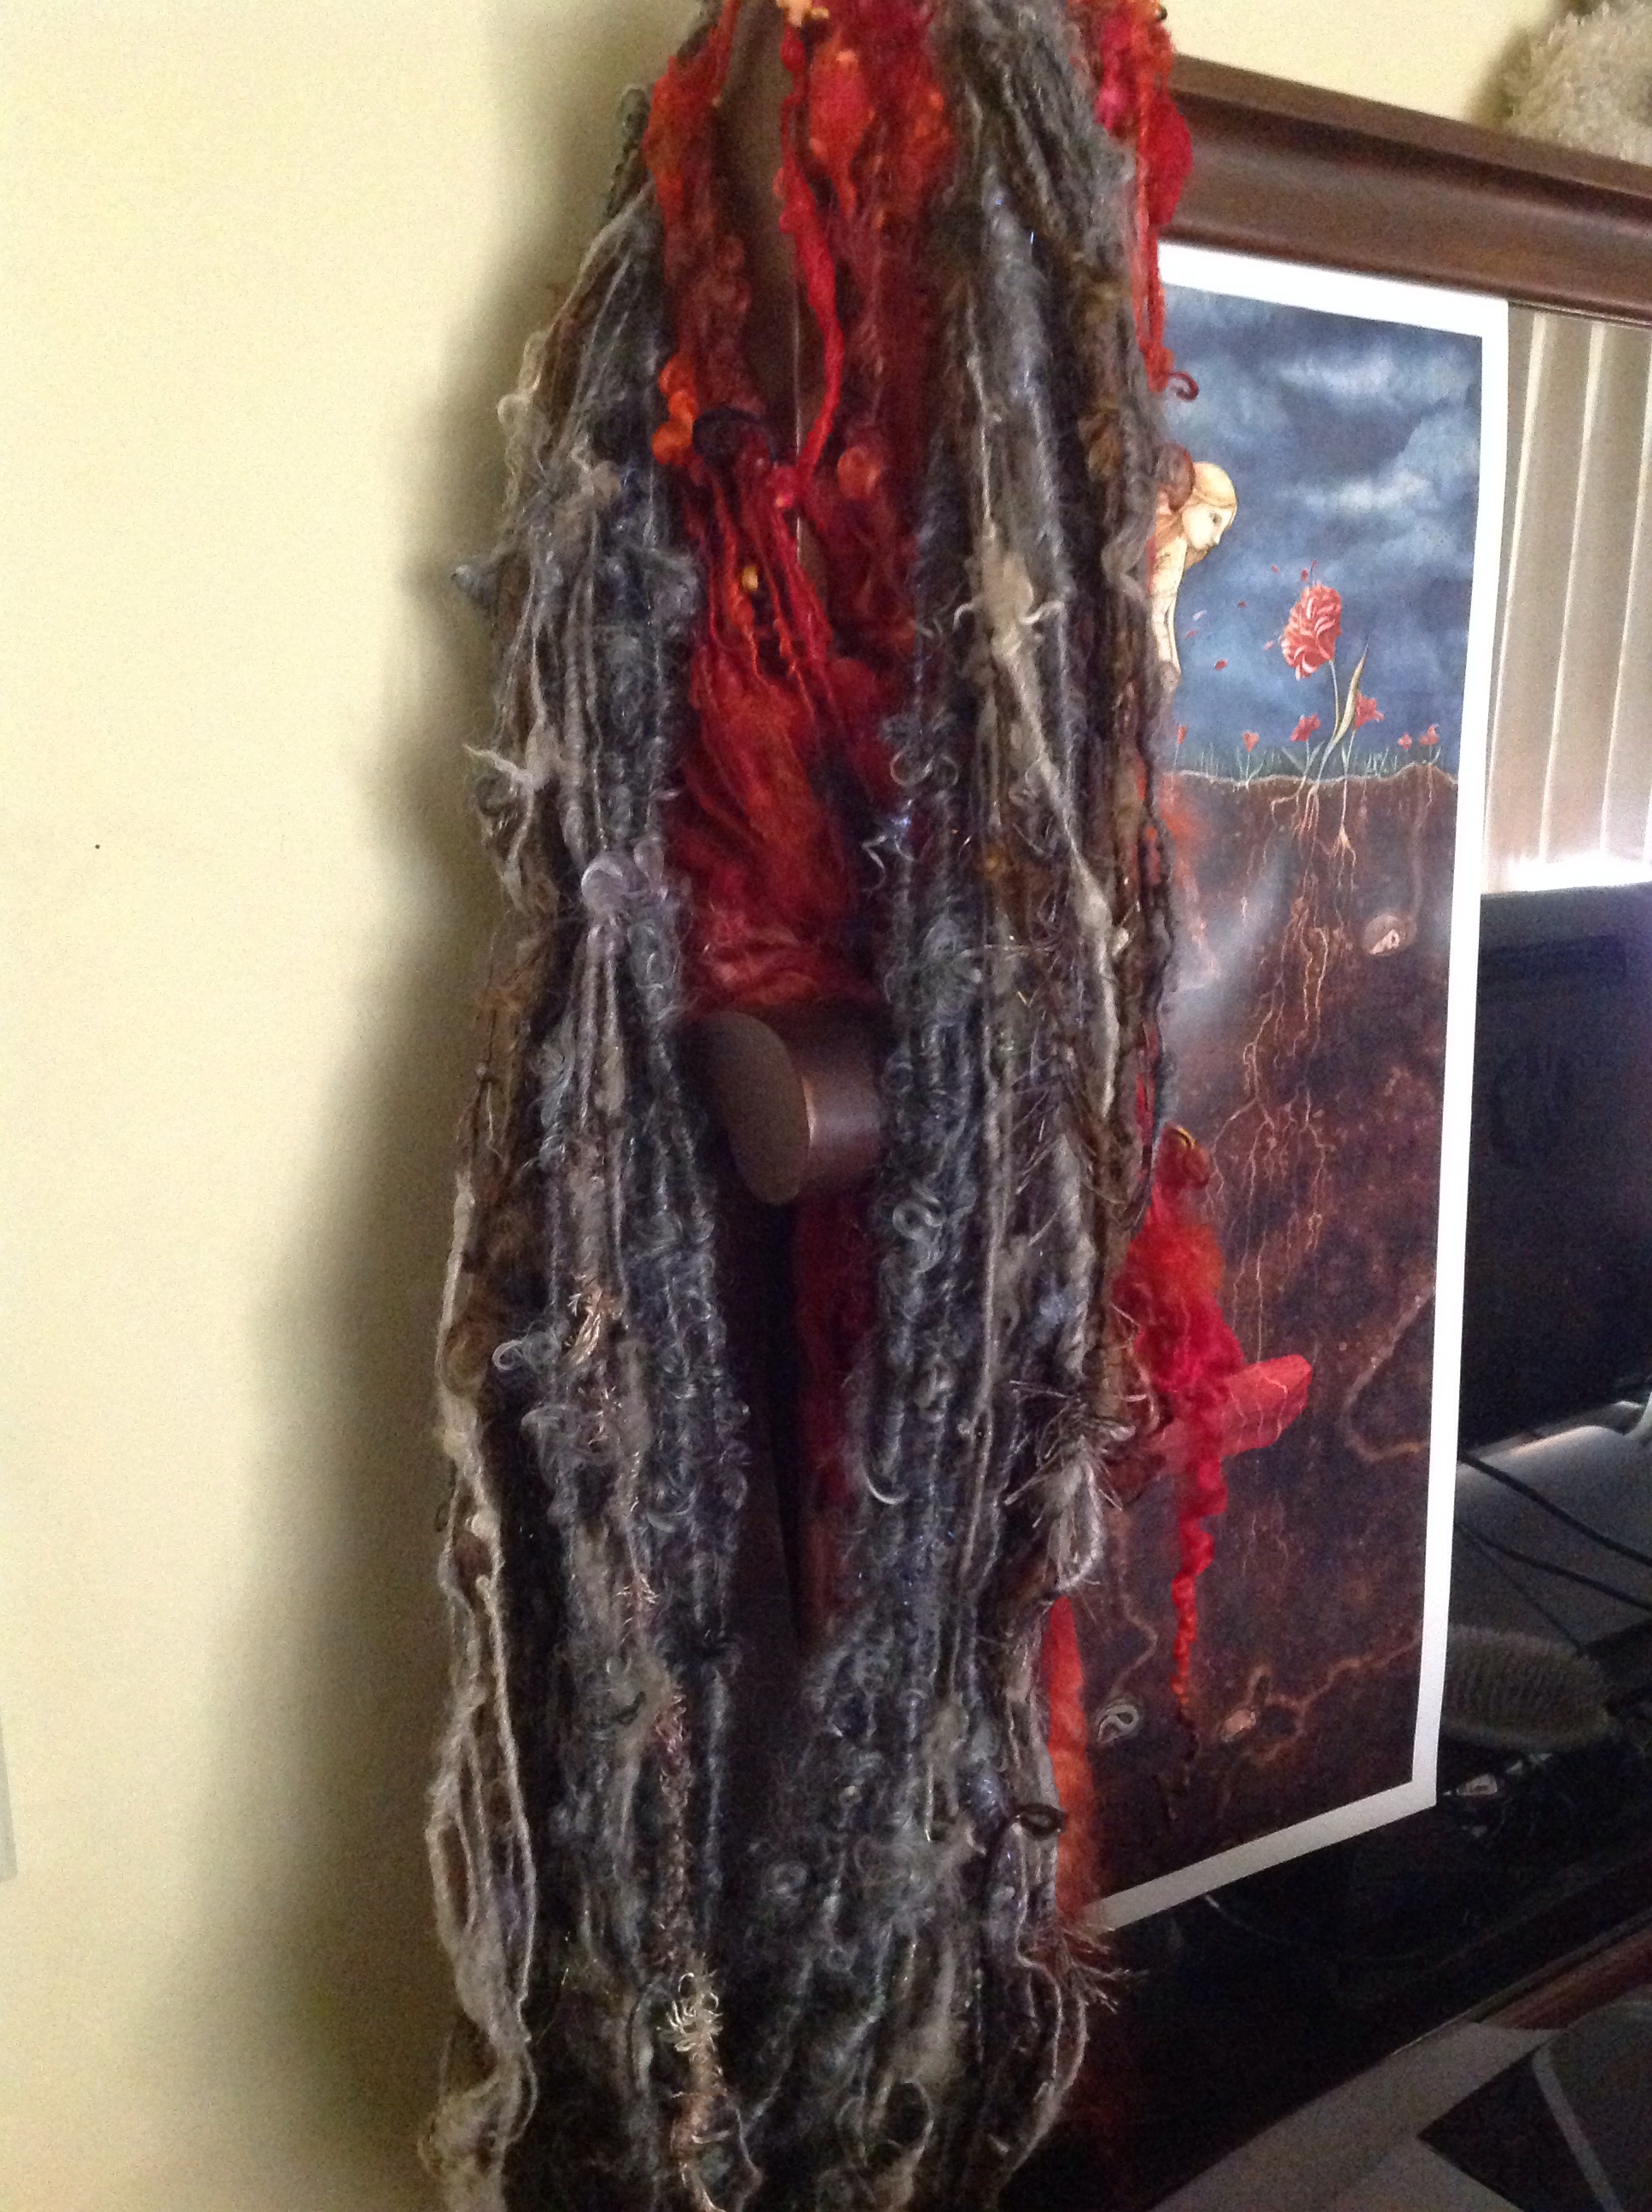
For now, neon sunset special is going to decorate my handspun wall.
Every time I see it’s bright happy colors, with the matching perfect curls, it just makes me happy, just being yarn, so I’m not in any rush…. Well, not until I have that perfect warp figured out.