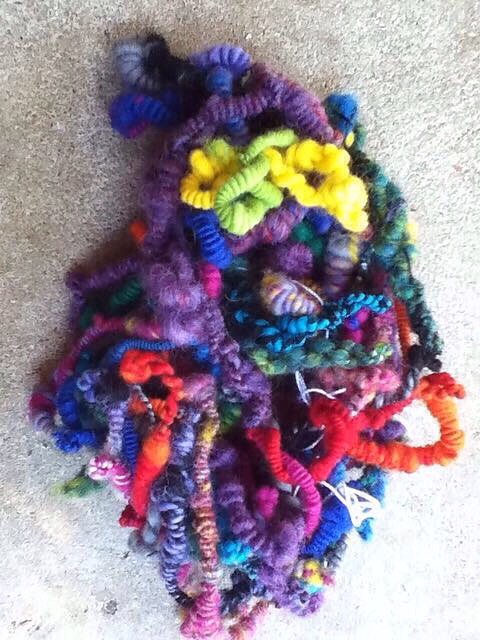
I think I was avoiding my oldest work in progress (the daisy square afghan), by way of, starting another project from deep stash.
My husband gifted me a drum carder and raw merino fleece the first Xmas after I started spinning. I was only spinning a couple months by this time and had no experience with raw fleece. I was so lucky that I didn’t felt/over scour/ruin the fleece during the washing process. After washing, I tried spinning and koolaid dyeing a few skeins but several pounds went into stash. And there it waited.
In my avoidance of the WIPs I already have going (daisy afghan, viajante, socks etc) and should be doing I went to my stash.. just window shopping, really. I came across one of several bags of this merino fleece.
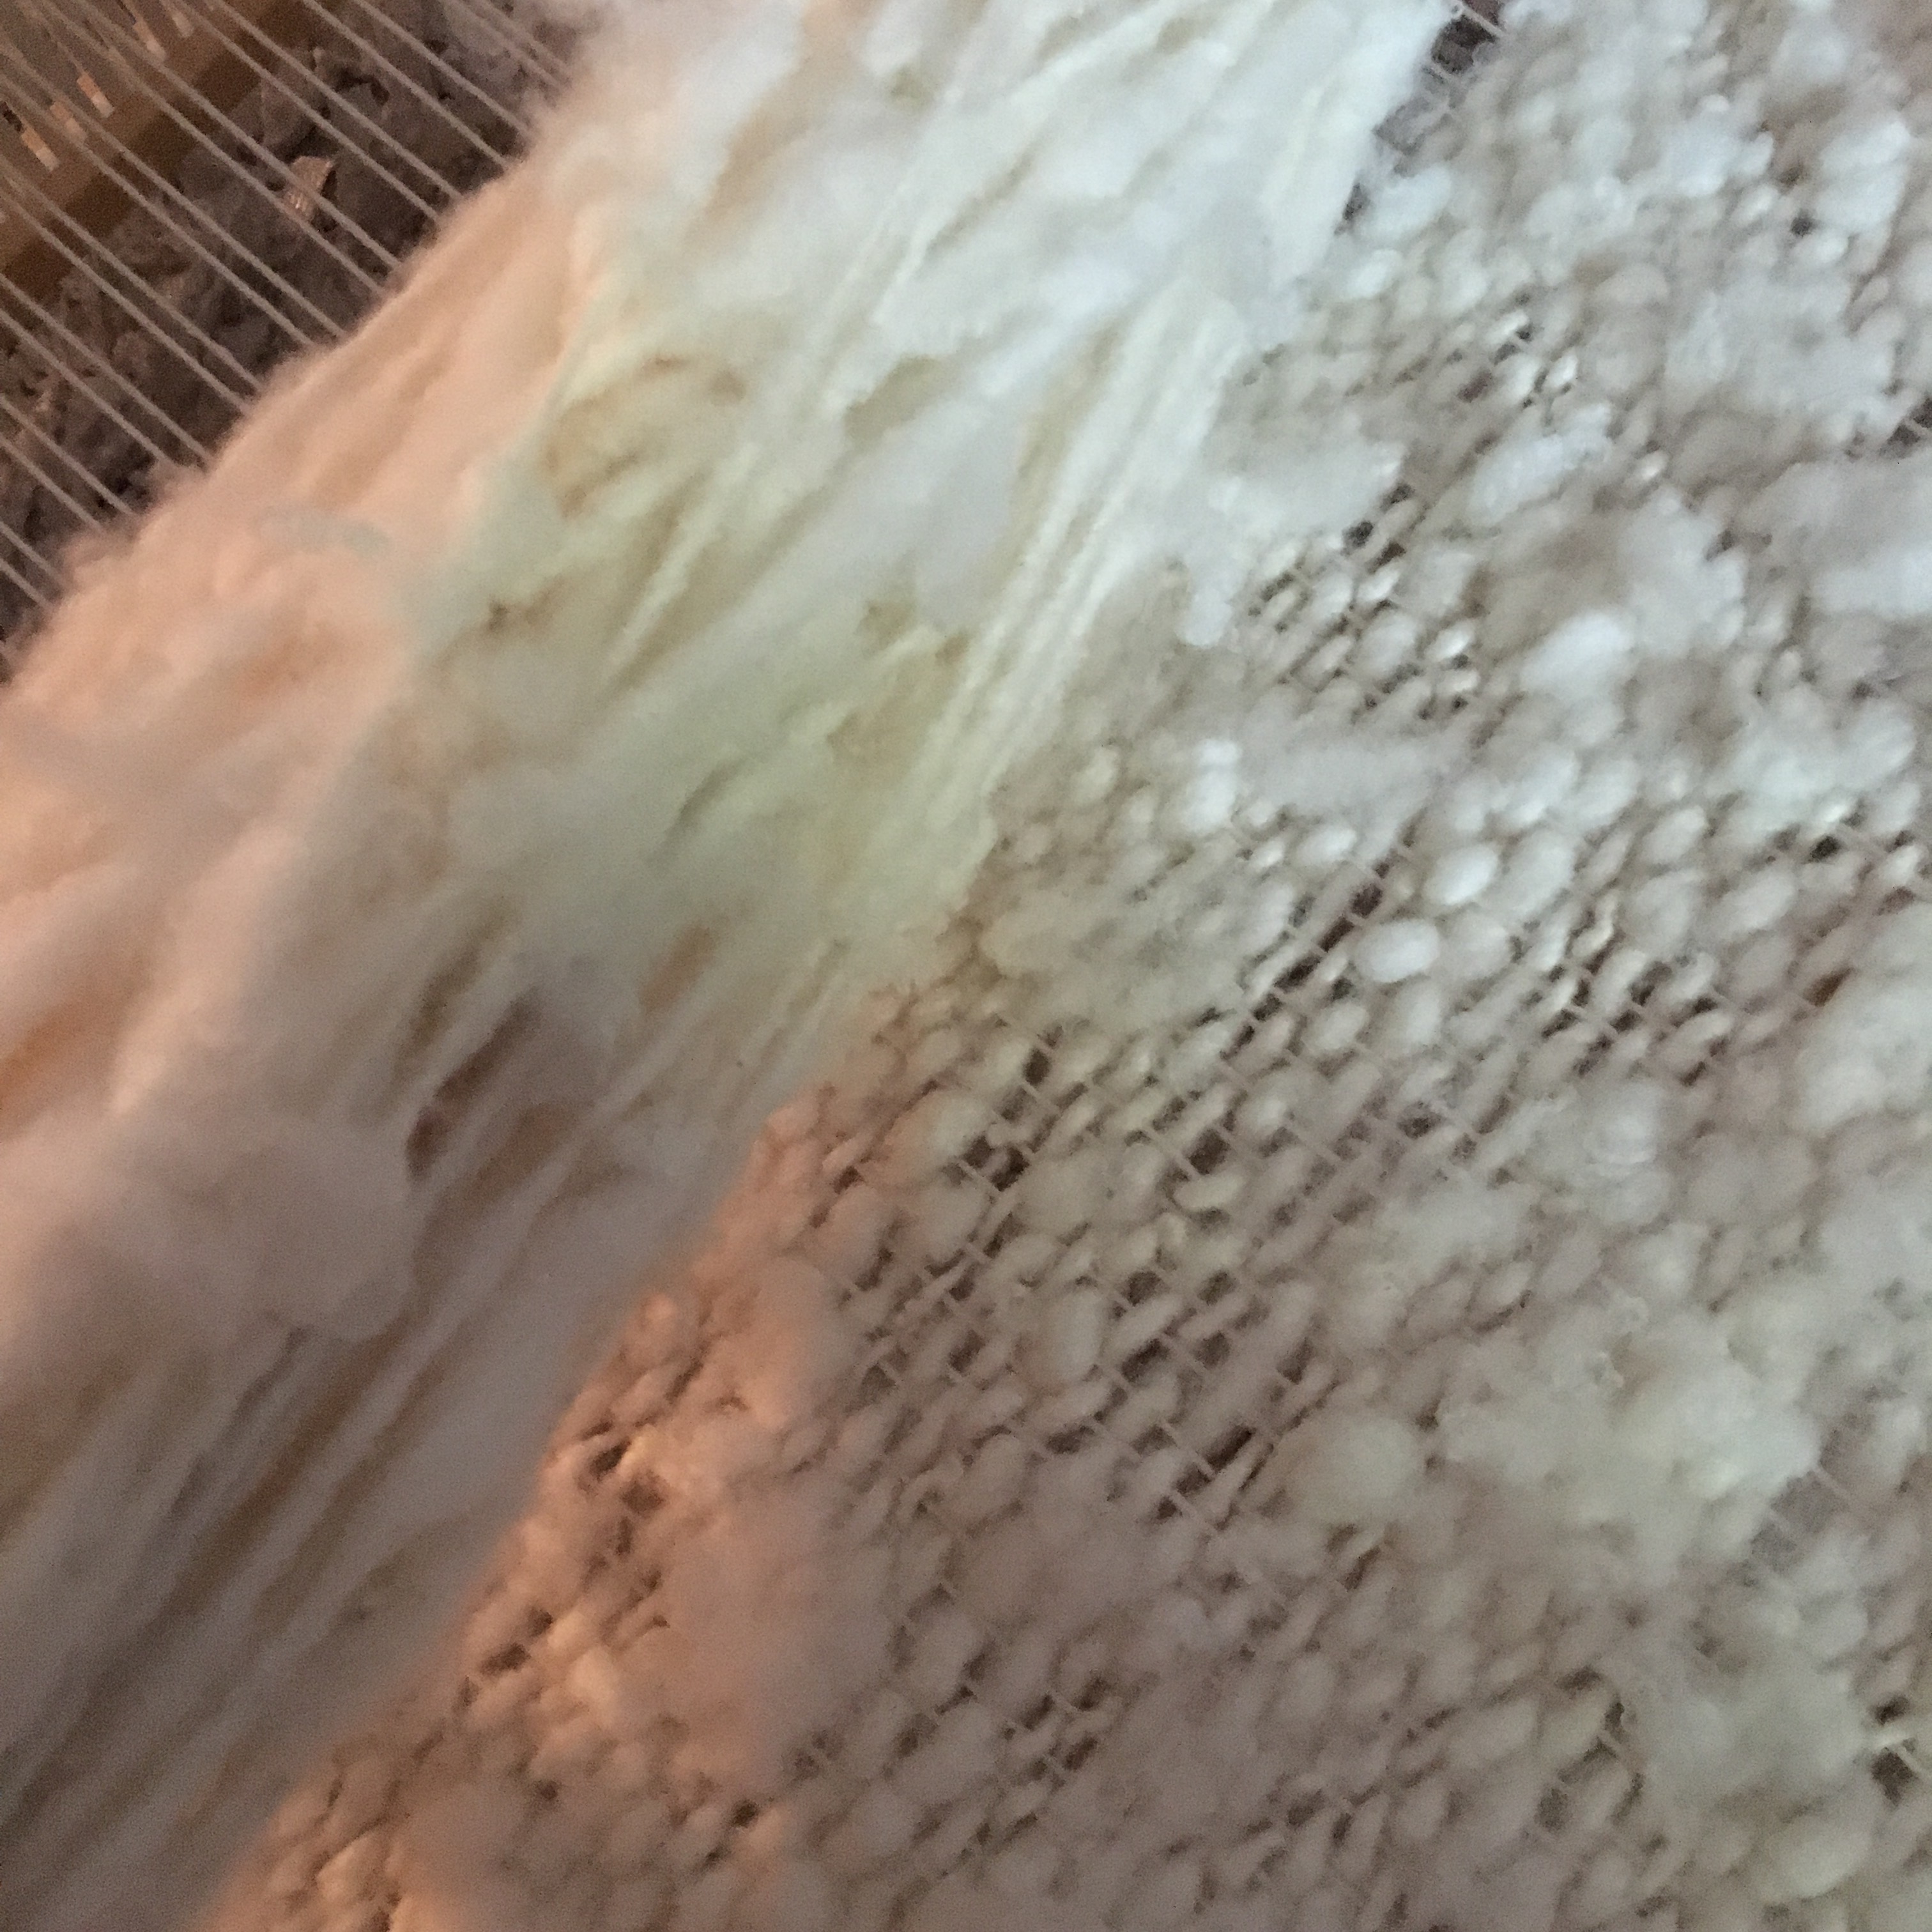
This fleece is just gorgeous. Incredibly soft, from a coated sheep, crimp to sing about, and bright white. (Many of the pictures have a yellow cast from the lightbulb, but it’s a true white)
I’ve had this fleece for years. I really wanted to try spinning a textured single that would show off that crimp. It’s such a good thing I had stashed this fleece long enough to learn Laura Spinner’s magic thumb technique.Magic thumb video
That technique is so cool for long locks but it also works for fine wool.
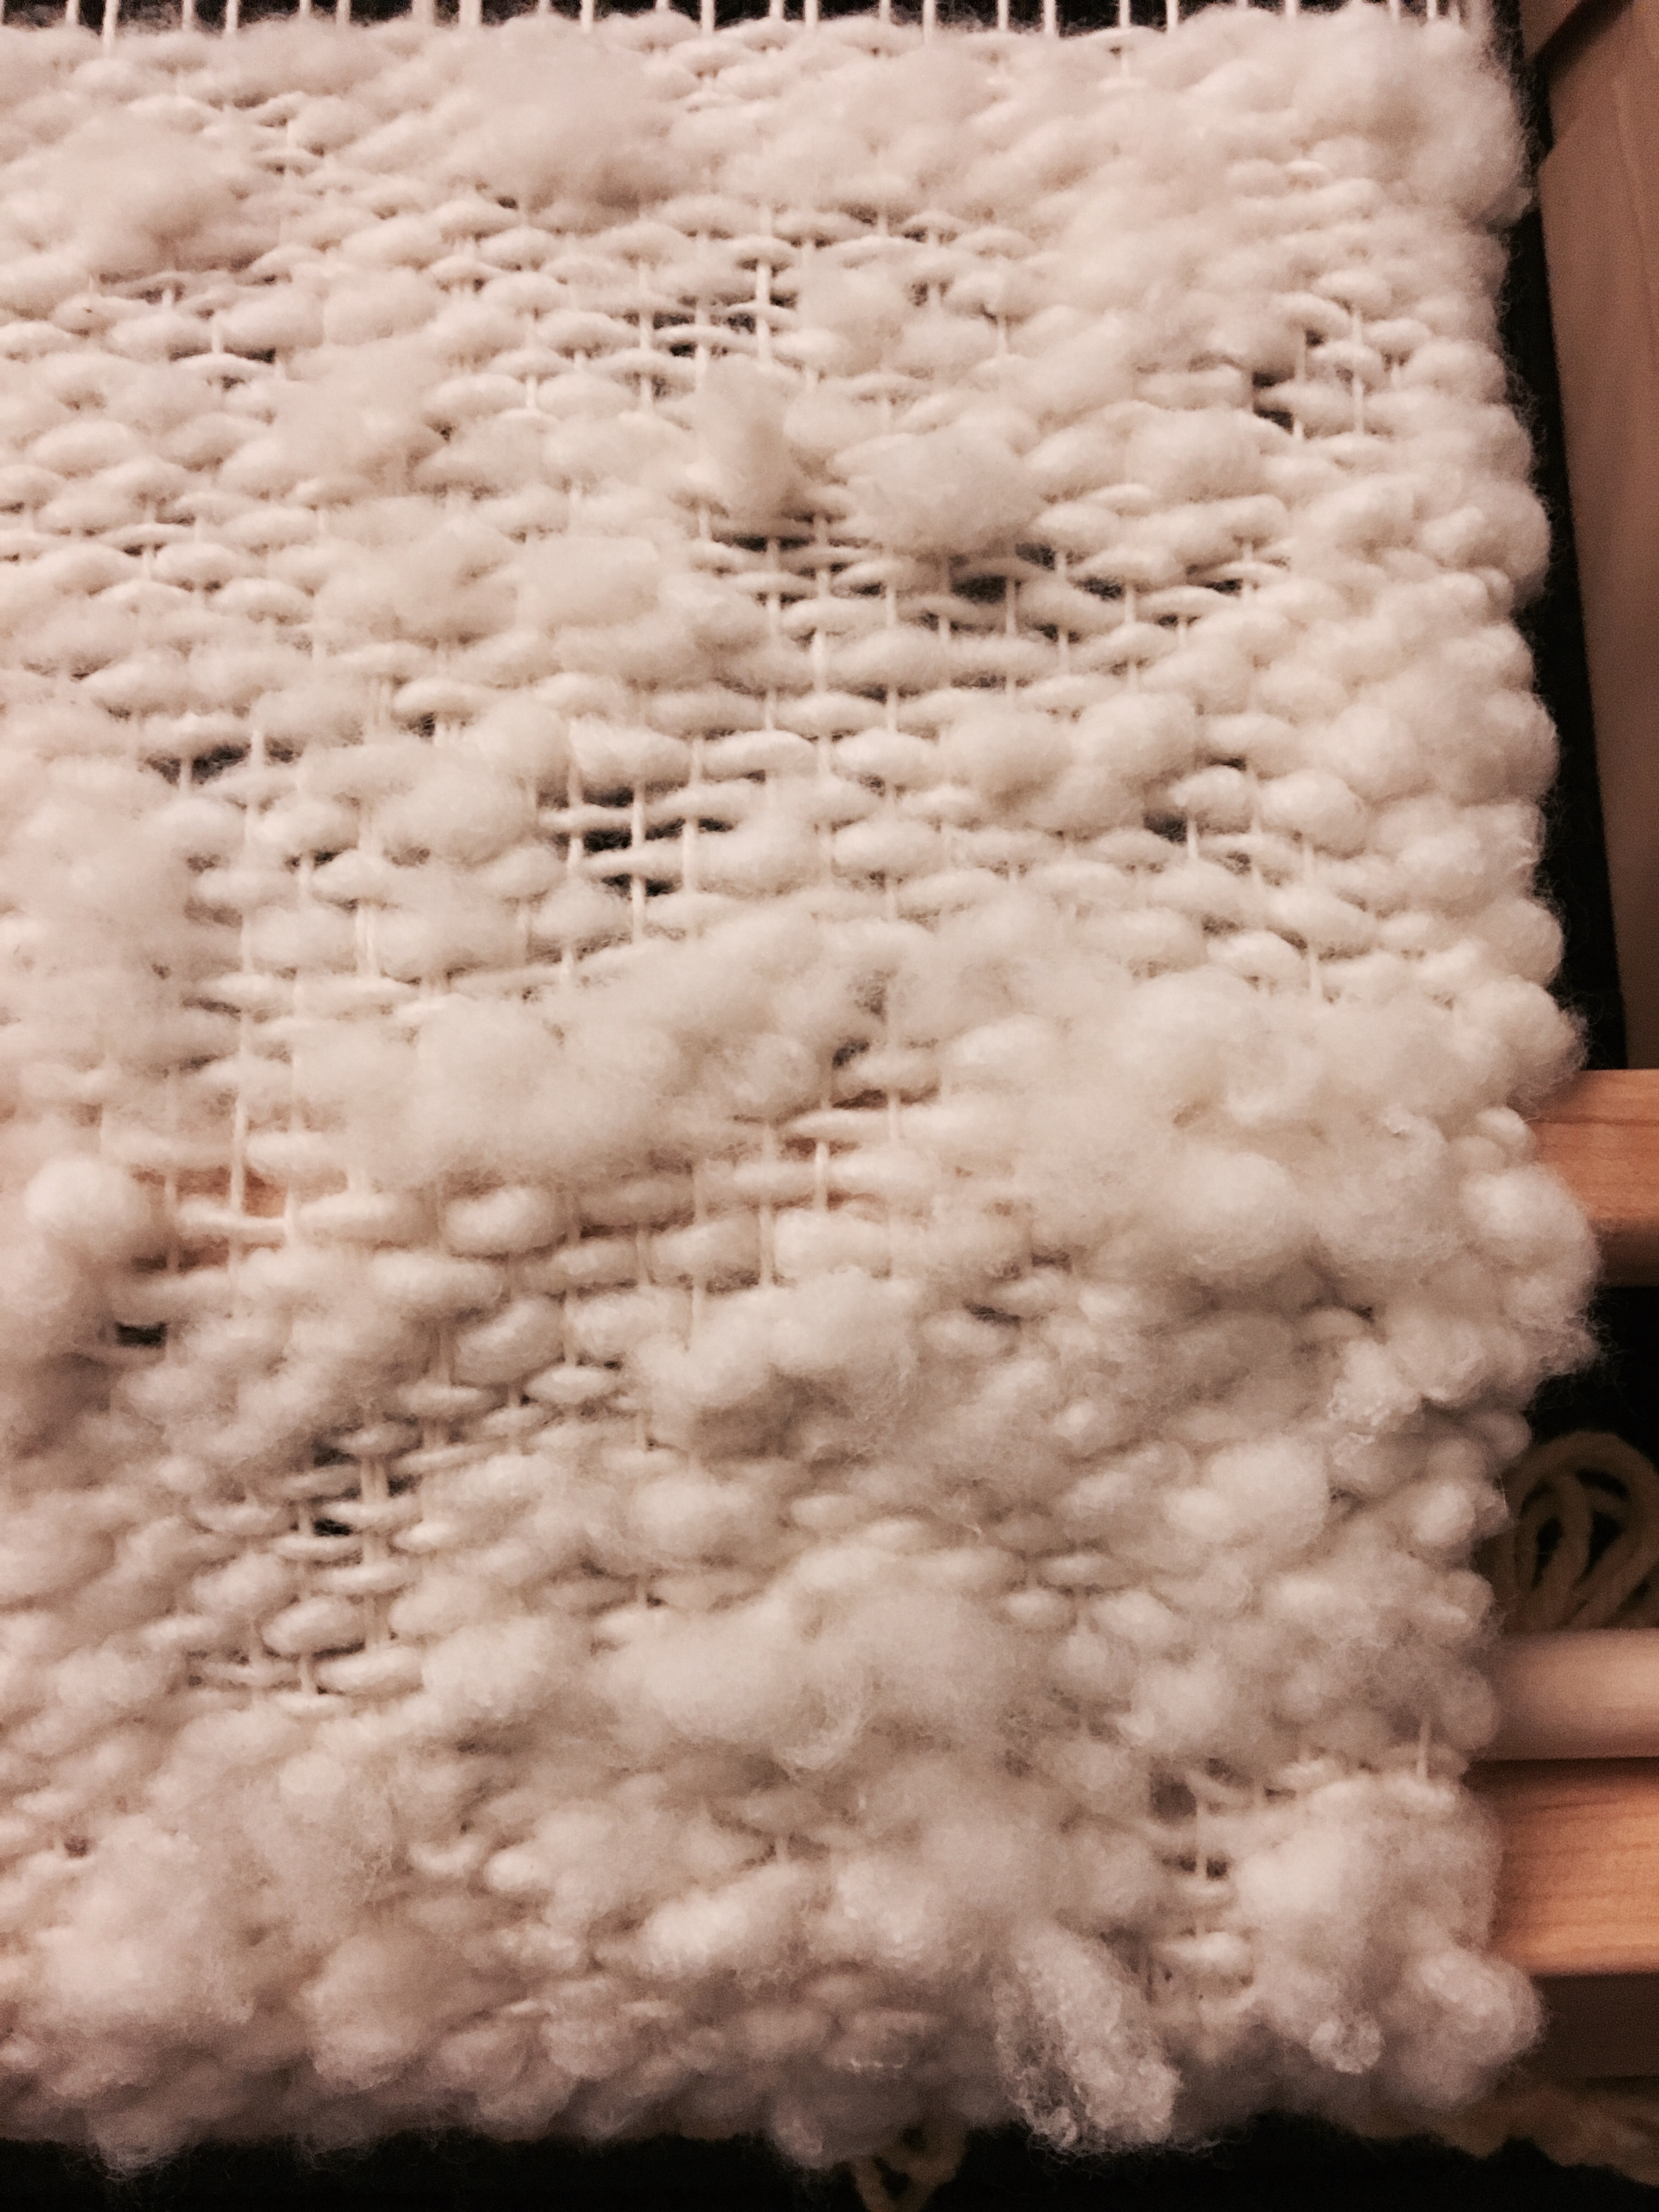
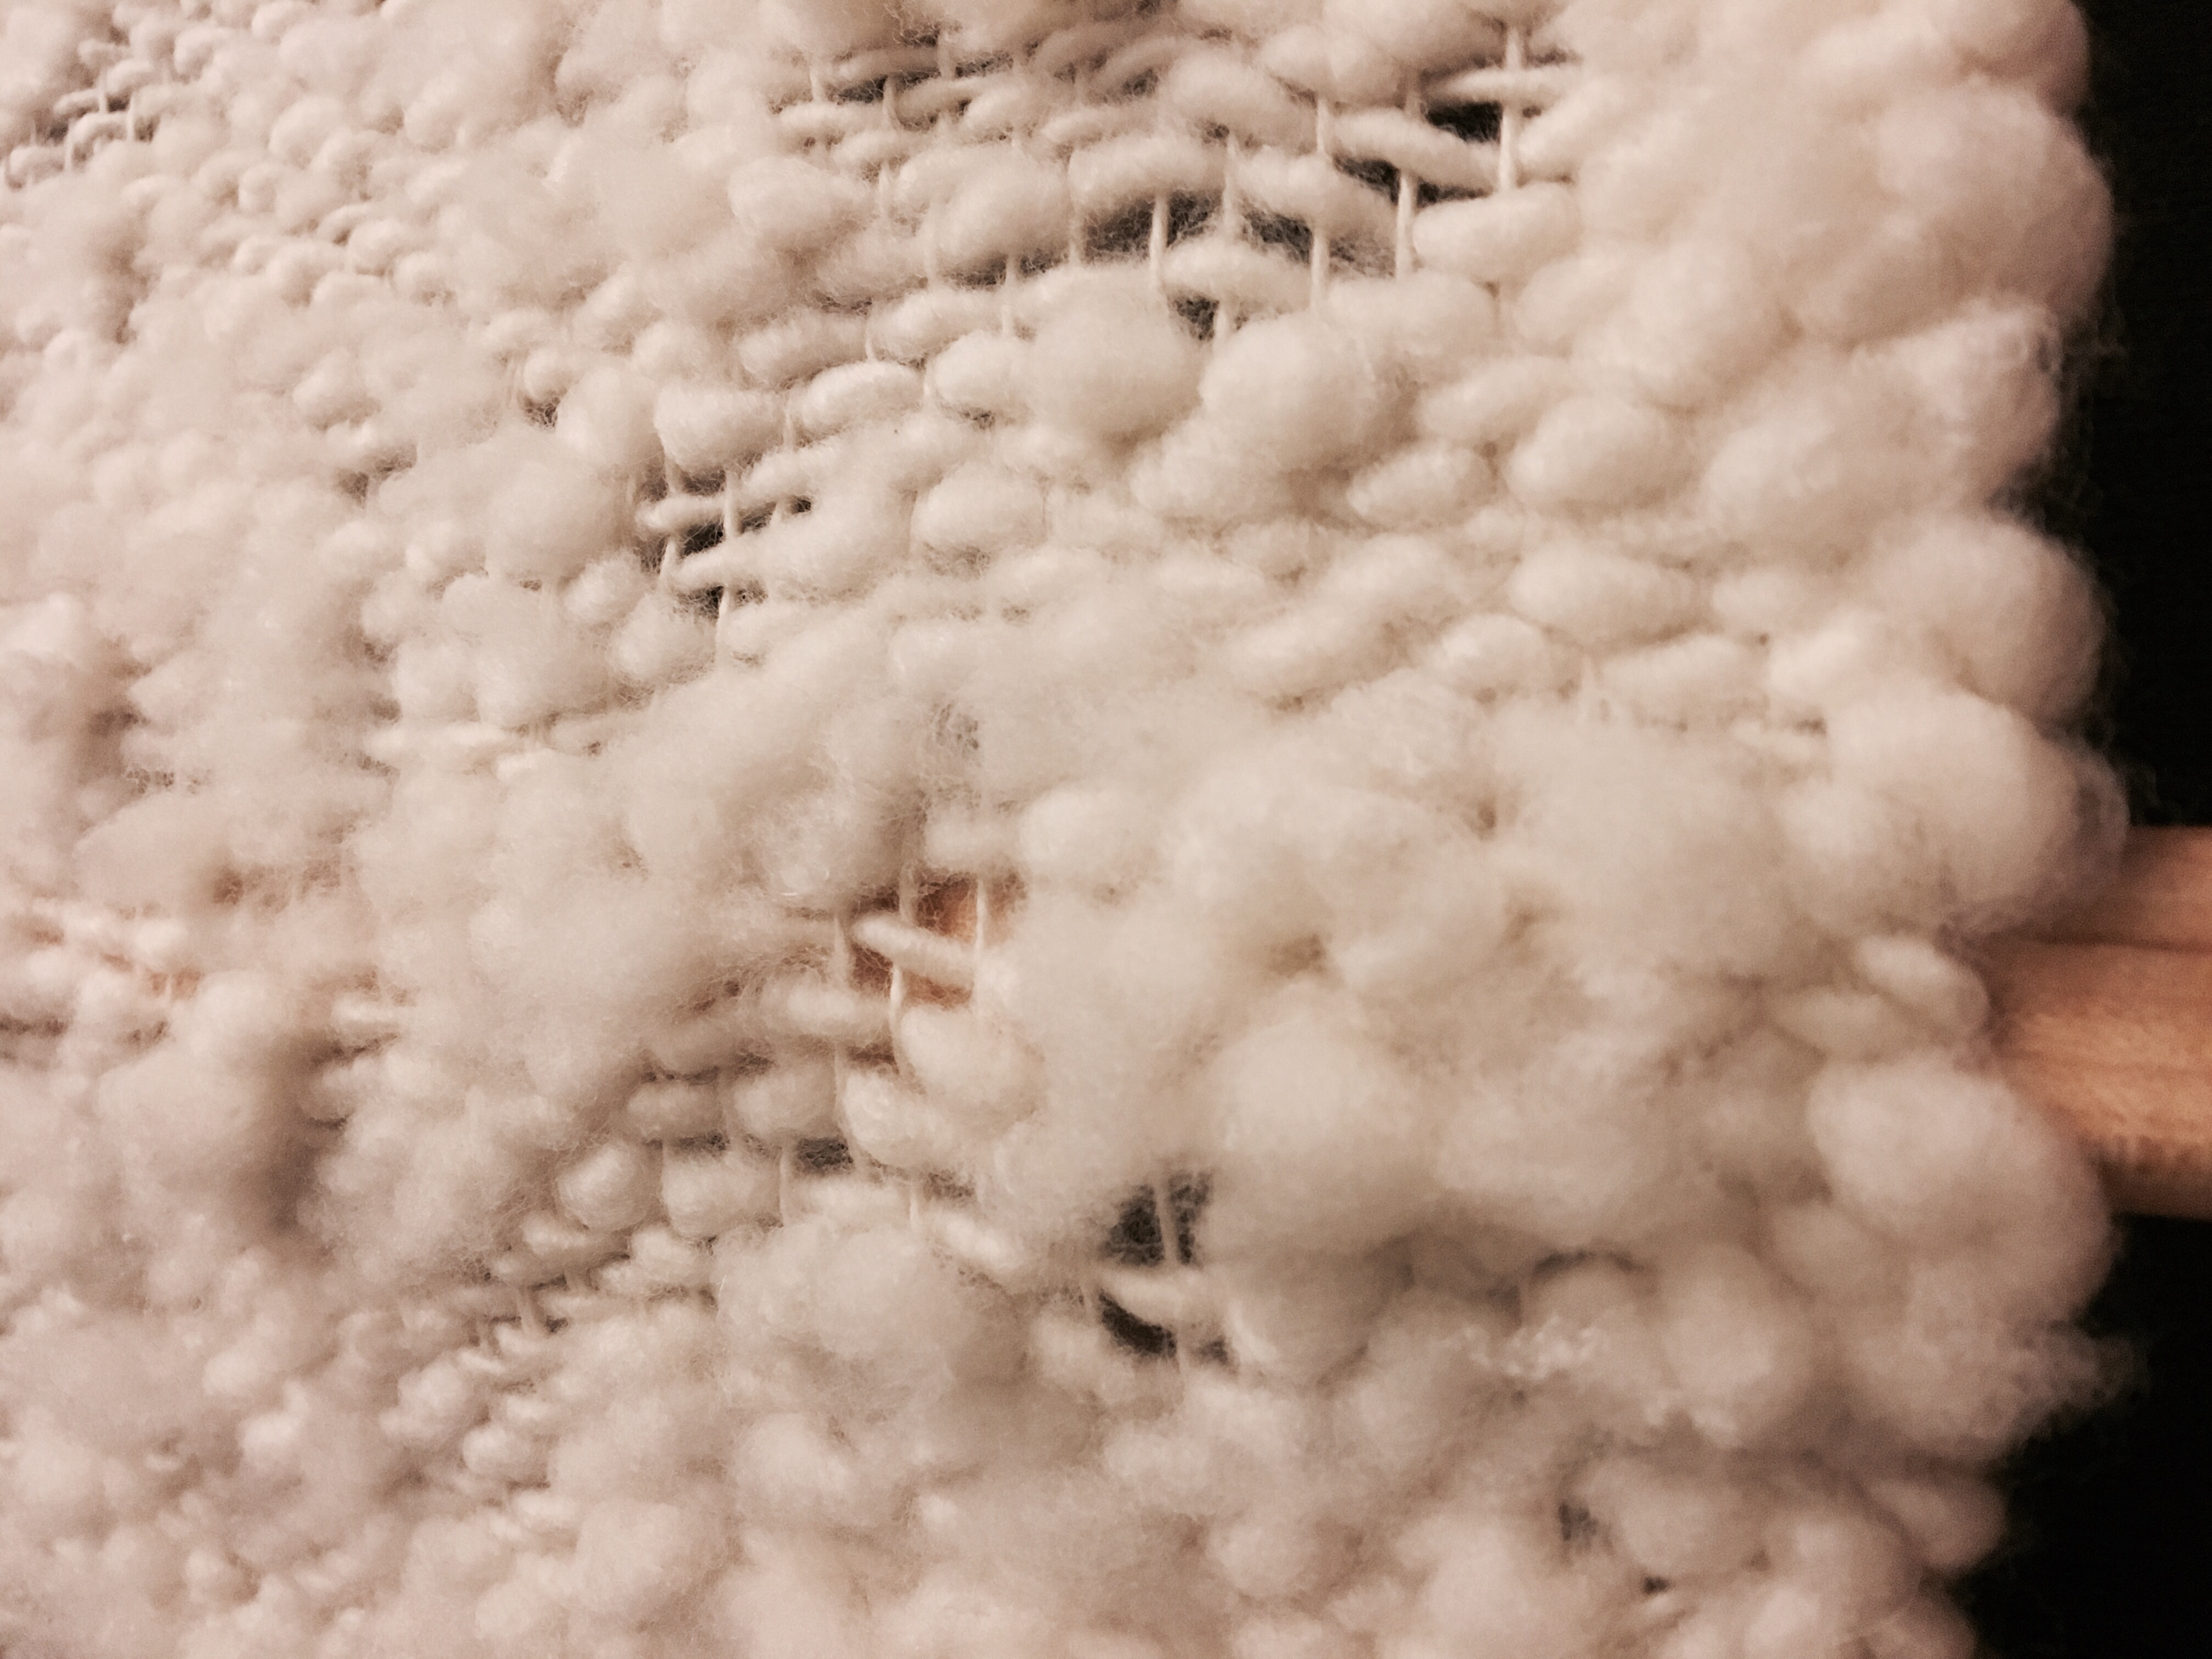
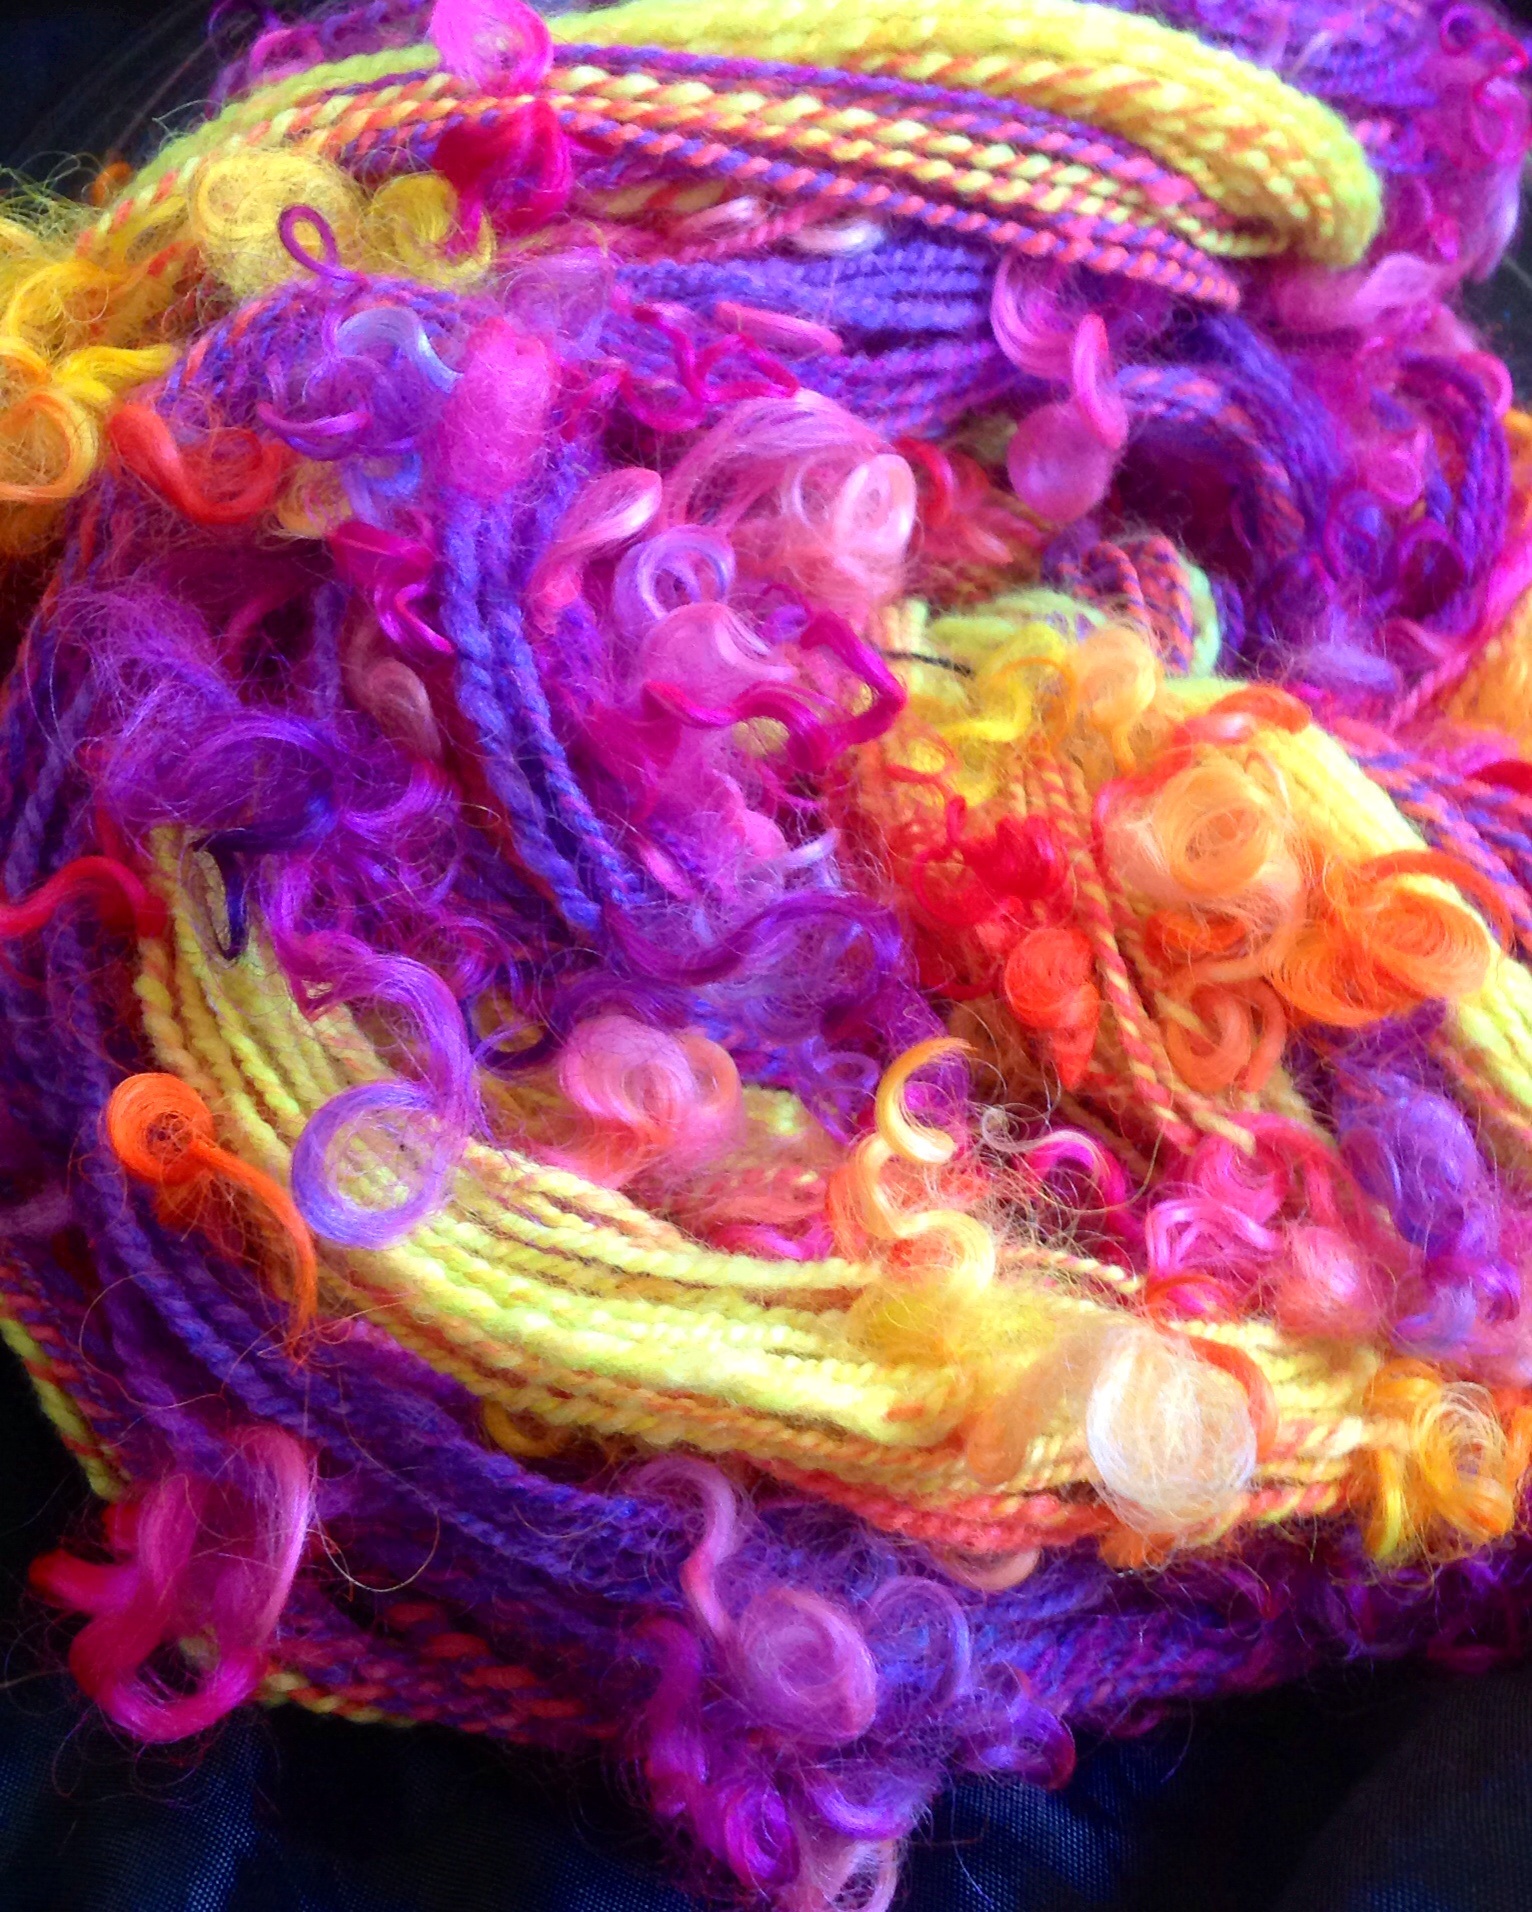
Specifically, magic thumb is able to save lock structure and crimp like no other. It made this airy woolen coreless corespun. Keeping the crimp throughout the yarn was important to me.
It’s those curls I wanted to save in spinning the yarn and hopefully try to keep in a finished project.
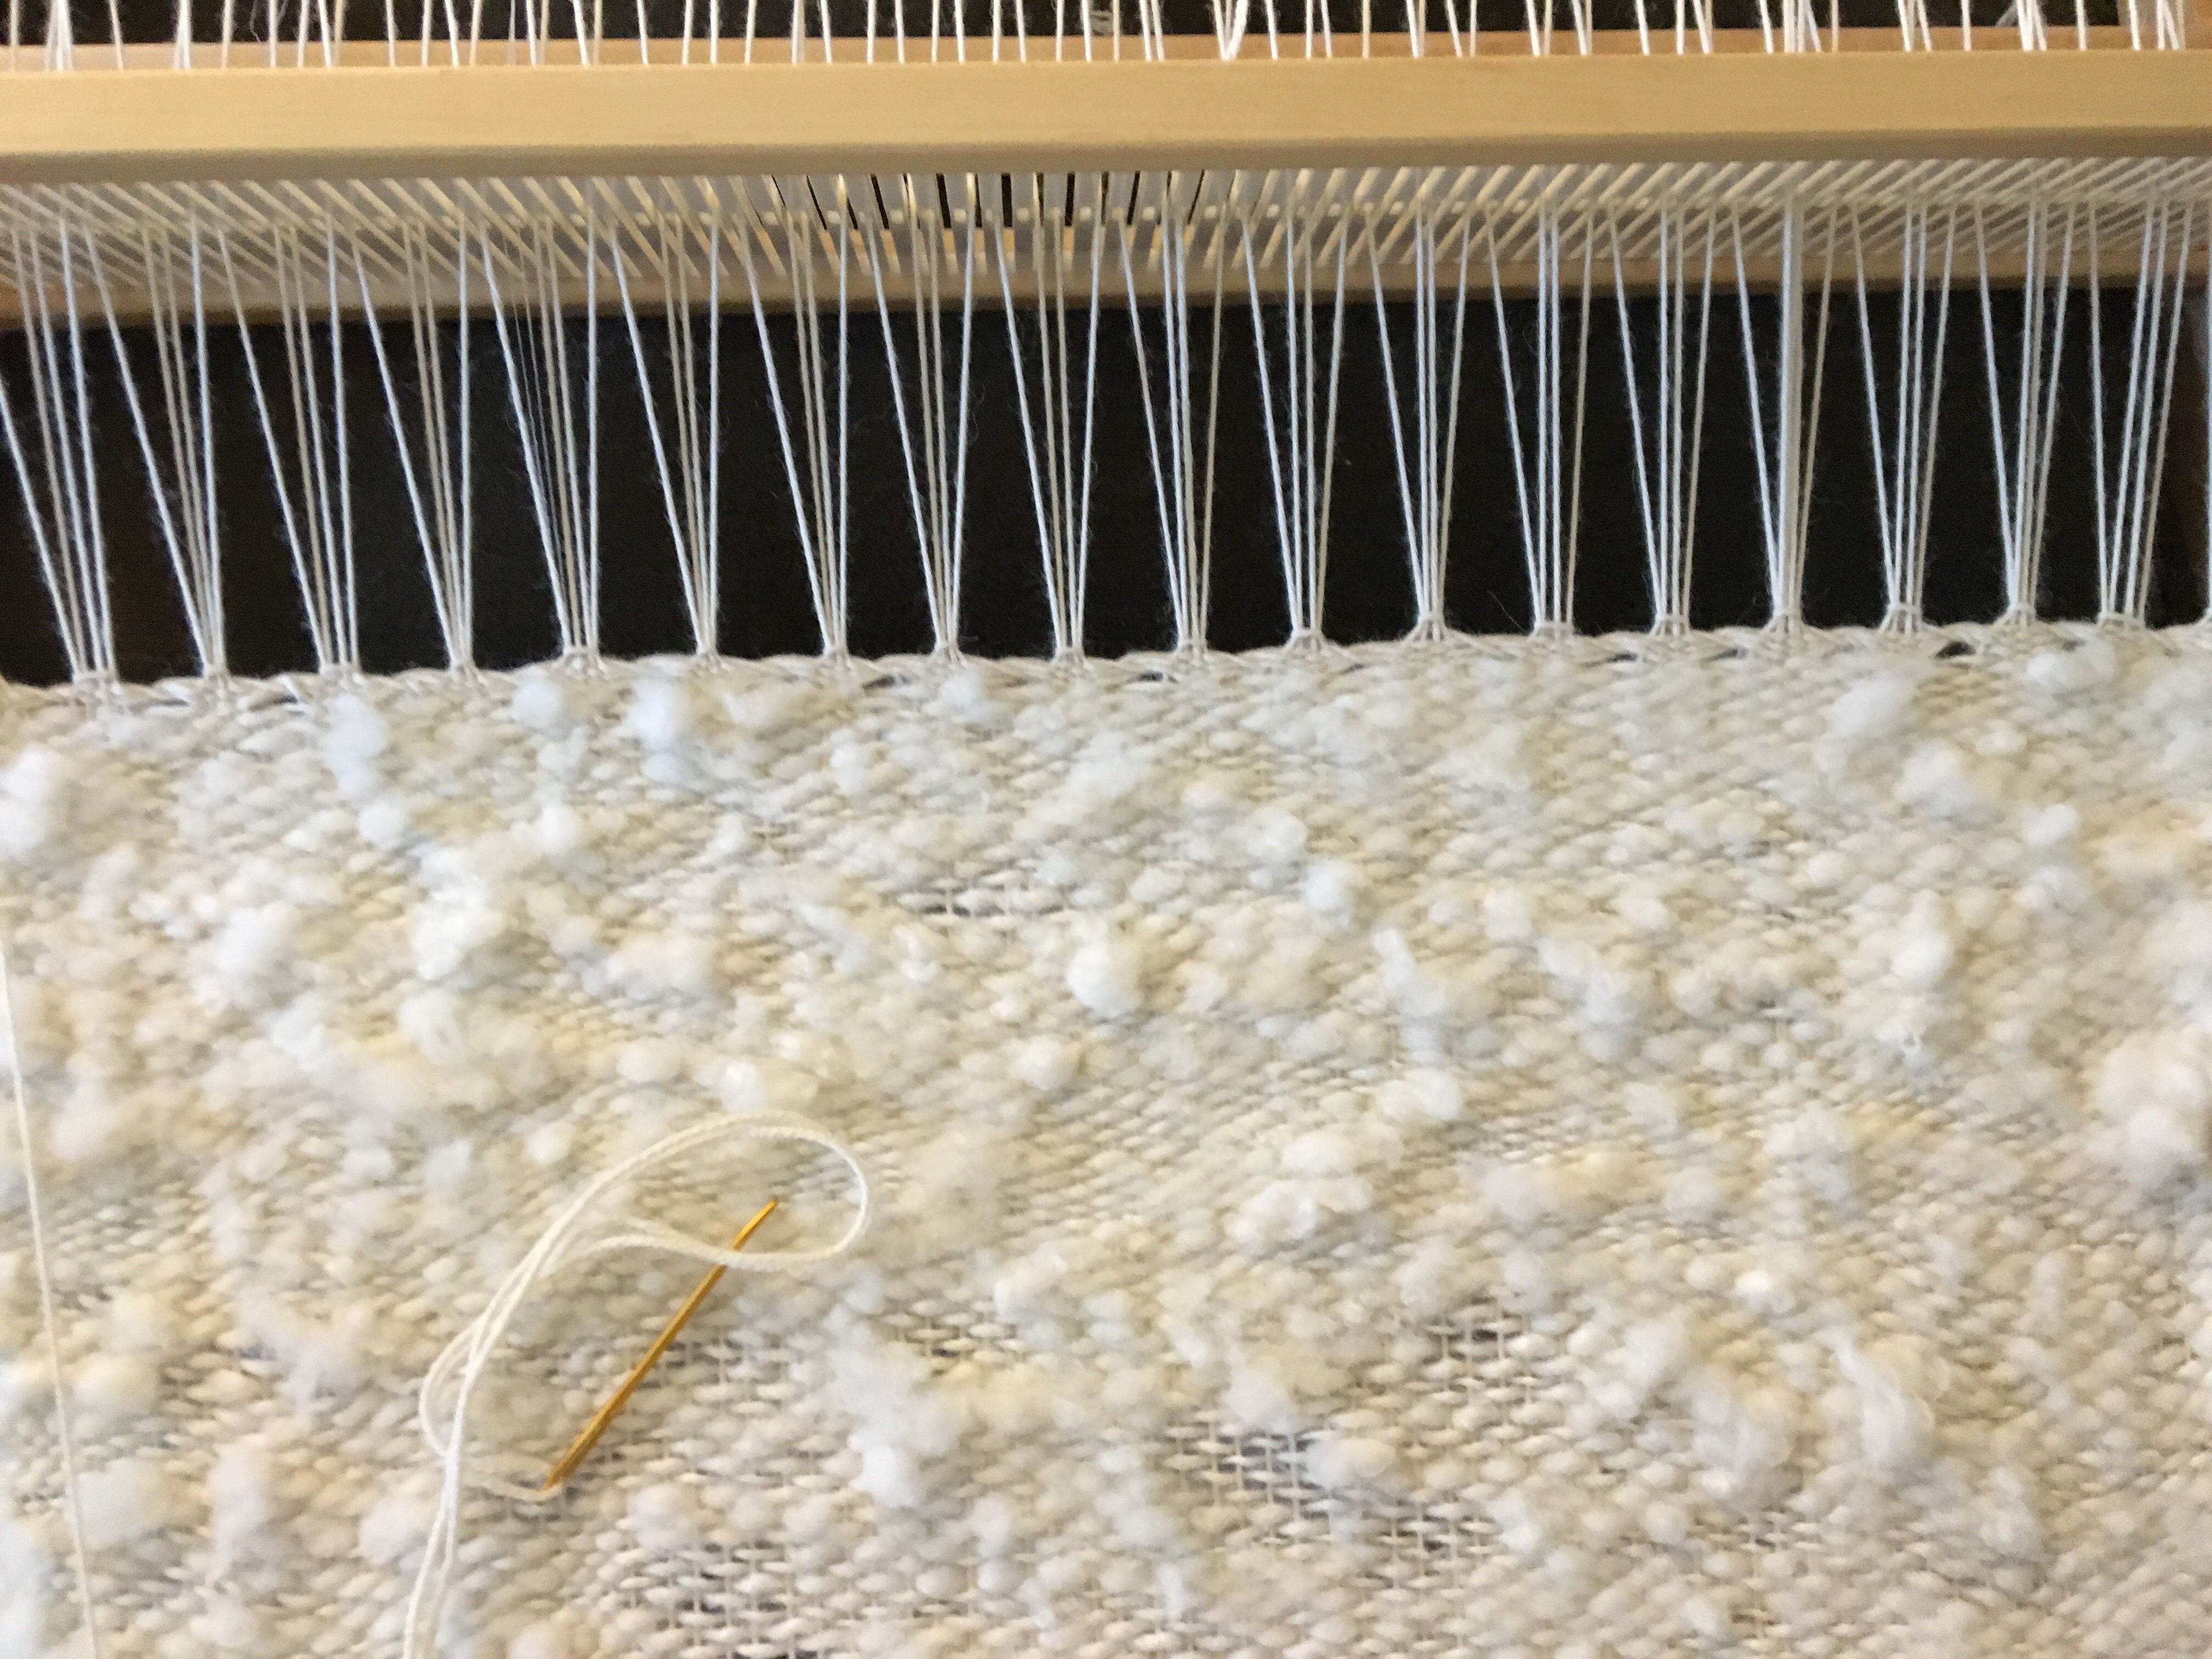
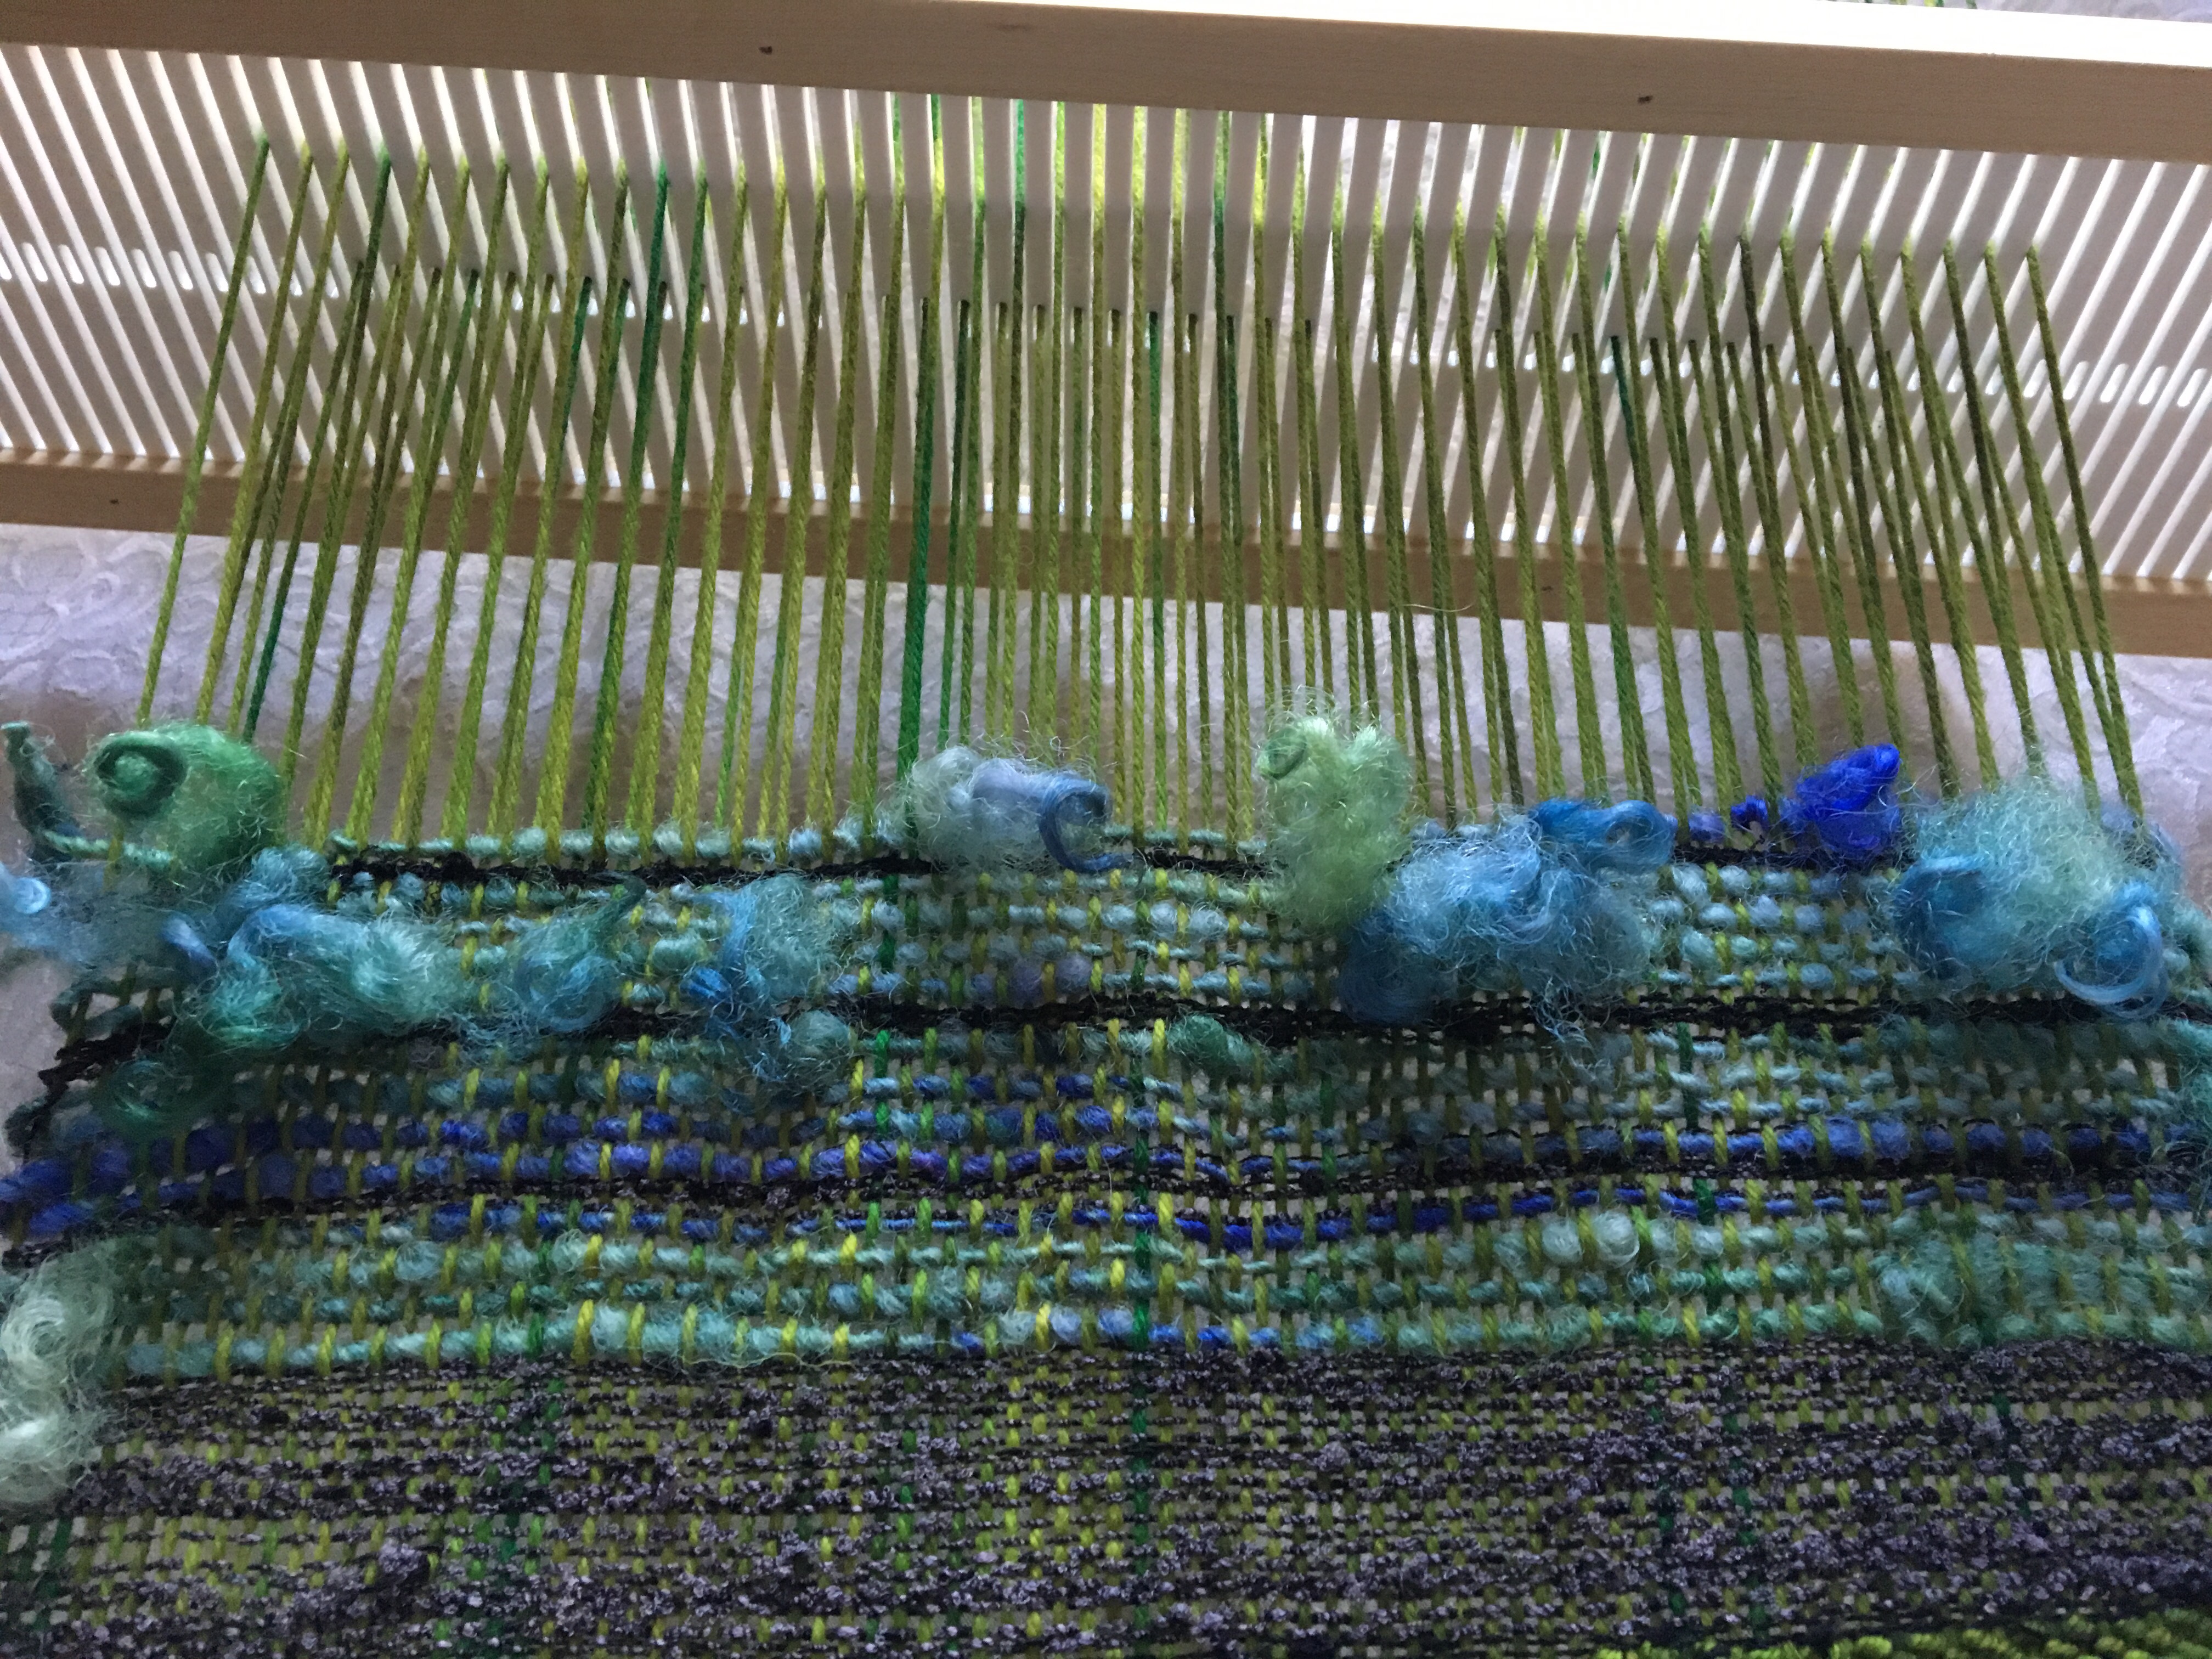
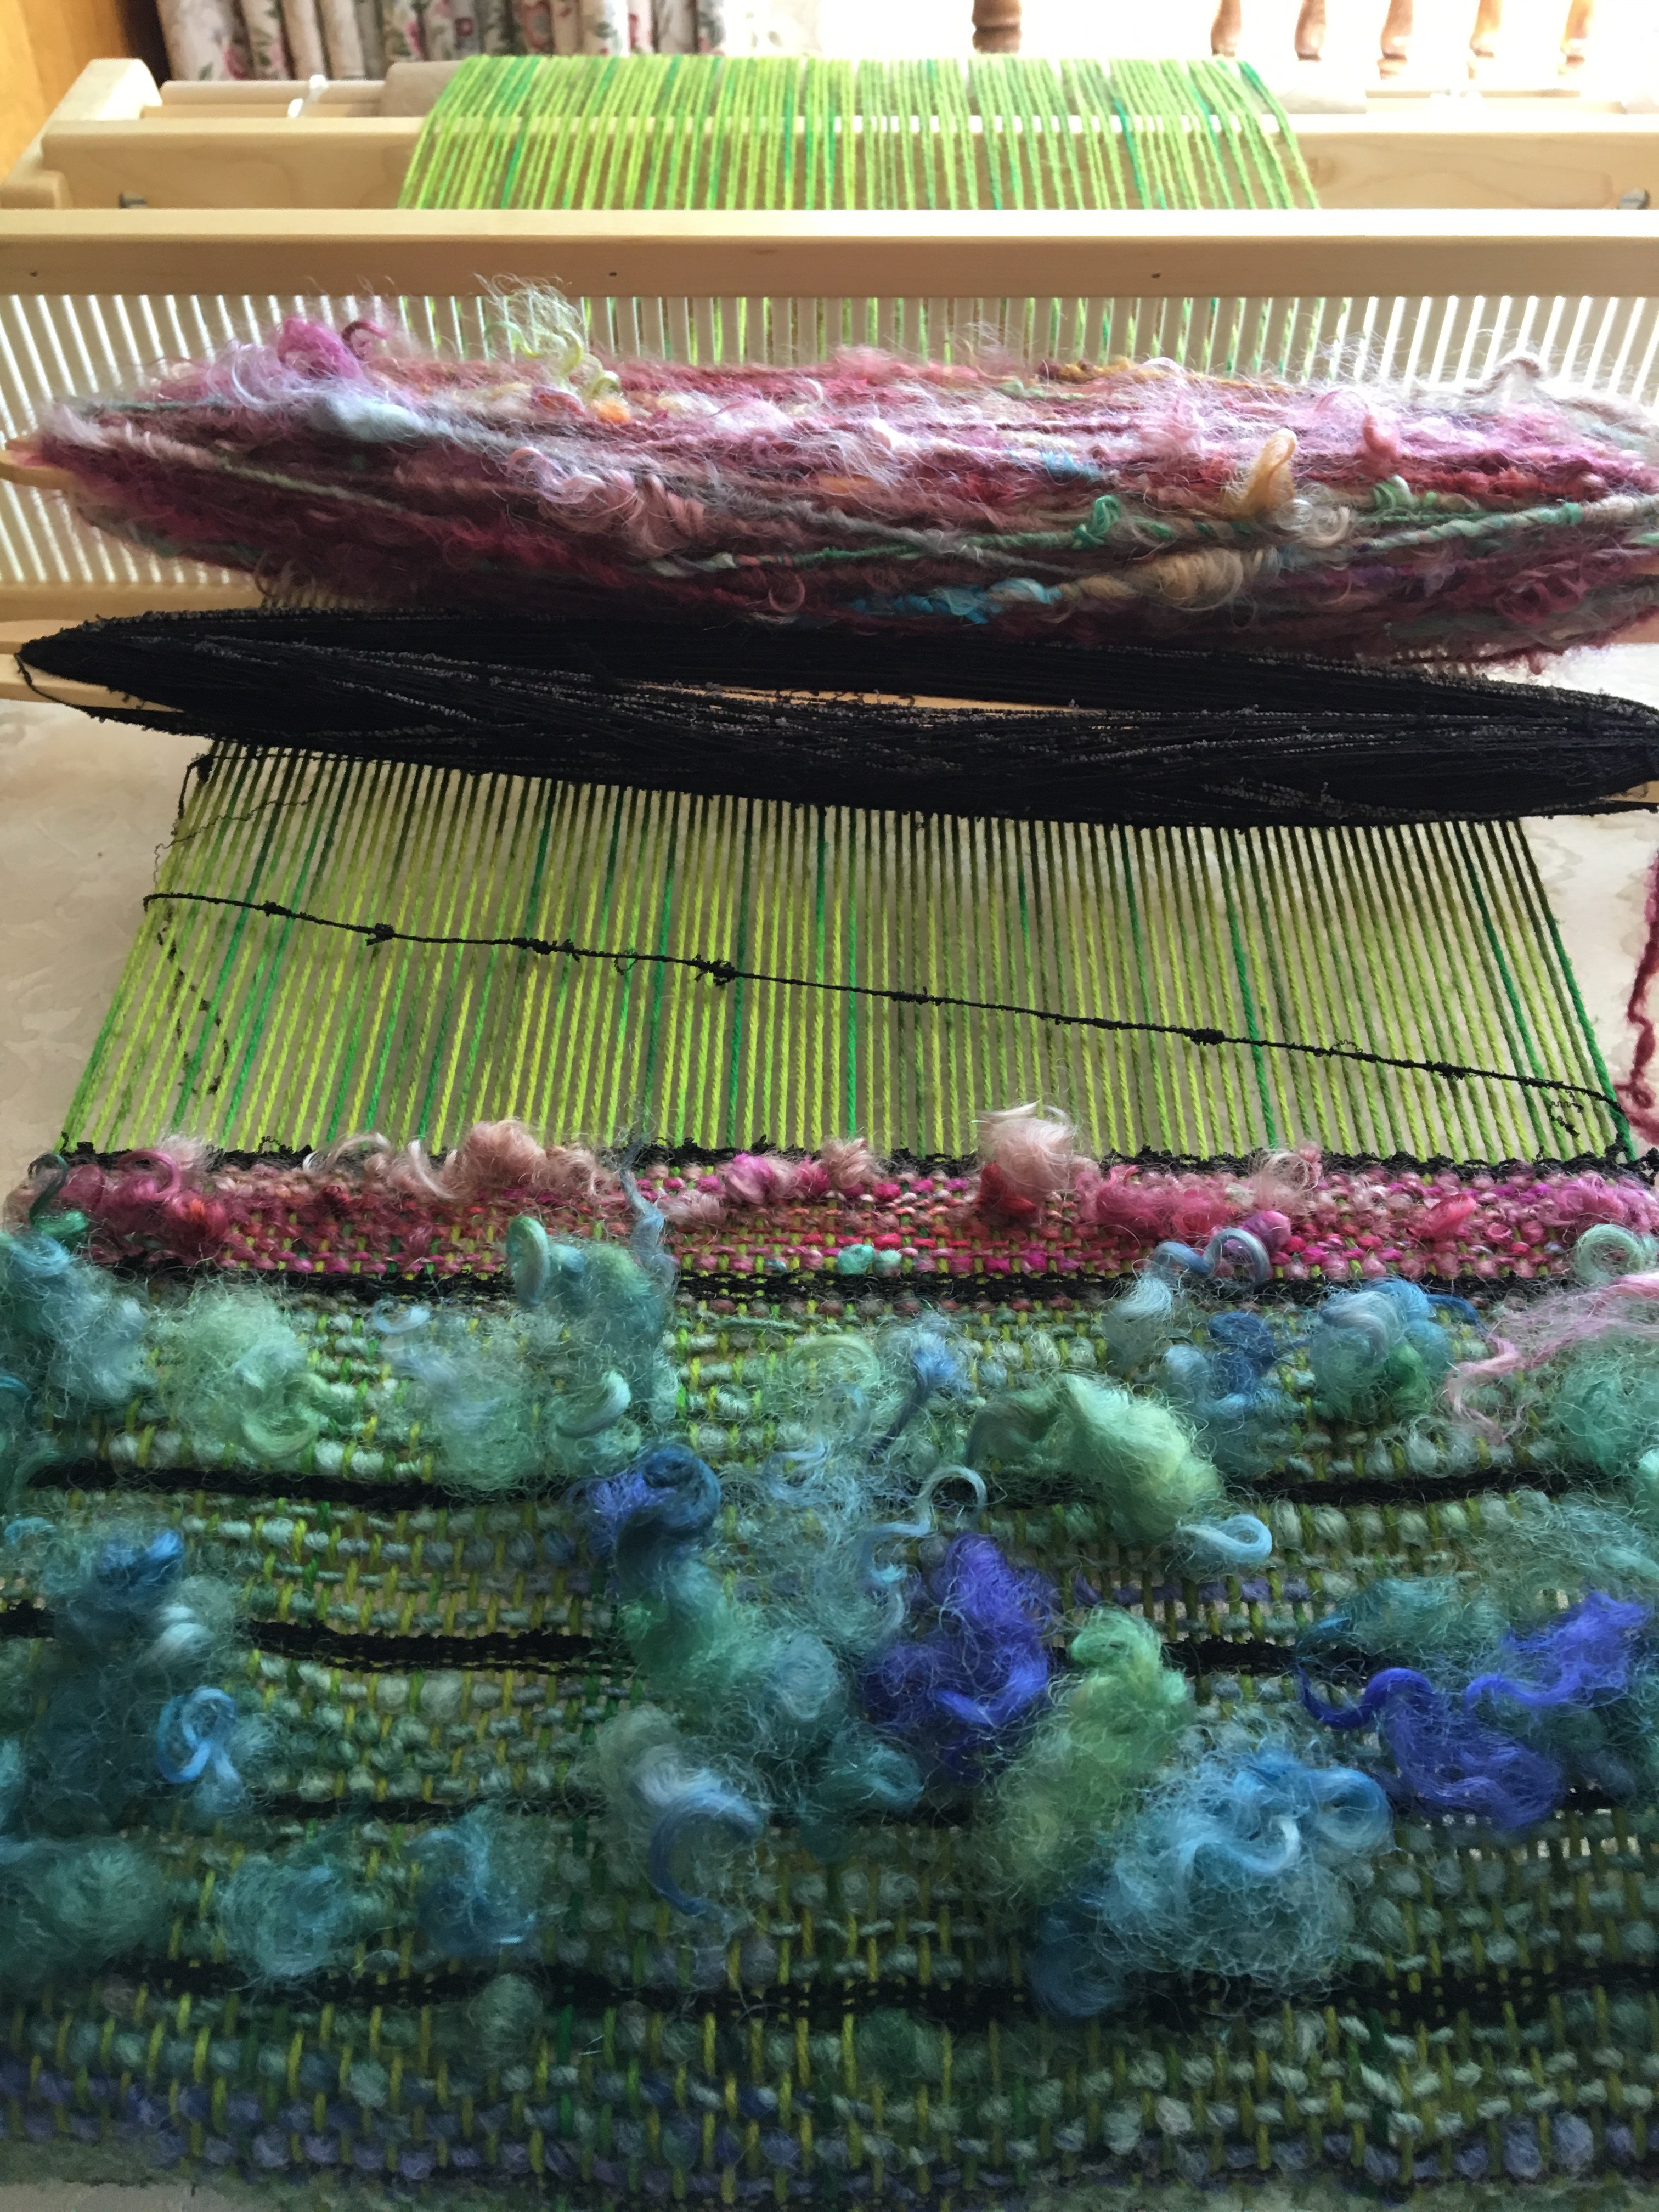
I would grab a handful of the clean locks, and lightly hand pick and spin magic thumb. I had spun 3 skeins when I thought how awesome a blanket would be. That was the plan when I warped the loom.
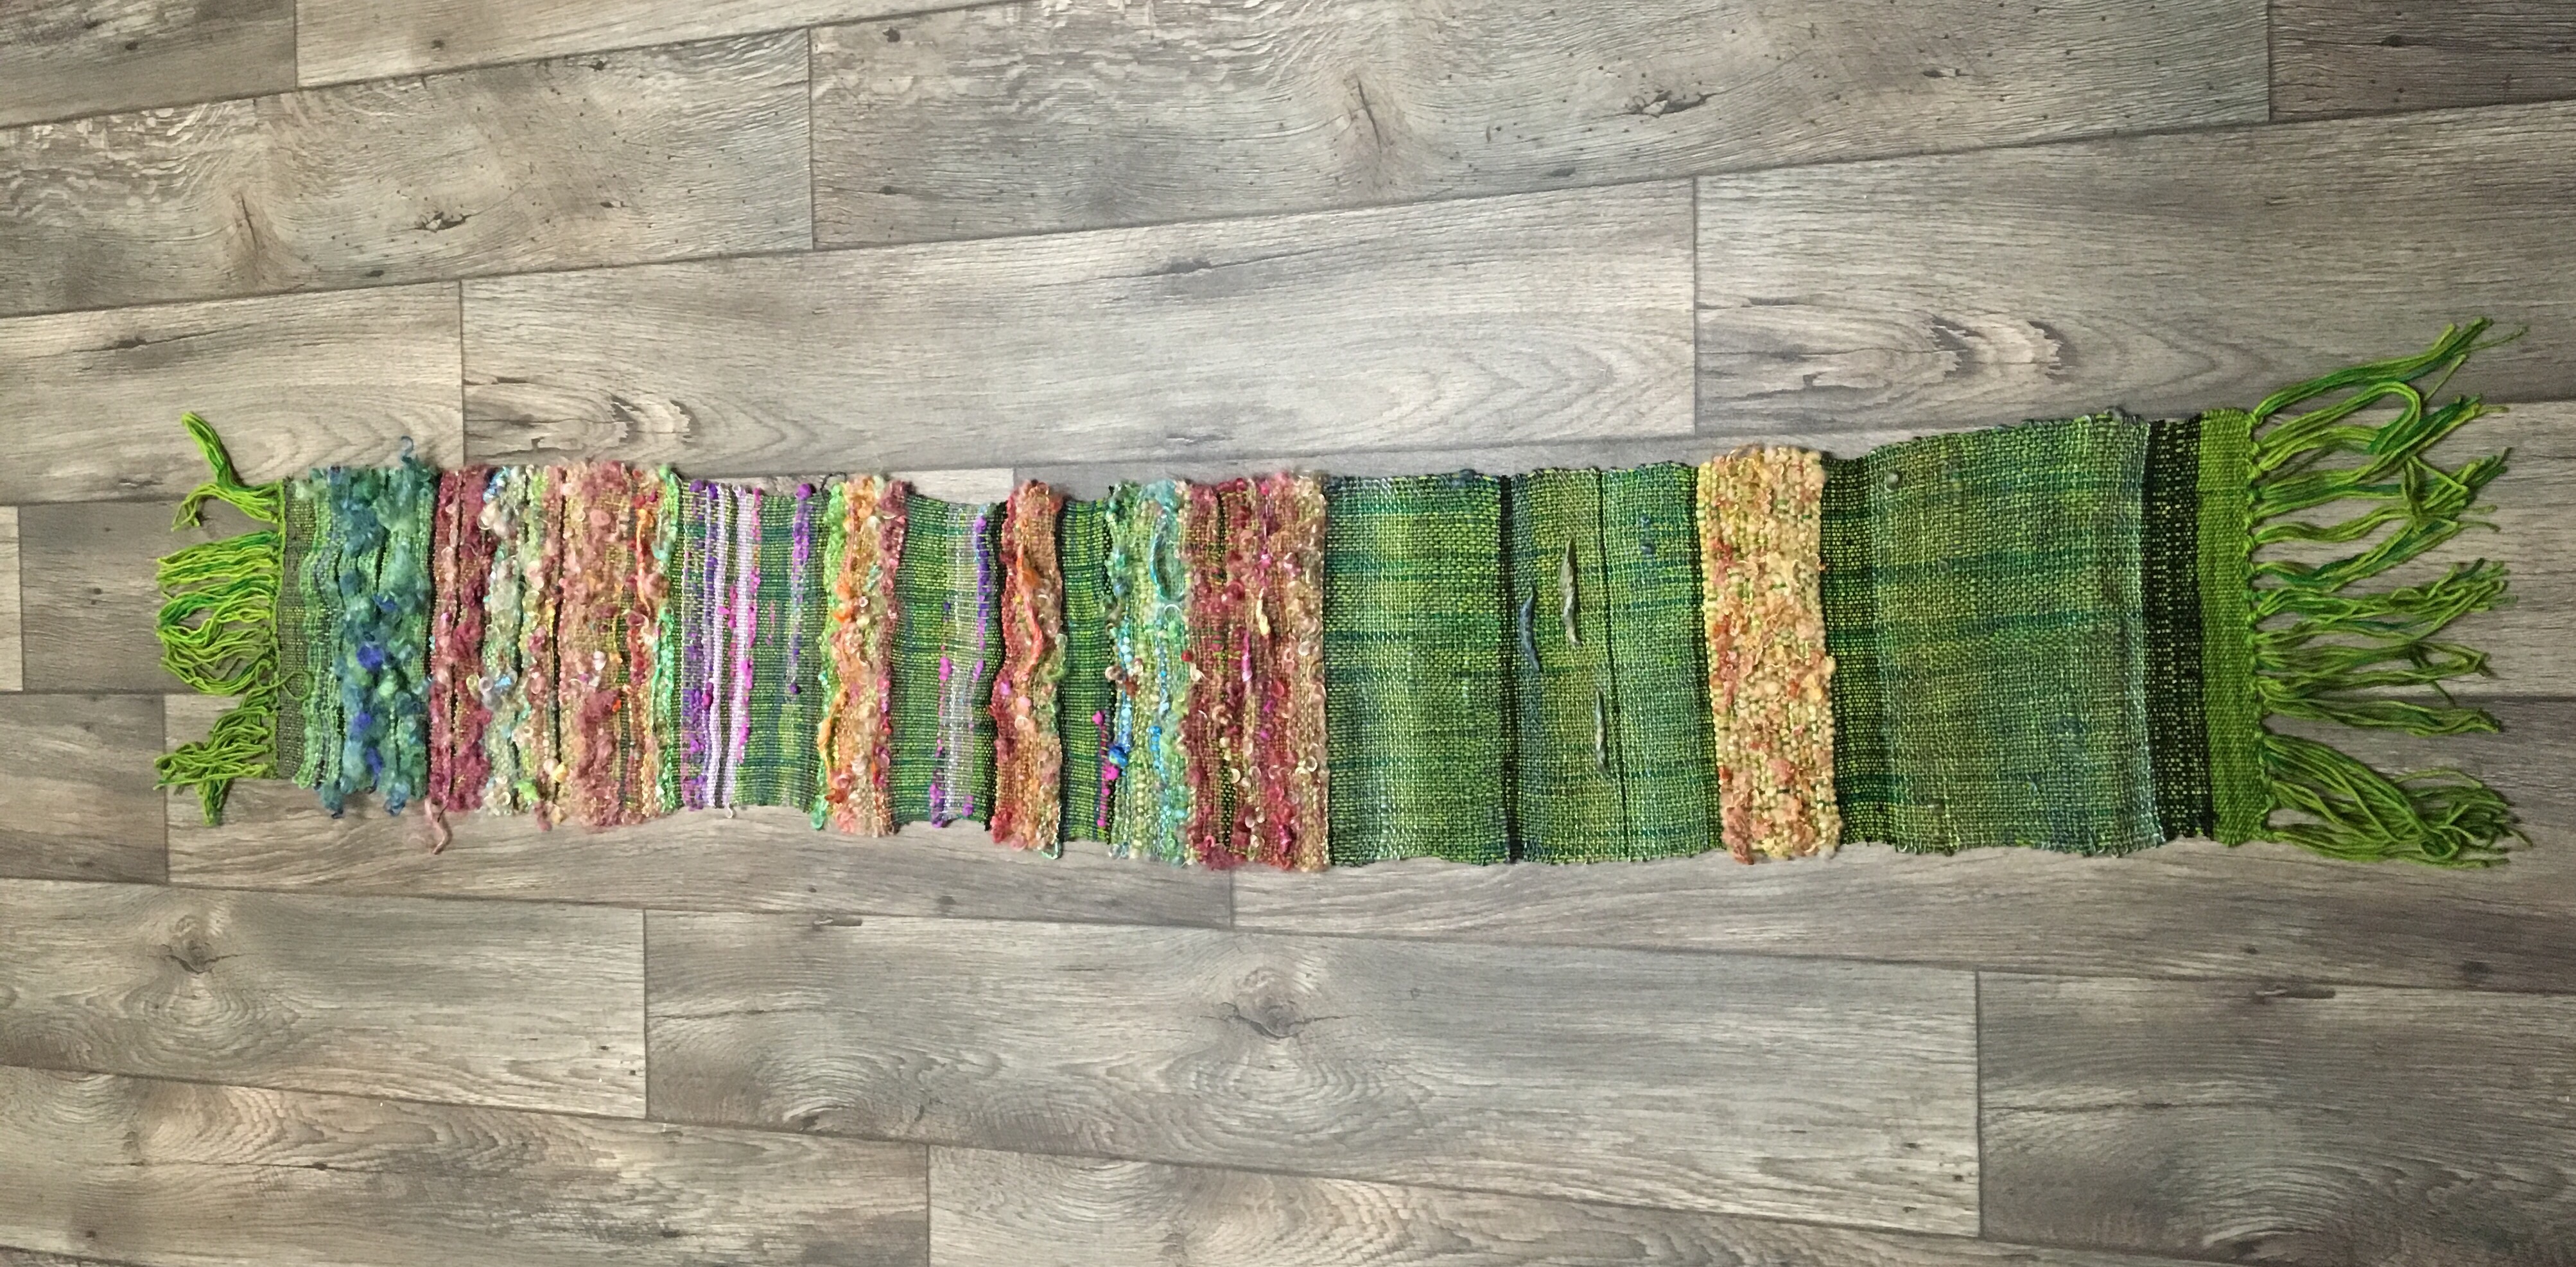
Hahahaha. That’s too funny! I settled for a shawl since a blanket might take another 20years. But initially, the grand idea was making several strips that would be whip stitched together for a blanket. I started spinning the yarn on May 22,2016 and pulled the finished piece from the loom on June 4, 2016.
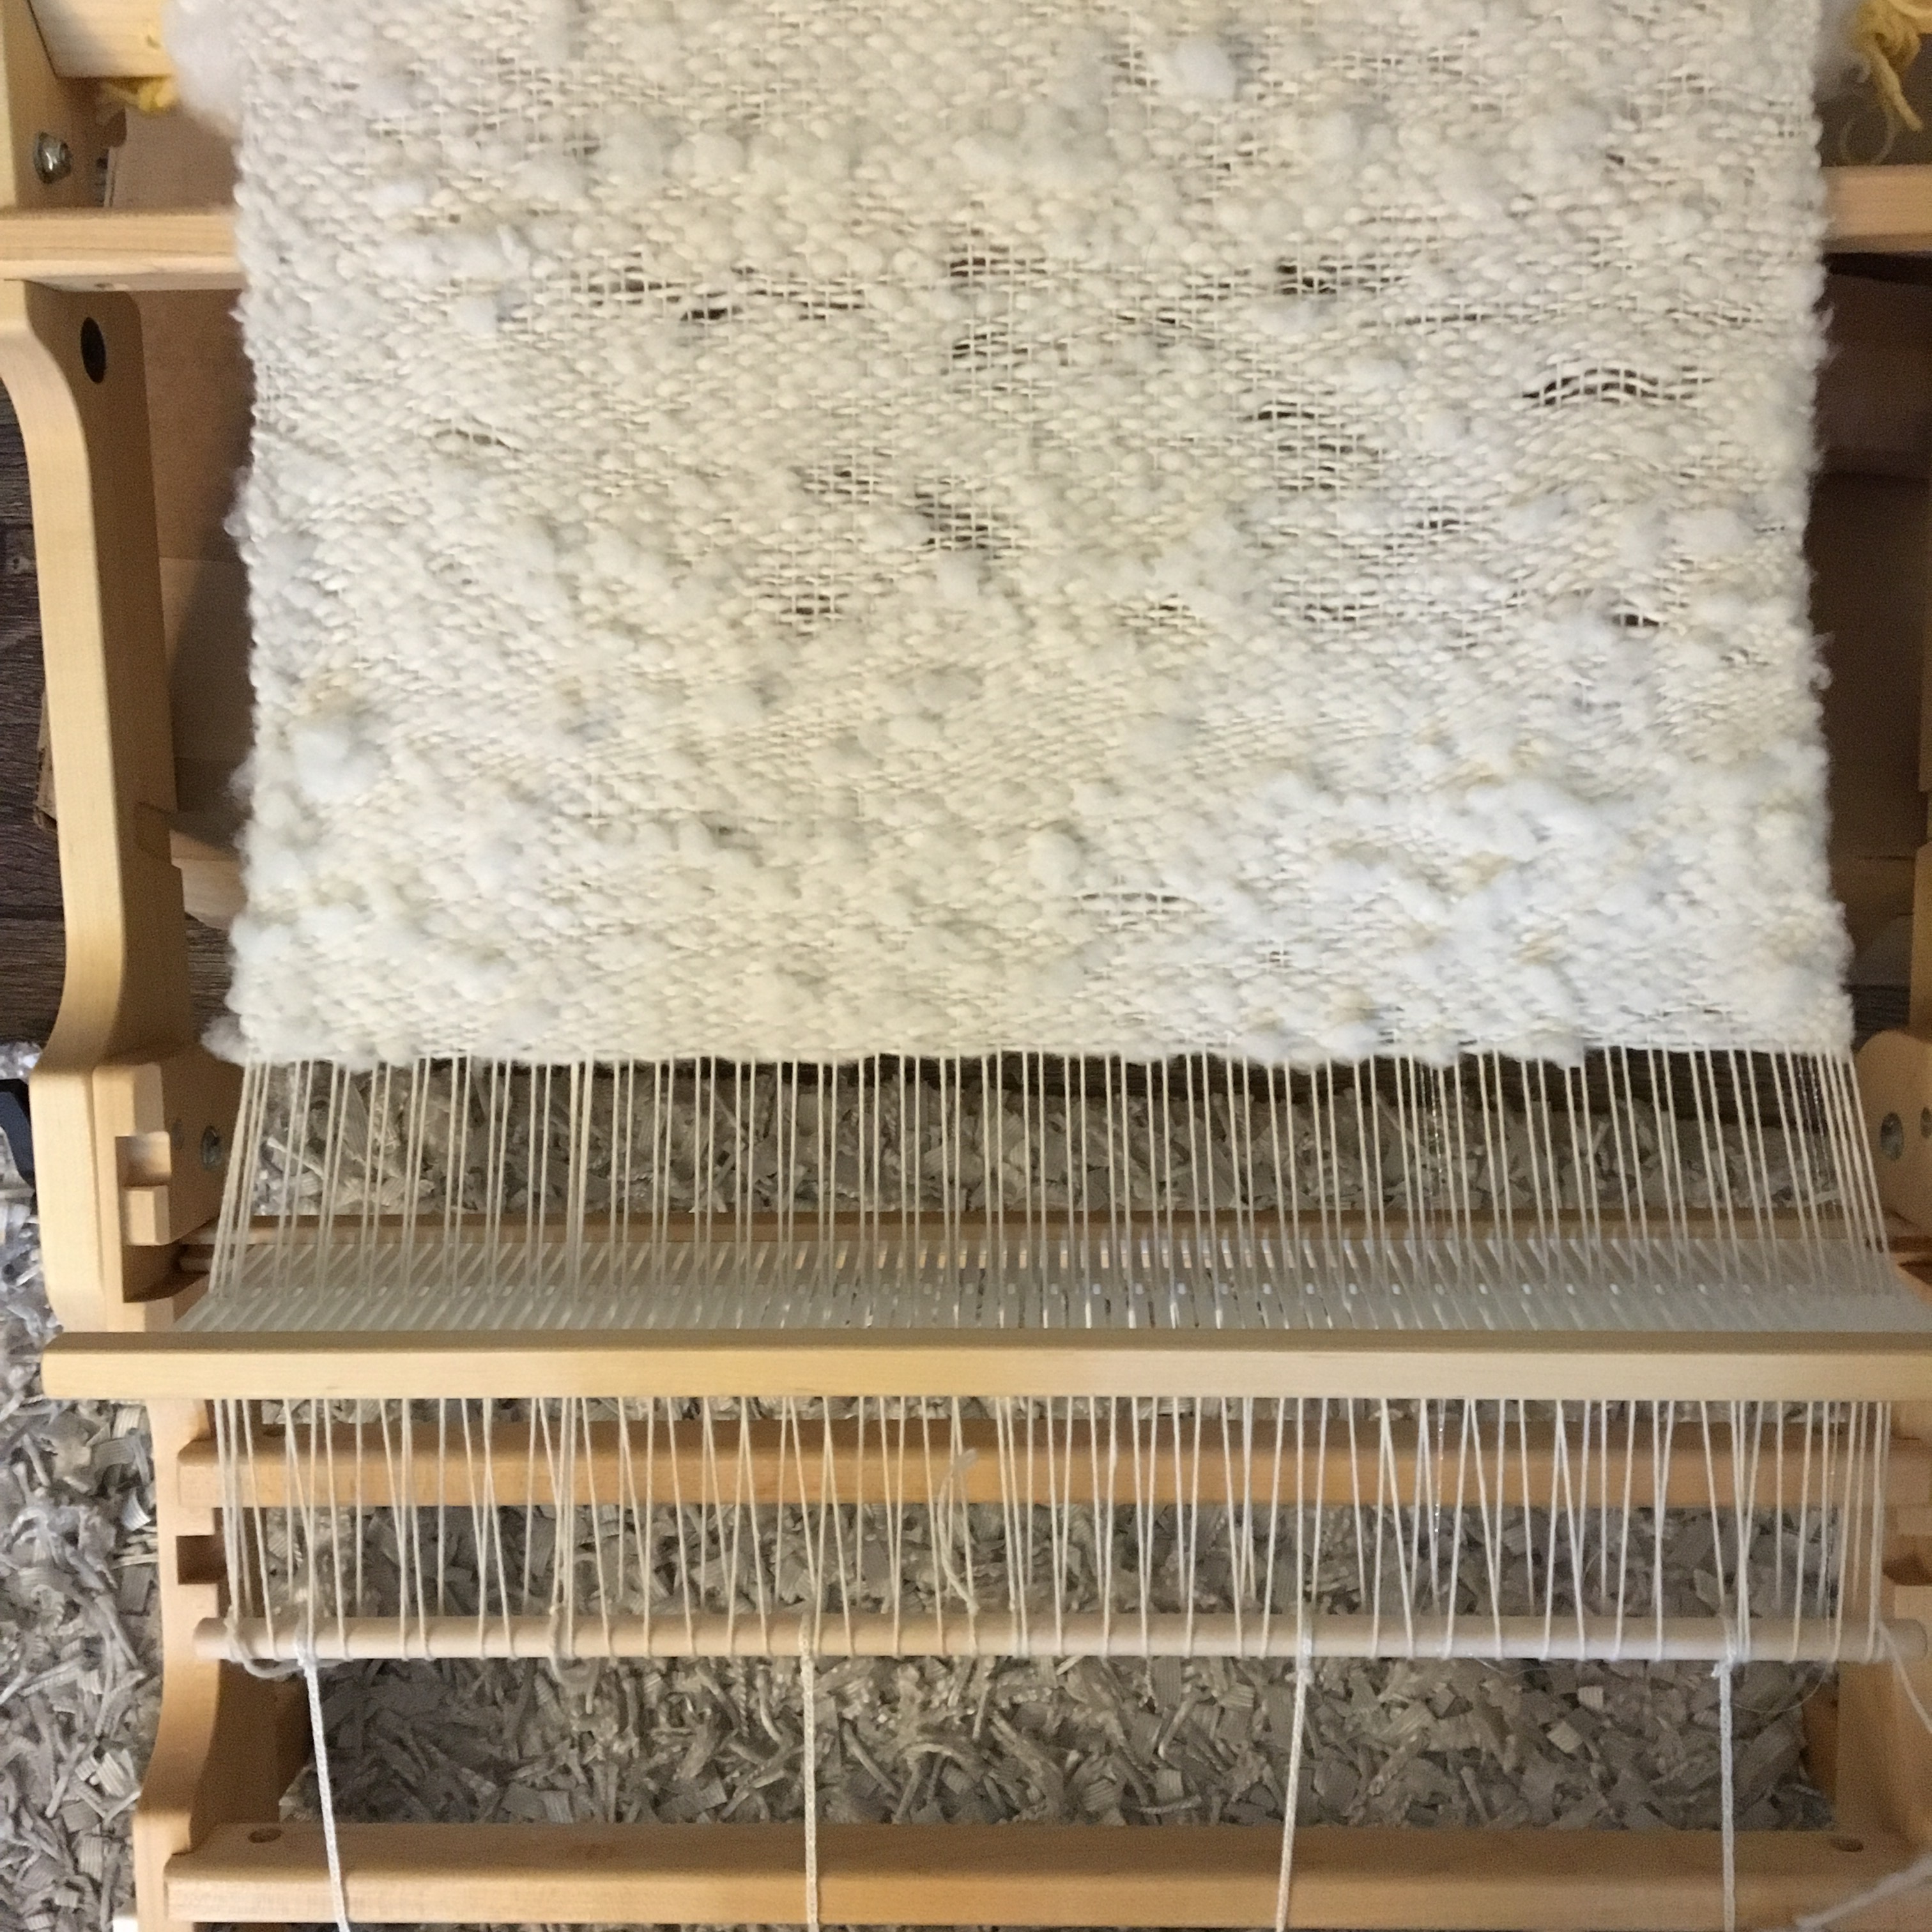
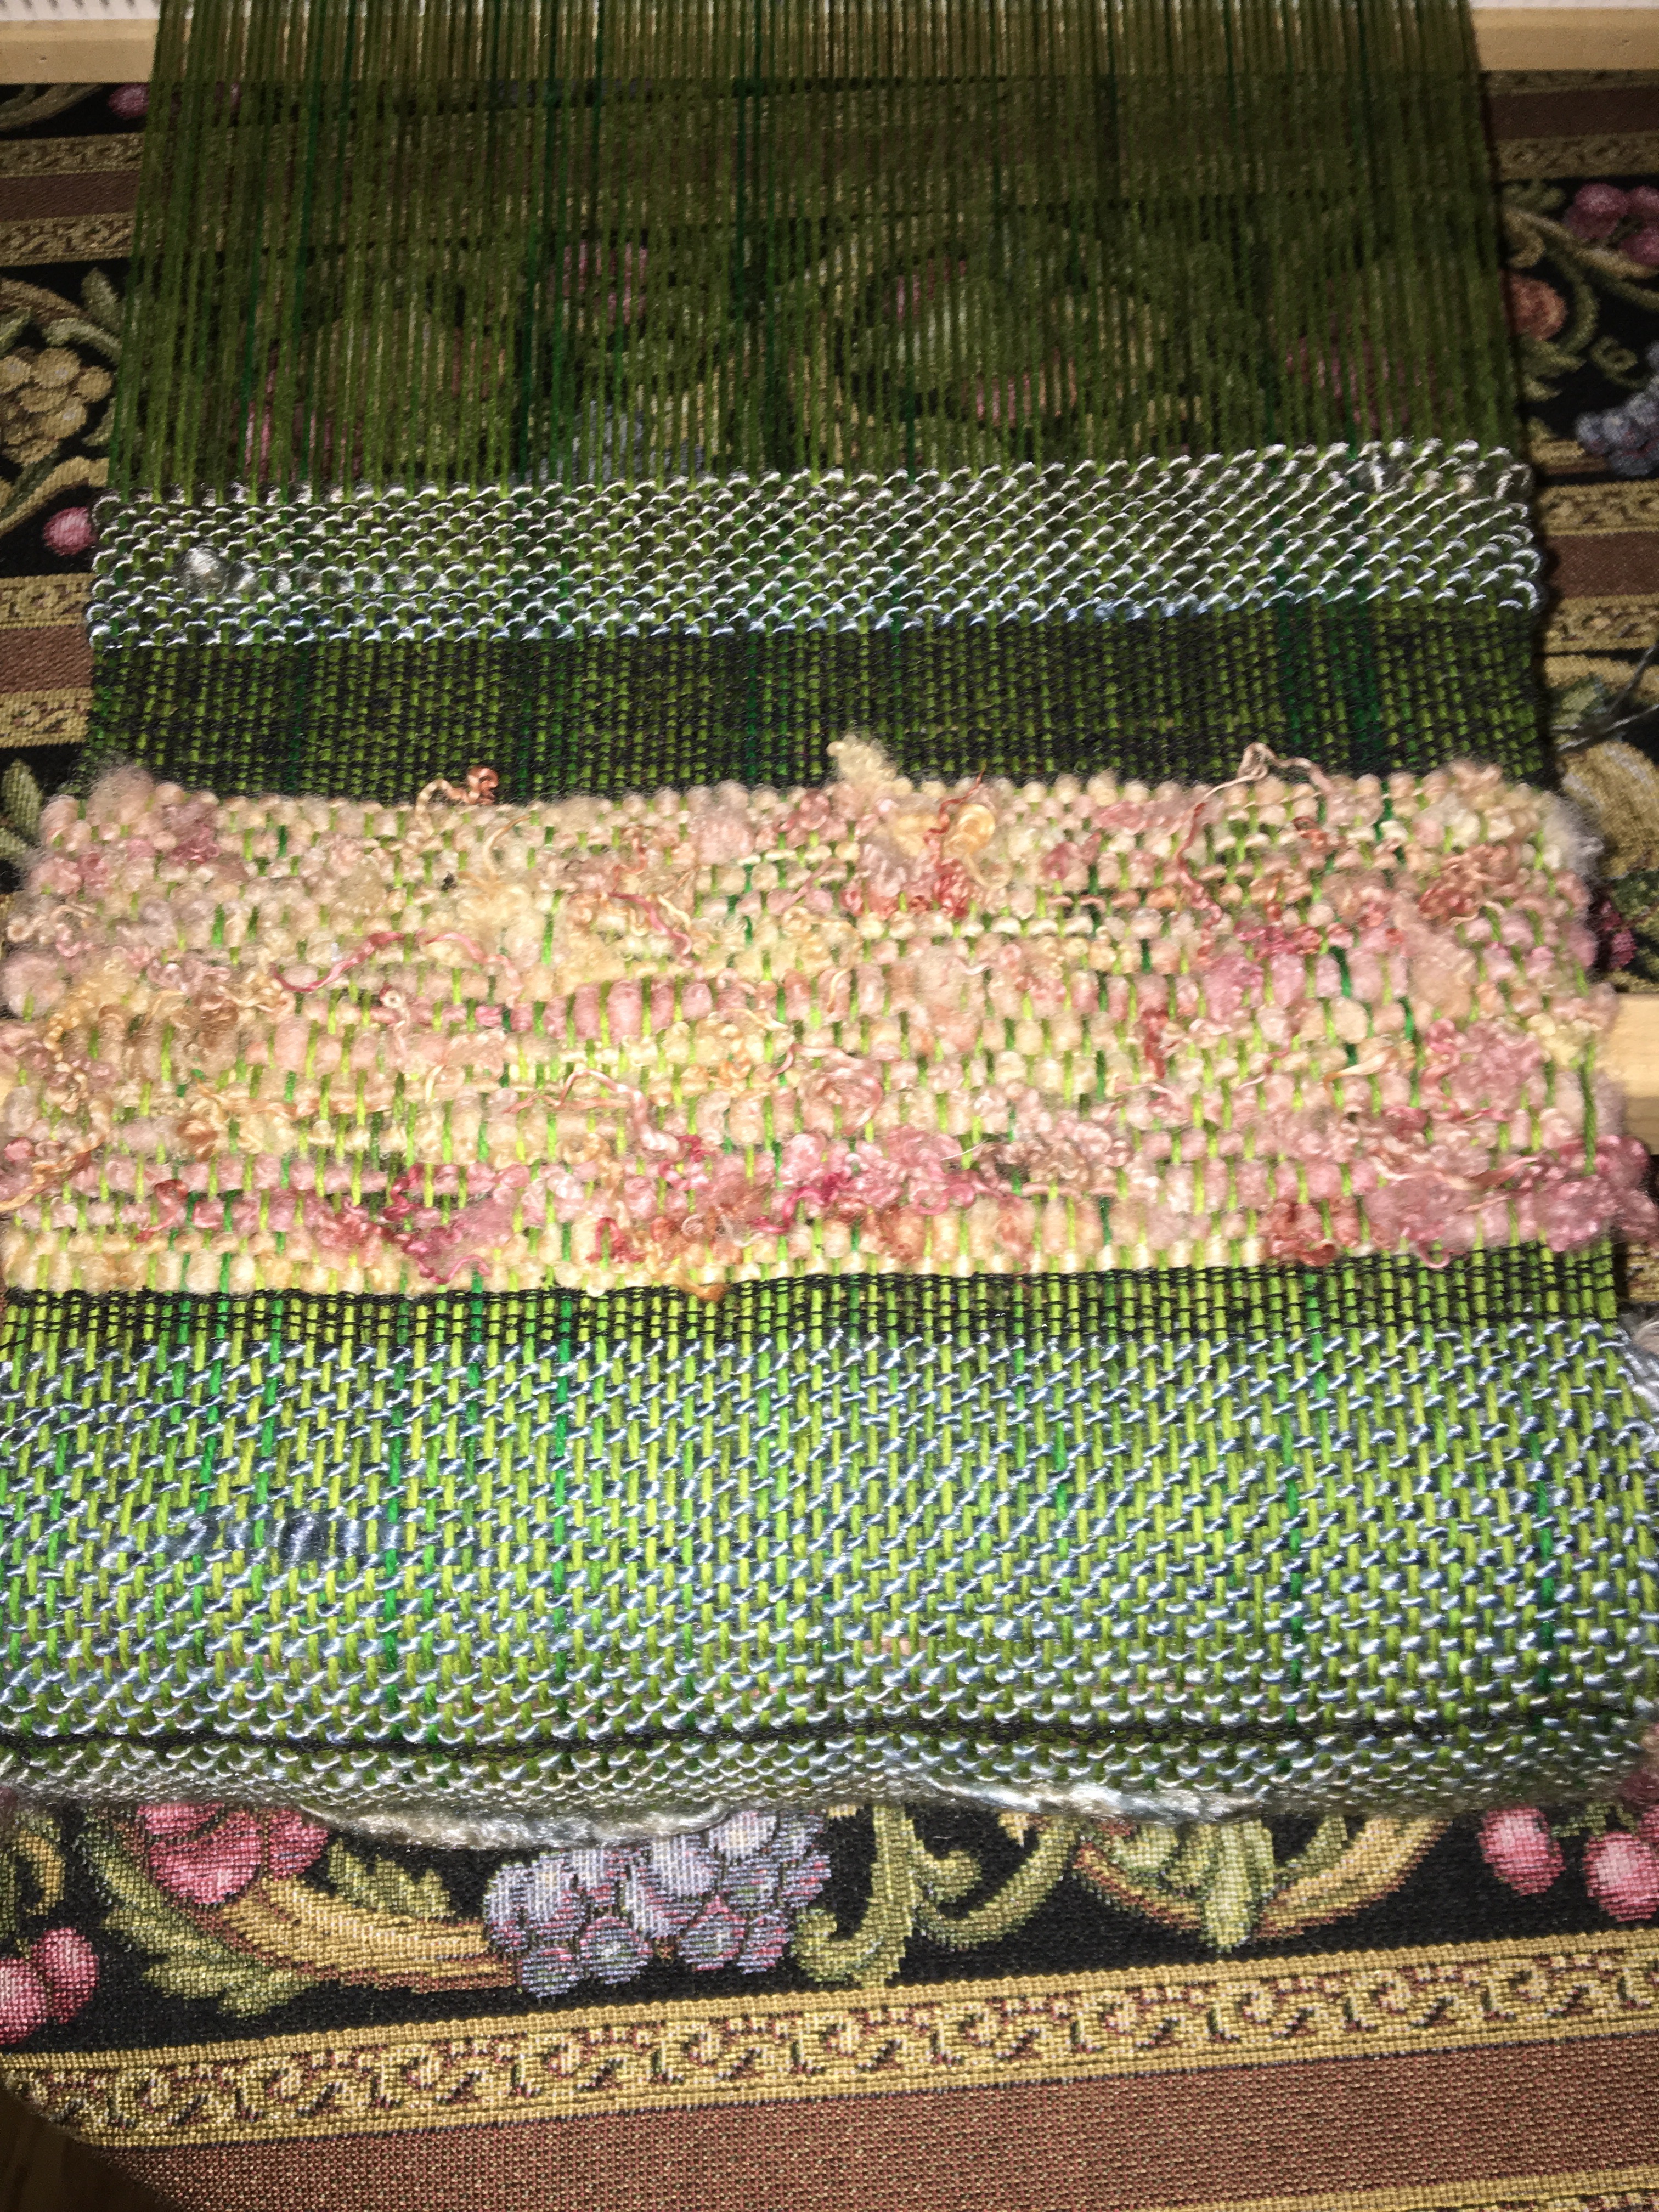
The loom was warped with 2 skeins of a white commercial yarn, made of, 50% alpaca, 25% merino, 25% silk. Since the weft was bulky, I warped every other slot. This being only the second attempt weaving, I wasn’t sure how this would work out, but gauge works the same in weaving, as it does with knitting and crochet. I wanted a fabric that was soft and drapey vs something stiff and able to stand upright by itself.
I wouldn’t have had enough yarn to warp had I gone every slot, so every other slot worked perfectly.
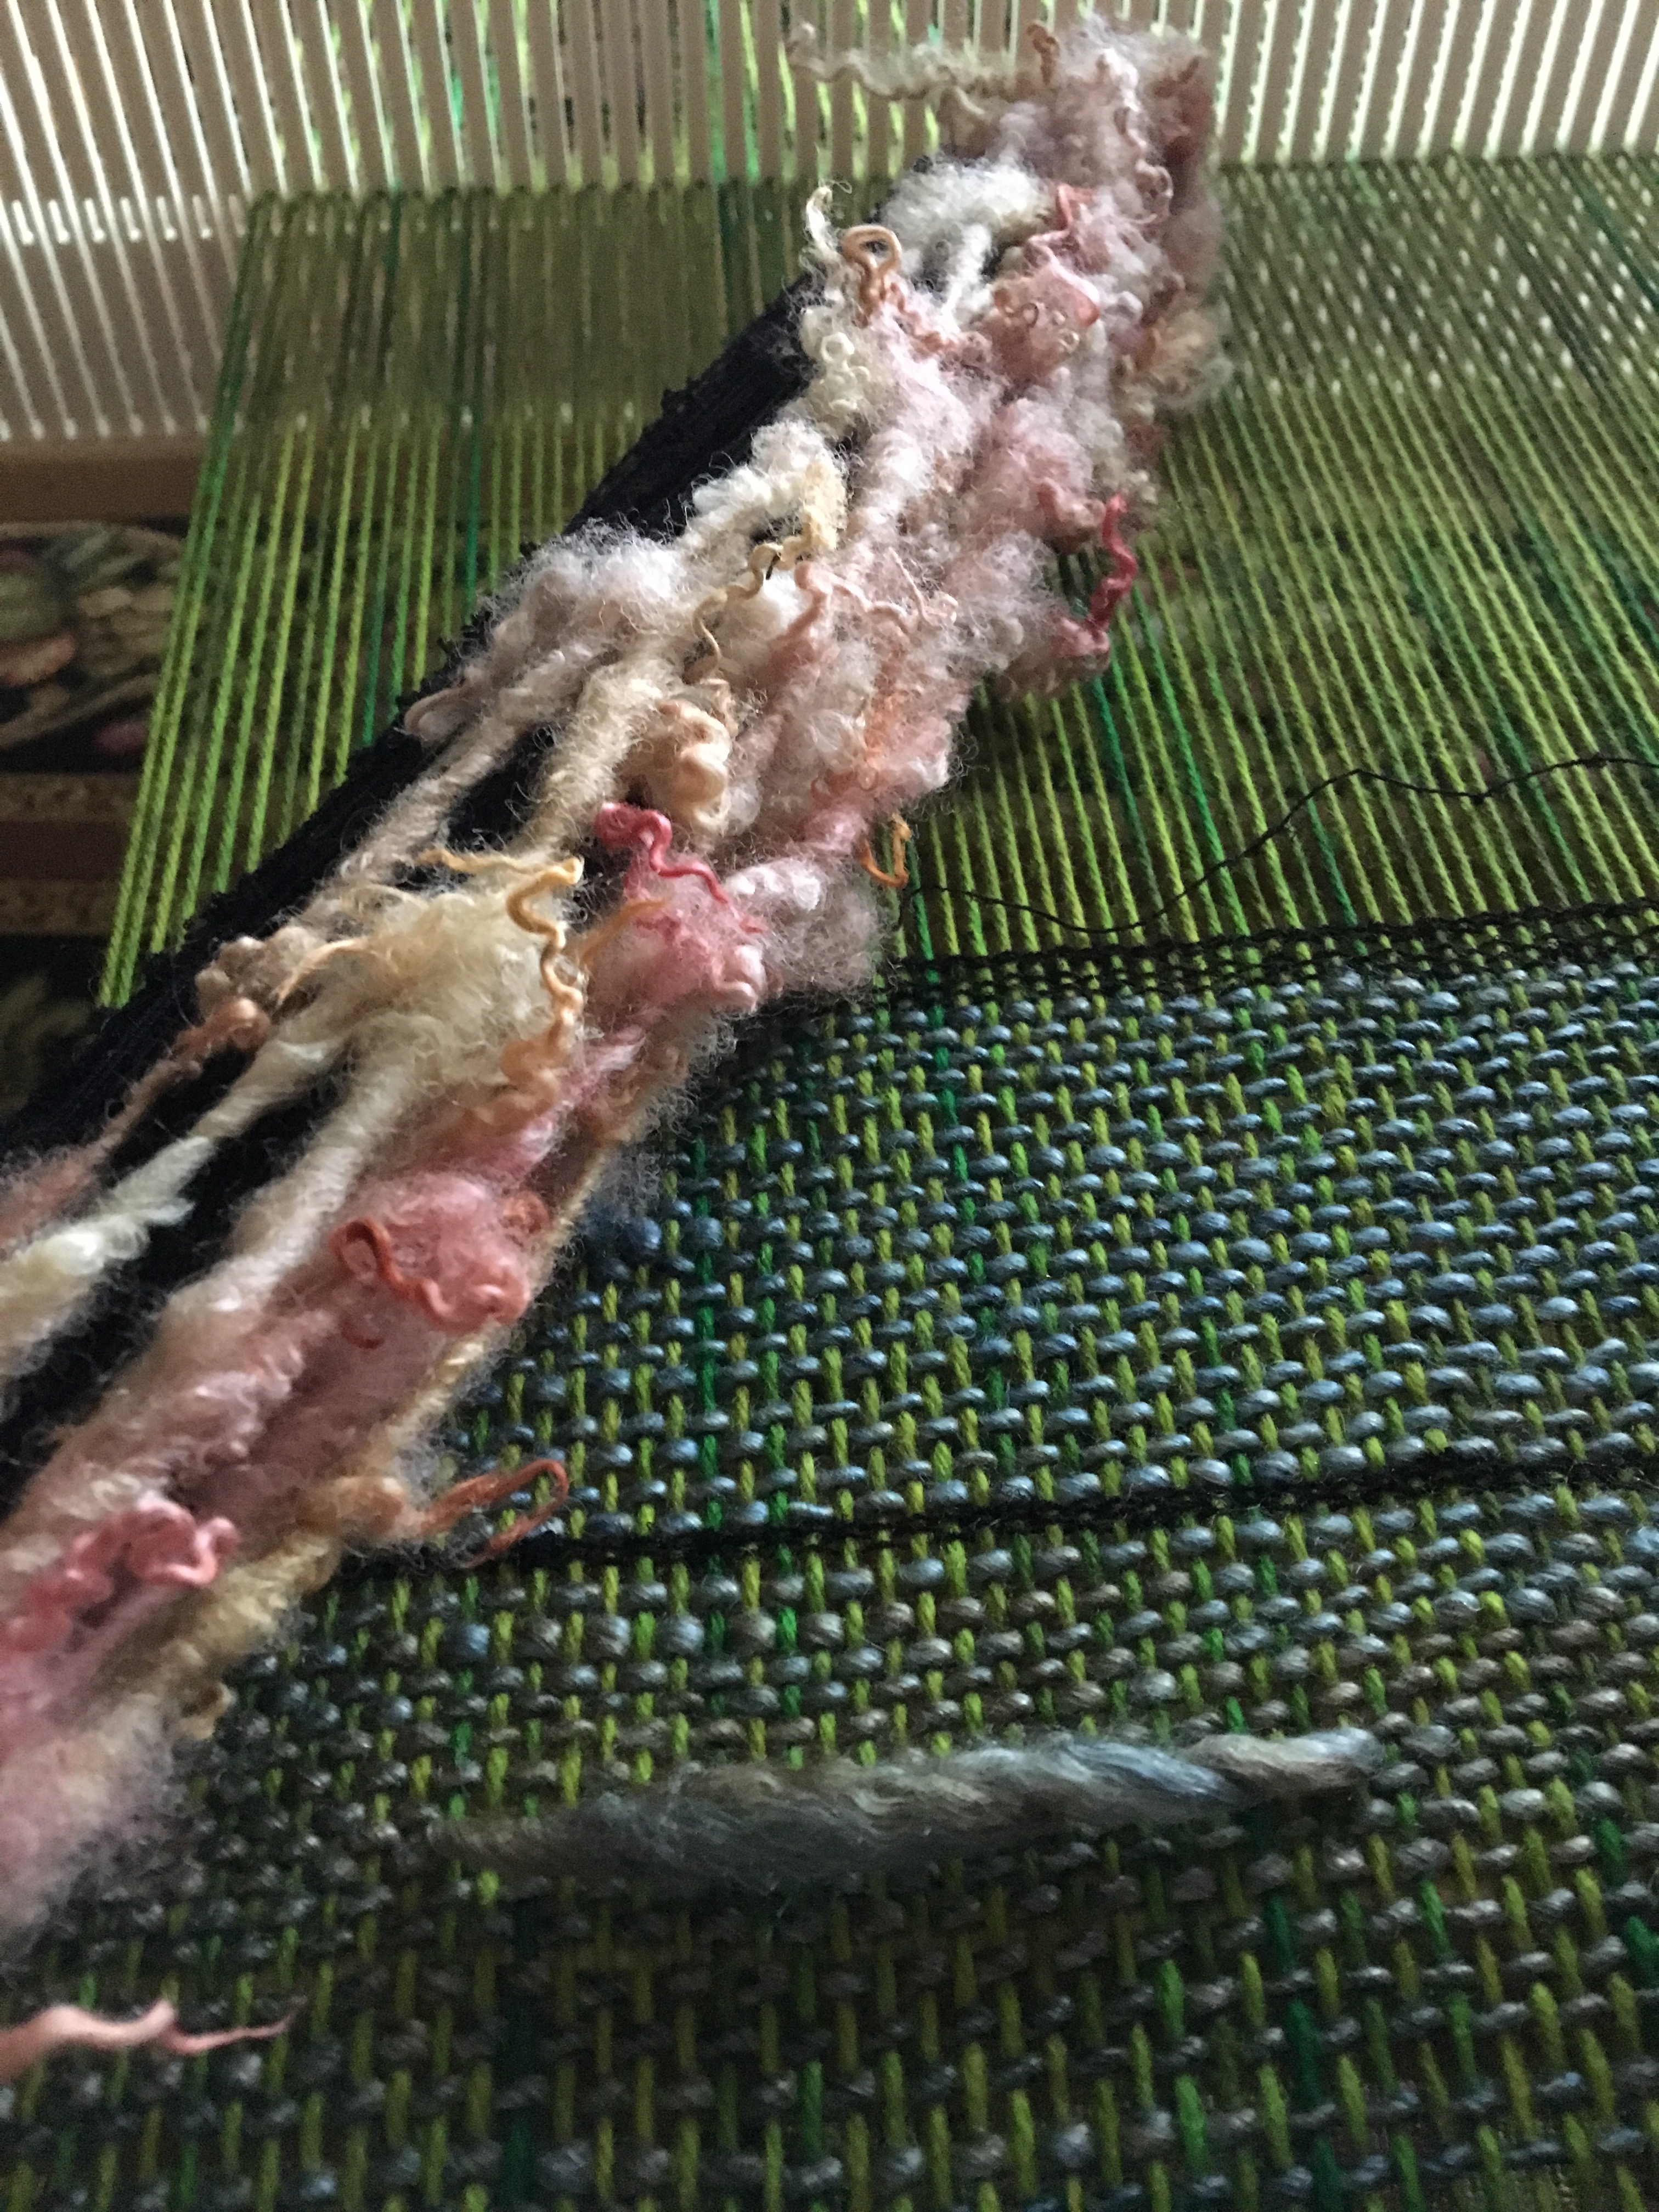
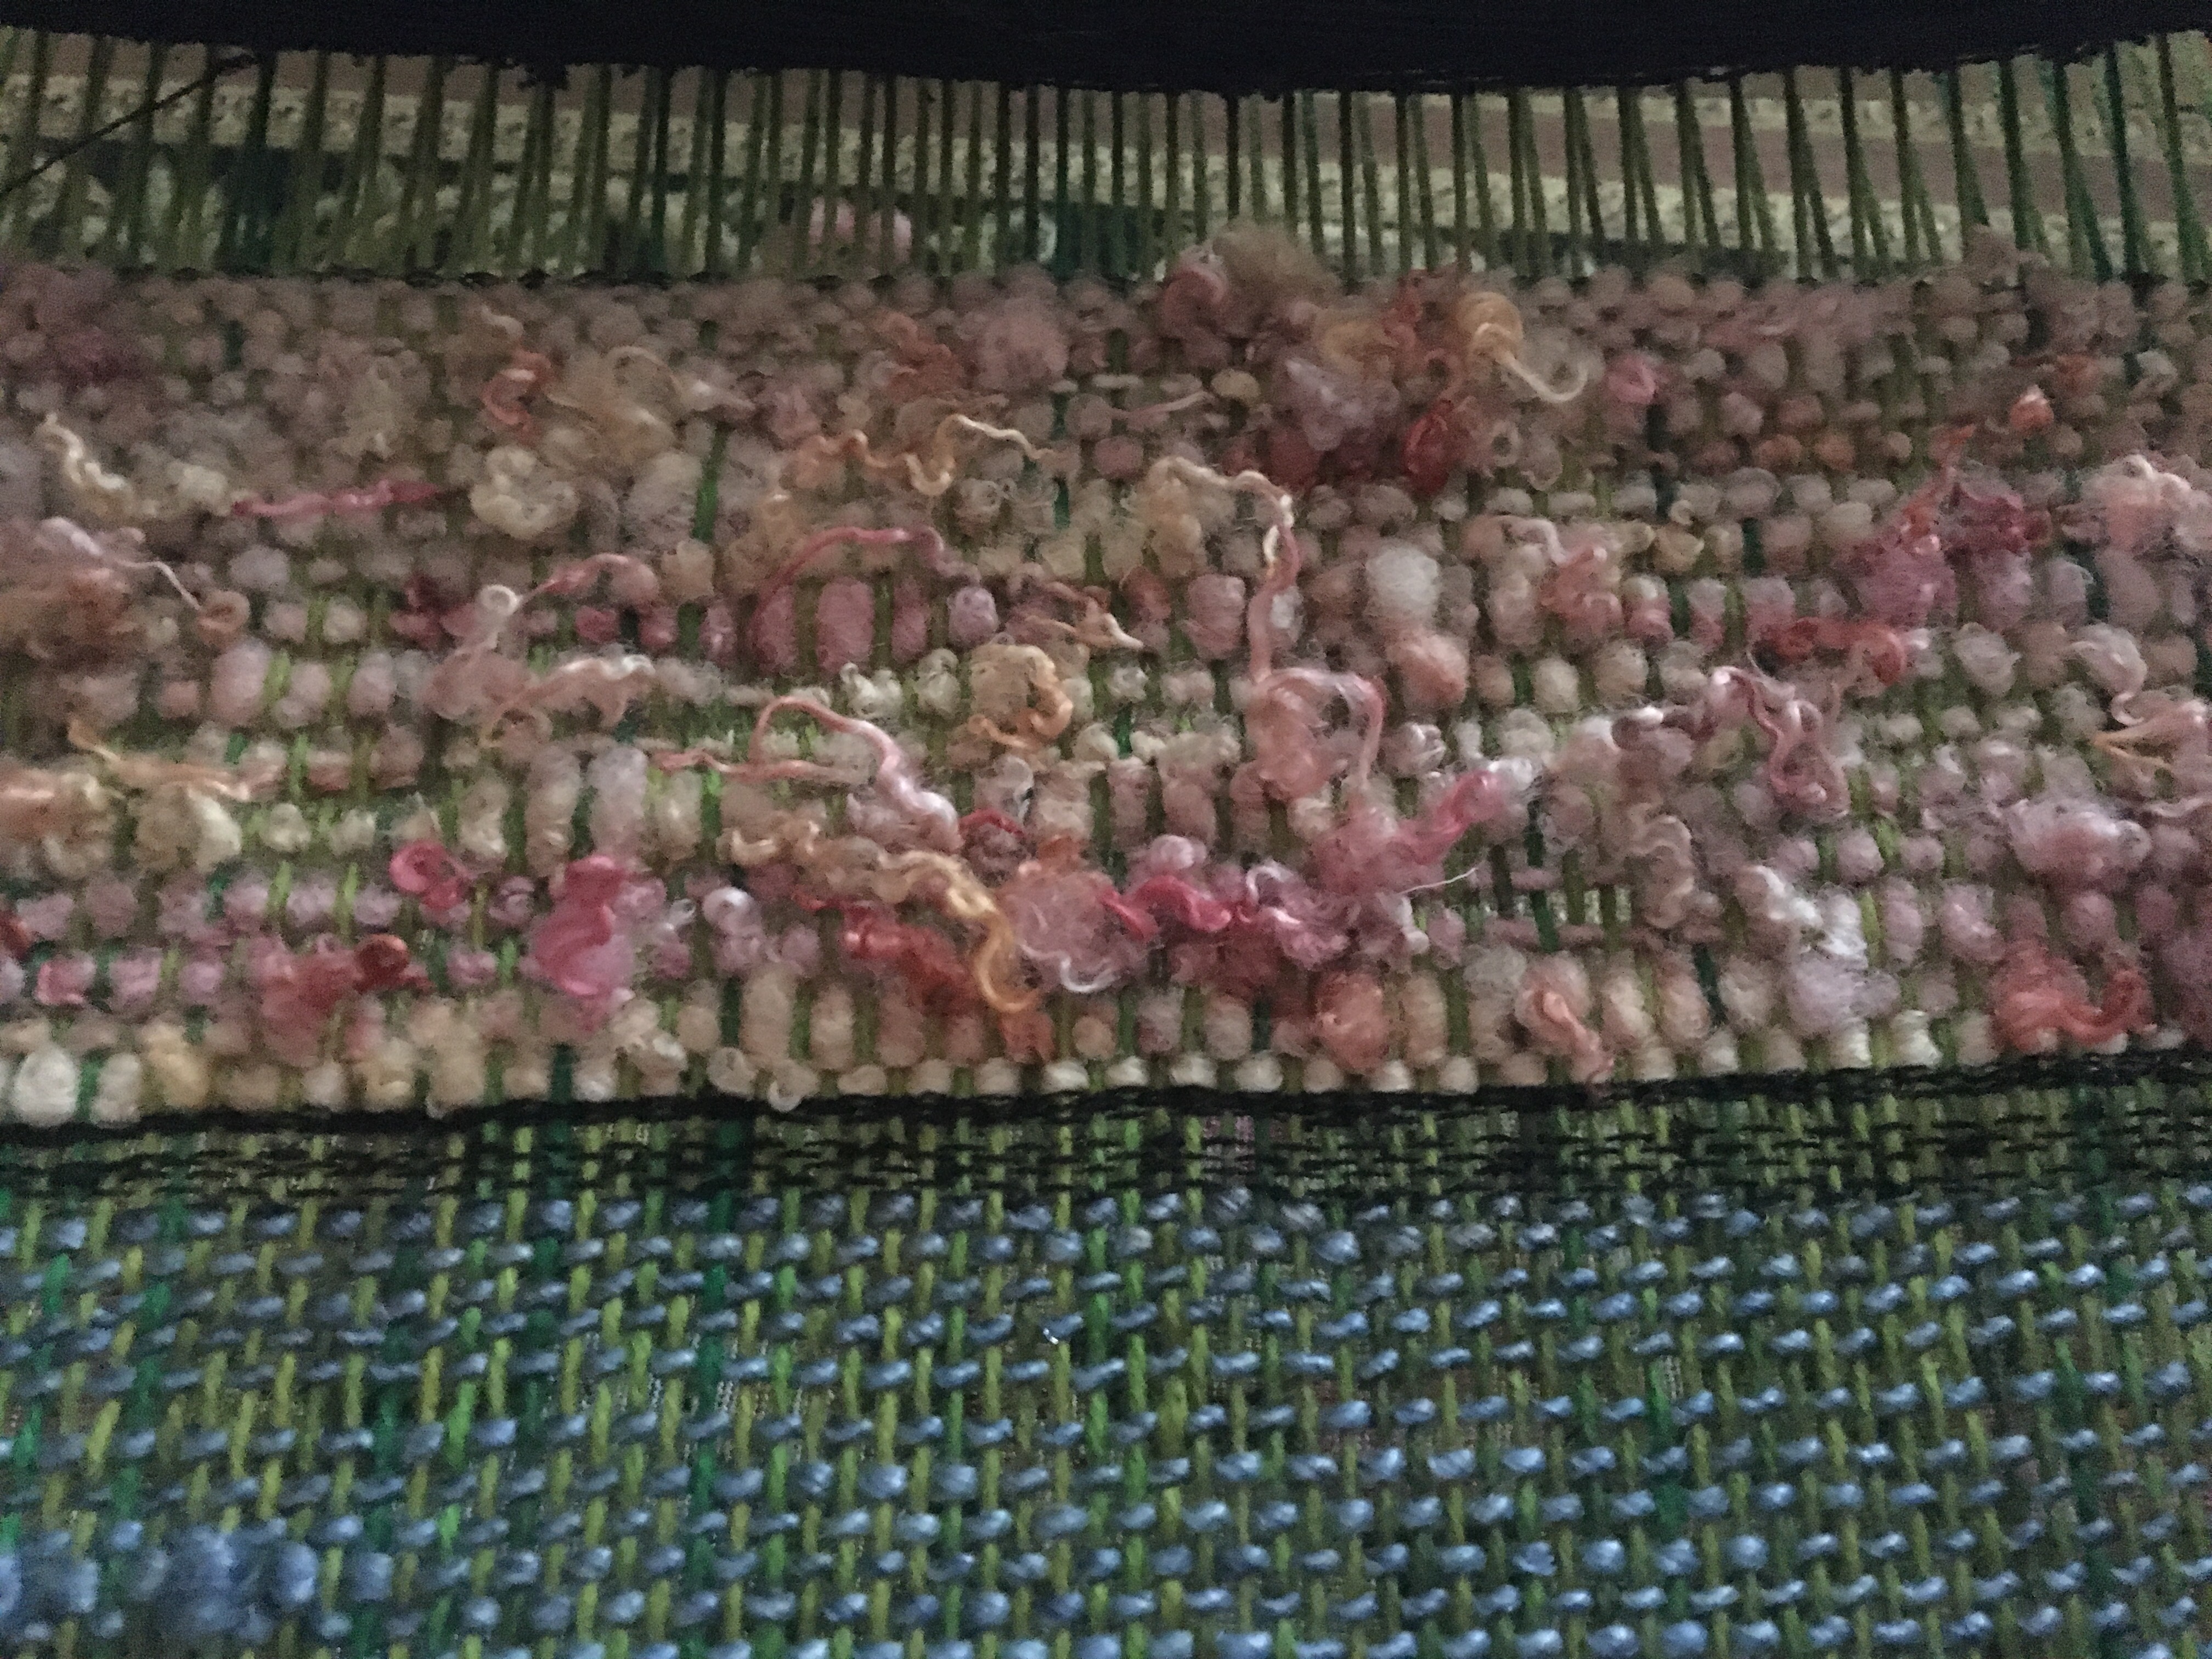
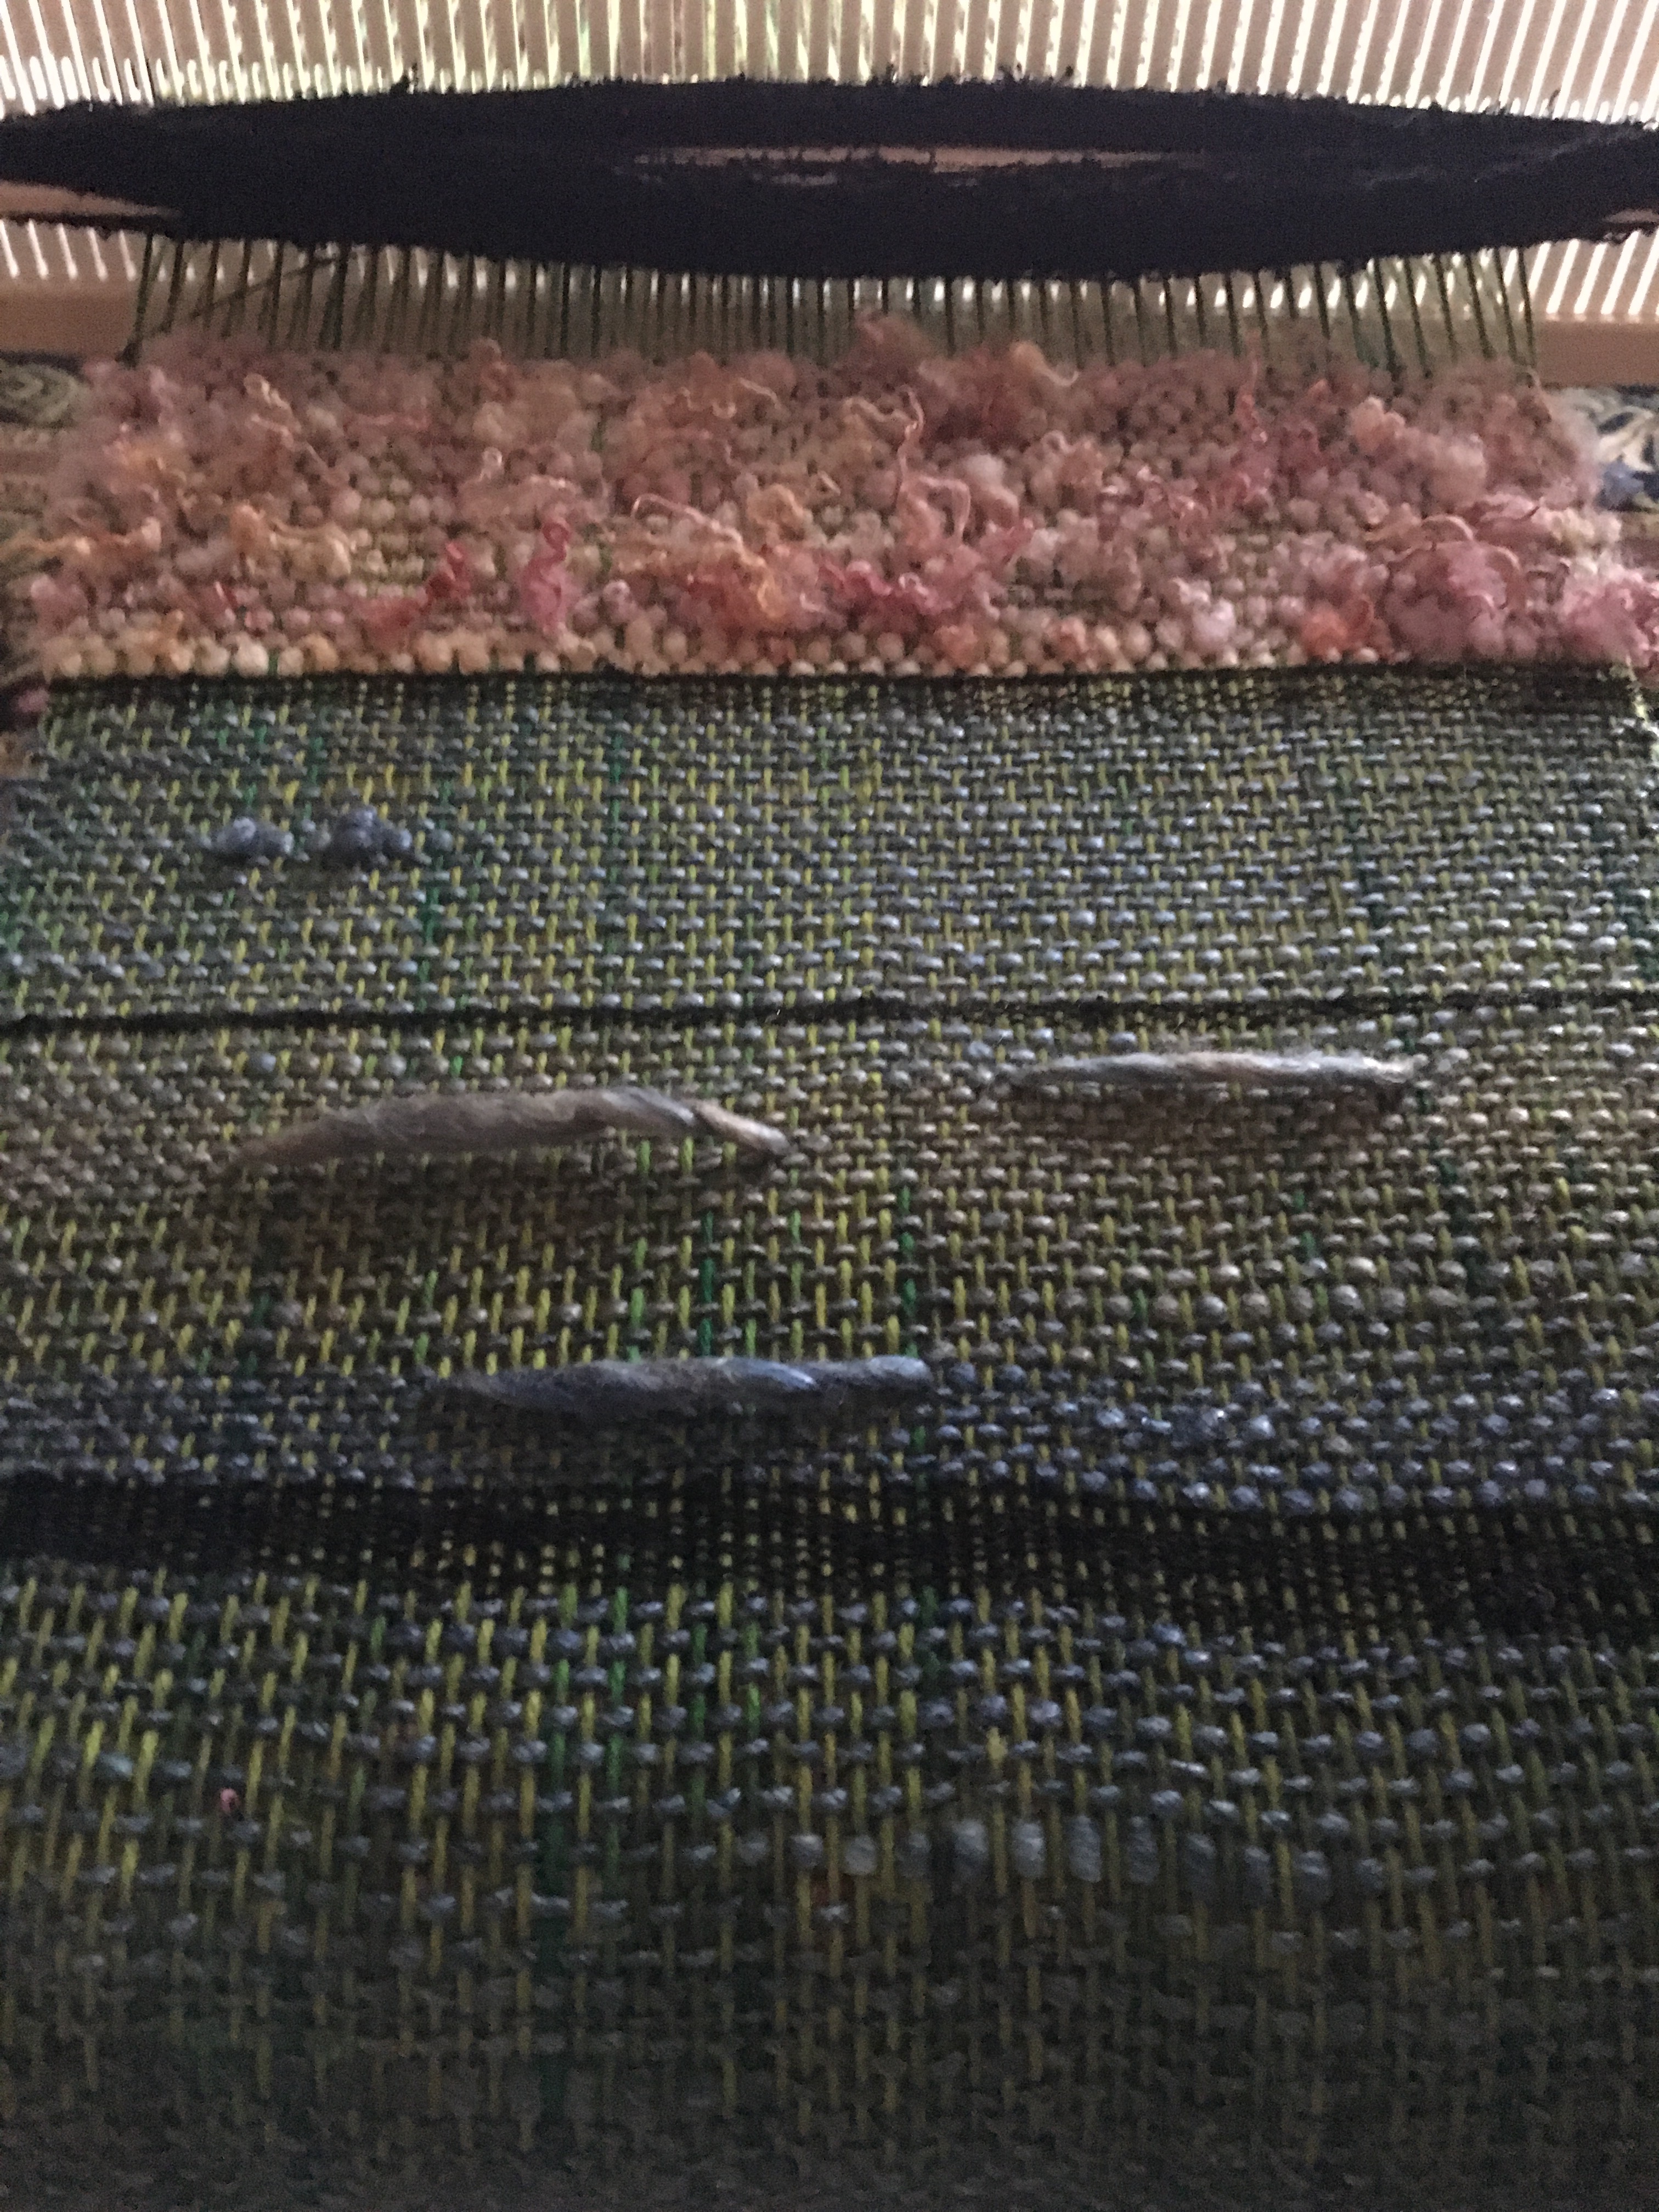
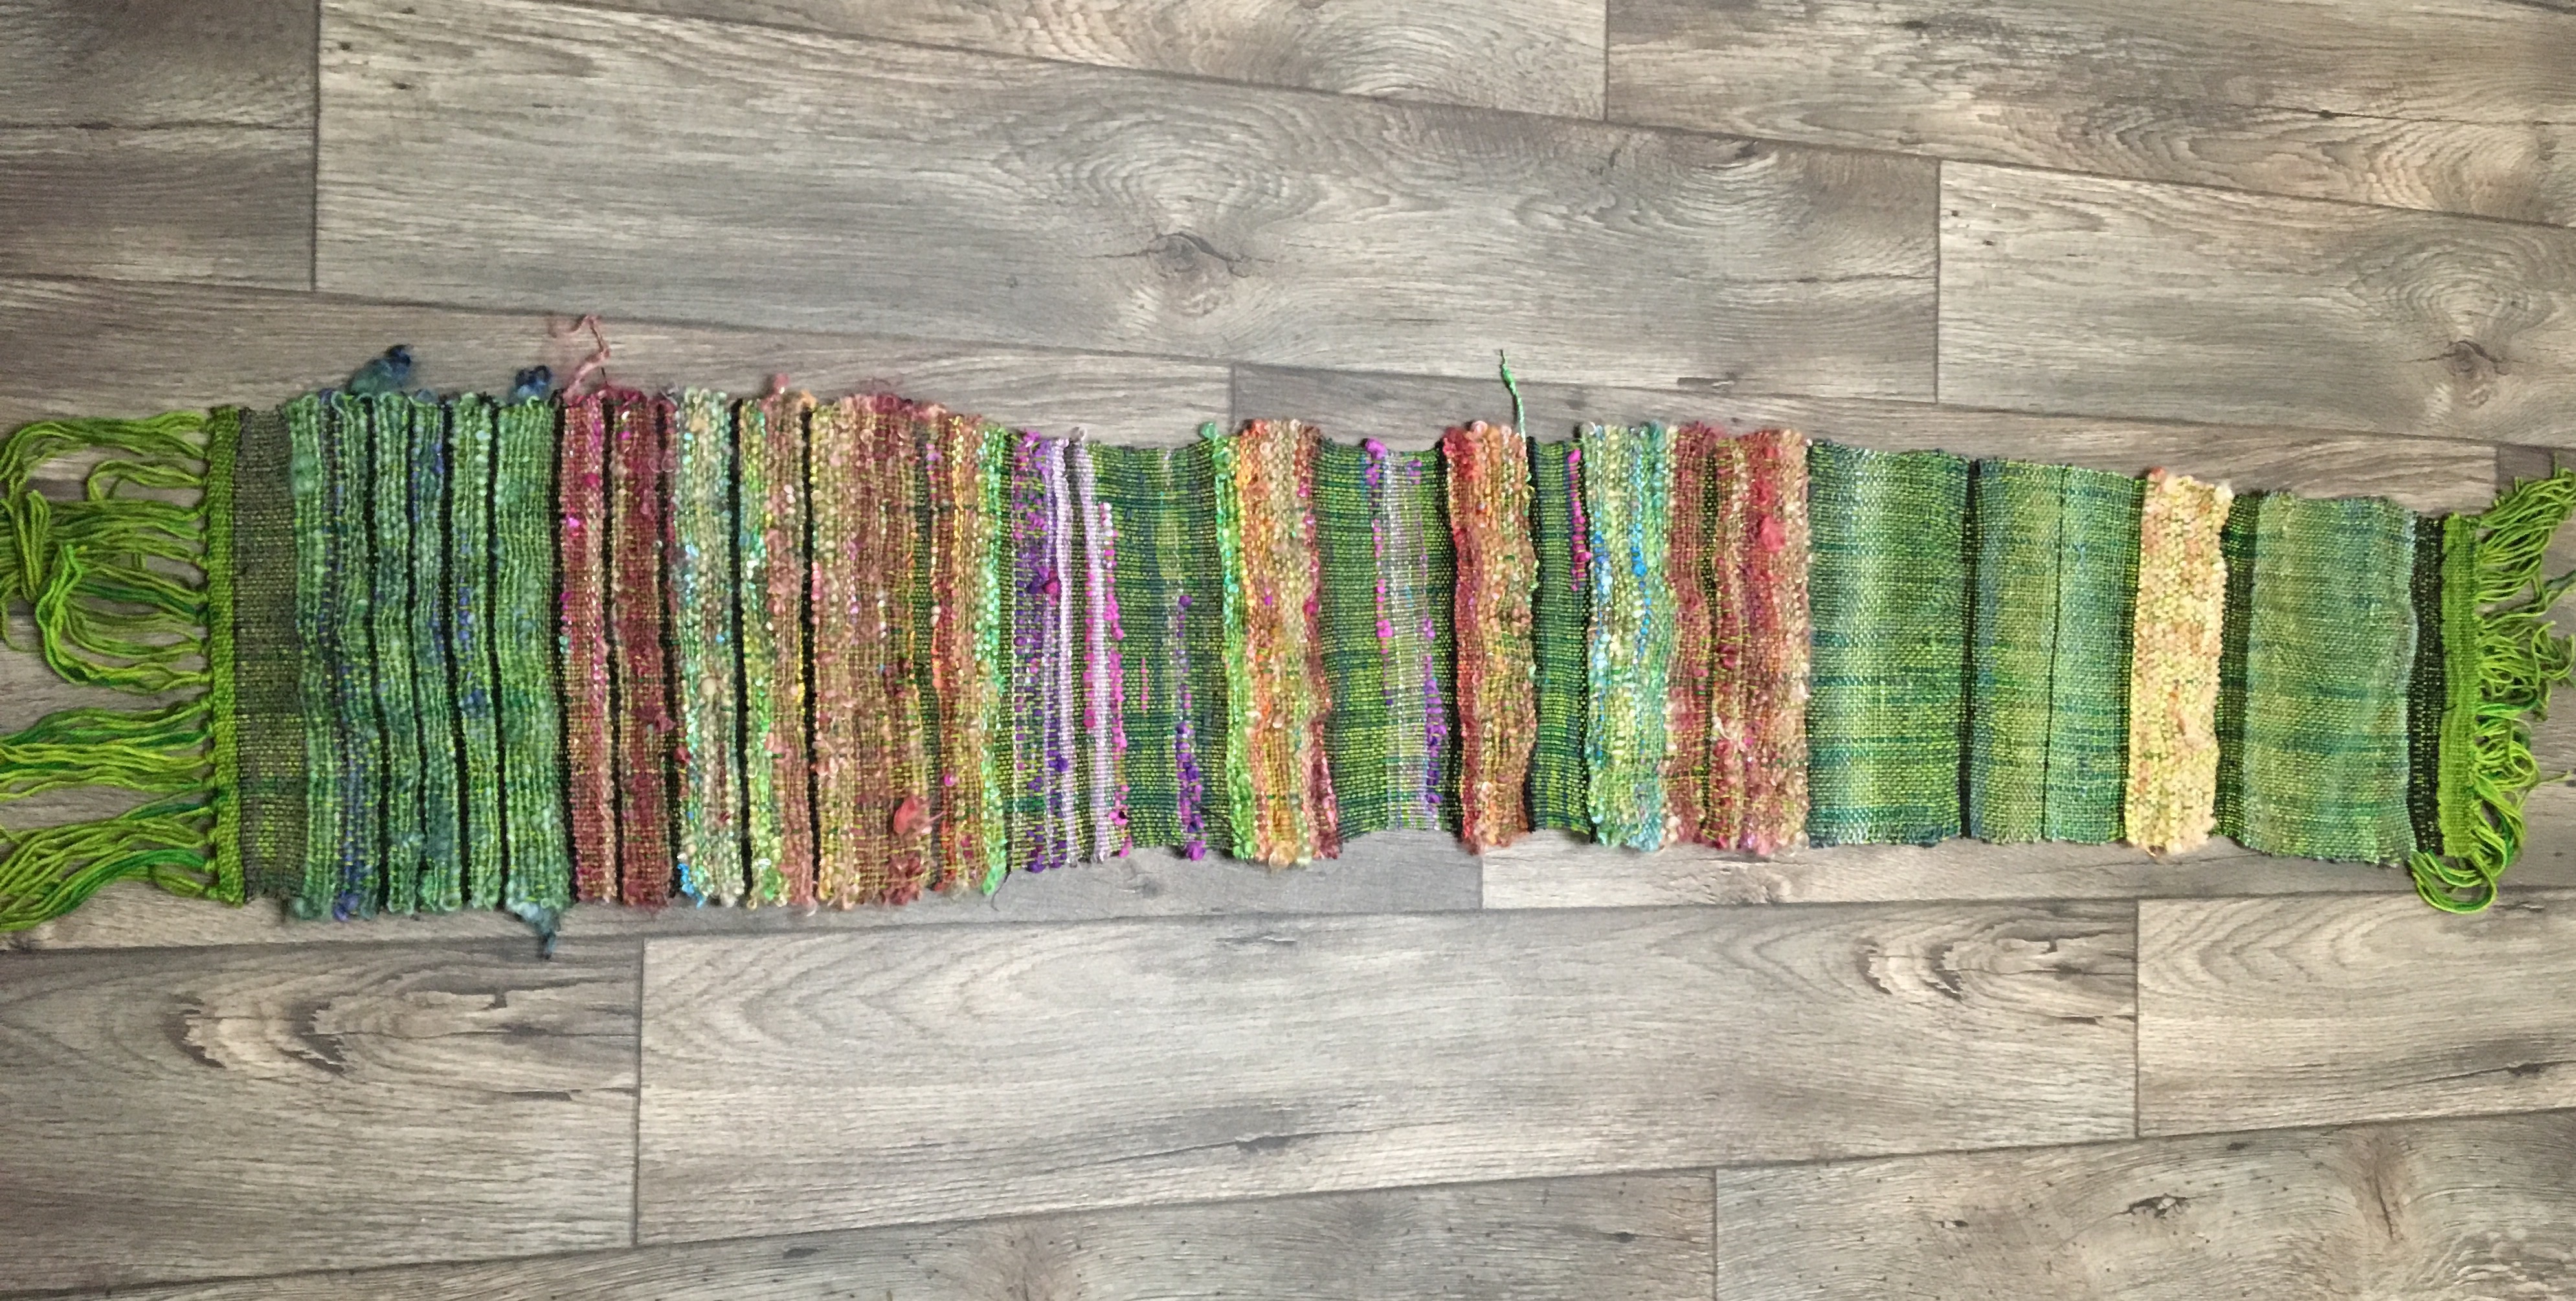
Pulling little puffs of the weft through the warp threads that had my favorite crimpy bits I wanted to show, as I went. Trying to keep things loose, airy, drapey, by not beating too aggressively.
The crimp I love was being maintained. The edges stayed relatively even. Puffs happened on both sides (front and back) equally.
With all the white, the curls and crimpy texture was the fun part of this yarn. I’m surprised I was able to power through and not get bored with all the white. When I look at all the progress photos they all look the same. I can struggle to get through a project that is all the same blah color.
I went through the handspun pretty quickly, and would stop weaving to spin a couple more skeins.
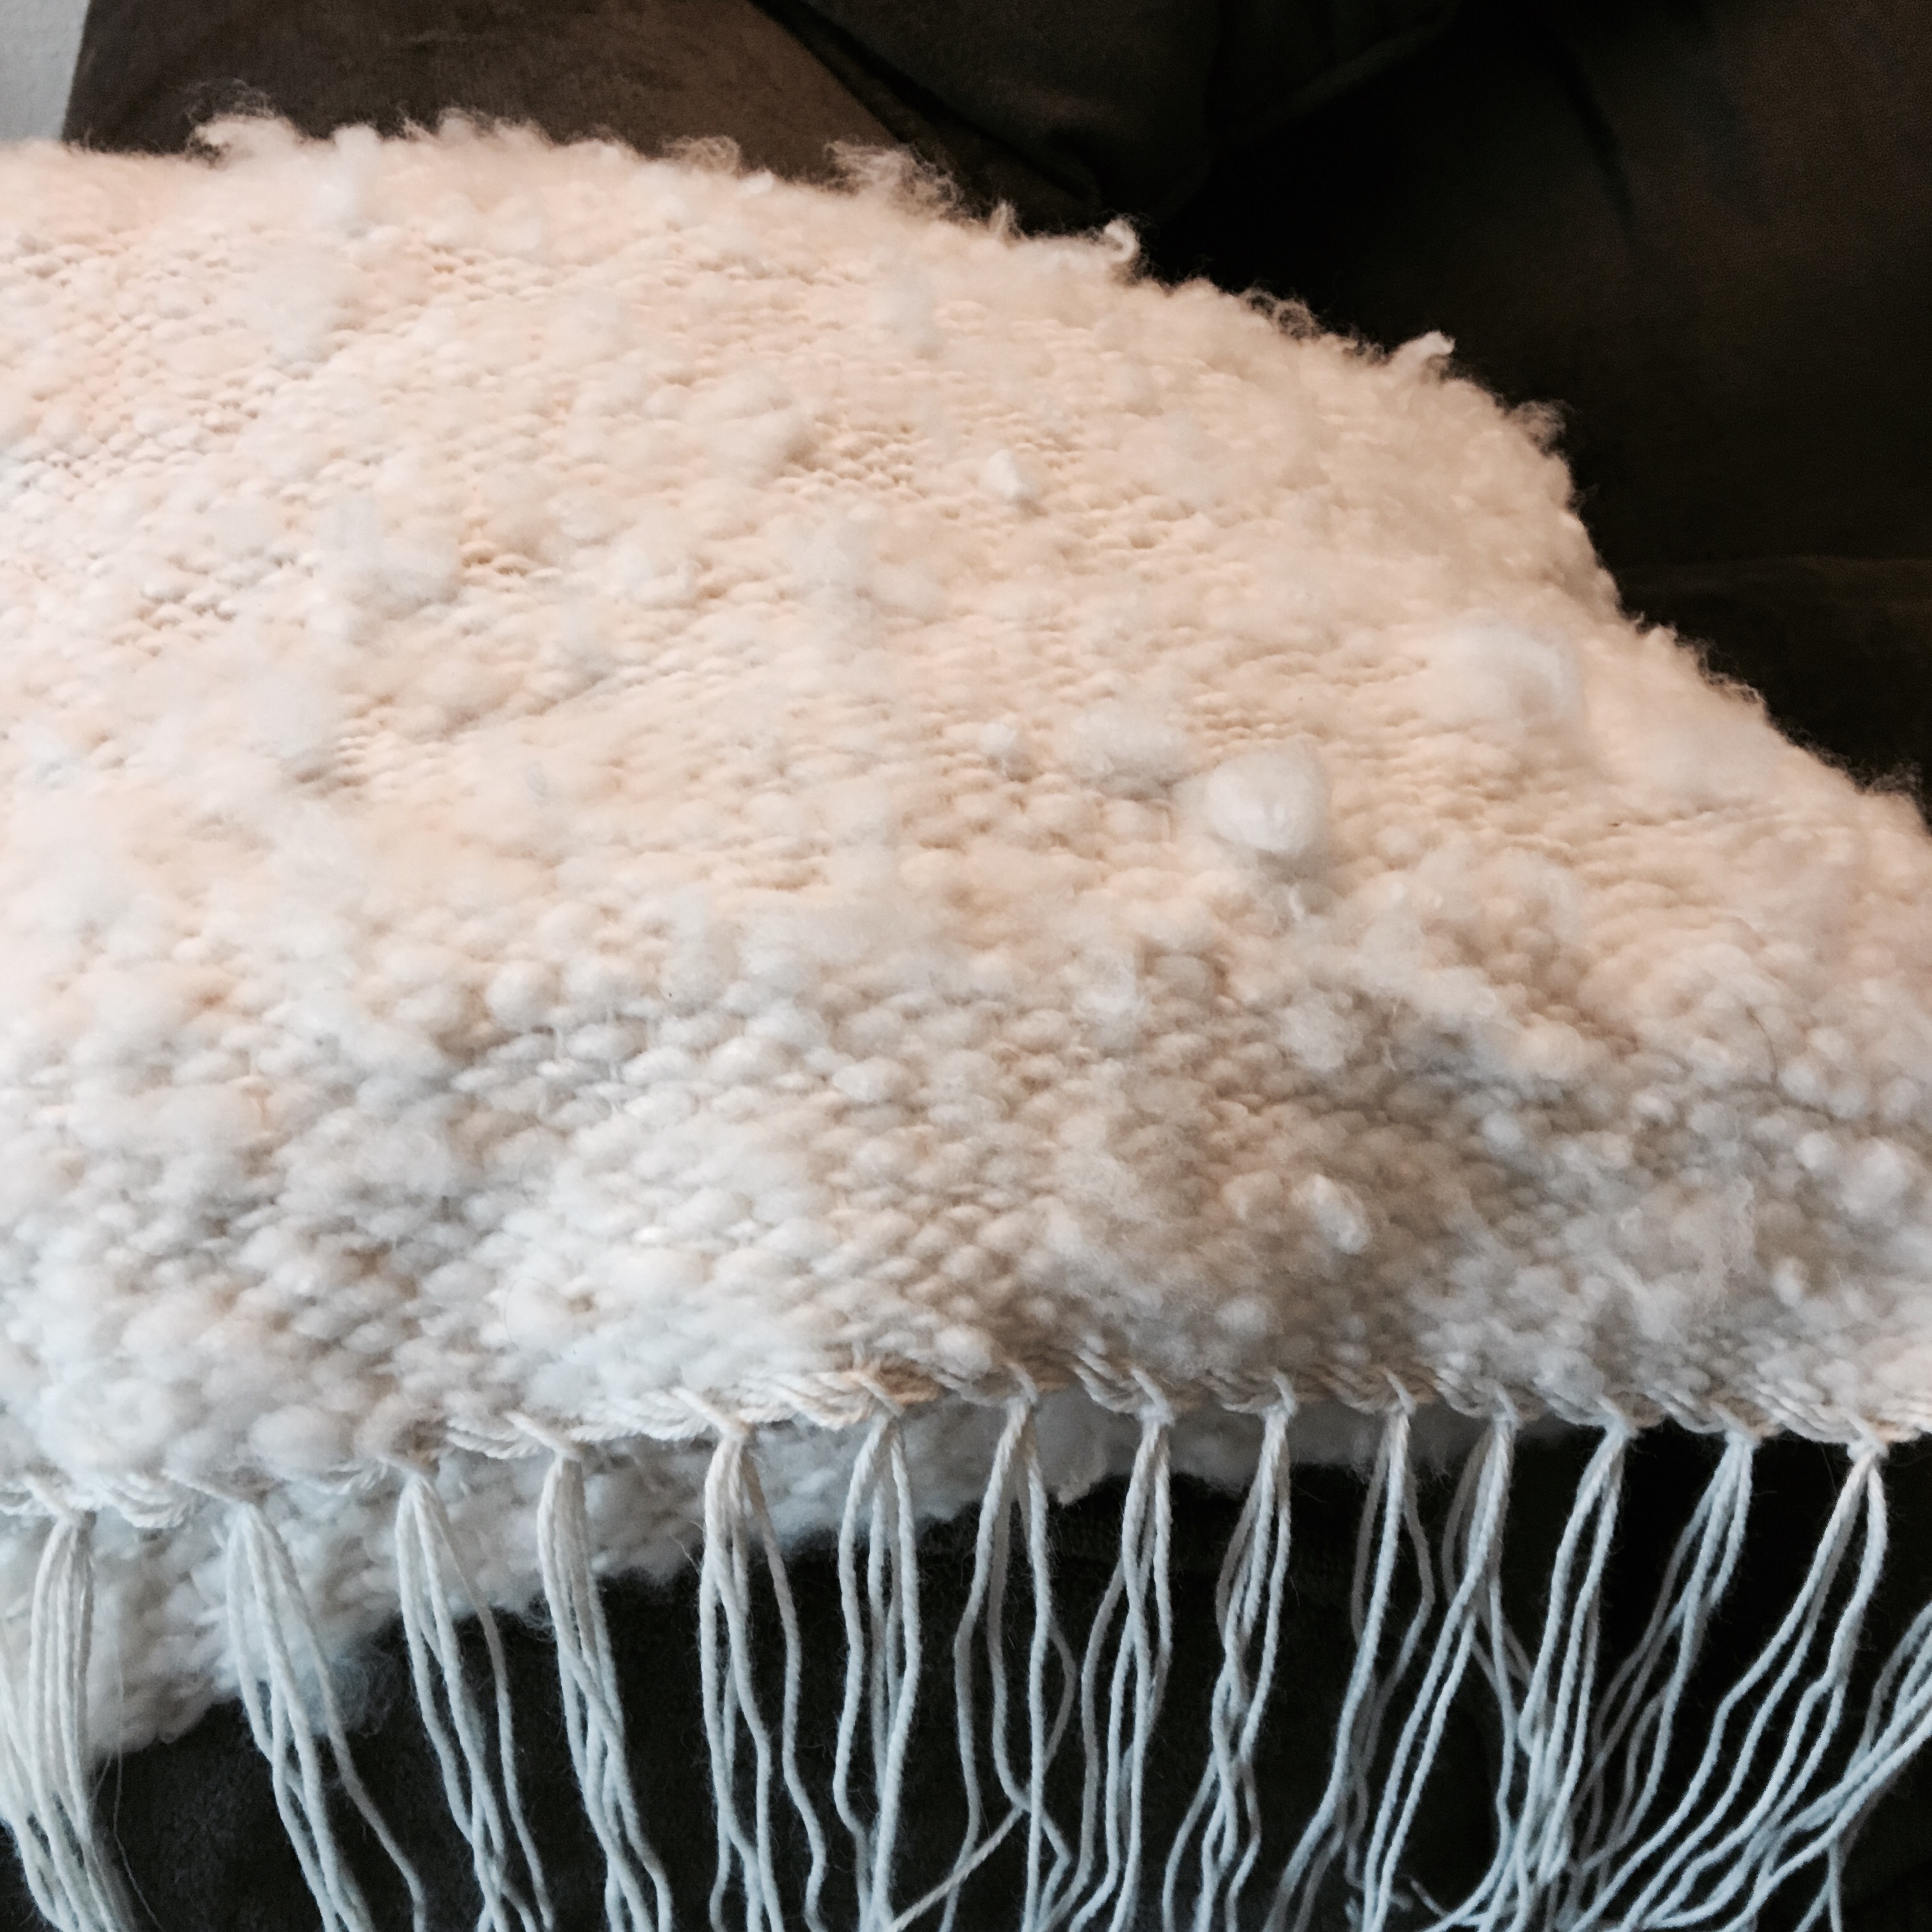
It is unreal to me how much yarn weaving takes up so quickly. I warped the loom on May 29. This shawl is 2feet by 6ft and used over 10skeins of yarn.
This has me thinking about future projects and really needing to be sure that I have enough to get through a project.
By the end I had started weaving much tighter in comparison to the looseness in the beginning. This is ok by me, as it is able to slide around to even out. But I can’t really tell. My husband pointed it out to me.
I tried a “new to me” way to end this project. Instead of a Damascus edge, I used hemstitching.
I much prefer hemstitching. This method is much easier for me. It’s easier because it’s still held tightly in place on the loom. Whereas, the other method I tried, it had to be cut first and then tied. As soon as it’s cut its floppy and moving around. I am really interested in all the different ways the ends can be done.
I also prefer the way this looks compared to the Damascus edge or the grouped tie off. This gives that little design element for a cute edge.
I’m really pleased with how it turned out. It would be pretty cool to have a blanket like this. I just don’t think it would get finished.
For my first sheep to shawl I think it turned out really nice.
It does feel like an accomplishment to take raw wool and process it, spin it, then weave it. Weaving is so easy and so fast compared to my knitting/crochet it almost feels like I’m cheating.
My husband said he really likes the way the loom looks when it’s all warped up with a project on it. I have to agree it looks almost like a musical instrument.
It was bound to happen. I mean, this is everything fiber arts, right?
My husband bought me a Schacht Flip loom for my birthday… Wait for it..
2 years ago!
I kept putting it off because I had only ever heard how hard warping would be. In the long run, believing this, may have helped. This idea I had built up in my head, of how difficult this was going to be, that when I mustered up the courage to take on the massive job of warping, I was pleasantly surprised with how easy it actually is. I did have some help from the people in Fibery Goodness group on fb. They talked me through any troubles. If you don’t know about them they are a great community.
And Fibery Goodness Facebook group can be found on Facebook Here
I had never taken a class on weaving. Everything I learned about weaving had come from YouTube. But the questions I still had, I was given answers in the Fibery Goodness group! Such great resource and people and classes in Fibery Goodness. I still don’t know the proper terminology for weaving. But, it is so much easier than I thought. Although, I have a lot to learn.
For whatever reason I had these preconceived ideas which I have since learned are not true, for me.
I thought I’d share those with you.
The following are myths I believed and what I have learned.
Myth – Warping is really hard
I followed directions from a video for direct warping with a peg. I’ve learned that warping is really easy. Considering it was a first time, I found it was pretty straight forward. Cutting the string at the end once removing it from the peg, was the tiniest bit nerve wracking, but they were already safe in their slots. The next time I have to make this cut, I won’t think twice about it.
Myth – warping will take longer than the actual weaving
The warping process took me 45 minutes to an hour. I have been weaving a bit each day for a week and I’m still not halfway. The steps that take the longest are bringing the yarn through each slot to the warping peg, and then when I was finished with the warping peg removing all those loops held by that warping peg, and cutting them. Rolling the warp threads closer to the loom, then taking one of the two pieces of yarn in the slot and hooking it with a special tool through the hole. It’s not fast, it’s not difficult, once you thread the first few holes, you get into a groove. Stick your hook in the hole, grab one thread from the slot next to it, pull it through the hole, NEXT! It becomes a process of doing one after the other and before I knew it I was at my last slot/hole.
Myth – lots of adjustments tying it on make sure it’s tight
It doesn’t have to be tight, it has to be even. The second you need to roll it on, you have to release a latch that completely loosens everything, but it will be rolled to the other side and that can make it as tight as you want. That’s why being evenly tensioned is more important than tight. Initially, I kept tightening each group of threads but I realized that tightness can be dealt with by turning the warp beam. It’s making sure it’s even so that when it’s turned it all turns together.
As far as I remember, I didn’t have any misconceptions about the waste yarn. Although, I am glad I used separate pieces. At the end after taking it off the loom, when waste yarn is pulled out, if I had to unweave one long string that would have been a pain, vs pulling out short bits, one row at a time
I enjoyed adding the waste yarn because I could see the warp yarn align itself to its proper place with every beat. I’ve seen regular yarn used for this but I wanted something bigger thinking it would be easier to retrieve at the end. People use cardboard strips, or rolled up paper towels, strips of fabric, I used a yarn that I made from cut up cotton tank tops.
Myth-Weaving goes by quicker then the set up aka warping
I thought warping was pretty quick and easy. I varied the thickness of my weft threads. Some were lace weight and some was chunky. Obviously, the lace weight goes a lot slower. The above black lace weight weft was only 2 inches of weaving and took longer then the whole warping process.
Even when I switched to a thicker weft it still took longer for me. Which I am pleased to have discovered. Weaving is definitely the fun part. I got a good week almost two weeks of weaving time everyday.
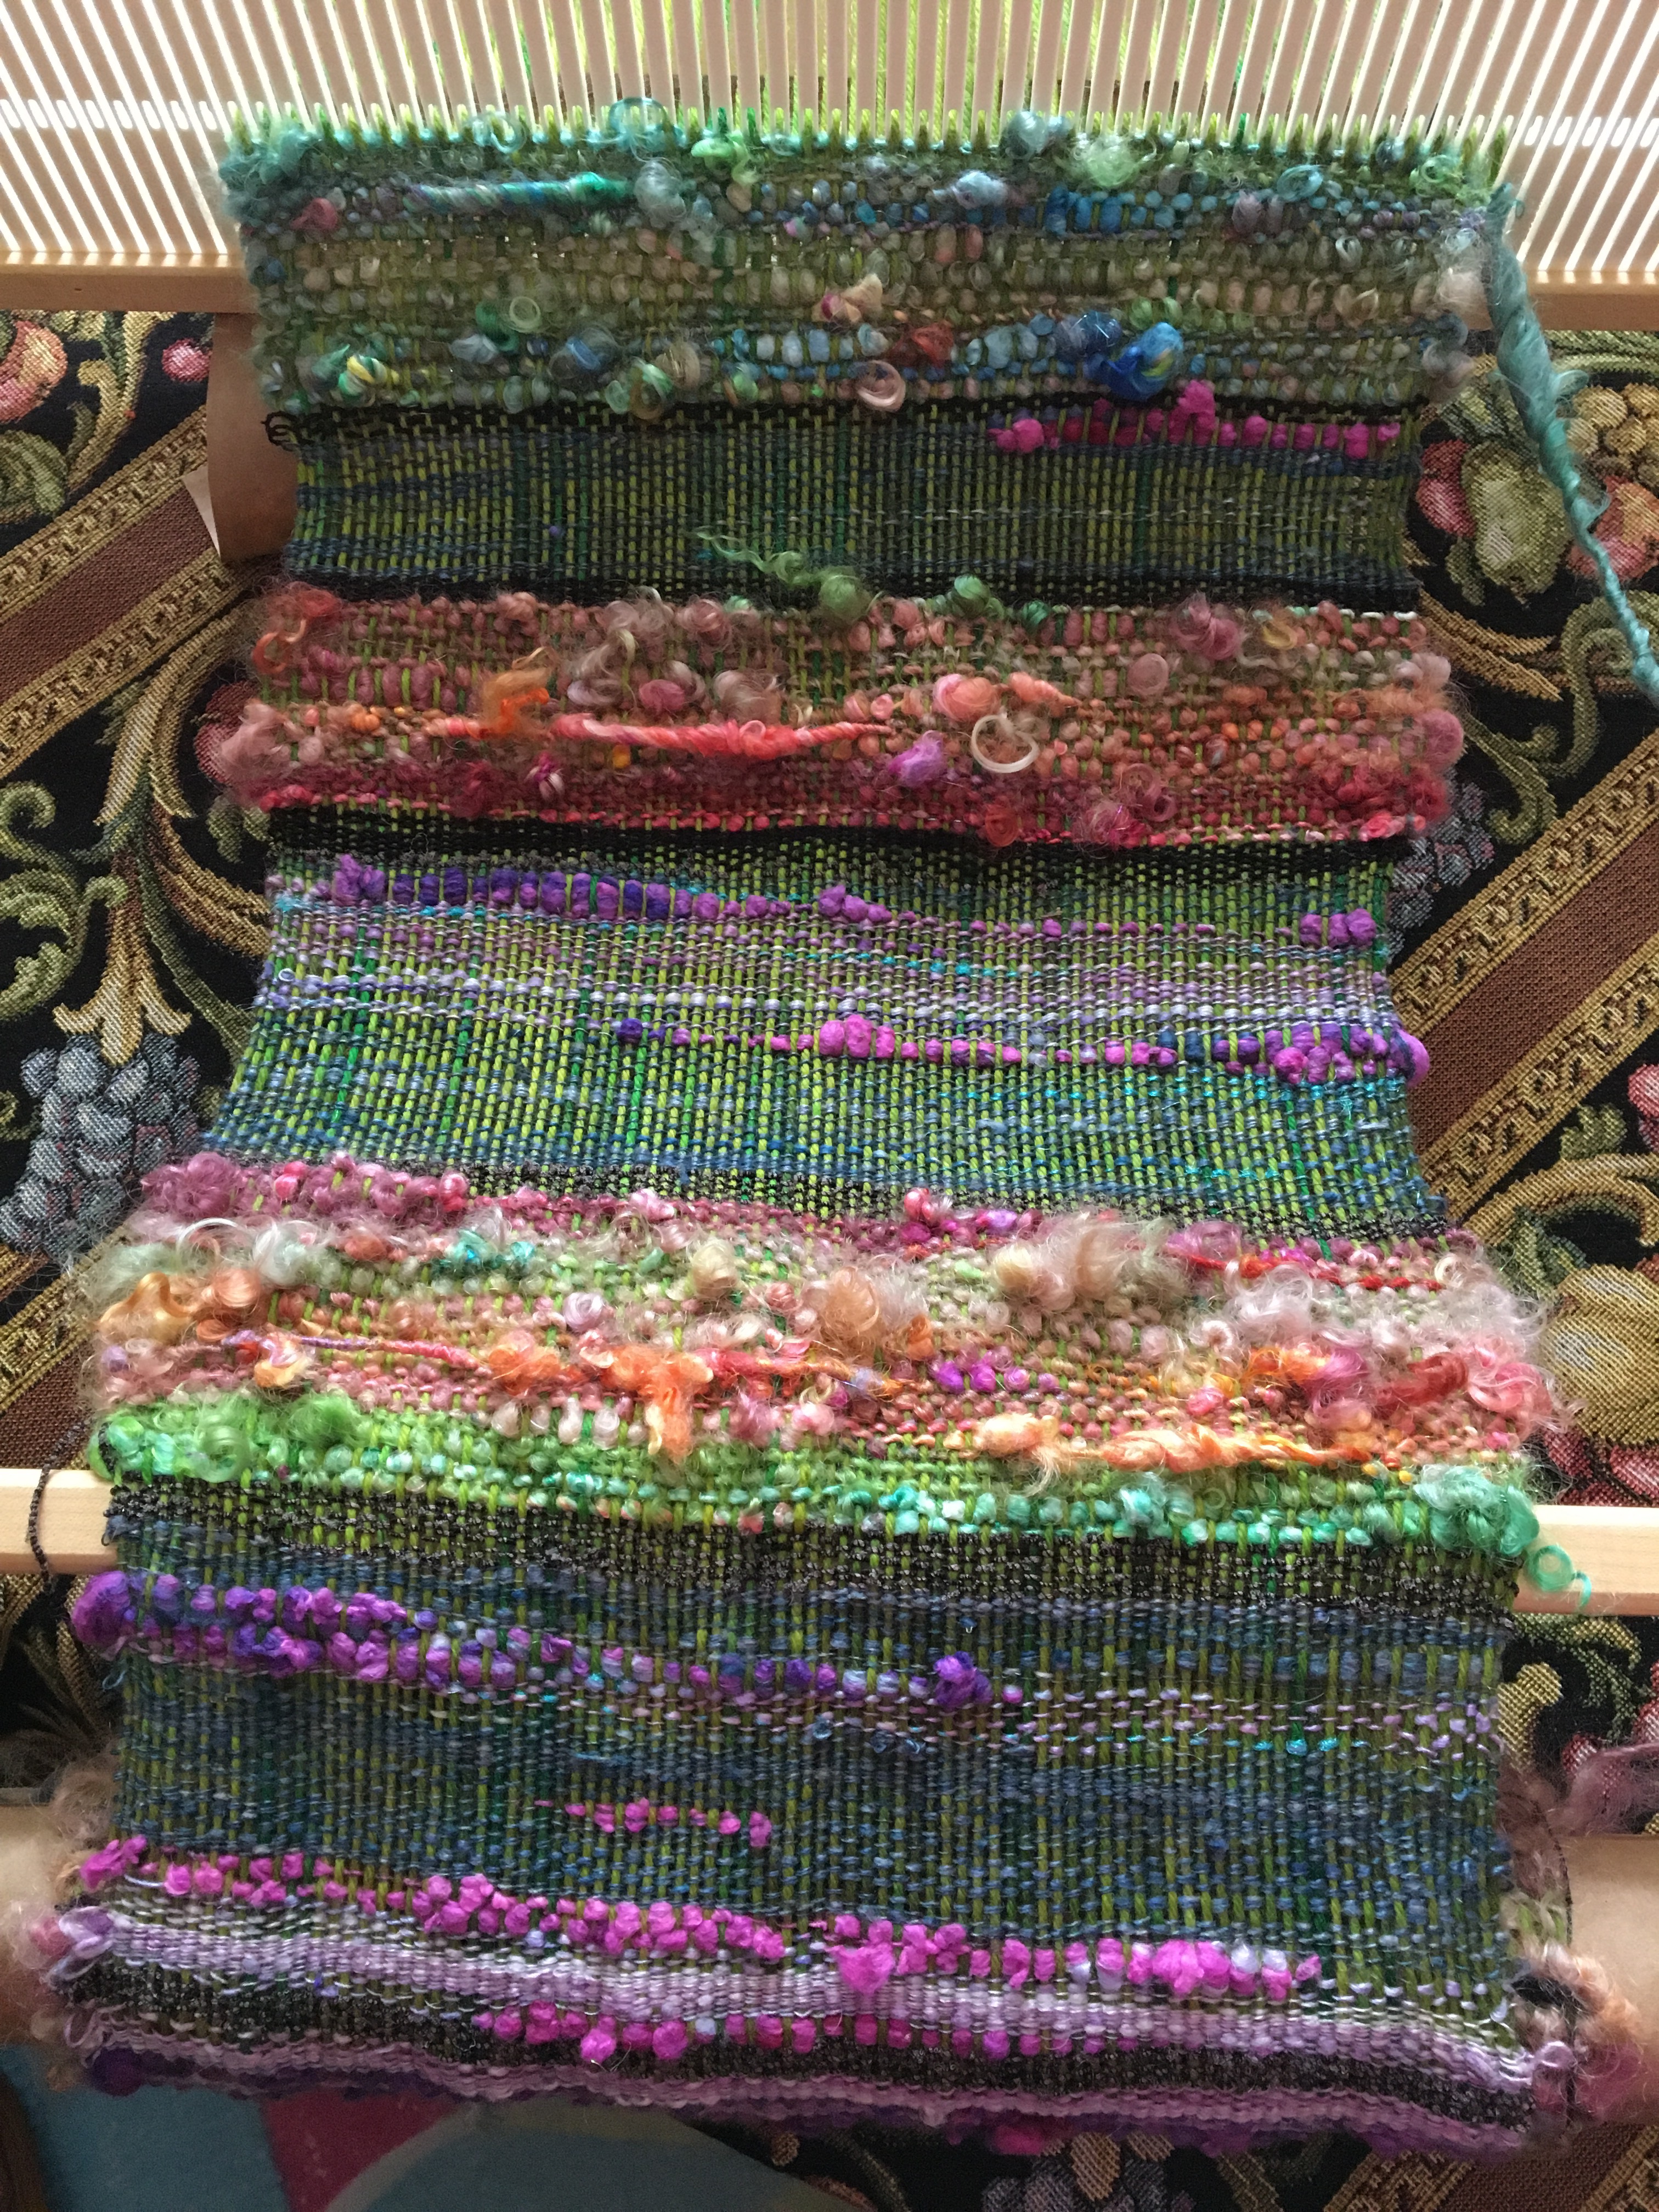
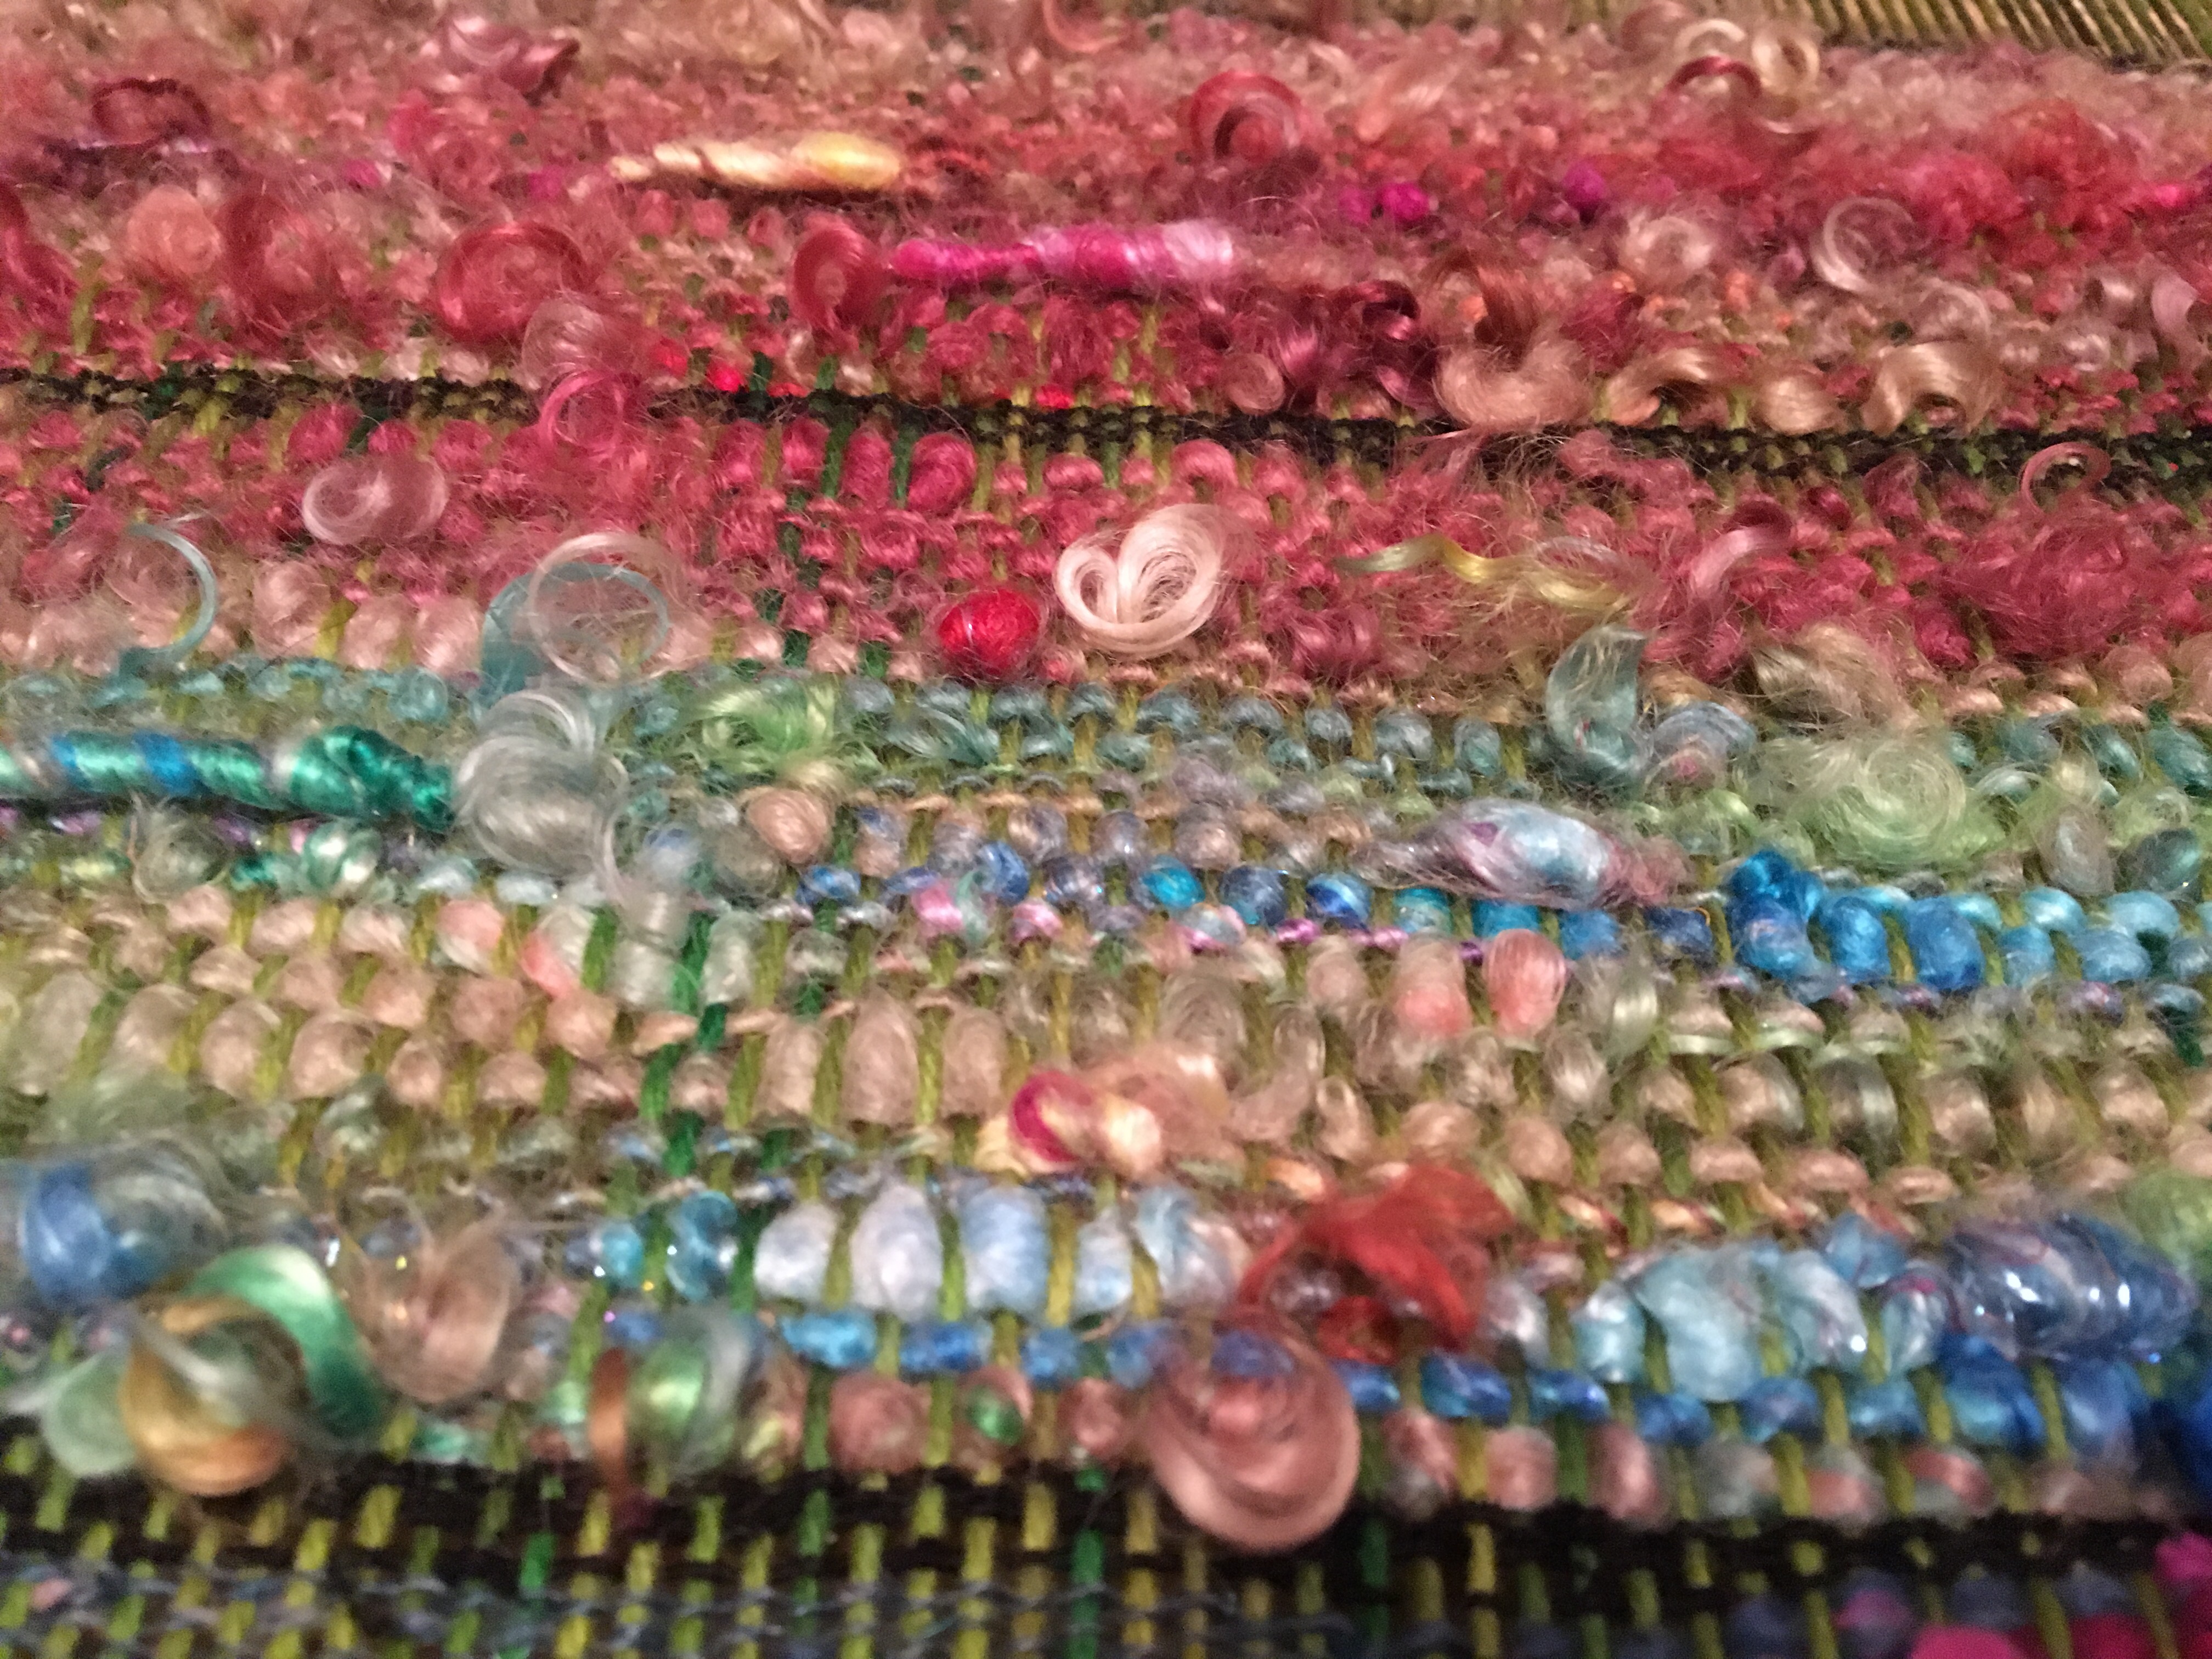
I also discovered how many different colors actually go with green. Weaving allowed me lots of color play that I never experienced with crochet or knitting maybe because it blends the color evenly throughout. Being over and under every thread. Whereas, with knitting or crochet it’s more color blocks.
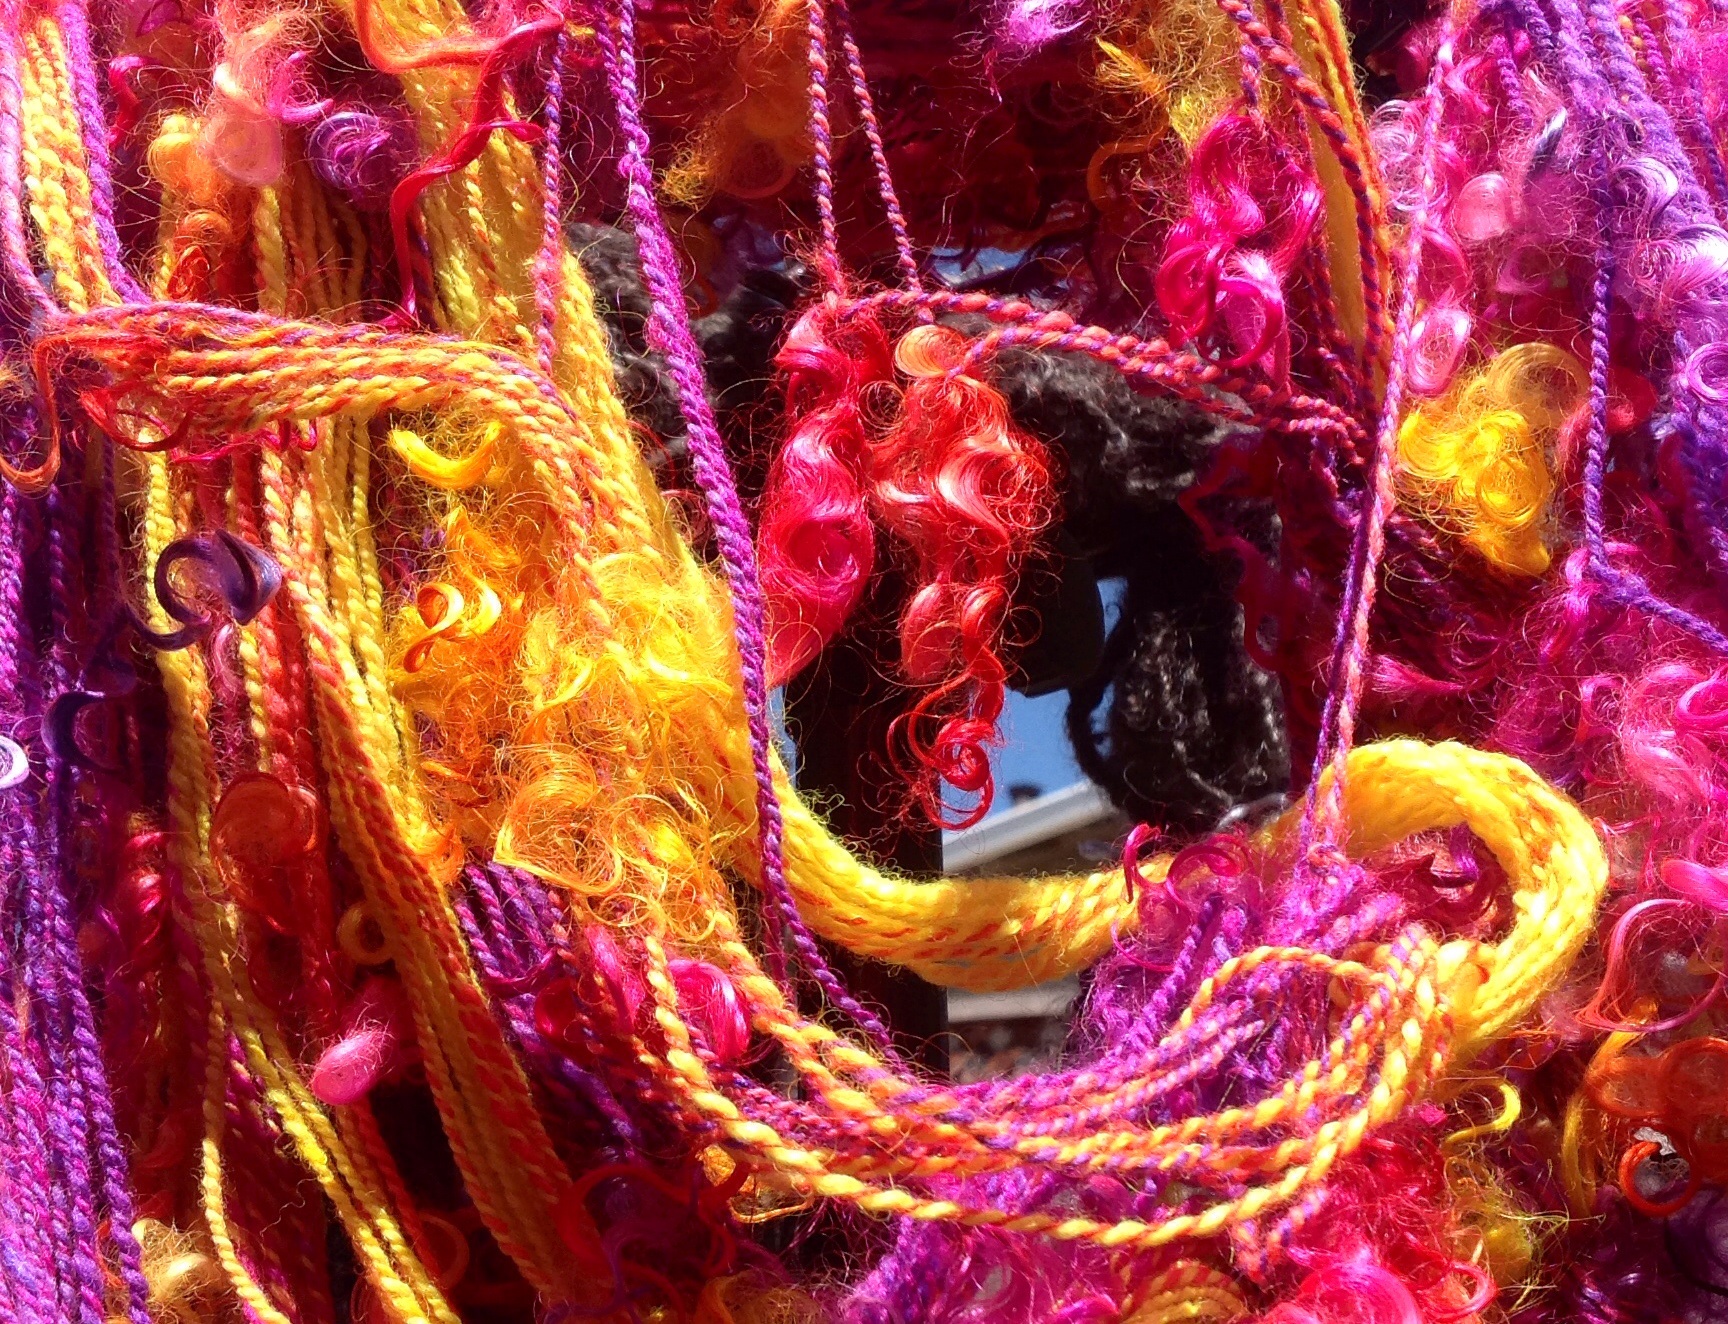
I played with different textures, as well. Leaving favorite bits of handspun out of the woven fabric. Switching from silk hanky and silk noil, to mohair, to wool and tencel blends. From lockspun, to thick and thin, to a traditionally spun smooth single. It all worked.
I did end up signing up for a weaving class and wow!! I’m so glad I did!! I learned a bunch of fun techniques from an online weaving class given by Stacey Budge-Kamison of
Urban Gypz website she teaches a lot of cool tricks for art weaving, using handspun and art yarns, but actually showcasing them. The class was very affordable definitely worth every cent. She gives both written and video. Plus has a group on Facebook that is private in case people may have questions or want to share. It’s not your average weaving class. It’s the fun stuff. It’s art weaving tricks. It tips on adding certain things to showcase anything that might be important to you. She gives so many ideas. One can use a small loom, add things to weaving I’ve never seen, weaving to wear, wall hangings, pictures, not just yarn in a woven piece (get creative) and add it. That class got me really excited about the possibilities. I’m filled with new ideas. The same way art yarns have add ins…
Weaving can too.
We have basic spinning that can be learned and art yarns that can be learned.
Well this is fun and showcases ways to use art yarns for those special one of a kind woven pieces.
So far my knitting and crochet have been pretty vanilla but I want my weaving to be as free as my art yarns. For wearing, for fabric for accent pieces, and wall hangings. I already feel like weaving gives me a kind of freedom.
Again this is something I didn’t do much with crochet and knitting. Weaving gave me a new outlet and I didn’t start thinking his way, weaving spoke to me. I felt different when I was weaving m, I felt more free. I did use the same black silk lace weight thread all the way through my project to somehow tie everything in from beginning to end. But I’m not convinced it did. And that’s ok too.
Myth-as long as you have even tension and you use that angle before you beat, you will have even edges.
Well I really tried to do exactly what was shown in several videos and got nothing close to even. Now to be fair, I haven’t washed it at this point, but the pictures show how my edges go in and out. I don’t know if this is truly a myth yet. I’m ok with my edges for now. Being a beginner, it’s a weaving right of passage to have wonky edges. I have a feeling, that using thicker yarns, then thinner, then thicker yarns may cause different widths in the fabric and thereby uneven edges. I need to weave more and find out how that works. I’ll learn with each piece if there is any truth to my thinking regarding this.
I love the way weaving can showcase yarns!
I really had no rhyme or reason to this project. I wanted to weave my first project and experience what it was, to weave. I didn’t worry about perfection.
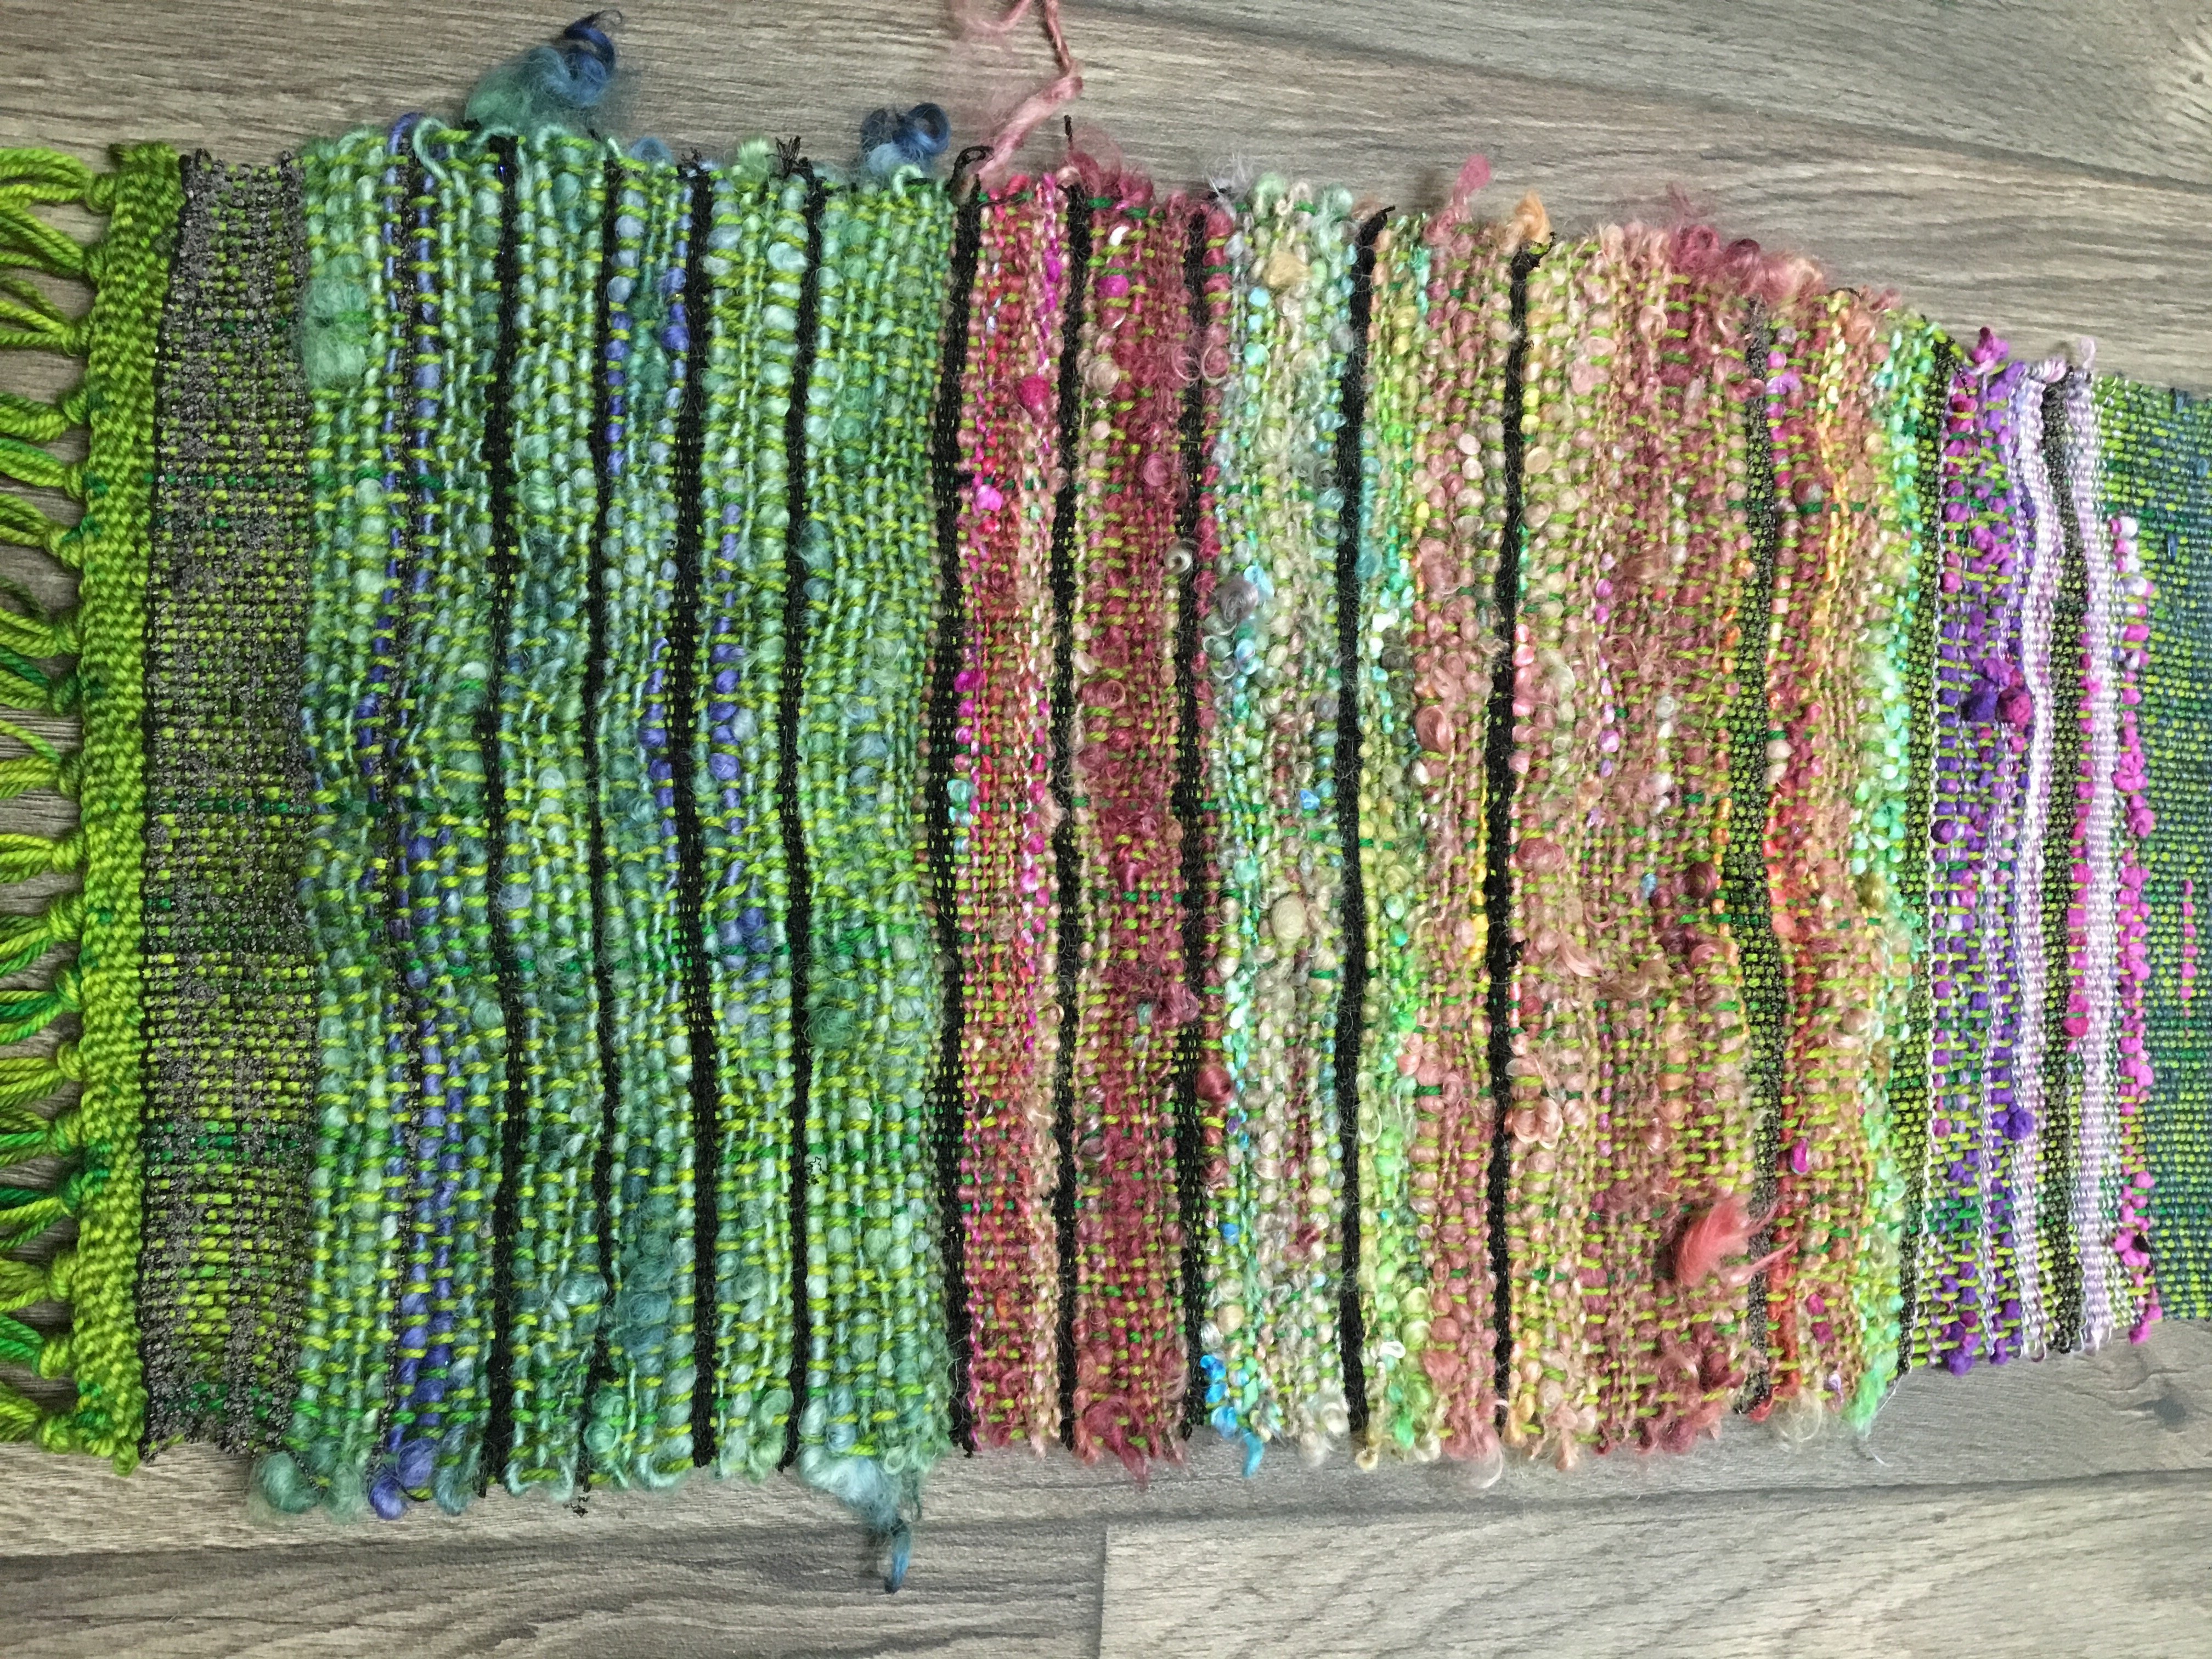
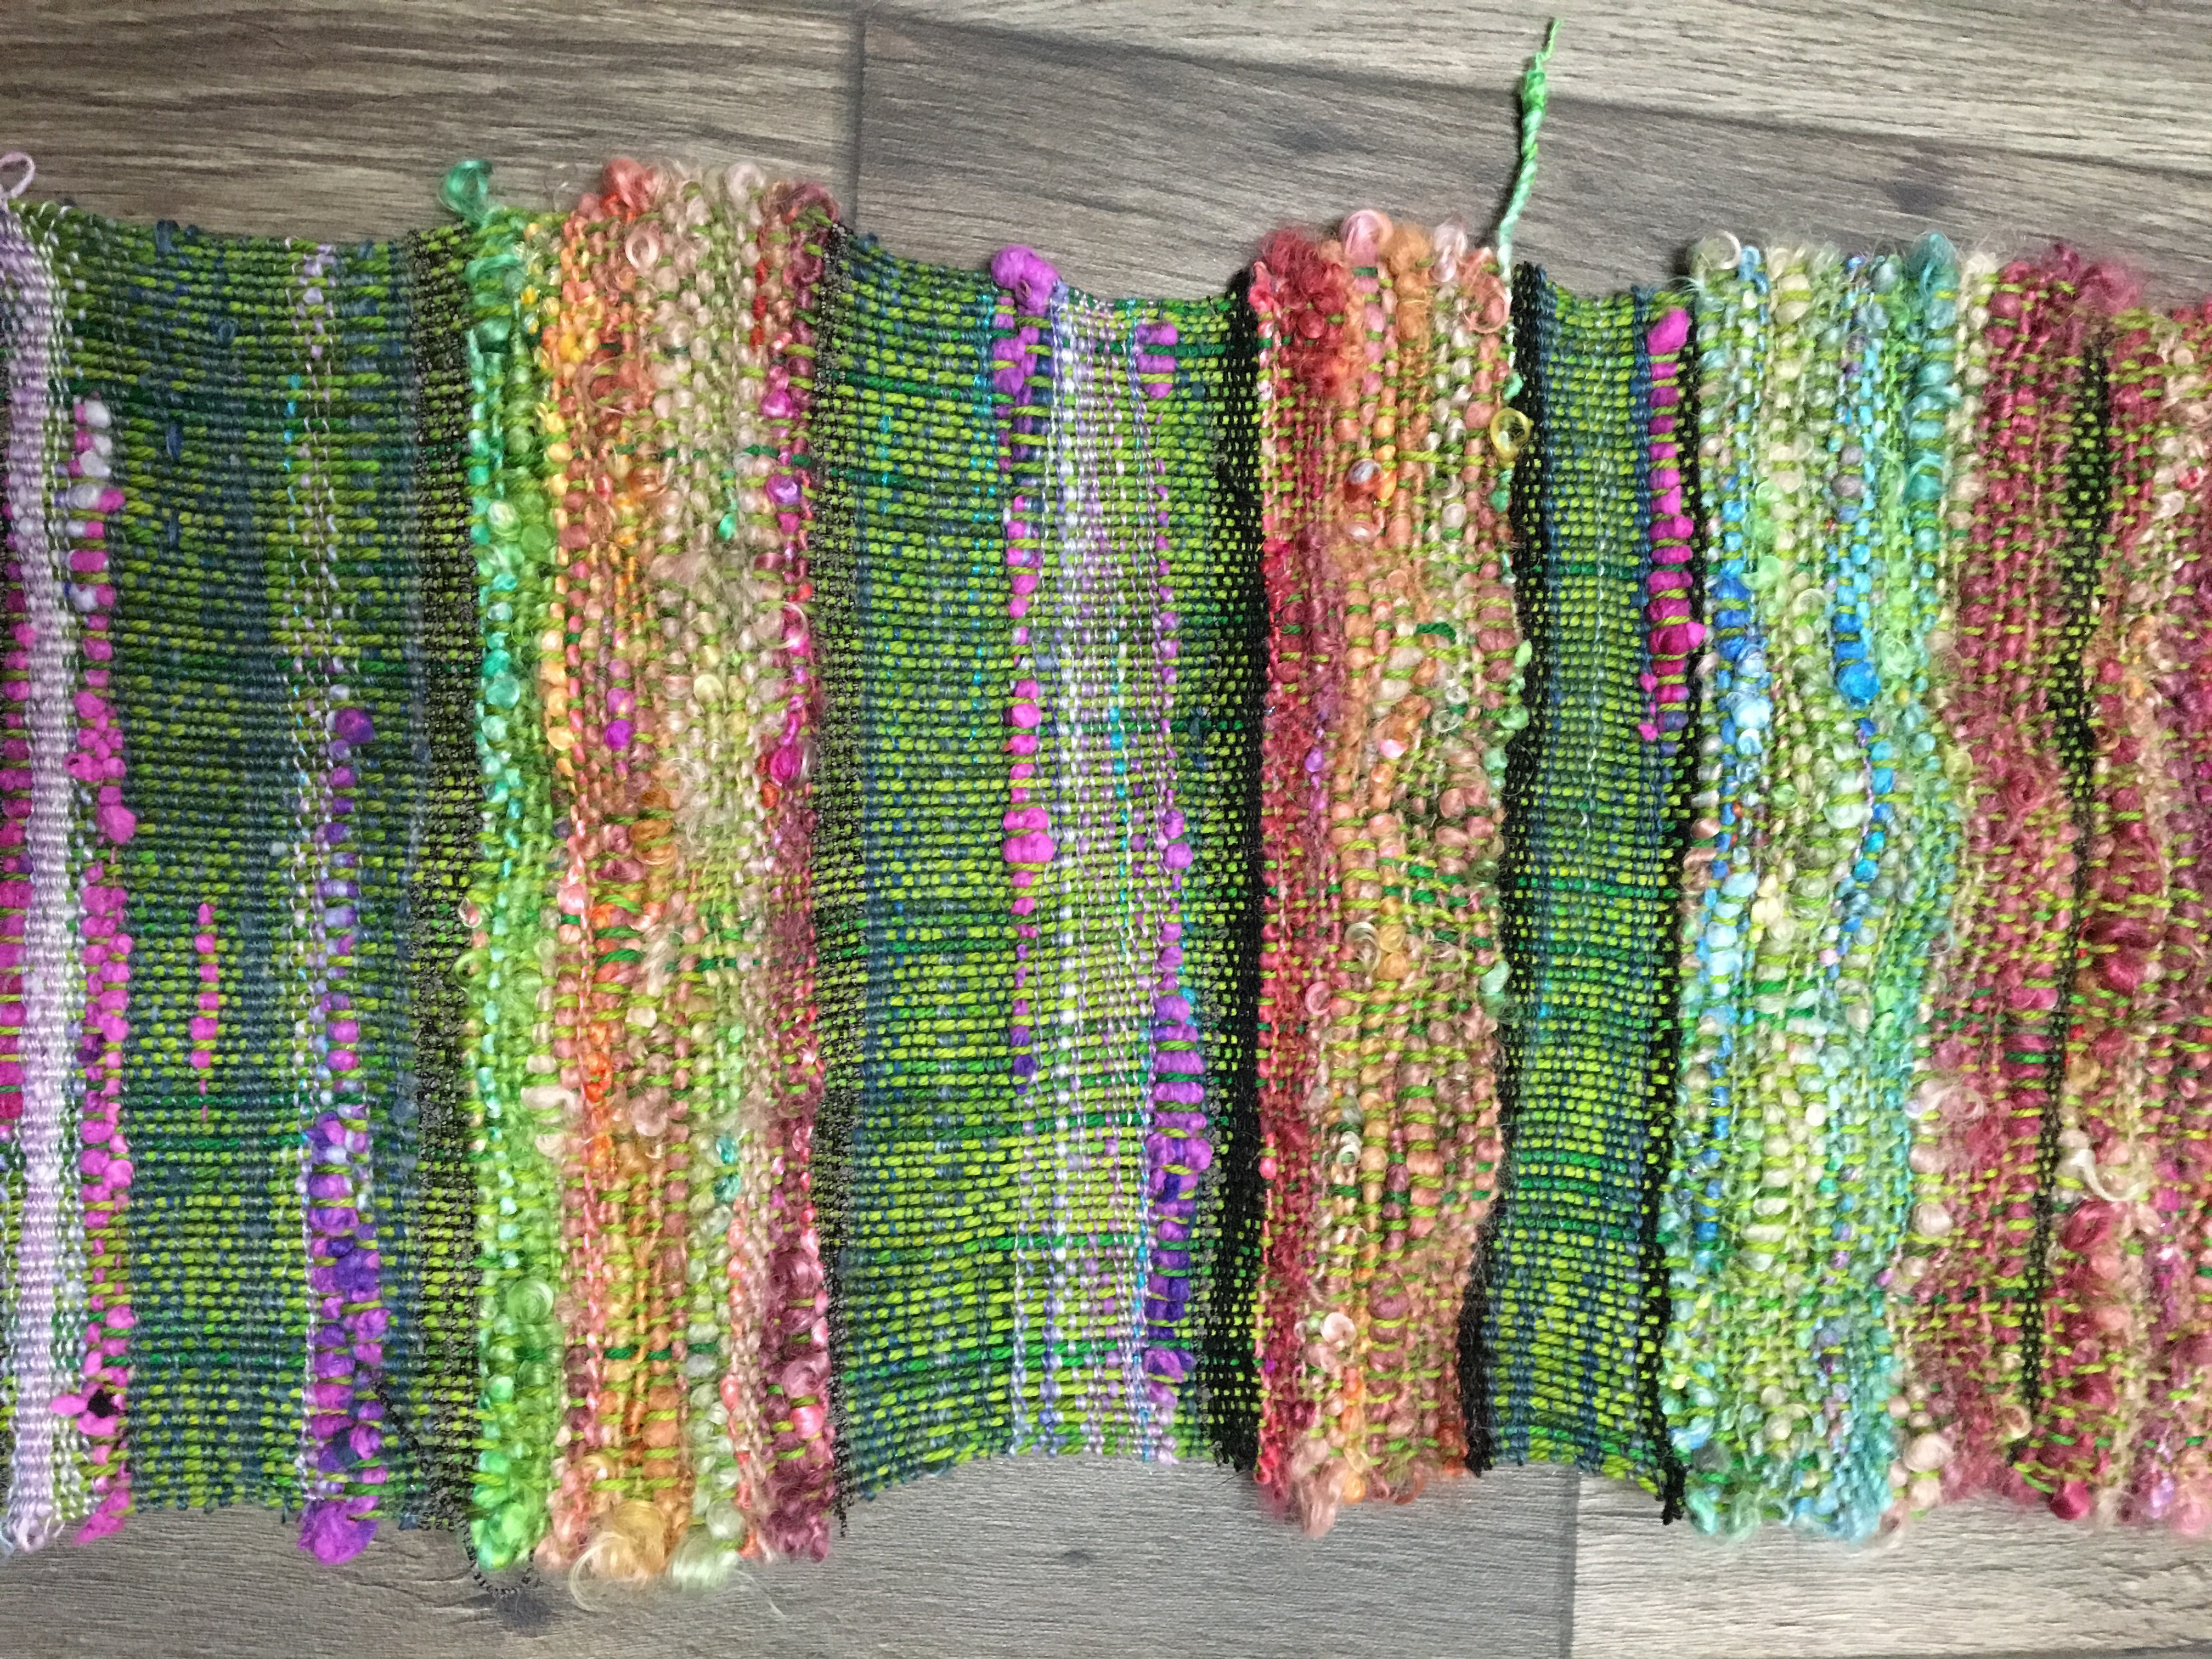
I didn’t worry about anything except carrying that black lace thread in certain places, throughout the project, to tie in the beginning with the end. I found that as soon as the fabric was wound onto the beam and I couldn’t see it, even with pictures, I wasn’t sure what it looked like. I couldn’t remember how thick each section was before I used my black thread again. At the end, I know I was using the black thread less often.
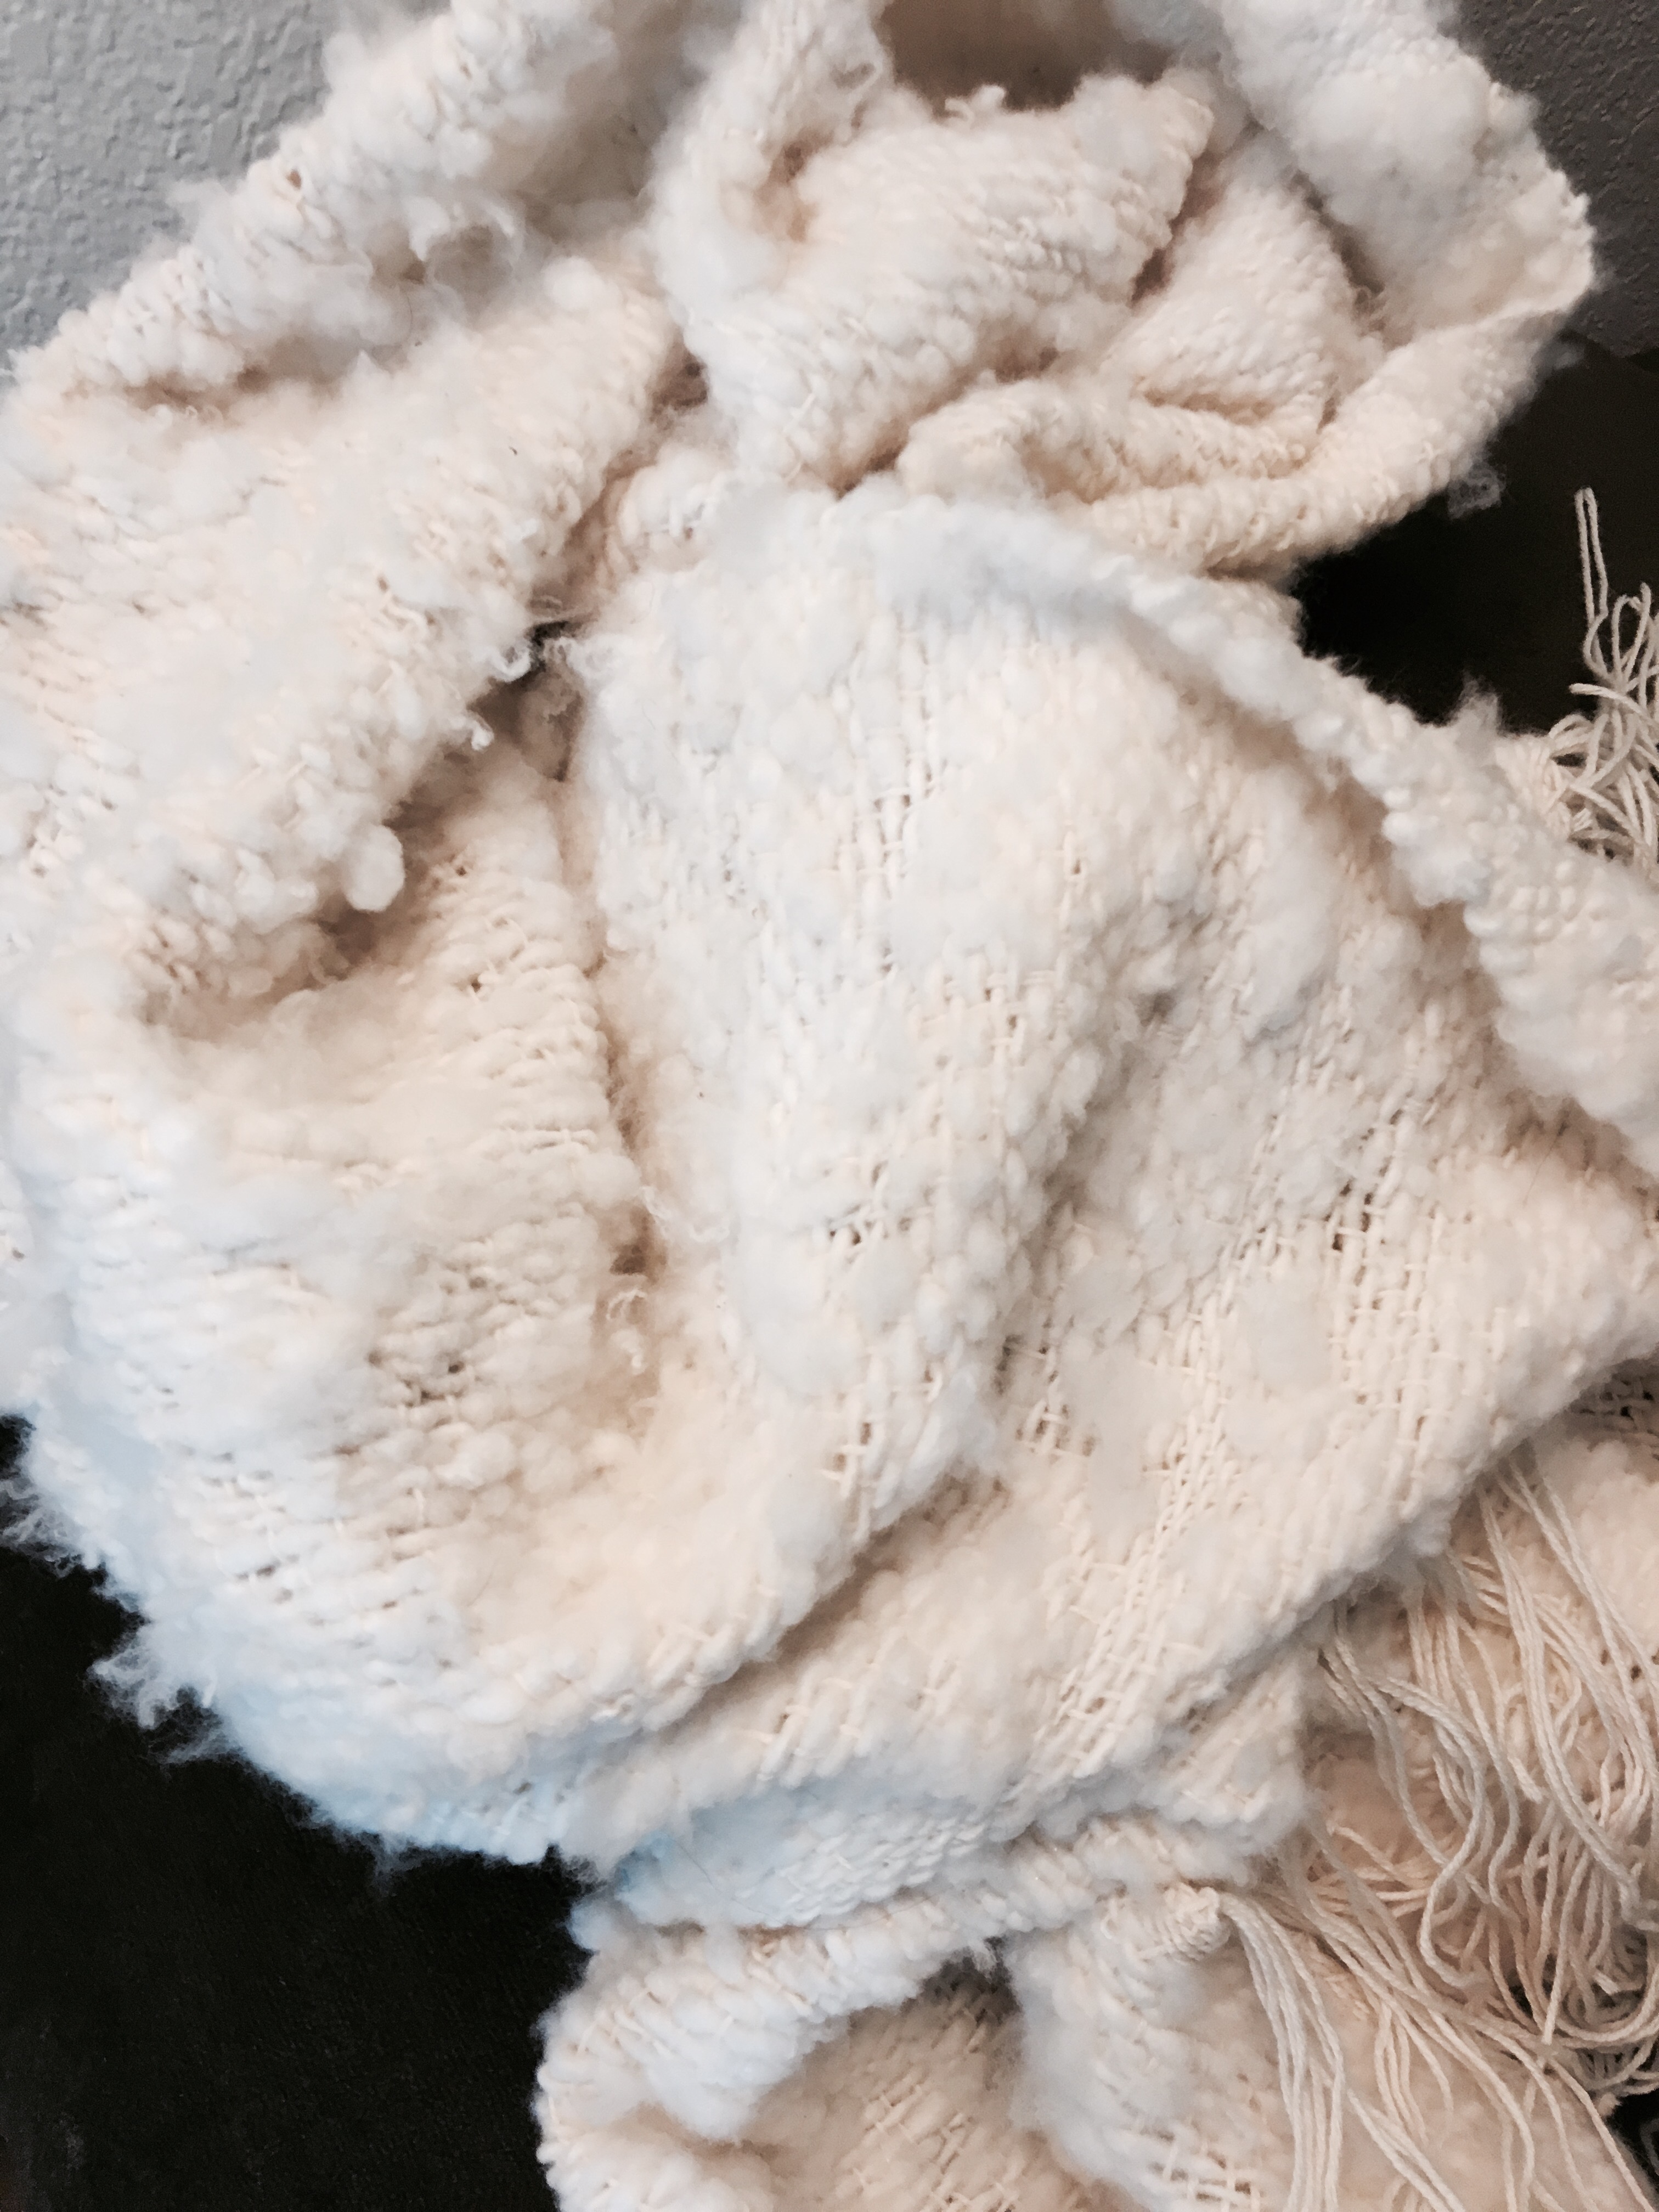
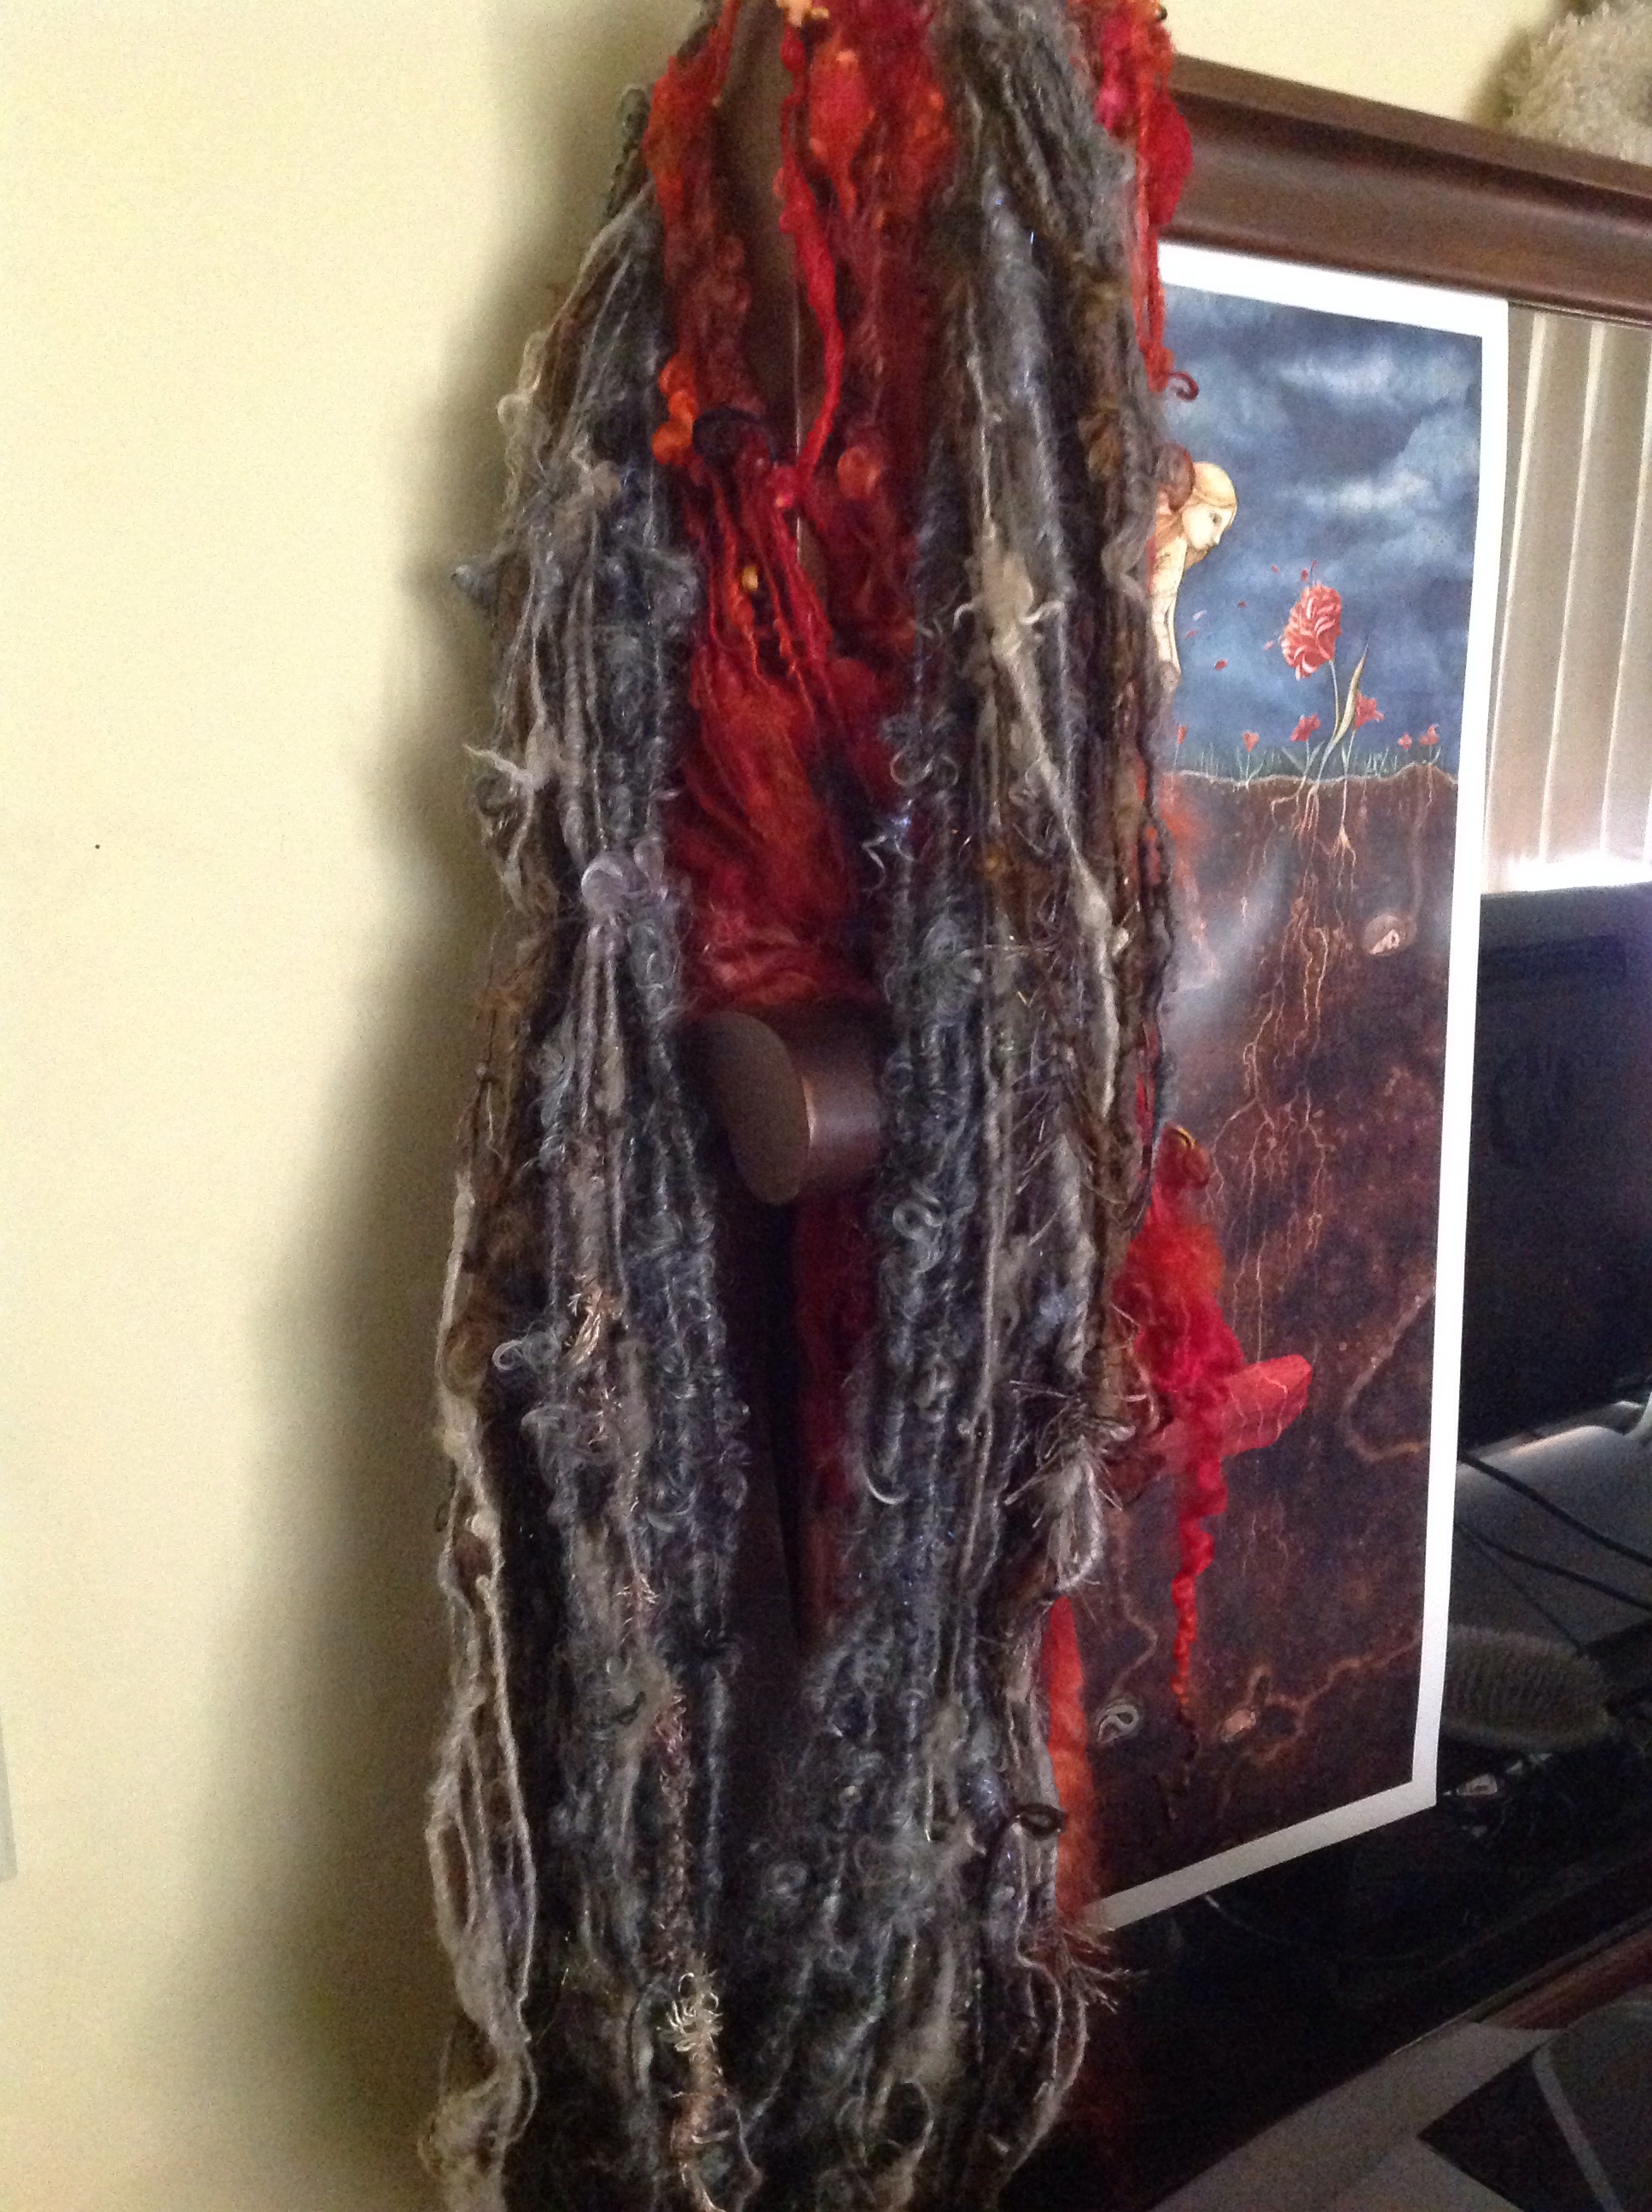
Another thing I did, was have any lock tips only poke through one side. So the side facing me is fluffy, and has fluffy, lustrous locks and sweet little lamb tips coming out. On the opposite side it’s smooth.
The same is true for any bits left out of the weave. These things only happen on one side. Leaving the other side to look smooth and pretty straight forward.
This piece is kind of like a mullet. All business in front and party in the back.
As it turns out, one end has more crazy lockspun where the other end has more smooth handspun.
If worn as a scarf, depending on which end you have in front or in back, it can look more business or more party.
Myth- weaving uses up a lot of stash yarn quickly
THAT IS NOT A MYTH! This is so awesome for busting through stash. If you have a crap ton of yarn, and crochet and knit as slow as I do, this can overnight make you realize….you just might not be at SABLE, like you may have thought you were!!! I know any one thinking about the possibility they are at SABLE, if you are without a loom, I can’t suggest enough to give it a try.
They have many looms that are pricey. But even trying a smaller inexpensive loom to see if this might be fun. An ashford sampler loom, a Schacht cricket loom,
Not to mention many people destash their looms at great prices when they upgrade. Look for those. Some Lys like mine even rent looms out when classes are taught. If you were in the slightest bit interested see what’s available to you.
SABLE = stash acquired beyond life expectancy
A loom is a gift for you but it’s also a major gift to your stash!! This scarf used 14 skeins of yarn!!!
Fourteen skeins of yarns!!!
Think about that a scarf!
I get to continue spinning, crocheting, knitting, to my hearts content, and weaving took 14 skeins from my stash in under 2 weeks! Next. Project I will take pictures of all the skeins I went through I had no idea how much I would have used!! Stash people that don’t have a loom… You may love this. I don’t have the saori, I didn’t make the big investment until I knew I’d enjoy it. For now this works I want to make fun stuff.
Ok so… I got to the end of my warp. I cut the edge free and did half of a Damascus edge (just one way across), and tied groupings of warp threads into a sort of fringe.
I have yet to wash it. Full it, get it wet, or whatever.
It feels rough and looks kind of a mess. I’m hoping for the magic that happens with this step everyone talks about.
Here is the woven piece before fulling.
The fluffy side front
The smooth side back
Closer of the smooth side
Yea I don’t know how much fulling can/will help this much wonk but while I won’t expect much, I’m hopeful. 😊
All in all, weaving is pretty cool and my stash is thankful! And so am I for an awesome birthday gift from my husband!
I hope this will encourage people to try weaving. I know my first try at weaving isn’t a masterpiece by any means but have you seen my first handspun ?
Here she is in all her glory.
No it wasn’t meant to be art yarn
This was my trying to spin a normal yarn.
Those aren’t coils. That is so overspun it won’t straighten at all and it is a hard rock.. If I threw it at someone’s head, they would be concussed. It could cause damage to sheet rock if thrown at a wall.
Even weighted after a soak and thwack…. Nothing. It doesn’t straighten out, it’s not usable. Can you believe that’s just wool? It is wool.
Some people saw it and say look at those coils and other art yarn techniques I’d never heard of at the time. That was not what I was going for. I thought I was spinning something I’d use hahahaha
It’s hilarious. But I could only improve from there and it’s funny now. I can’t say I’ve ever seen a first handspun quite this bad. Especially when I was hoping for a regular usable yarn. It was a great starting point because I could only go up.
I hope the same with weaving and I hope others will join me. Especially new weavers or yes experienced weavers. Fibery goodness has been wonderful and also if you are interested check out the art weaving class I took listed above.
I’ll post the woven piece once it’s finished. It needs those finishing touches.
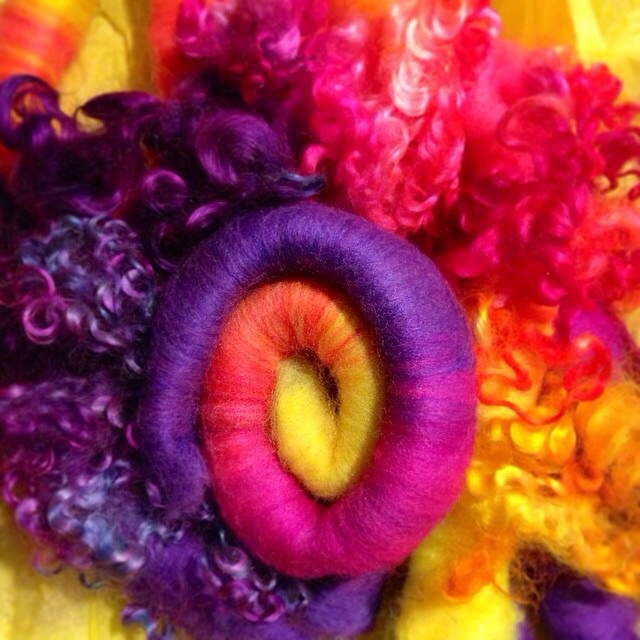
Yet Another, scrapbox from Namaste Farms, so what keeps bringing me back to spinning the same thing over and over again? That’s just it, it’s never the same! Each scrapbox brings me something new to taste test, whether it’s a new fiber, add in, or technique (taught via livestream tutorial that is sometimes offered with the scrapbox purchase)…I am addicted. Too much of a good thing doesn’t exist where fiber is concerned, and these Scrapboxes, are a healthy dose of just that!!!
Prior to lock spinning and NF scrapboxes, my all time favorite was polworth commercial top. (I still love polworth)
That was out of merino, BFL, and polworth that I had tried, to that point. There’s just so much more to experience in spinning!!
Over the years, opening my palette, I’m finding I love other wool preps and fiber blends so much more! Years of spinning and I’m still only scratching the surface. A scrapbox keeps it fresh, inspiring, and fascinating because I experience another first, everytime.
My blog is transparent, I’m a scrapbox fiend, that’s pretty clear. But I learn more of what I like to spin everytime I treadle one of these onto my bobbin. (I want to spin a little bit of everything, I want to try it all) Each fiber has a quality that makes it beautiful and these scrapboxes let me experience more fibers, treats, techniques etc, all at once. So yes, I’m on a scrapbox kick because I get a lesson and experience in each one, not to mention… The way it’s dyed, the colors!!
*swoooooon* there is nothing like beautiful color on fiber.
The color is what sucks me in, and then every discovery after, is bonus. I love when there is more then one color in the lock staple. I love when the tip is darker, or lighter or a completely different color then the rest of the lock.
Ive moved twice in the last 3 months, I might add, these are great during a move. When you need to spin, but your stash is packed. Order up one of these puppies and you are ready to go. Everything included for a fun and fulfilling spin.
I ordered some extra Angelina, in different colors, during a purchase from namaste farms. That is the only extra, I added to this kit. I didn’t need it, as this box came with a bunch of novelty add ins, but why not? I love sparkle.
Angelina in blaze, violet, blue, copper… Love sparkle
The Mink box, is dyed in neutral or natural colors. The taupe is worthy of special mention, it’s amazing. At first glance, you think it looks gray, until you have it next to gray, and then you see it’s not gray at all, but truly taupe. It’s gorgeous.
Taupe locks Exmoor/merino cross
The taupe locks are dyed on an exmoor/merino cross bred fleece, so they have a soft sproingy crimp, with a curly tip. A new breed and fleece type for me. Really really cool wool!! A must try!
Mink fiber and add ins
In addition to the color taupe, this box came with, fibers in all natural shades from light to dark. The taupe, actually, was originally a white fleece. It’s amazing for how natural all these colors look, they were dyed to be this way. This box came with colors from light gray, deep steel gray, cream, tan, beige, lighter medium browns to rich dark chocolate browns, some that seem to look black but in the sun, will show more depth and reveal other colors like deep mahogany. The tints of color, all mesh and put together make a gorgeous yarn. They look so natural to have been dyed. I think the steel gray mohair, was the original fleece color, but again, having been dyed so expertly, it’s hard to decipher in this scrapbox what is dyed vs originally grown that way on the animal.
Colors of mink
The add ins were several different novelty yarns and threads.
Three different colors of especially soft eyelash yarn, the good stuff, high end. Another was a golden train track or ladder novelty yarn. Now I say yarn, but it’s not what one would think of as a traditional yarn, more like novelty ribbon. It’s special, whatever it is. Several different threads in all neutral colors, matching the dyed fibers found in the scrapbox. All different (neutral/natural) tones and textures. A gray fuzzy halo thread, and a smooth brown with a little golden metallic sparkle.
Autowrap addins
One of my favorites, was the Habu textile thread in chocolate brown that appeared to have what looks like fat, soft furry caterpillars crawling across every few inches.
There were, well over, ten different add in threads, that came with the fiber. Each thread came in one long length, but I chose to cut them in shorter lengths for my purpose of use. Adding a touch here and there
Spinning goodies ranged from mohair, to long wools, to medium and fine wools. All variety of different fibers that inspire, with the many different staple lengths and textures. From crimpy, soft, fluffy and sproingy to light reflecting luster with ringlet curls, silky smooth to the touch, all in beautiful neutral shades.
As mentioned earlier, some of namaste farms scrapbox purchases come with a livestream tutorial. Prior to spinning Mink, I had the chance to watch one of these Livestream tutorials, held by Natalie Redding.(a lucky replacement for a namaste farms blogtalk one evening)
In this livestream episode, she shows several different techniques, while spinning the kits contents. Since she does this live, viewers can ask any questions, or request to “please show that again”, or “what ifs”, or “how would I”?
Anything really. These live tutorial spinning sessions are invaluable.
To quote Natalie, she knows how to spin “a balanced, light, lofty single.” And let me tell you, she does it well. Many many hours, many many skeins of practice makes perfect.
She referred to herself as a “one trick pony” spinner, as this, light lofty single, is the yarn she spins. With respect, I fervently disagree with this sentiment. With regards to Natalie’s spinning, this couldn’t be further from the truth, she is no “one trick pony”!!!
You won’t see MORE ways to spin a single ANYWHERE ELSE…
She shows more ways to
-spin a single,
-style a single,
-add something to a single
-all the while, keeping it stable, balanced, and freaking awesome.
Natalie demonstrates techniques that are unique and priceless. Sharing her proprietary knowledge, thereby, adding inspiration and tools to my own spinning repertoire. She is an intuitive spinner and is able to translate how she gets from point A, to point B, clearly. She is an excellent teacher. It is very difficult to spin a thick yarn, that’s light and airy. Even more difficult, is to keep it a low twist single, without it falling apart. If you have the chance to see and touch her yarn in person, it’s incredible. I got this chance in her booth at Lambtown 2014 held in Dixon, Ca. Photos of her yarn are incredible, but in person, you can feel the stability and just how weightless it is, it just boggles the mind. Seeing a bunch of her handspun skeins together, I realize how many options there are to spin a single. She is constantly formulating something new and different, forever changing and adding options available to a spinner. It never gets old.
I’m enthralled by the skills and amount of new content I learn. The above link is one of many recorded past spinning sessions. She always has new techniques and a new style yarn. Recent spin sessions, show several different techniques while spinning a single. On her livestream channel, one can find older posts where she has plied skein sessions, and even sheep to finished project. She shares many proprietary techniques exclusive to her. I feel very very lucky to have her share so openly, to help other spinners like myself.
A few examples of tips and tricks, would be, how to add a small puff of very short stapled fiber, and secure it to the single, by taking just a few long stapled fibers of longwool and essentially plying over those short bits locking everything in place. Brilliant!
Adding plied strength to a single where it otherwise may have been weakened! That was huuuuge for me. Major a-ha moment!
She’s shown several things to do with add in threads, like tucking one side in making it in invisible and allowing the other half to fly freely, much like a long lock. Or another technique, allowing the addin to auto wrap and hide both sides of the string within the fiber.
Another technique that blew my mind was how to lock “something” in (a curl, a long lock, or how to spin a lock of fiber, the cut end in the single without a trace but leave out the perfect curled tip she wants to show) with a tug of fiber up toward the “something”she wanted secure, sometimes wrapping the tugged bit with fiber, sometimes leaving it as is, depending on the outcome she was aiming for. These techniques were just a few she shared and I have never seen them before anywhere. Because Natalie is an intuitive spinner, she spins fast, but when teaching, is able to slow it down significantly while giving a detailed, step by step, explanation of exactly what she is doing.
After watching this I was excited. I got to spinning straight away. This yarn is the coolest Ive made.
It’s natural colors are subtle, but all the add ins, autowraps, different fibers, textures, techniques, sparkles, etc etc etc I mean,
This handspun has so many elements of interest… It’s a special skein and one that I am really proud of. With so many things going on in this yarn, the natural colors of the dyed fiber tone it down, and it works. It’s wildly complex but sophisticated. I’m still learning color, I love me some bright rainbows, neon aqua and hot peach, but my wardrobe shows I’m a fan of plain black and white,of blue jeans. So to make a neutral yarn with this much fun going on, it kinda blew my mind. This is the styling of a yarn, I’m talking about, that I didn’t know played a part.
I can’t recommend enough, to watch, Namaste Farms tutorials.
Coming up, she is also doing spin in labs/ classes with http://www.fiberygoodness.com hosted by Spin Artiste creator – Arlene Thayer and Woolwench – Suzy Brown.
Check the fiberygoodness website for further information on all the spinning inspiration and classes they offer. The gallery of handspun made by students is motivational eye candy.
I’ve signed up for one of the fibery goodness labs by on November 19 with Namaste Farms. I barely got in, as these classes sold out In minutes for months in advance. Keep an eye out for more!
Mink and Shanghai
Awww I love spinning… I imagine how impressed our ancestors over thousands of years would be, to see what we are making today… Spinning is such an intricate art, as is the wool that is grown today. Animal husbandry is an artform. The constant quest for perfection over centuries, to bring the best fiber, to hand spinners and the textile industry. Especially, with the latest in AI science, and the ability to bring the best genetics from across the globe. We are so fortunate to be spinners today. The progress is monumental and something to be revered. The hard work of our shepherds and shepherdess’s to bring about such a superior product is truly an art in itself. This isn’t nearly as recognized as it should be. This is where spinning begins, and our handspun art as spinners, is made possible. I appreciate them and all their efforts to bring nothing but the best fiber. I love to grab a handful of dyed locks and just play. I could do this for hours… And I do,
as often as I can.
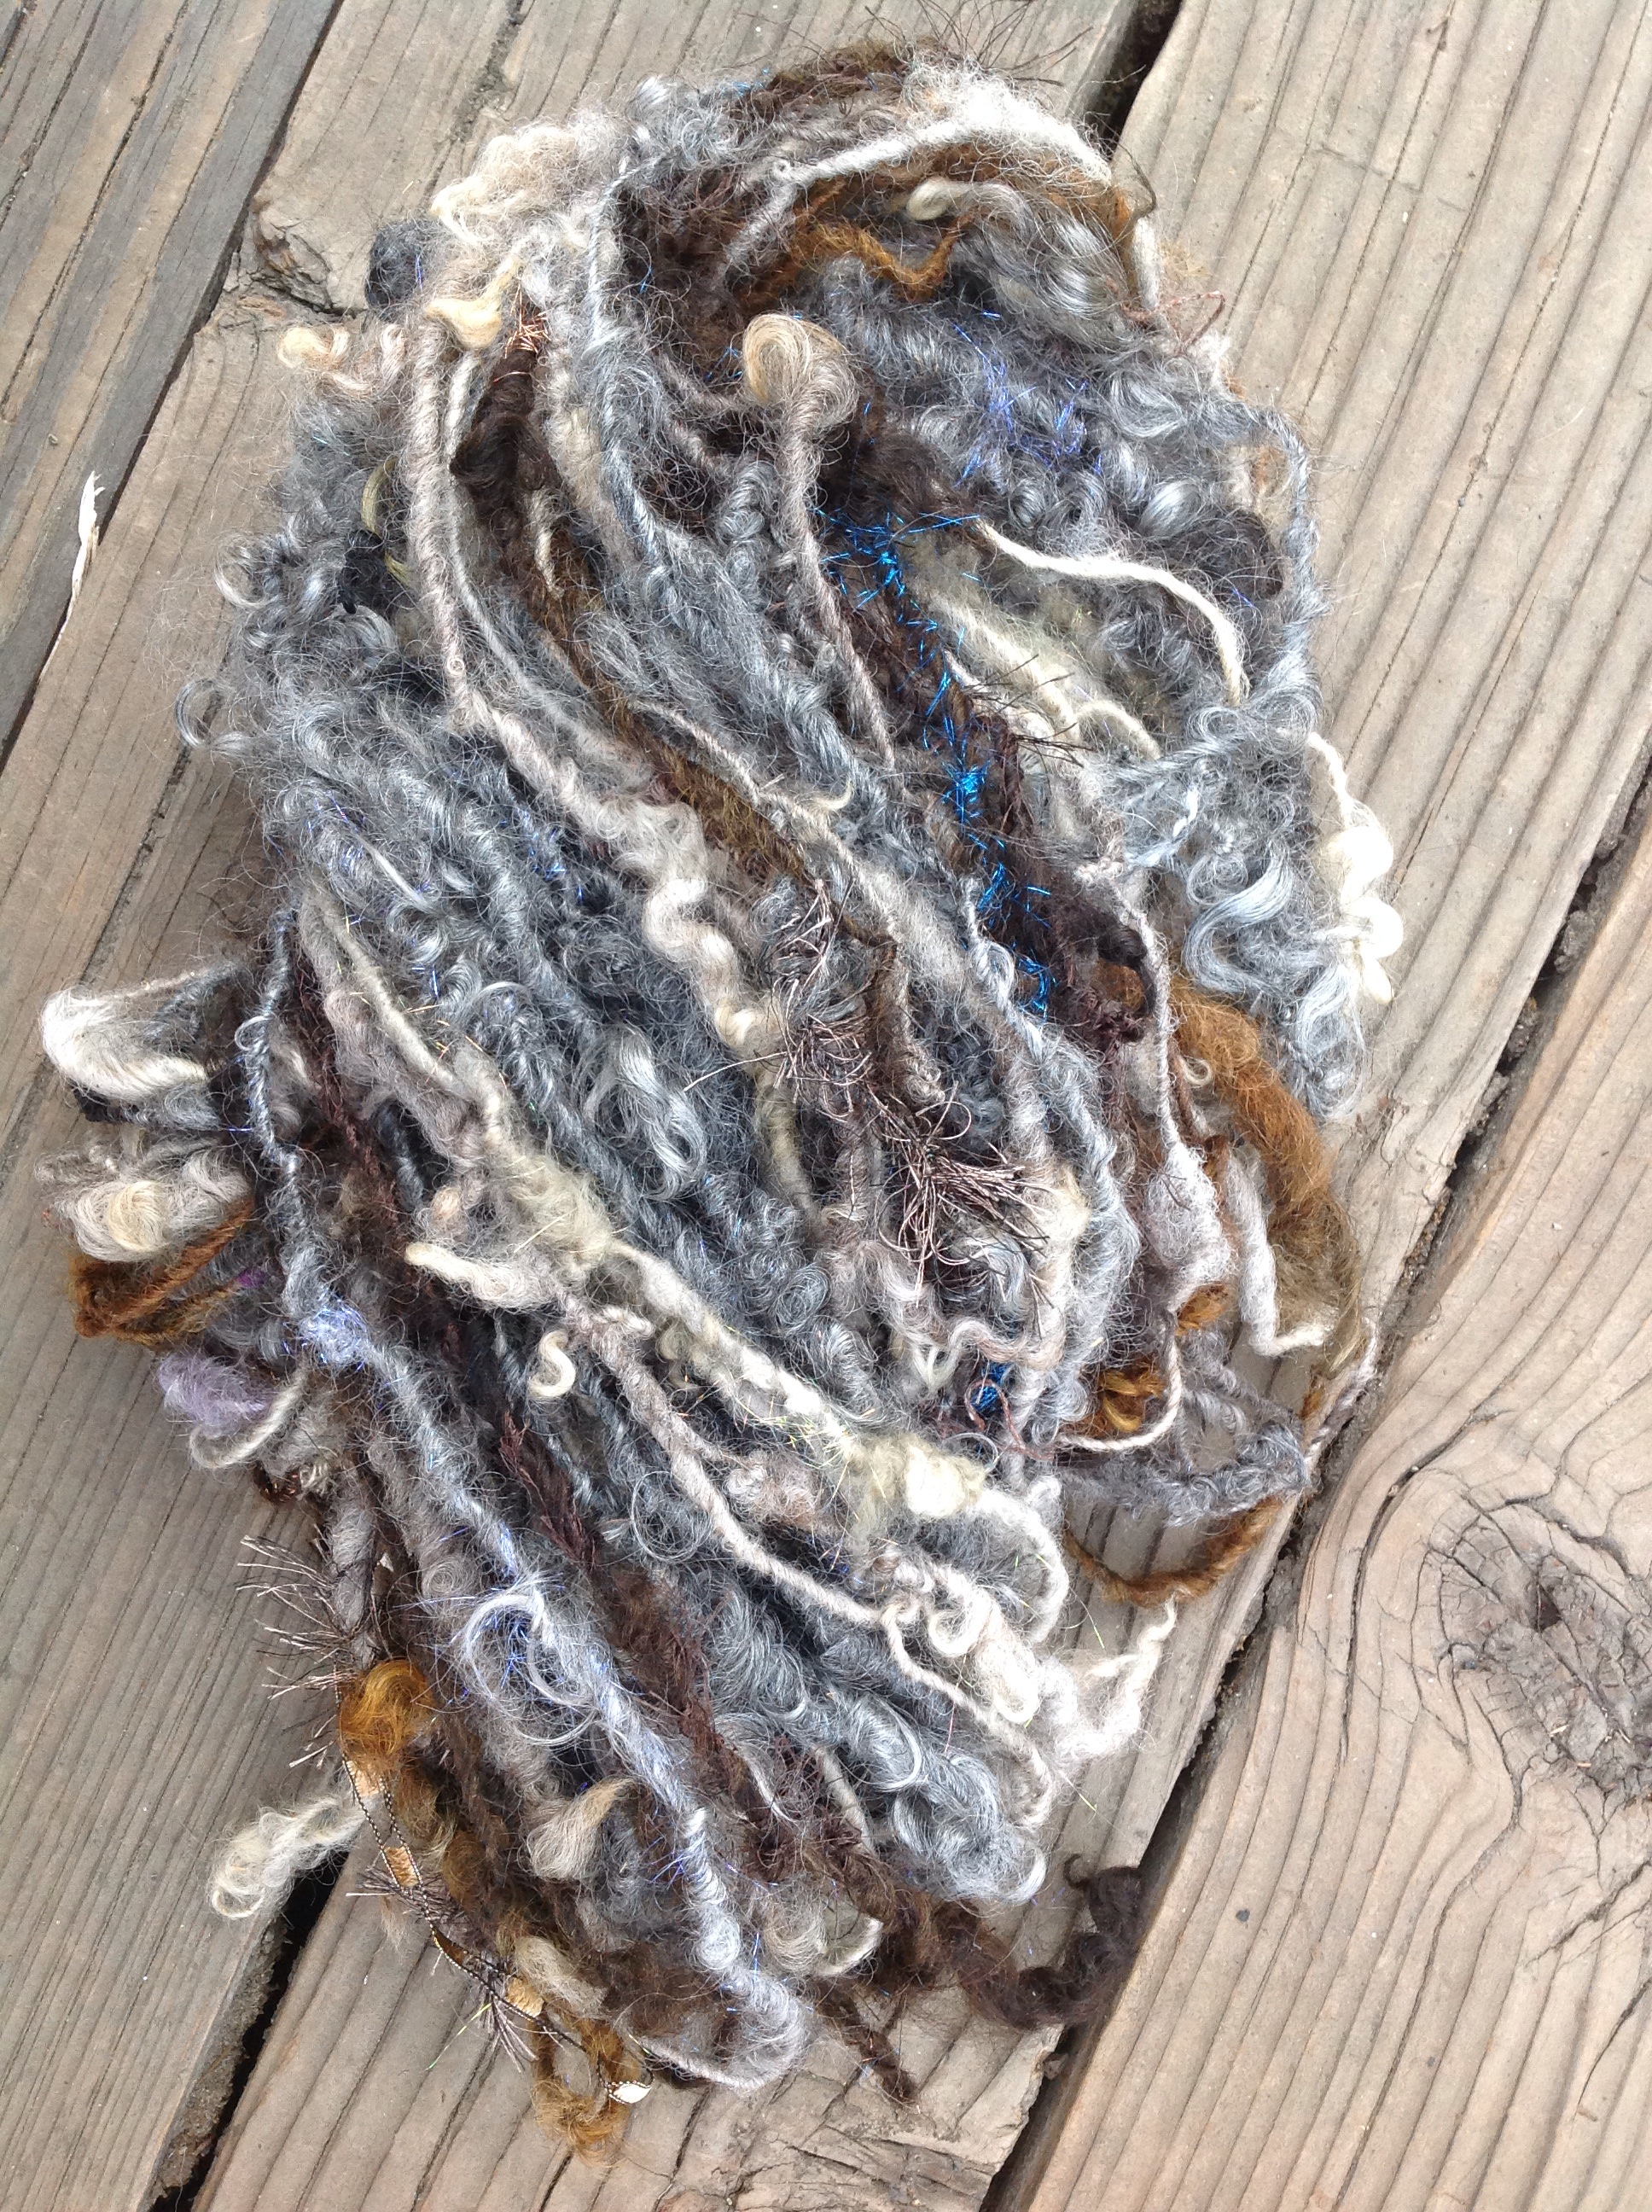
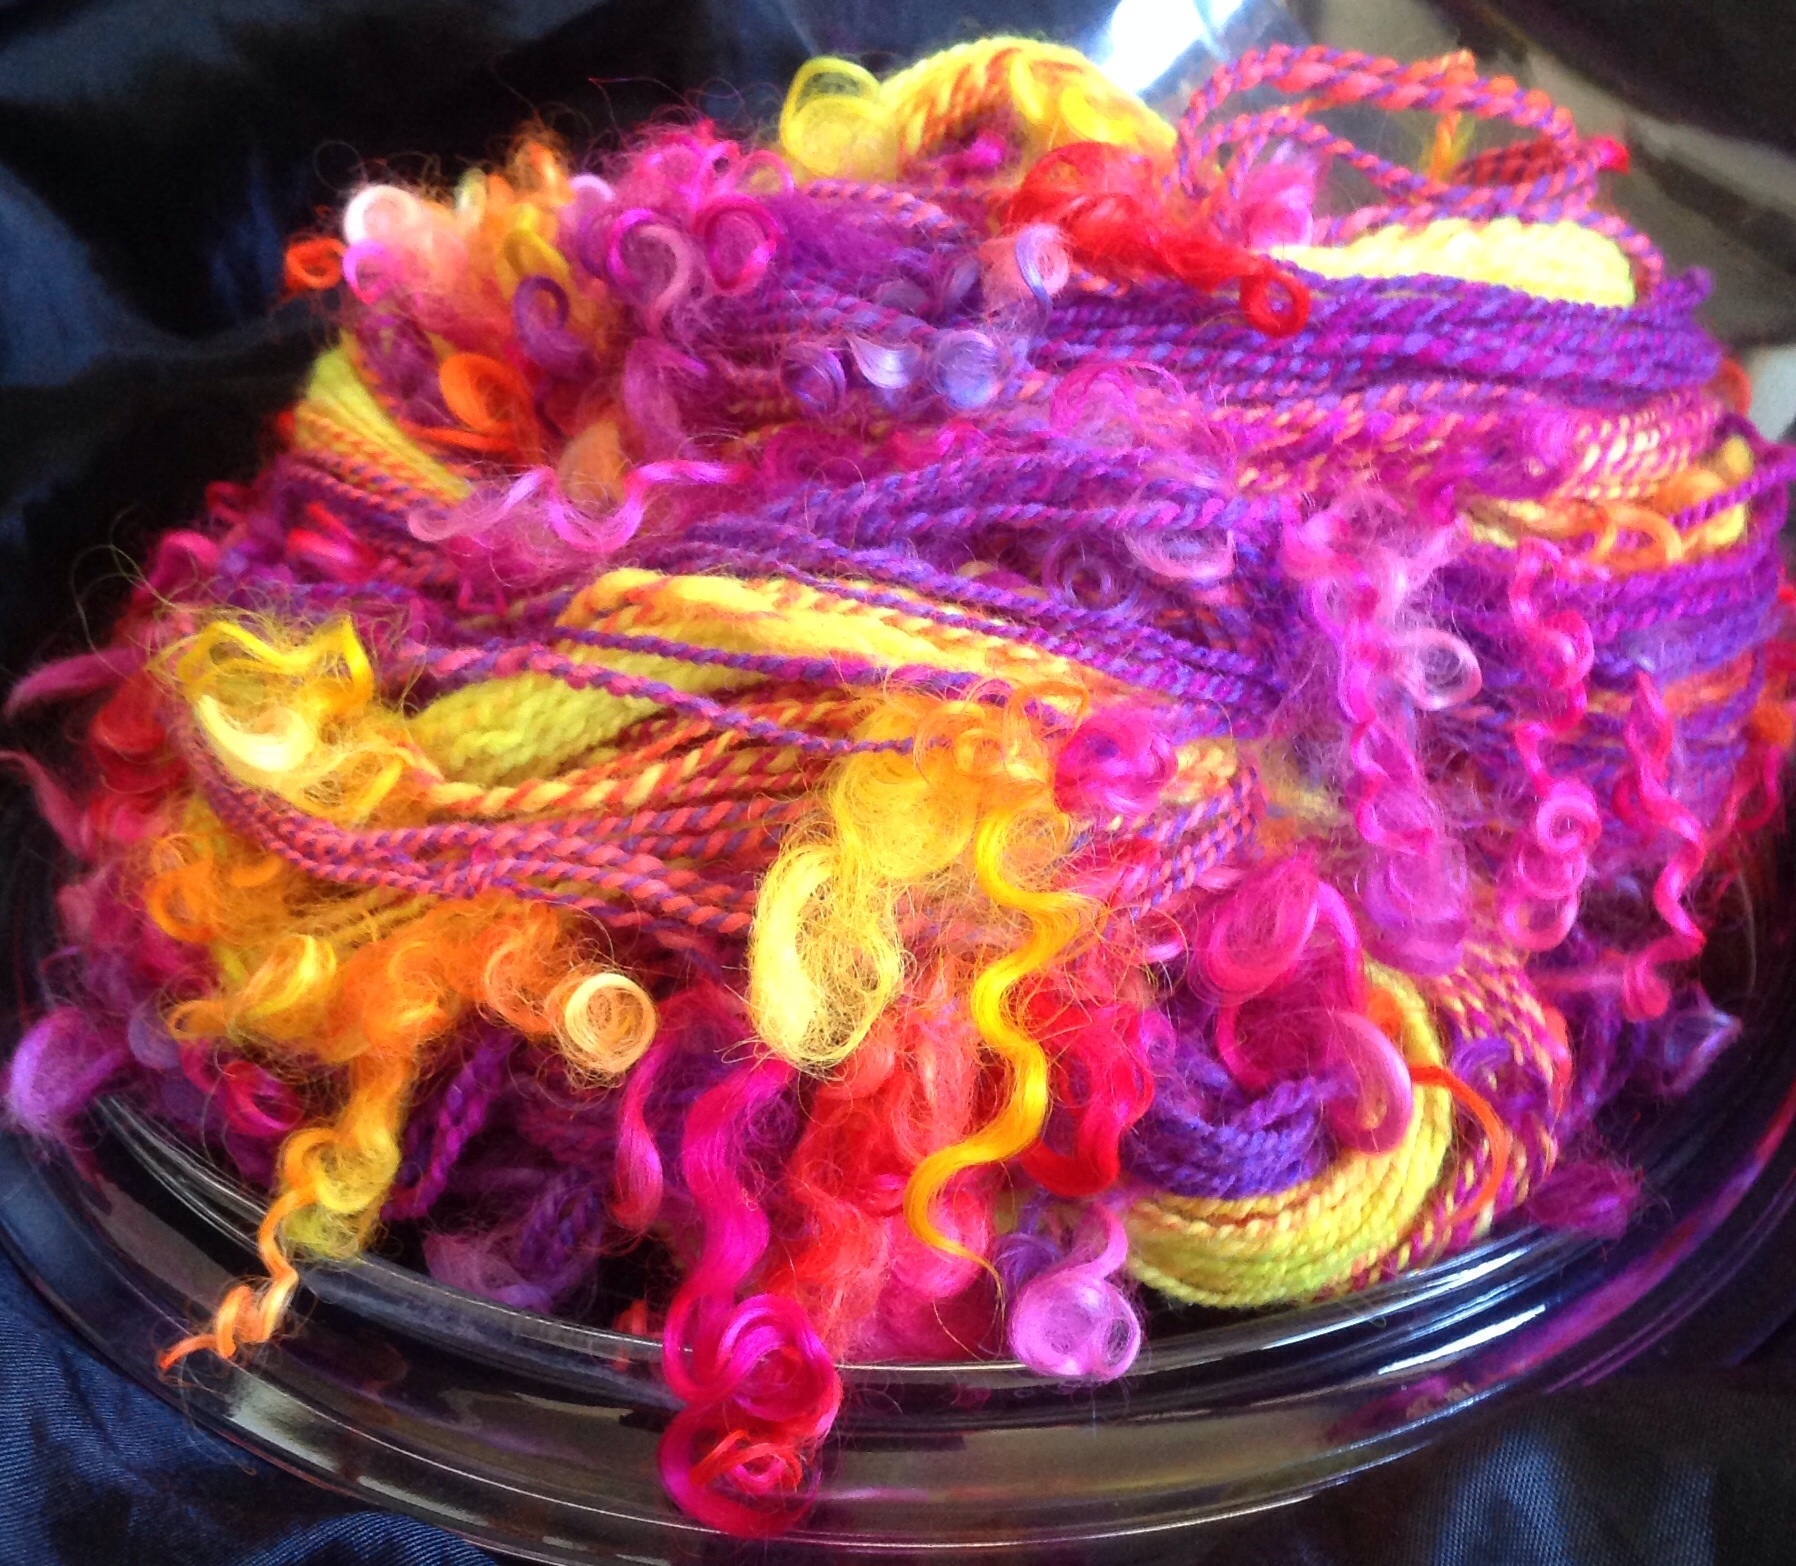
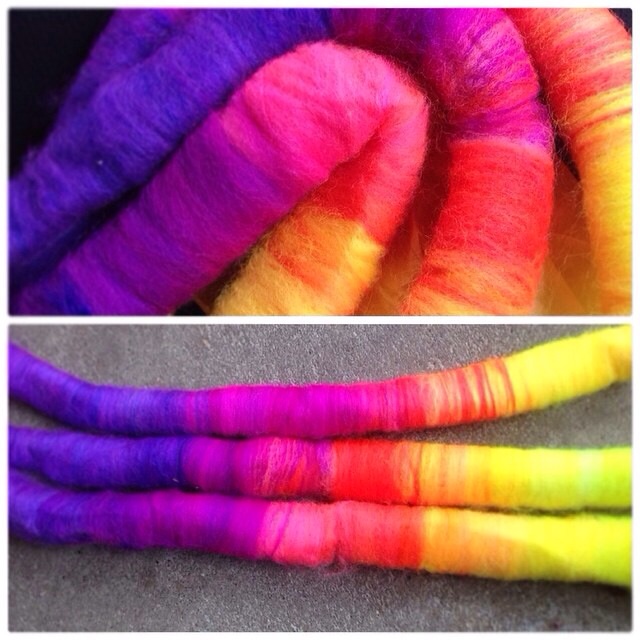
Neon sunset polworth silk with teeswater curl add ins
214 yards of happyThis handspun is made with Blue Barn Fibers polworth/silk rolags in the neon sunset colorway. With teeswater curl add ins, also from Blue Barn Fiber, in the neon sunset colorway.
I did end up with some barberpoling while plying, however, when woven or knit up I think the barberpoling will help the transition when moving from one color to the next. It is actually pretty finely spun pre soak, which came out to a 13-14WPI off the wheel.
Pre soak 13-14 WPIPolworth has an amazing way of poofing up after a soak and set.
Drying in the sun – that luster in that lock in the middle is indicative of why I love an amazing teeswater… Teeswater top vs teeswater locks, is a completely different experience. I prefer the lock, for sure.Which ended me up with a 10-12WPI yarn, stuffed consistently with the teeswater locks throughout.
post soak 10-12 WPI that polworth really fluffsI left a long beginning and end to the yarn without any locks. Ultimately, the idea of a thinly woven scarf is what I have in mind for this very special yarn.
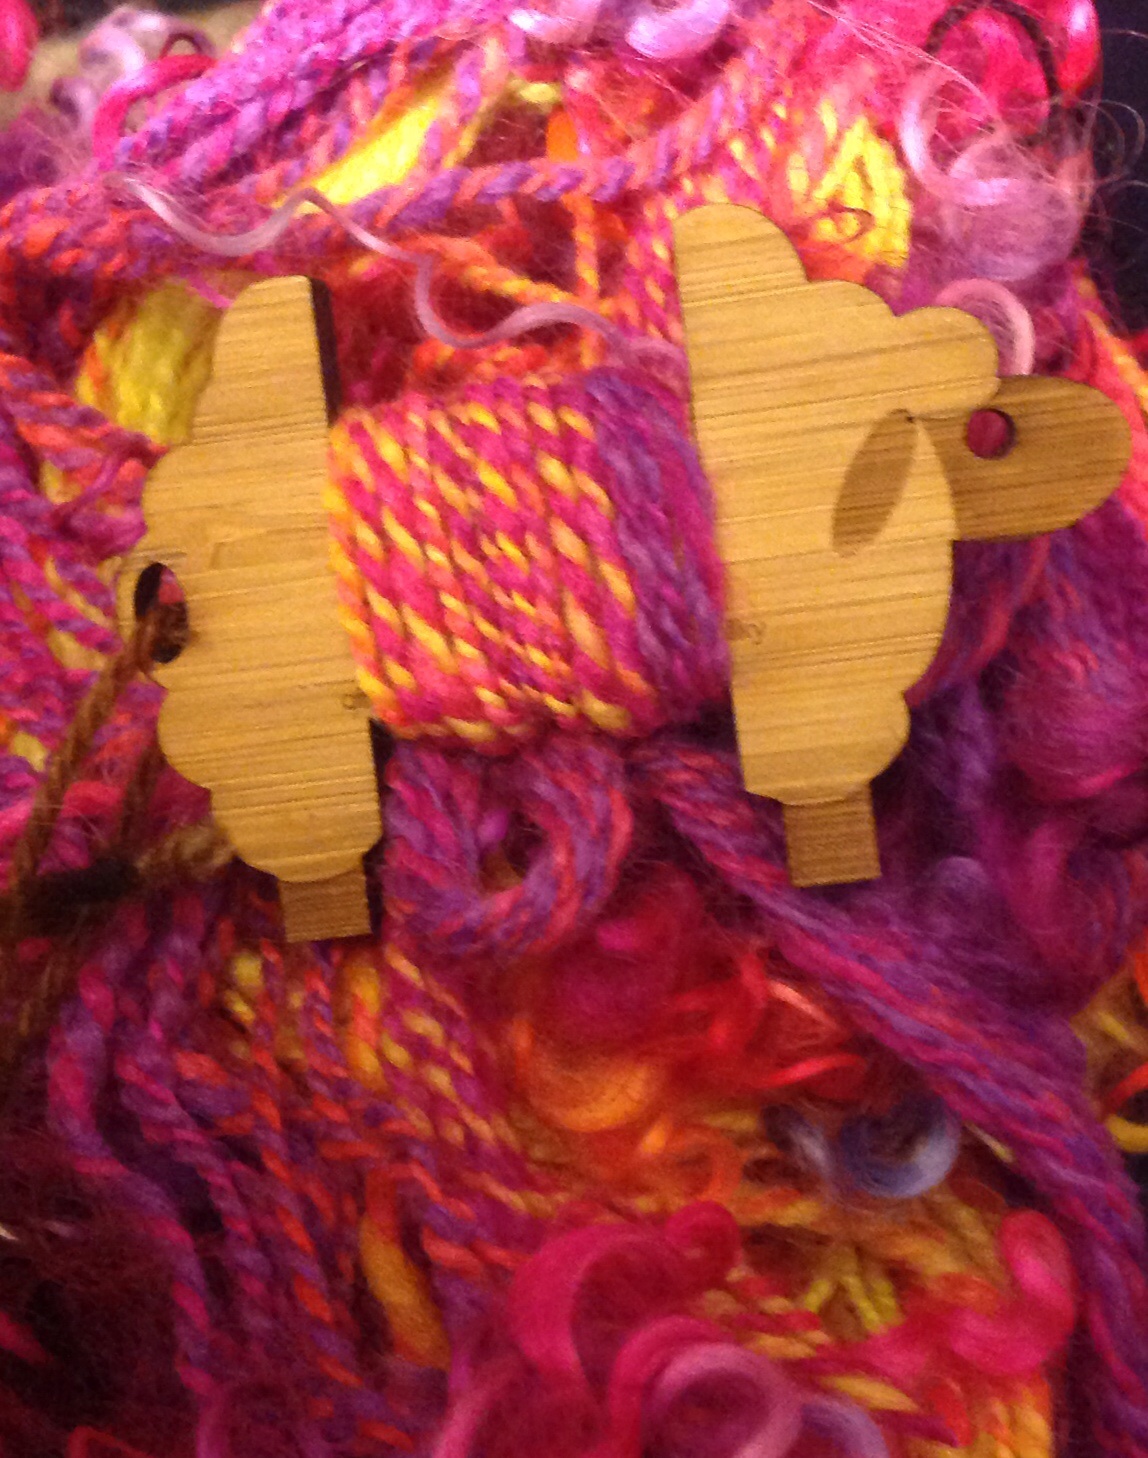
I love how the colors are so incredibly bright. The purple melts into pinks, into neon peaches once mixed with the tangerine orange, and finally into a bright happy yellow. The way I chose to spin one rolag to the next, matching up the rolags colors, end to end, giving it longer color repeats. I see it being the perfect weft. I ended up with approx 214yards with 2oz of the rolags, and 1oz of teeswater, which didn’t play a part in the yardage the way it was used.
On the niddy noddy214 yards is quite a bit to work with…
It’s serendipitous the day I finished this handspun, is the day I get notified that my loom is shipping. What are the odds, that as I’m winding this yarn on my niddy noddy, after months of spinning it, is exactly when I find out my Schacht Flip loom is on it’s way? (The loom was ordered from schacht before my birthday may 10th, and an month and a half later it’s on it’s way)
I’ll need to practice a little on the loom prior to using such a special yarn, which is fine, as this will give me time to think about a warp.
For now, neon sunset special is going to decorate my handspun wall.
Every time I see it’s bright happy colors, with the matching perfect curls, it just makes me happy, just being yarn, so I’m not in any rush…. Well, not until I have that perfect warp figured out.
Blue Barn Fibers
Neon sunset colorway
Polworth silk rolags and
Teeswater locks!!!!Blue Barn Fiber http://www.bluebarnfiber.com
I was window shopping etsy, as I sometimes do…
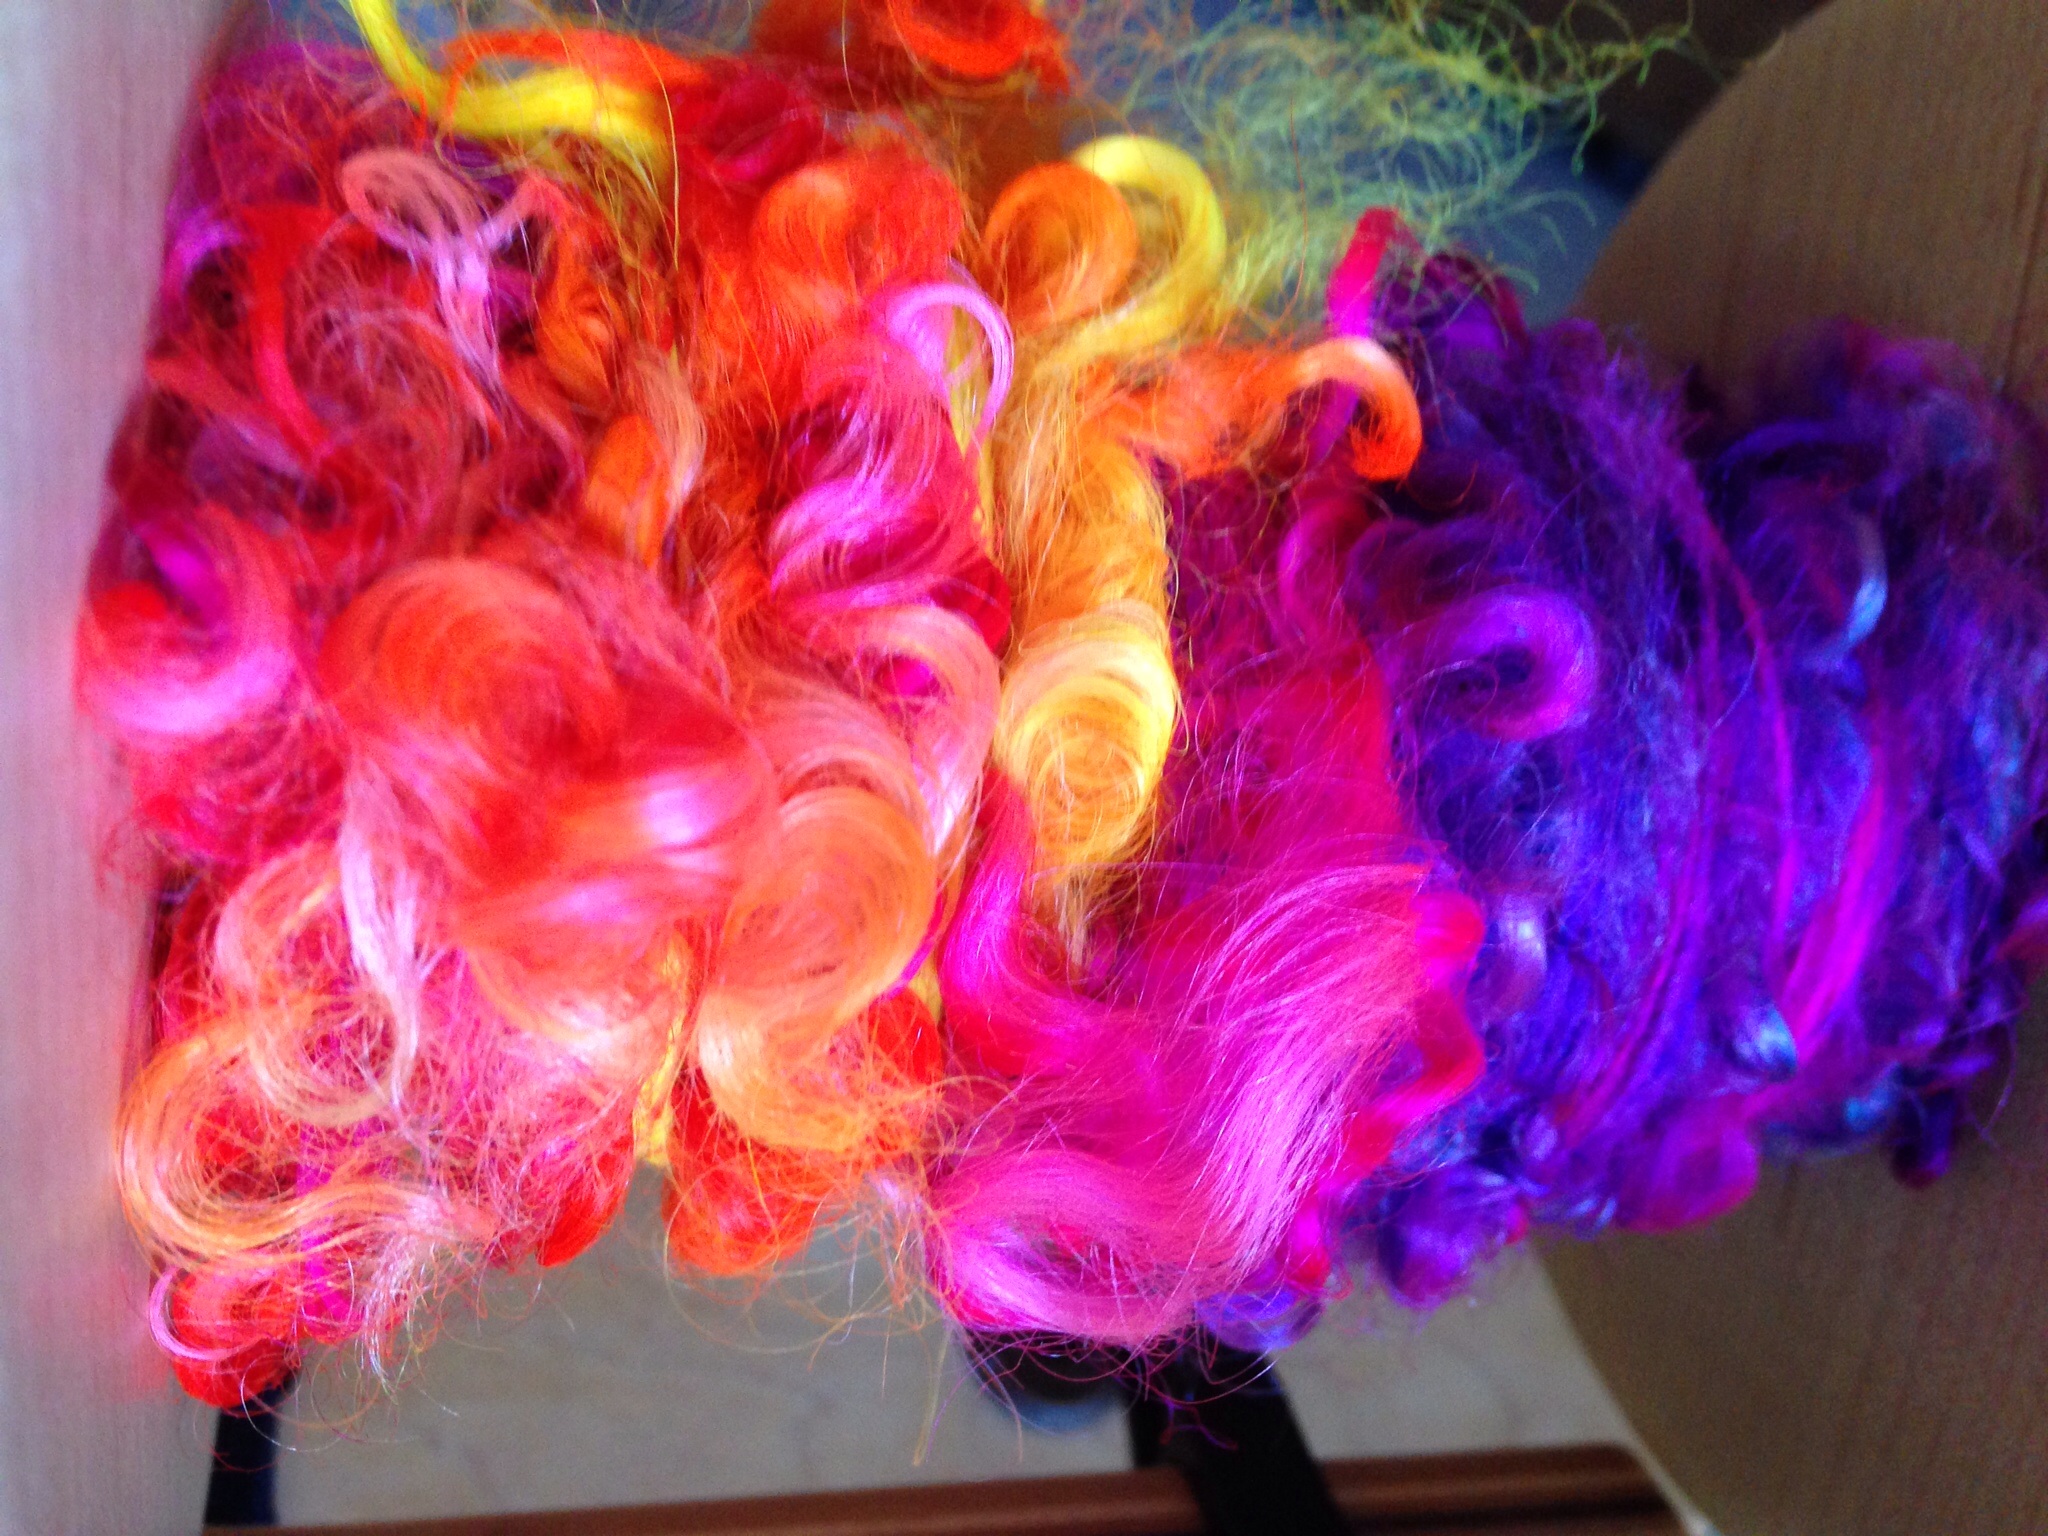
The new thing had been rolags and punis on the podcasts I’d been listening to as of late. I was scrolling along and literally was stopped dead in my tracks, by these colors.
Blue Barn Fiber
neon sunset -polworth silk rolagsGorgeous, amazing, happy, bright, colors. Several colors that each blended perfectly to the next all rolled up in a nice neat rolag form.
The colorway was called, Neon Sunset. I had the choice two different silk blended wool fibers. I chose the polworth, as it’s my favorite. I had also bfl/silk to choose had I wanted, they were both awesome, but again, polworth has a puff factor I love. So I had to have the polworth/silk rolags. Immediately, if not sooner. Naturally, I ordered.
The box came neatly wrapped in tissue paper, as initially I had plans, to split half and half. Holly, one of the two the proprietors of Blue Barn Fiber (the other being her husband, Dan), had separated them for me and wrapped each ounce already separated, as I initially planned to share half, lol. However, once in my possession, I couldn’t let it go. That’s right, I kept it all totally selfishly for myself. And guess what… I’m not sorry, lol.
Shortly after that purchase, she decided to offer the same colorway, in choices of, mohair or teeswater locks. Once again, immediately, I ordered the teeswater locks.
Neon sunset teeswater locks…
I couldn’t pass it up, it was a pair, the rolags and locks… They were meant to be together, it was fate. One should never tempt fate. Far be it for me, to tempt fate, I won’t do it.
Fate… I love you, and blue barn fiber 🙂Let me tell you, I have a stash. A large stash. This went on the wheel next. Look at these colors, I had no other choice. I had 6 rolags total, so I spun 3 colors going end to end very thin, with the plan to spin the other half the same thinness with the teeswater locks, in the matching color or as close to it locked in the twist.
First bobbin of rolags, spun thin.
3 rolagsBasically, as I spin, I split the single in two and put the lock inside at the middle of the lock, and continue spinning. It’s in there pretty good, but my hopes are the plying will lock it in that much better. I’m also spinning the other rolags end to end same as the first single, ideally, the colors will meet up and if I have some barber poling happen, that’s okay as it’ll lead into the next color. This is a double first for me as, I’ve never spun rolags before this. Rolags, at least, blue barn fibers rolags are smooth sailing, just dreamy to draft thick or thin spinning can be done easily, but I love yardage. So, thin it is. Second, I’ve never spun handspun like this, one normal ply, and the other ply with teeswater locks. Both very thin singles. I’m interested to see how this turns out.
We will both be surprised. I’ve taken lots of photos along the way. This teeswater lock adding is very very time consuming. But I’m enjoying every second of it. I’m thrilled to see it turn out. I’m writing this as I spin, so the actual outcome is a total mystery to me at this point.
Rolags with teeswater locks spun in
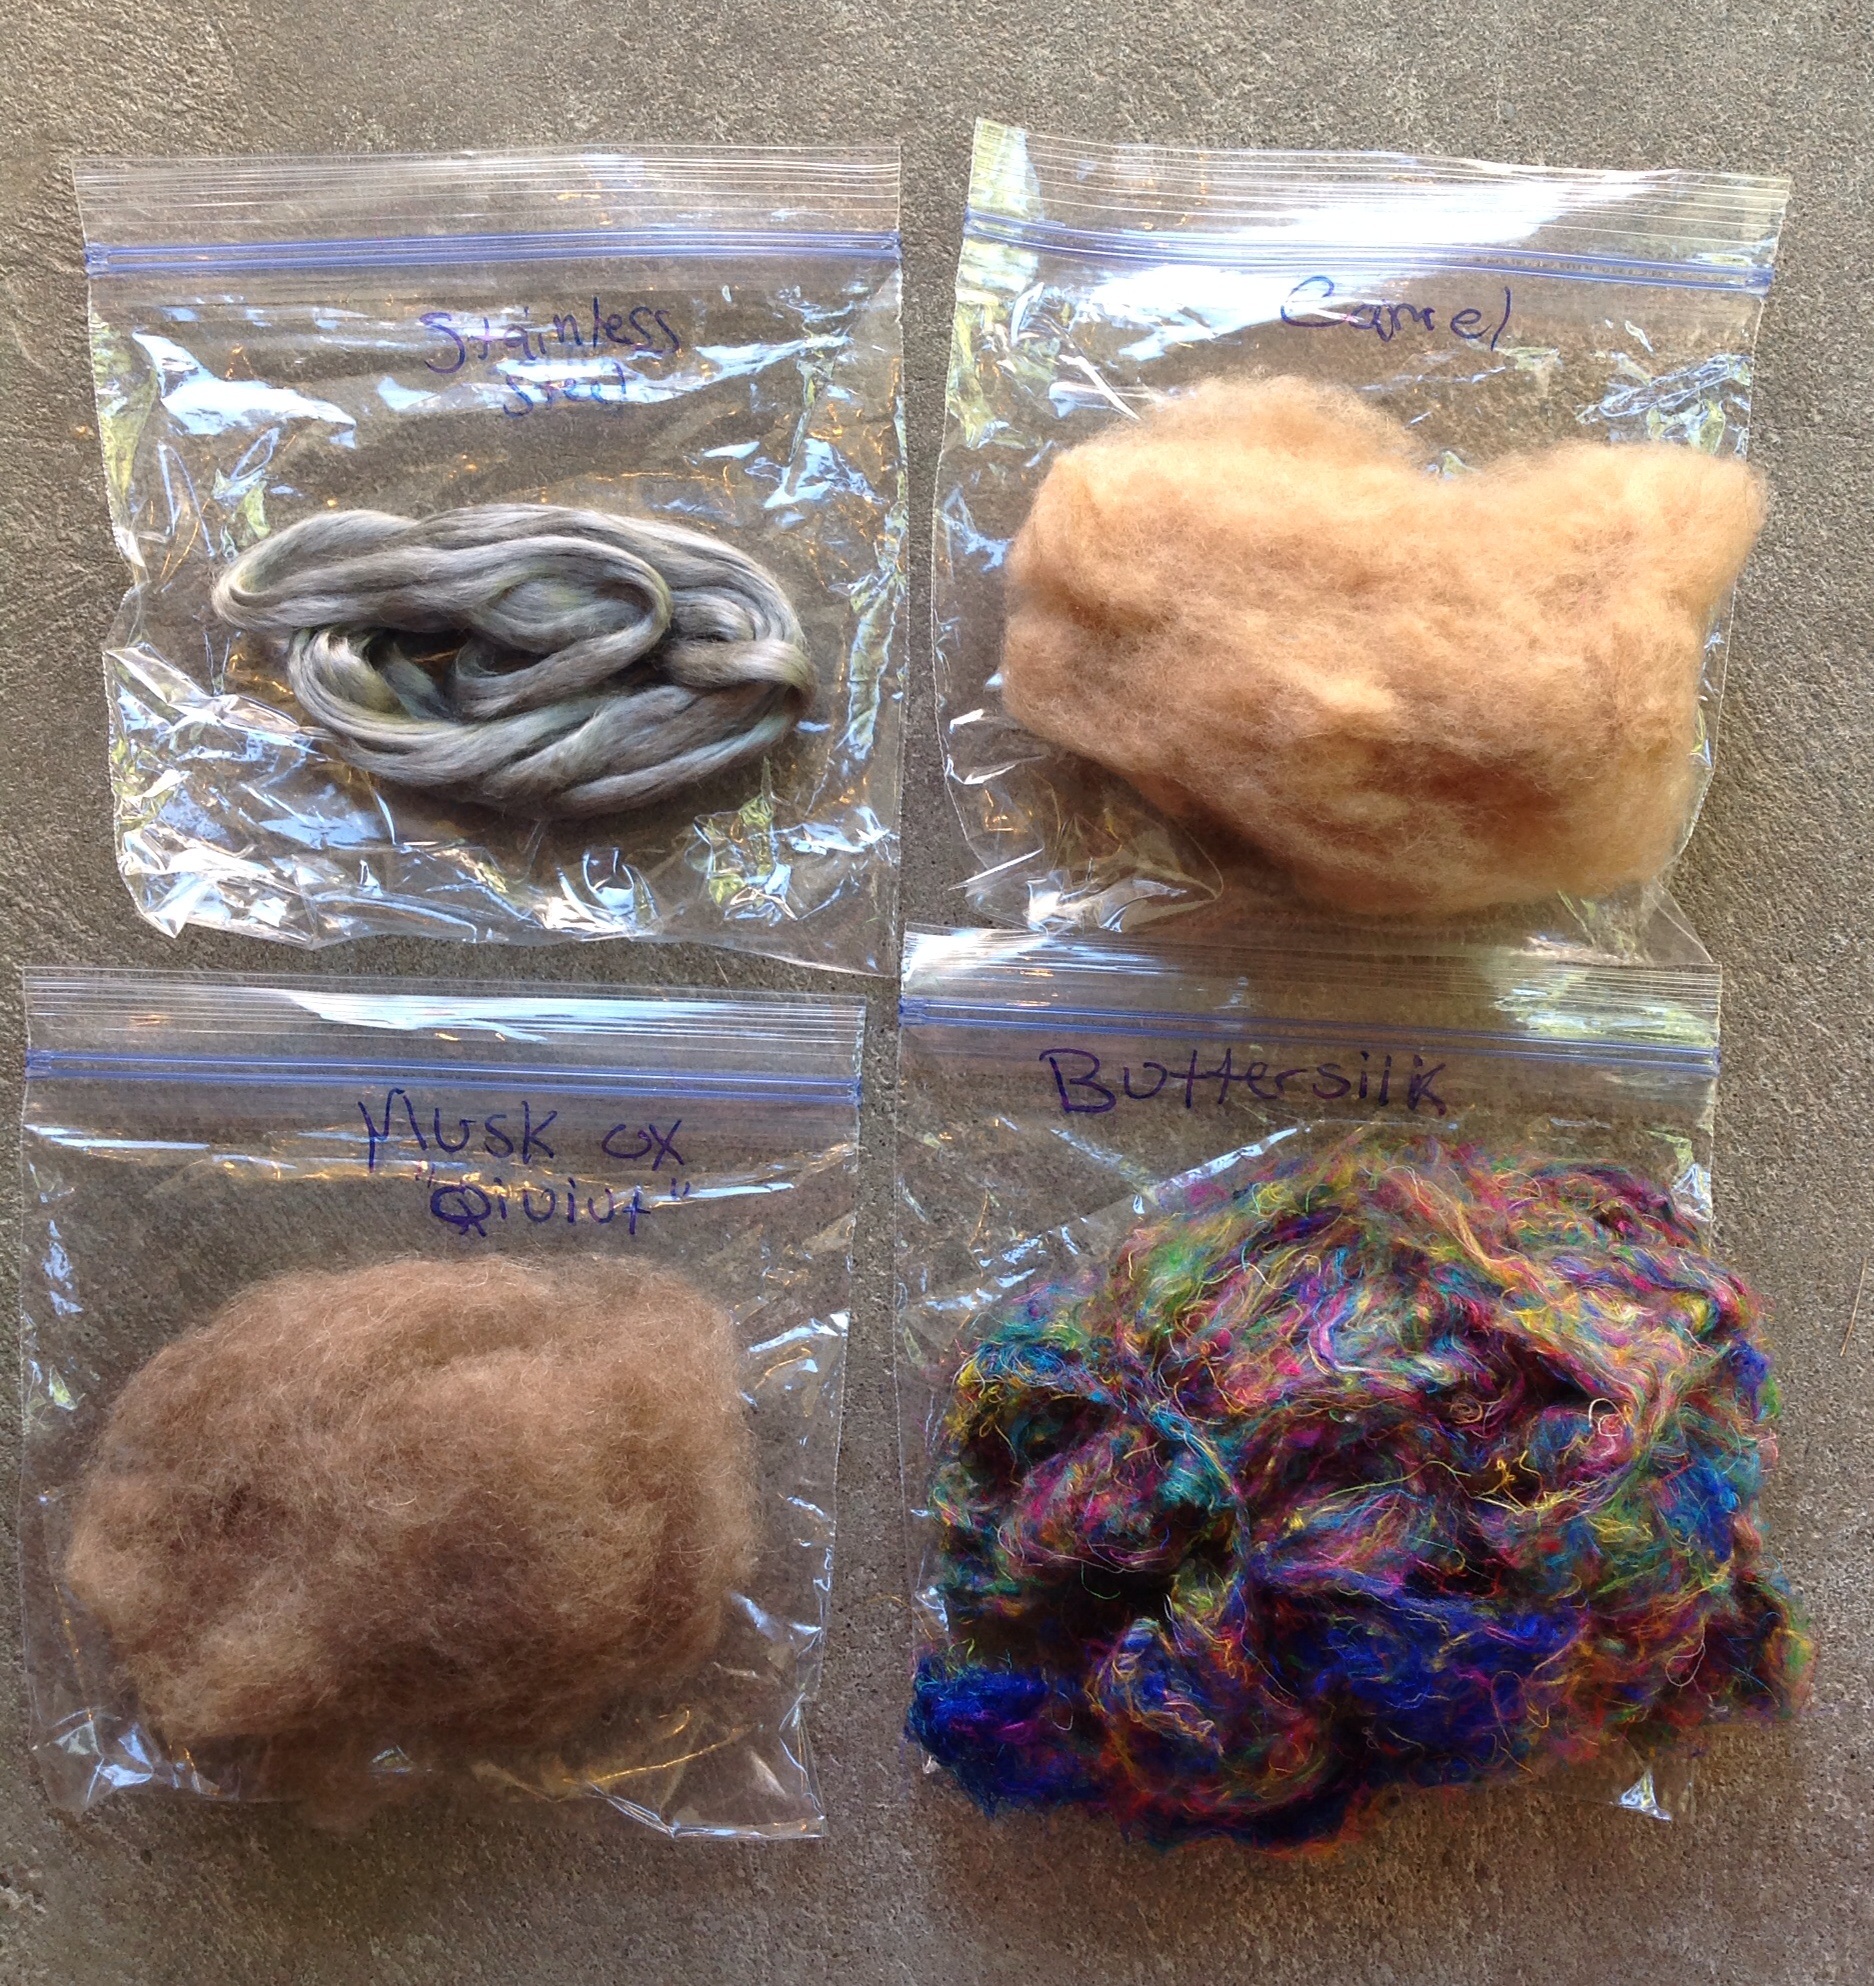
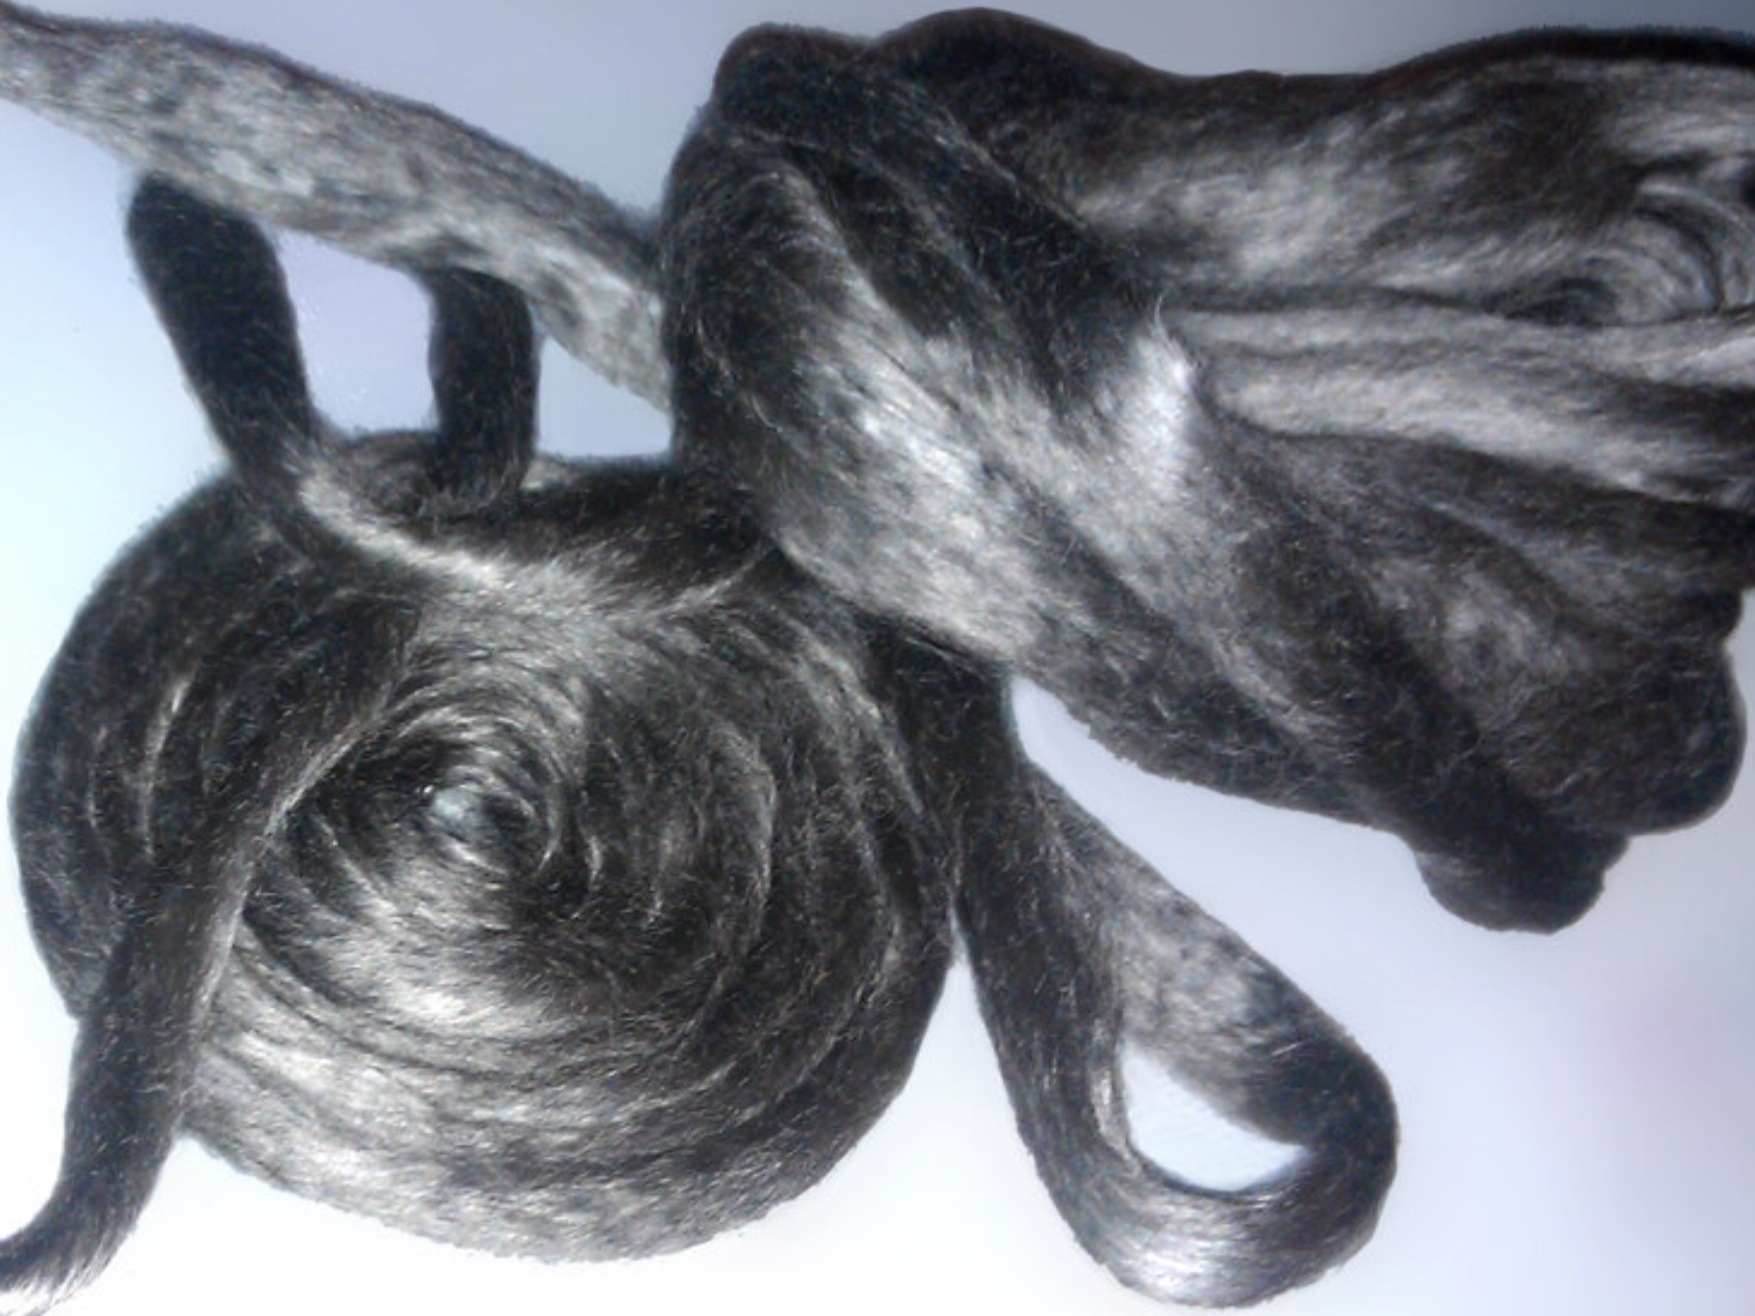
I love the silky locksOn another note, while making my second order with Blue Barn Fiber, ordering the teeswater, I decided it was high time I see what sari silk is all about. Playing with it in batts, corespinning, you know, just really getting a feel for it. So I ordered that at this time, as well. I had written her some notes through etsy asking questions. Holly was so patient, thorough, and sweet. Excellent customer service. I mentioned how rolags were new to me, also the sari silk, stainless steel, qiviut, rose pearl fiber… You can imagine my Squeeee when I opened my box of teeswater locks in neon sunset and sari silk, to also find samples of the stainless steel, her BUTTERSILK™, camel down, and you won’t believe this, but, qiviut!!!!
The samples that were sent so excitingYes, Holly, sent me qiviut. The most coveted, and one of the most expensive fibers around.
I still can’t believe it. But before I go further on the qiviut, because qiviut has a reputation all it’s own. Let me tell you, the Buttersilk™ is freaking amazing. Honestly, I doubt I will ever buy sari silk again, because the Buttersilk™ just melts in your hands.
Blue Barn Fiber
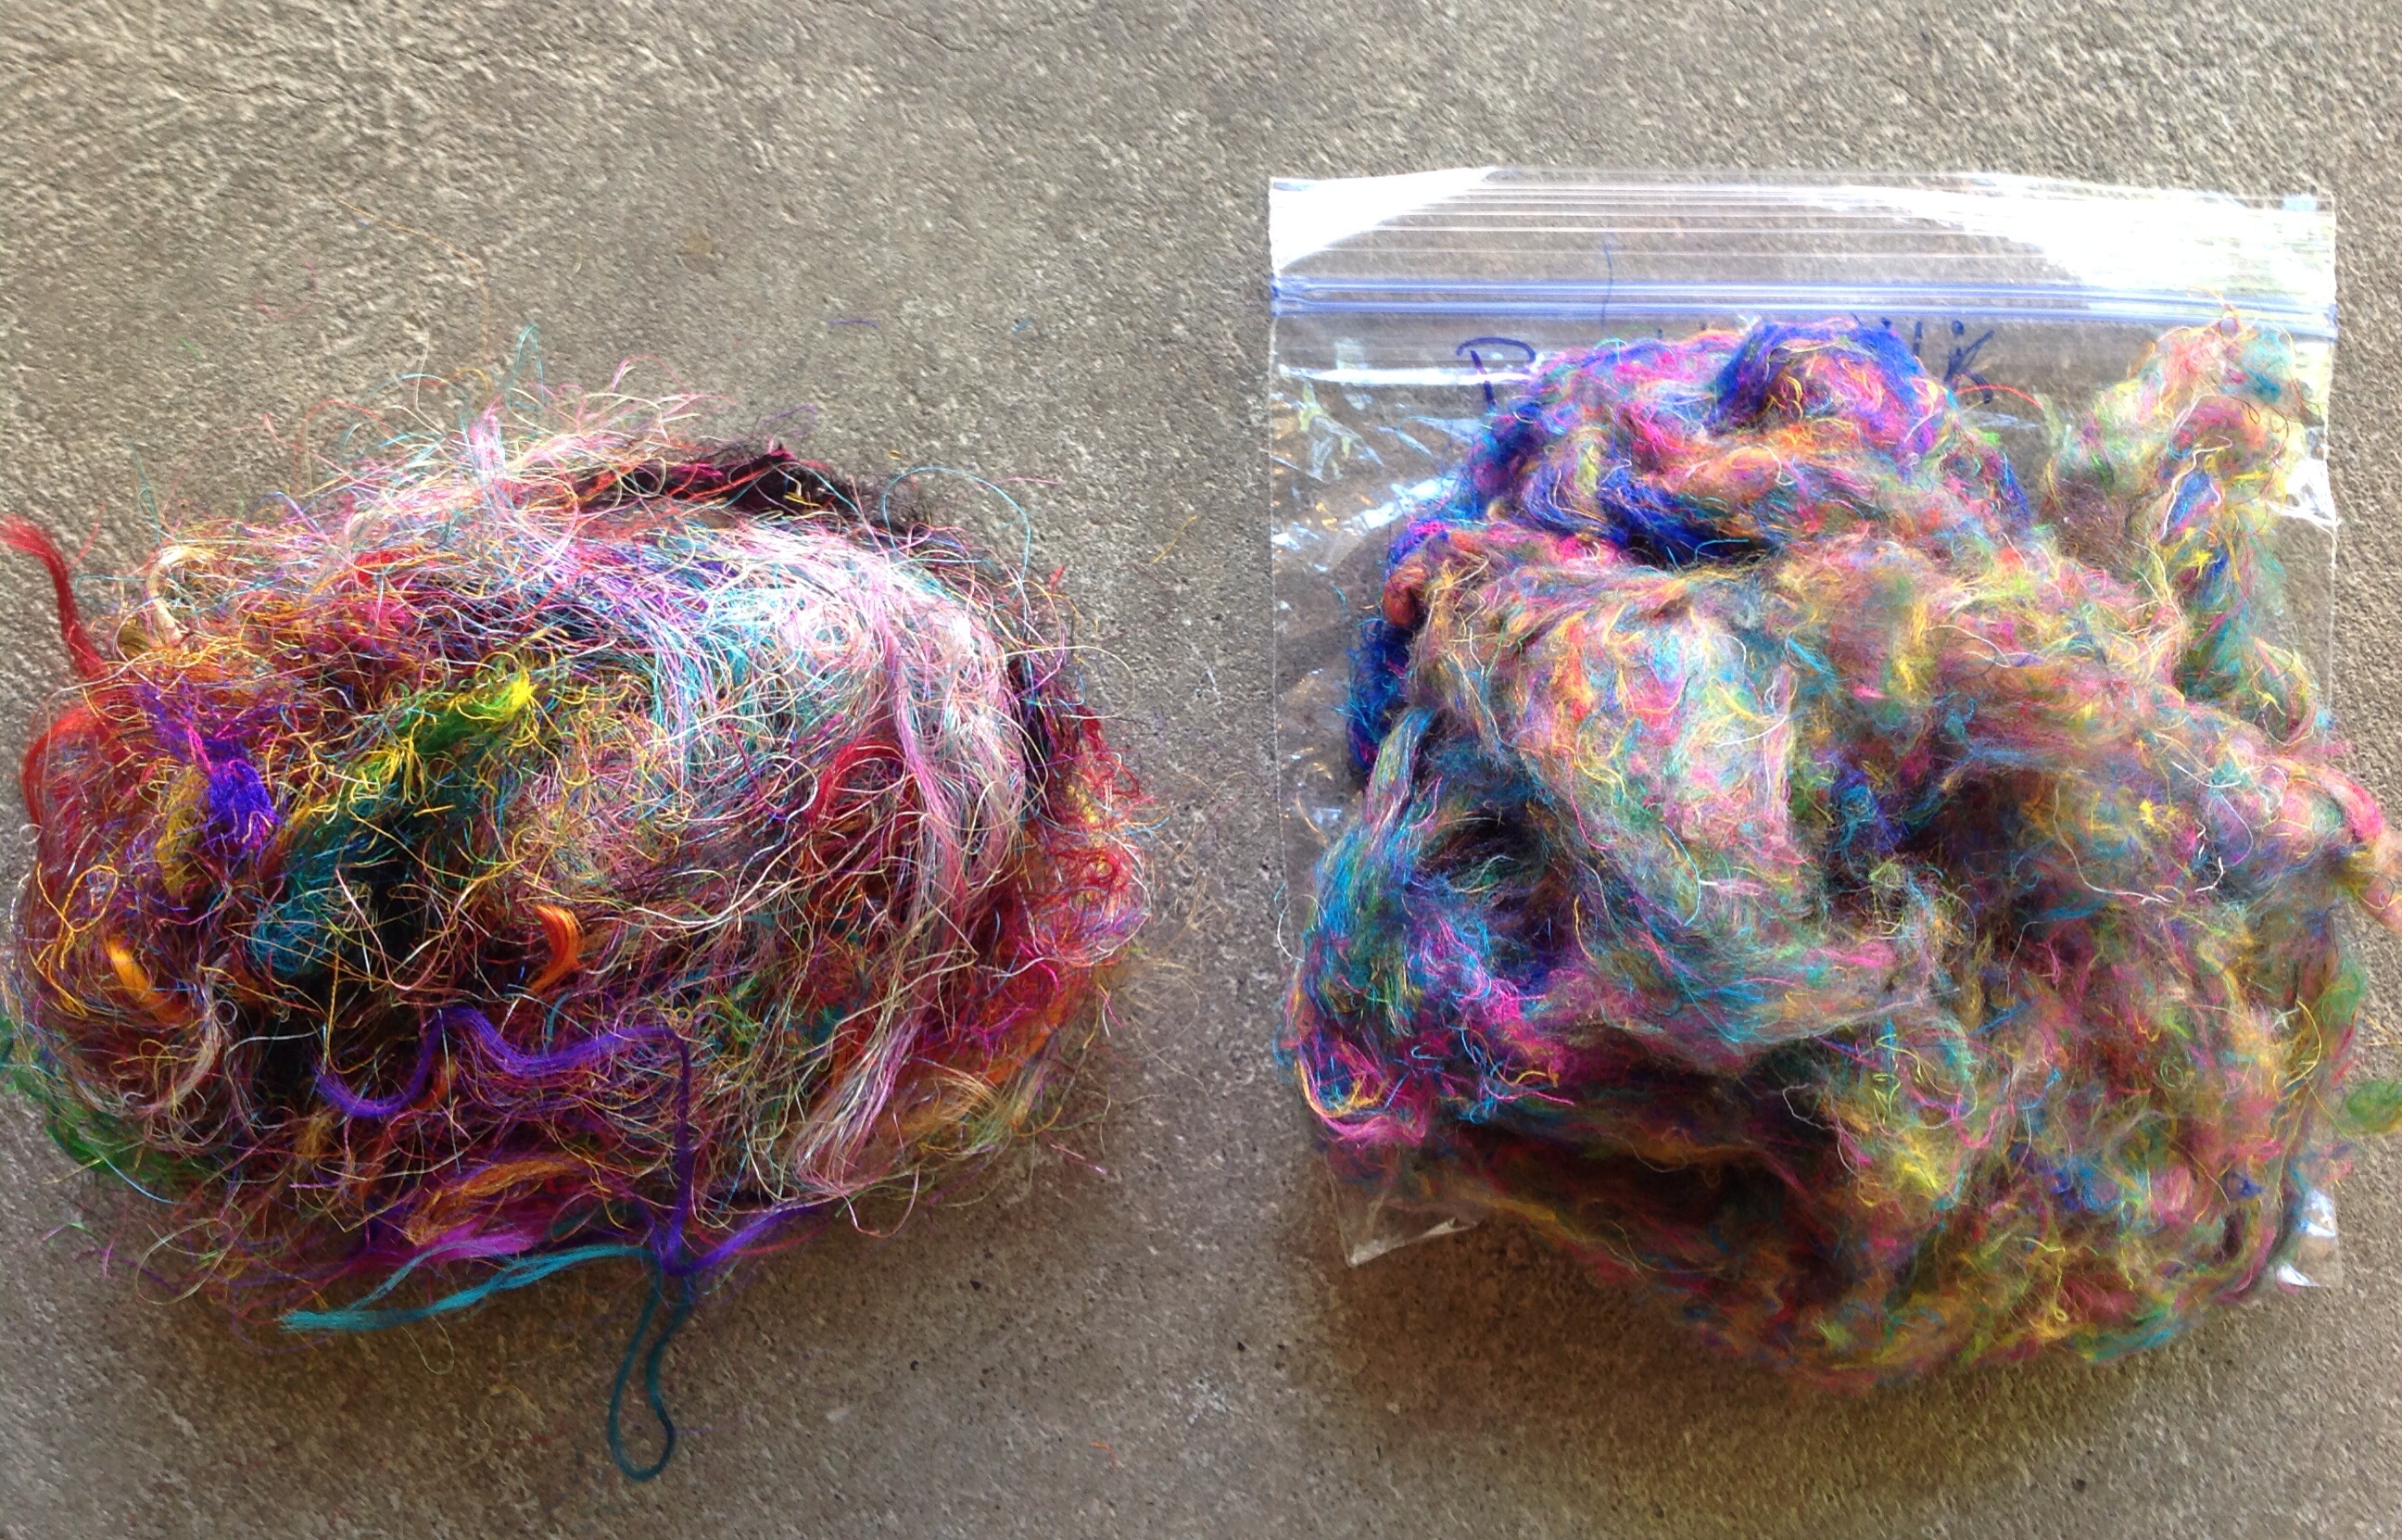
Buttersilk
These are just four of the many colors she offers… And if you have a color in mind, that’s not there, not already made, seriously just message her and she does her best to make it happenIt’s hand pulled sari silk, mixed with mulberry silk, and more, more, more. It sparkles and it’s soft literally like butter in your hands. Like, chocolate that has sat in a hot car melts in your hands. Soooooo silky soft with the sari silk factor. It’s amazing.
See the difference between sari silk on left and buttersilk on right
It’s a huuuuge differenceA little goes a long way, it comes in multiple colors and the price can’t be beaten. It had been on sale, so I bought a few more colors, and as if that wasn’t enough, if you had a special color in mind I have no doubt, she would make it just for you, each customer is special. Her etsy shop is chock full of a fiber artists dream.
She sells in bulk too for cheaper pricing, for those wanting to make larger projects or I imagine for other fiber artists to use and sell in smaller quantities to make money…. This shop is for everyone. It’s obviously a favorite of mine, and others as well , as she sells out of items at times. No worries on that either, she restocks quickly, and a quick message to her about what your needs are and she makes it happen.
The customer service, is perfect, I feel like a special VIP customer every single time I shop, from the first time, to several purchases later.
Blue Barn Fiber products, always impeccable. Nothing but the best quality fibers. Example, the dyed teeswater I bought was sourced from Namaste Farms. Namaste Farms has the best teeswater out there and let me tell you as her customer also, good fiber is not cheap. That is my point. She sources the best quality fibers available.
The stainless steel, I can’t wait to make a little yarn skein for glove fingertips to be able to enjoy touch screens without the need to remove a glove. I understand a little of this fiber goes a loooong way.
Stainless steel fiber – a great add in, that will work with touch screens
It’s definately a fiber that needs to be blended with something else. Another blog post when I use this fiber for sure!!! Touchscreen gloves for gifts are going to be total winners! I have an awesome idea for this, I will share before the holidays.
The qiviut will also get it’s own blog post when I experience that, however, I’ve never heard of bad qiviut, and this sample she surprised me with matches all the great things I’ve heard about this fiber. It’s so soft I almost can’t feel it. Although I saved this for last to touch it’s insane. This is one of those precious fibers people tend to wait on using… Are you one of those?
Clearly, I need more. See, that’s my thing, I can’t use what I have until I have more. Soooo, a qiviut purchase from Blue Barn Fiber might need to happen prior to testing this. I can’t be left with none after using up the sample, sheesh. Just enough to spin a very fine 2 ply that I can make a cowl or I believe it’s called a smoke ring? You know, the cowl, that can go over the head?
Also, do I blend? Or do I go full on quiviut? I’m thinkin full on quiviut… We only live once and it’s an heirloom piece. Right?! Mmmmmm qiviut. I feel like Homer Simpson talking about donuts or beer.
Now, they have glow in the dark fiber, it’s a nylon type fiber so while I haven’t tried it yet, that is just awesome!!
Glow in the dark fluff – no it’s not too early to start that Halloween projectAdd it on the trim of a child’s hat and charge it up under some light before a walk at night, and safety increases. This fiber in a project, glowing away is going to be a conversation piece in any dark room. Anyone, who doesn’t think a handmade glow in the dark accessory isn’t awesome, really isn’t worth your time. Lol this is better bait than that schmatzch.com dating site, or whatever it’s called anyday. Also imagine for a baby blanket, little stitches, here and there, like stars, when the lights go out for bed. It glows in the dark of course it’s magic, everyone knows that. Especially kids, and grown ups, like myself.
Last, but, certainly not least, a little more about the brains behind such a cool website/store, … Holly got her degree in Environmental Science and is very sensitive to keeping the earth healthy and green. Additionally, she works as a graphic designer but has the etsy shop with her husband ultimately planning to farm and fiber full time. We need our farmers, we’ve lost too many already. Blue Barn Fiber’s love of the earth, renewable resources, fiber, and animals is shown again and again.
In saying that, they only purchase cruelty free fiber.
Dan and Holly are awesome. Their website can lead you to everything and has pictures and links needed. You have to check out there website! They literally sell a zillion different items, lots of fiber in all kinds of breeds and animal plant and recyclable materials, tools, etc etc, if you are looking for something particular you don’t see, just message, and they will do whatever they can to obtain your wish…. Just like a fiber fairy who lives in a blue barn.
GO NOW, you won’t be sorry and try the Buttersilk™ It’s love and heaven in fiber form.
They are the epitome of everything fiber arts, you want to try. I love this shop period, love!!!! LOVE!!!
I’m currently plying my neon sunset and hope to have it pictured before the day is over. Go check that shop out, any questions, seriously amazing amazing place to find the newest fiber on the market, including inventing her own fiber blends that’s are to die for…. Literally, clouds of heaven are being sold in her shop.
I have heard of how in the past, there was not much of a selection…
Well fiber friends, that has changed by leaps and bounds. We have fibers to spin, made from everything from stainless steel, to glow in the dark fiber, to rose fiber (yes, fiber made of crushed rose stems, that has a pearl sheen, and a faint rose scent) oh, did I mention pearl? Because, yes, they also have fiber with ground pearl dust that is infused into the fiber. Are you kidding me?!
Glow in the dark
Stainless steel fiber to make your yarns work with touch screen!
We have beautiful natural colors growing on animals that are new, and colors that are neon bright, due to brilliant hand dyed fiber artists who have amazing color sense.
Now, fiber is grown by farmers with spinners in mind, no longer just a by product, as with several breeds, in the past.
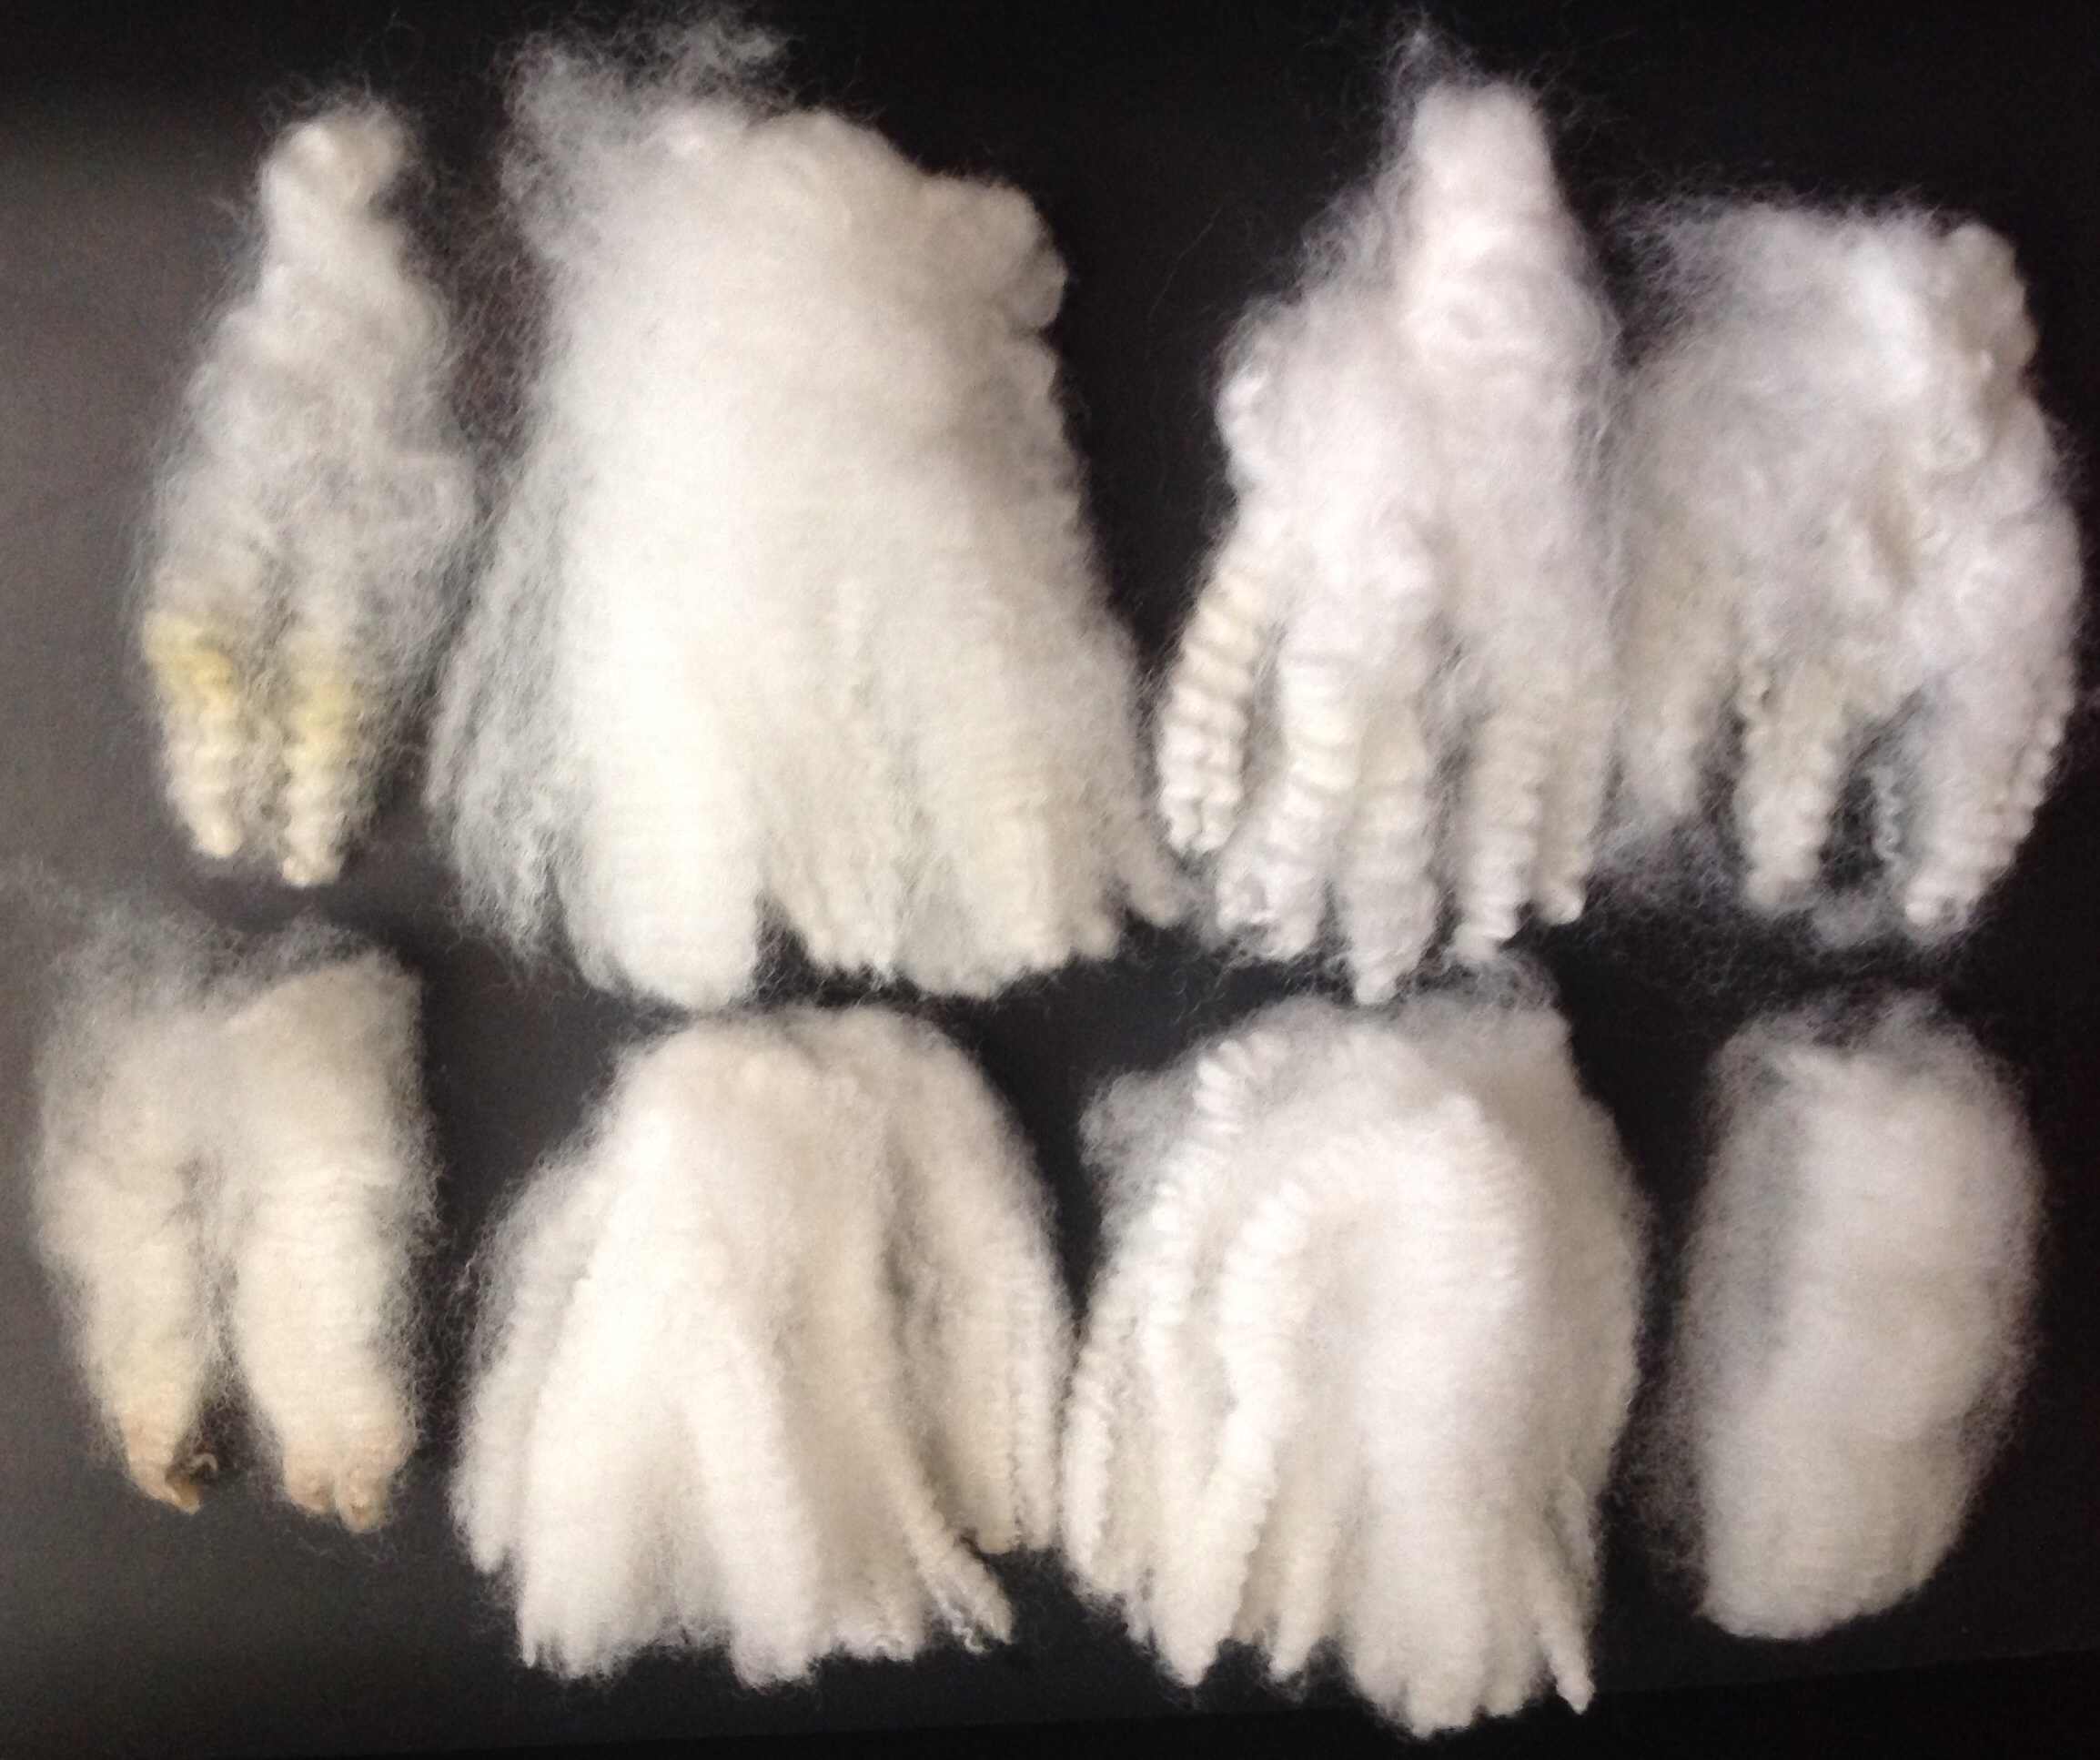
Sheep are coated to keep their fleece free of vegetable matter and sun damage. A very labor intensive process of changing the coat as the sheep and fleece grow. Shown in this photo is a coated Namaste Farms teeswater.
Although we still have many fiber growing animals where the fleece is a by product, the word is spreading. As spinners, we know all fiber has it’s place, it can all be used for something, somewhere. I am just in love with the new products that are coming out as time passes. We are so lucky, to be fiber lovers at this moment, and it’s only going to get better for our future people inclined to be of the fiber addicted persuasion. WE ARE SO LUCKY!! And I plan to show such fiber in future posts! Websites, blogs, shops, Independent dyers, fiber artists, fiber products, both new and old. (I say old as, it could have been around for several years, but if I’m just discovering it, then just maybe, an oldie but goodie, will be new for you as well) This is an amazing time for us… We are gaining power in numbers, and how can new people coming across soft fluff, not want more.
Knitting, crocheting, fiber arts etc is already shown to be healthy for people. Clinical studies being done show this. I saw this video and had to share.
Stained white locks before and after hydrogen peroxide use.
Examples of stains on the far left
3 results of each stain placed to the left of our starting point .
The results are fascinating!
The following is an experiment I wanted to test out if it worked.
But I want to strongly advise if anyone tries this for them self, to test a lock or two and see if you are happy with the results on a test lock before doing an entire fleece.
I used Corriedale in my experiment with regular drug store hydrogen peroxide I checked at 10min and 24 hours. I didn’t experience any deterioration in the lock, but the science shows it can break down fibers. I don’t know how it would effect fine wool so make sure
Before trying this to test a lock first. Even 10min produced results so 24 hours may not be necessary. I didn’t dilute the hydrogen peroxide for my test, however it was a very low percentage. For instance, it wasn’t using a high peroxide strength that is used to professionally bleach your hair, we all know that damages no two ways about it.
My experiments on a medium wool came out with results I was very happy with. I wouldn’t do this on an entire fleece as personally I would rather dye it.
Where I would use this technique?
if in a finished yarn I had noticeable yellowing in a small portion and it was very apparent in contrast to the white I might try this to fix that.
If I had long locks that were very white and I had some stubborn dirt.
I would always test a lock first and use the minimum amount needed to get the job done.
Low concentration of hydrogen peroxide, maybe dilute with water if that was a concern and to check often if ten minutes is all it needs. I did take photos at 10 min and 24 hours to share my experience.
Again this was an experiment but only using one type of fleece that was a medium wool and I didn’t have any notable breakdown in strength when compared to my control lock.
I could have very different results with different fleece so if anyone decides to try this, I would say to make sure to test a lock and use the least amount of product and time required to achieve results.
Everyone knows the less we put our fiber through the better.
This experiment did work for me with no problems, but I would always test again were I to have stains I want to remove from fleece.
Remember this was an experiment that I tried and wanted to share my results.
It’s not necessary to do. I can always overdye stains. But it’s nice to know I have another option to try if I want to whiten fleece
Majority of my knowledge comes from the internet. That said, there is one person in particular I have learned a lot from . There are many fiber artists that teach and are wonderful. They show tried and true techniques and are famous for being leaders in our world of fiber arts. I have books from several of these people. This experiment I am trying I learned from Natalie Redding, of Namaste Farms.
She can be found at http://www.namastefarms.com, where it will lead you to a myriad of information. In addition to her own professional website, she has a YouTube channel, livestream account, a blog talk radio show that airs every Thursday night at 6pm PST, Facebook, Instagram, Twitter, Pinterest, google plus, oh and a season of her own reality show on Nat Geo Wild called Shear Madness, with Springcast shows that followed each Shear Madness episode. I’m sure I’m forgetting more somewhere. She is truly inspiring when it comes to fiber arts.
It was, Namaste Farms YouTube videos, that inspired me to start spinning. She made high end handspun yarn, for http://www.yarnmarket.com, using rare breed wool and long locks from her prize winning flock of sheep and goats. Her yarn is gorgeous and fun, and she shared special techniques, like ways to make locks longer without having, the hard to find, expensive to purchase, extreme long locks that grow on the sheep only once in the their lifetime.
She shared lessons she learned, from the hard knocks only experience and mistakes can bring. Proprietary information, that made her gorgeous yarn, she willingly shares with the public. I soaked it all up, I watched over and over. She made everything look so easy, and for Natalie, after producing these yarns 100’s of times, I’m sure it was easy, but when I would try, I didn’t catch on to everything the first try.
She has a special touch. You should see her beat the side of her house with a skein of yarn, it’s insane looking, but the results are magical. That technique I got down pat, my husband usually tells me to “keep it down, what will the neighbors think”… And I respond, “they think you are my submissive and getting what you asked for, now kiss my feet, lol” he covers his face, shaking his head, saying “what am I going to do with this woman” anyways, on to stain removal.
She put out a little piece of info that I had to try. Hydrogen peroxide removes stains from your precious wool locks.
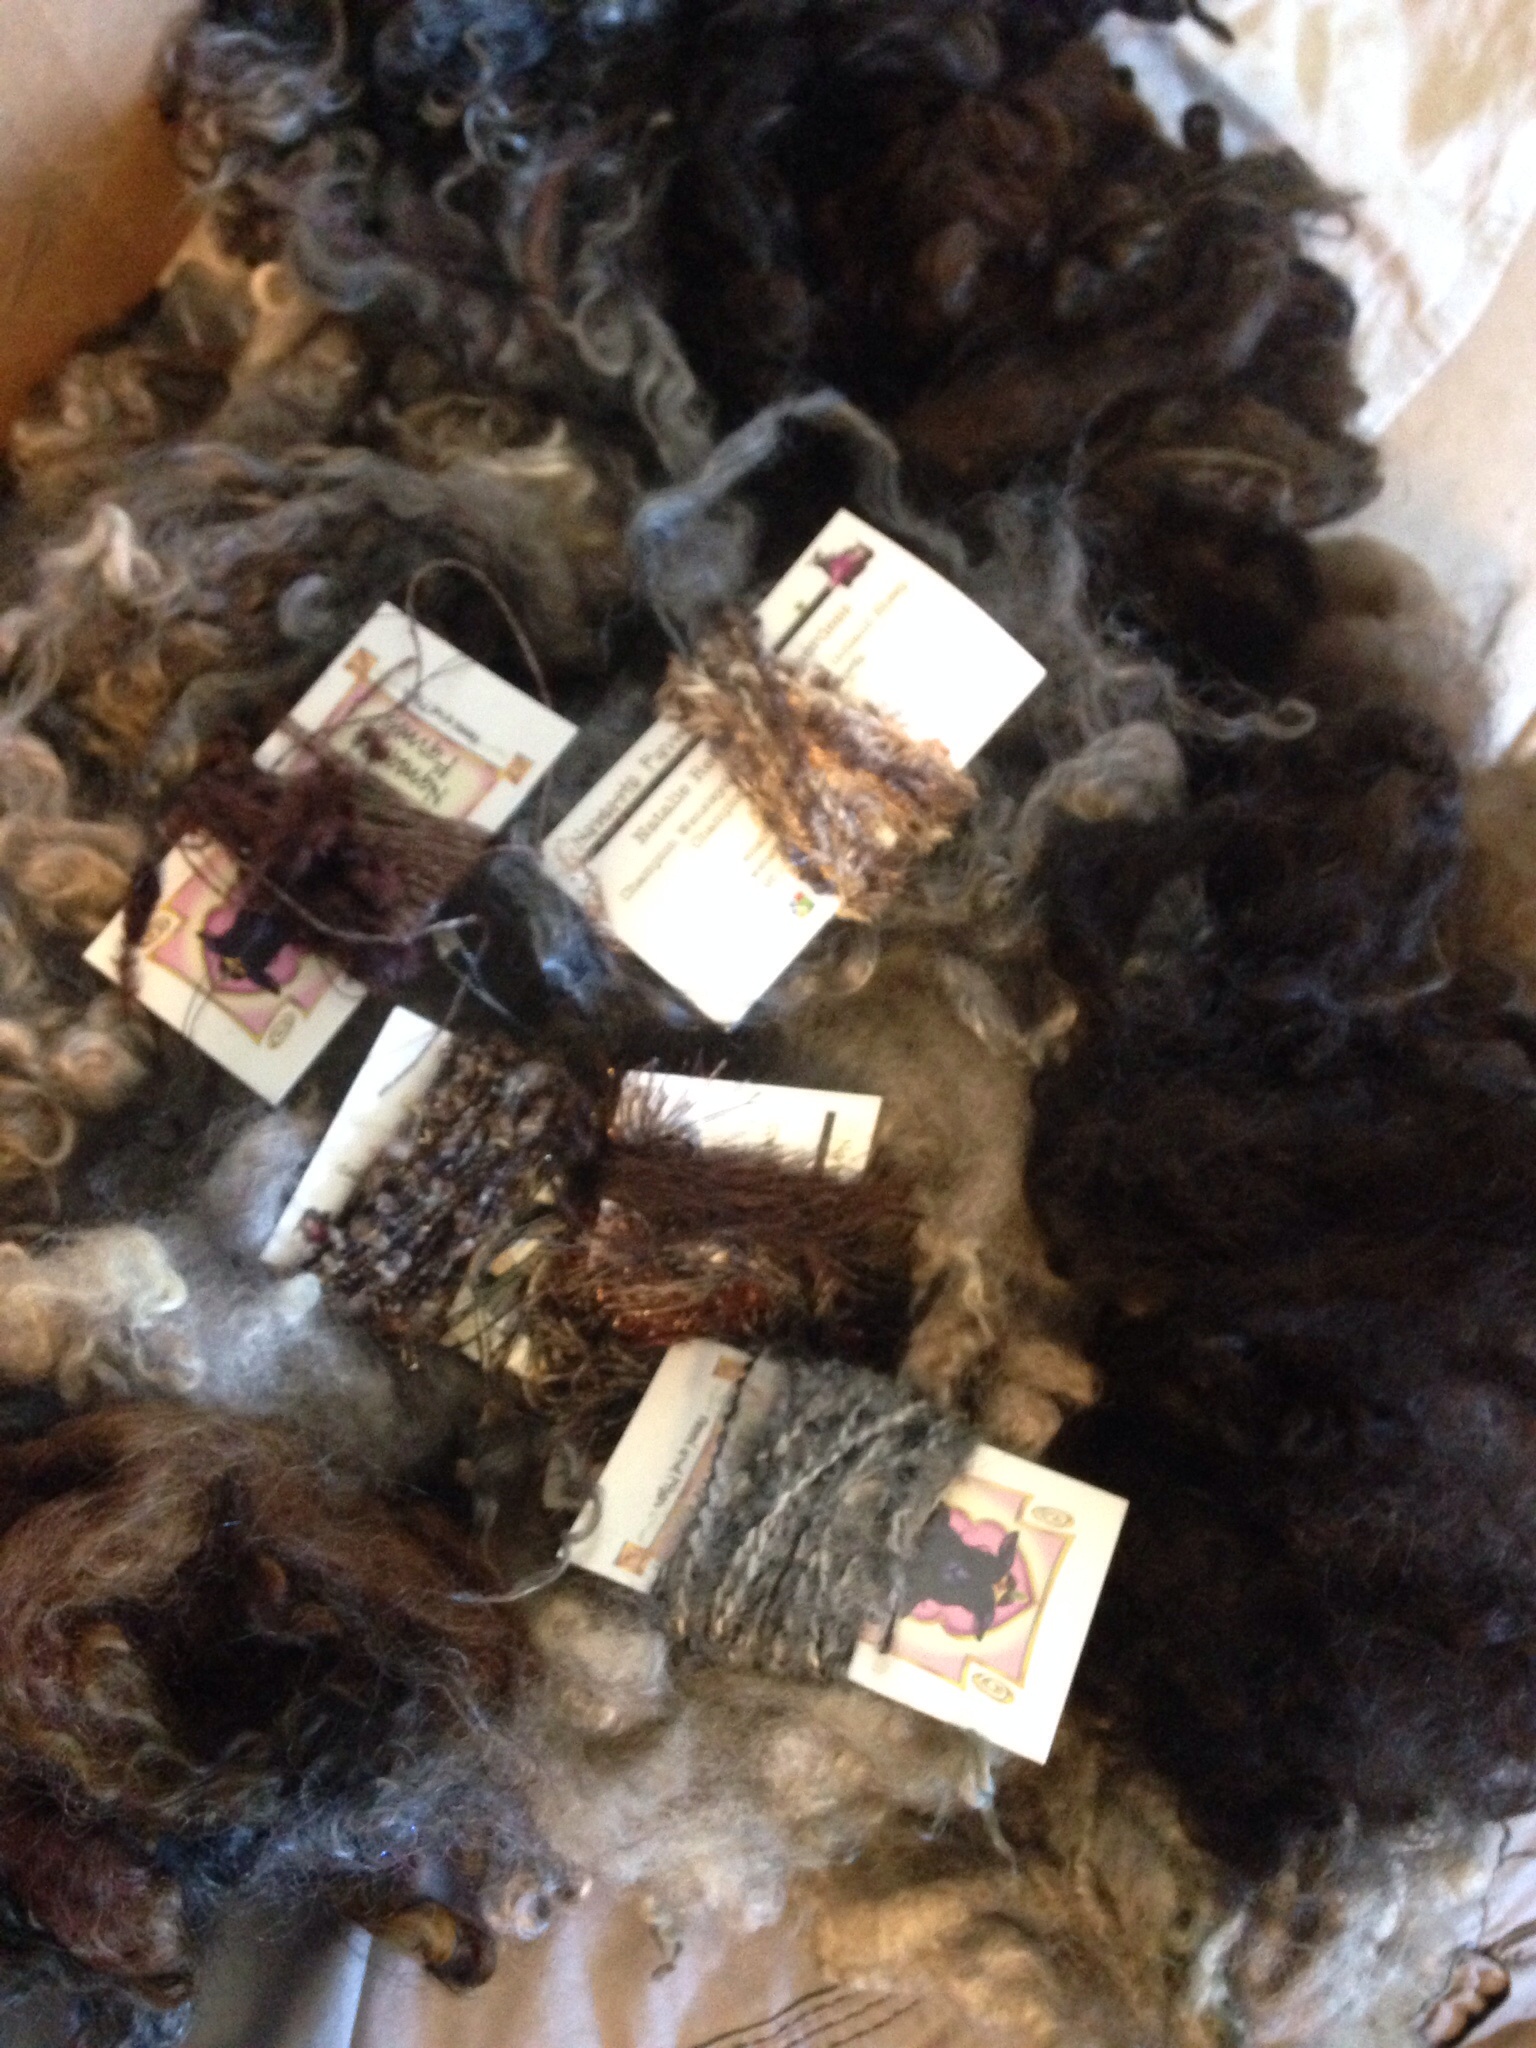
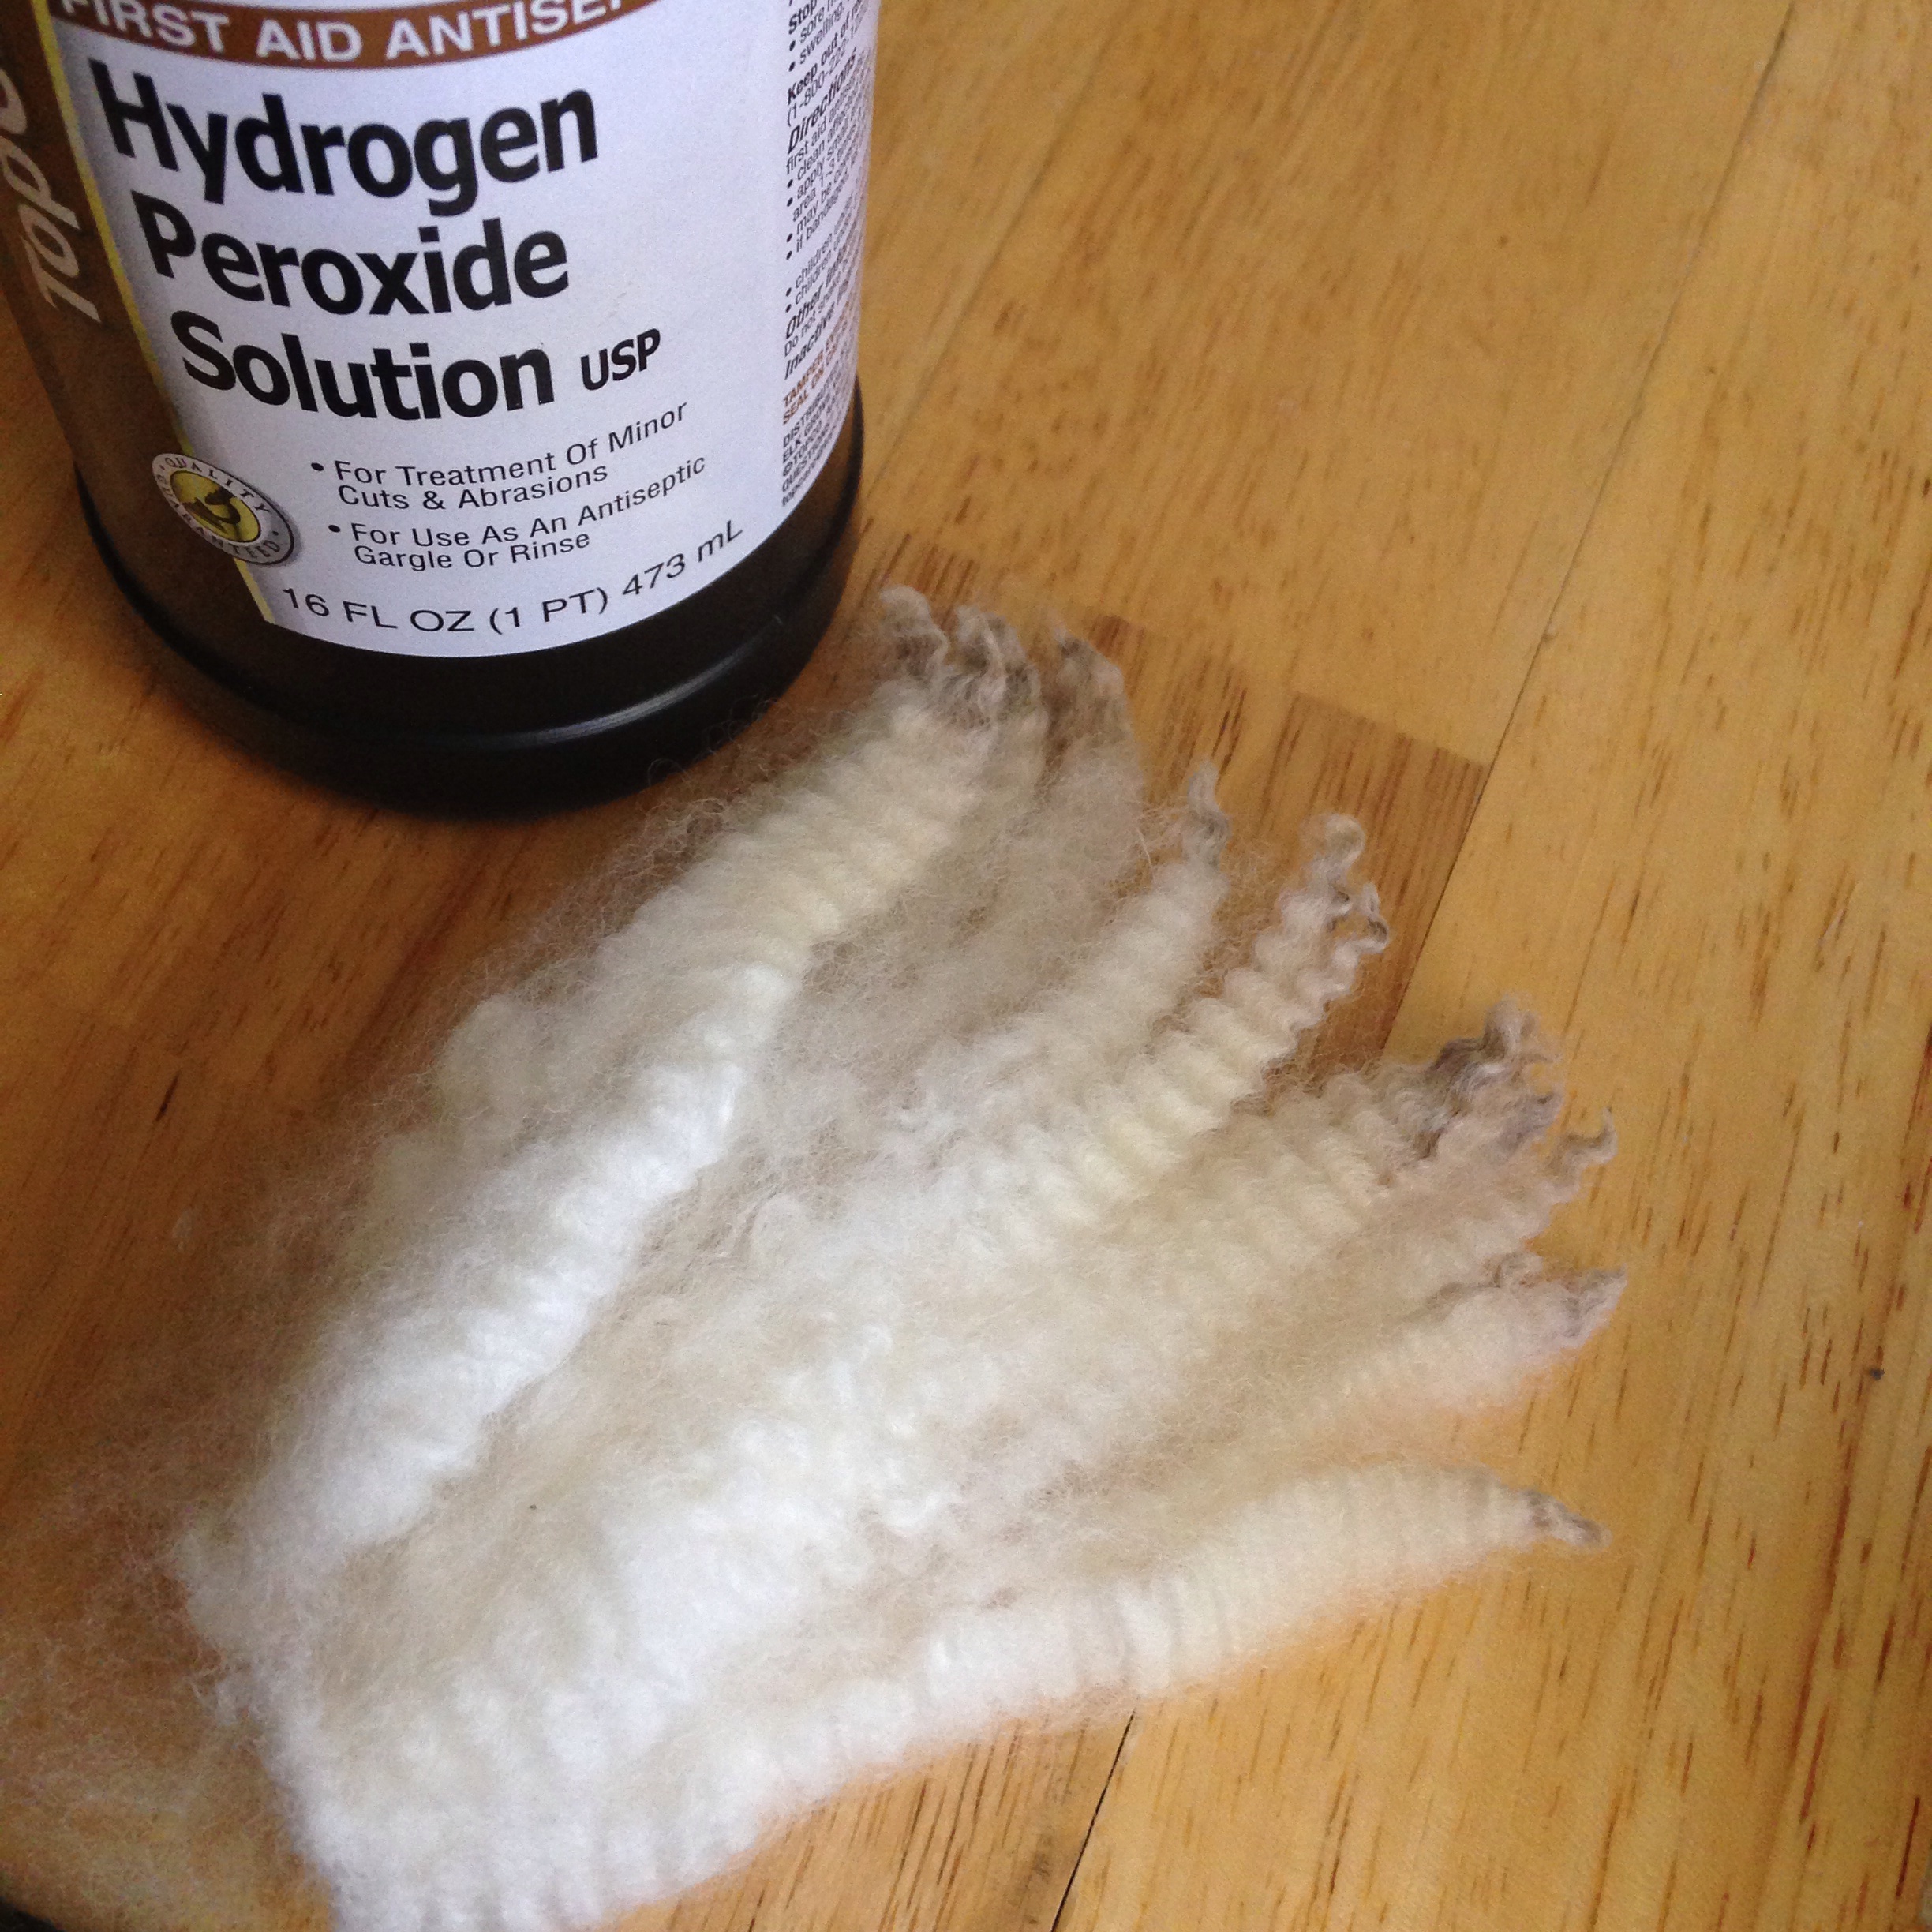
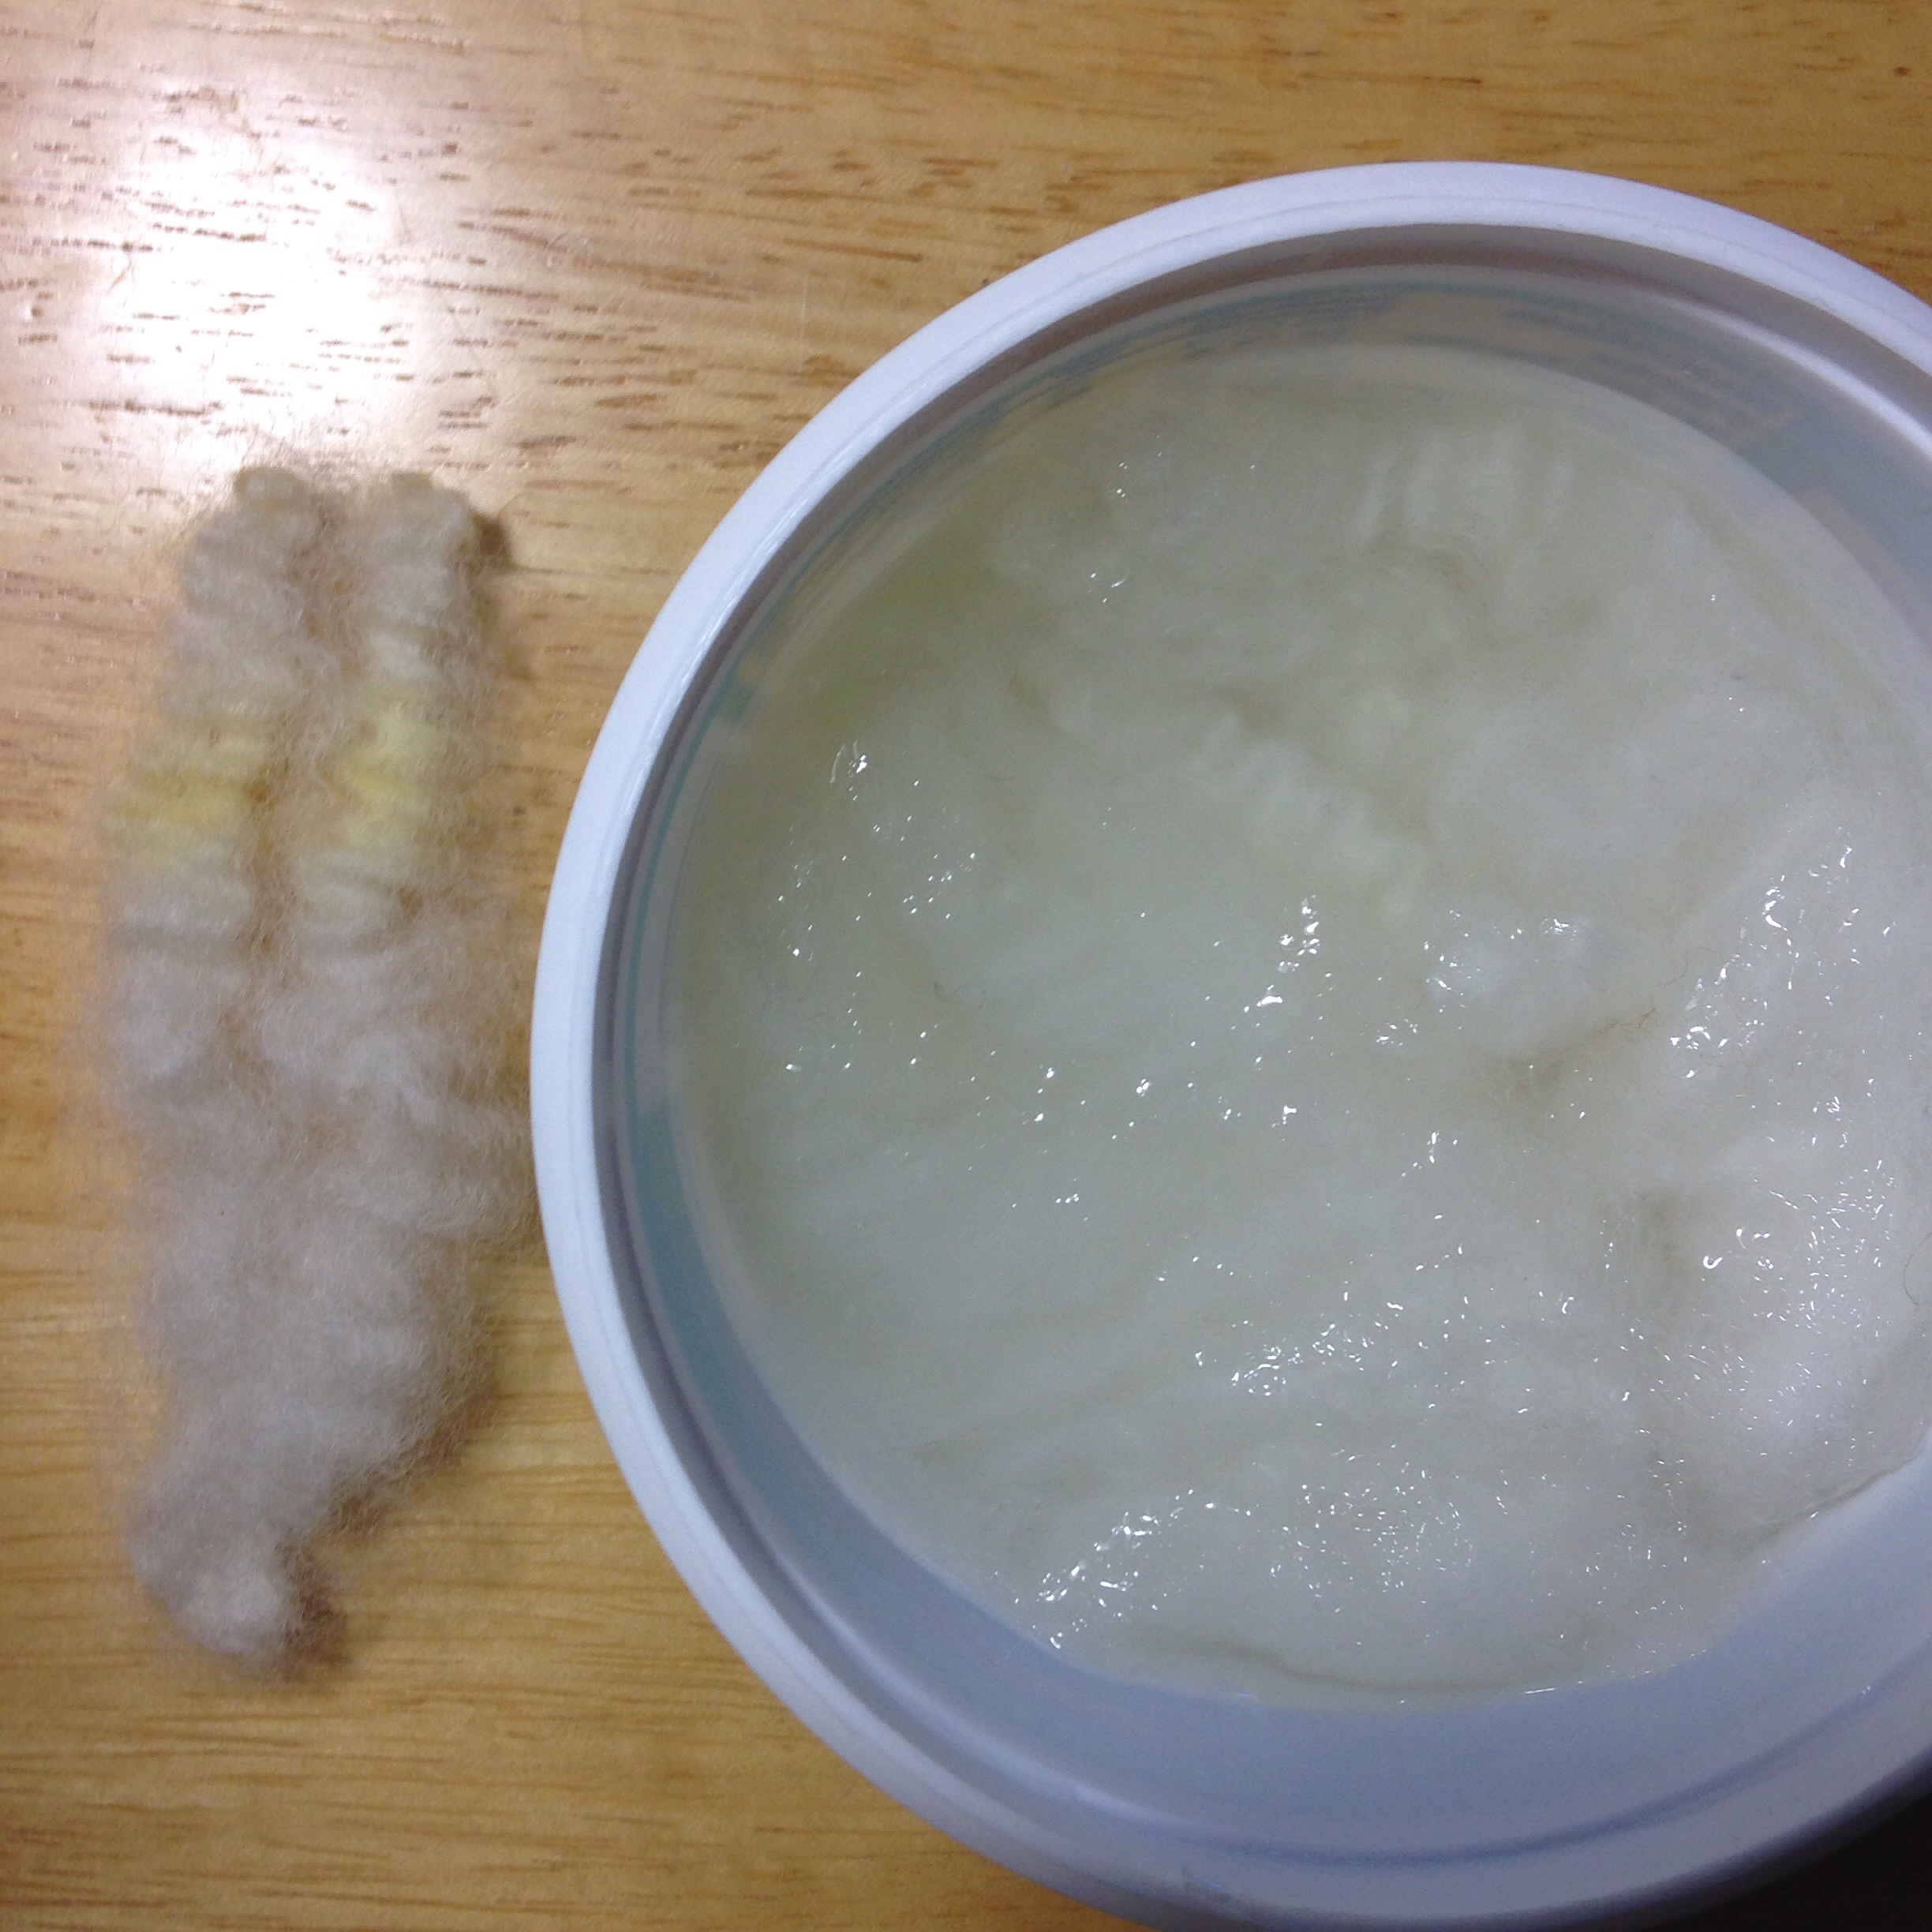
Ever have a fleece that is so gorgeous, so amazing, that you wash it lock by lock? I got some of that. A pound here, a pound there, different breeds of gorgeous raw locks, that I want kept in lock formation. After washing the locks, carefully, clean as usual, I was left with a very few that had these stubborn stains.
I decided to give this, hydrogen peroxide soak, a try with a few locks to see if it worked, and here are my results…
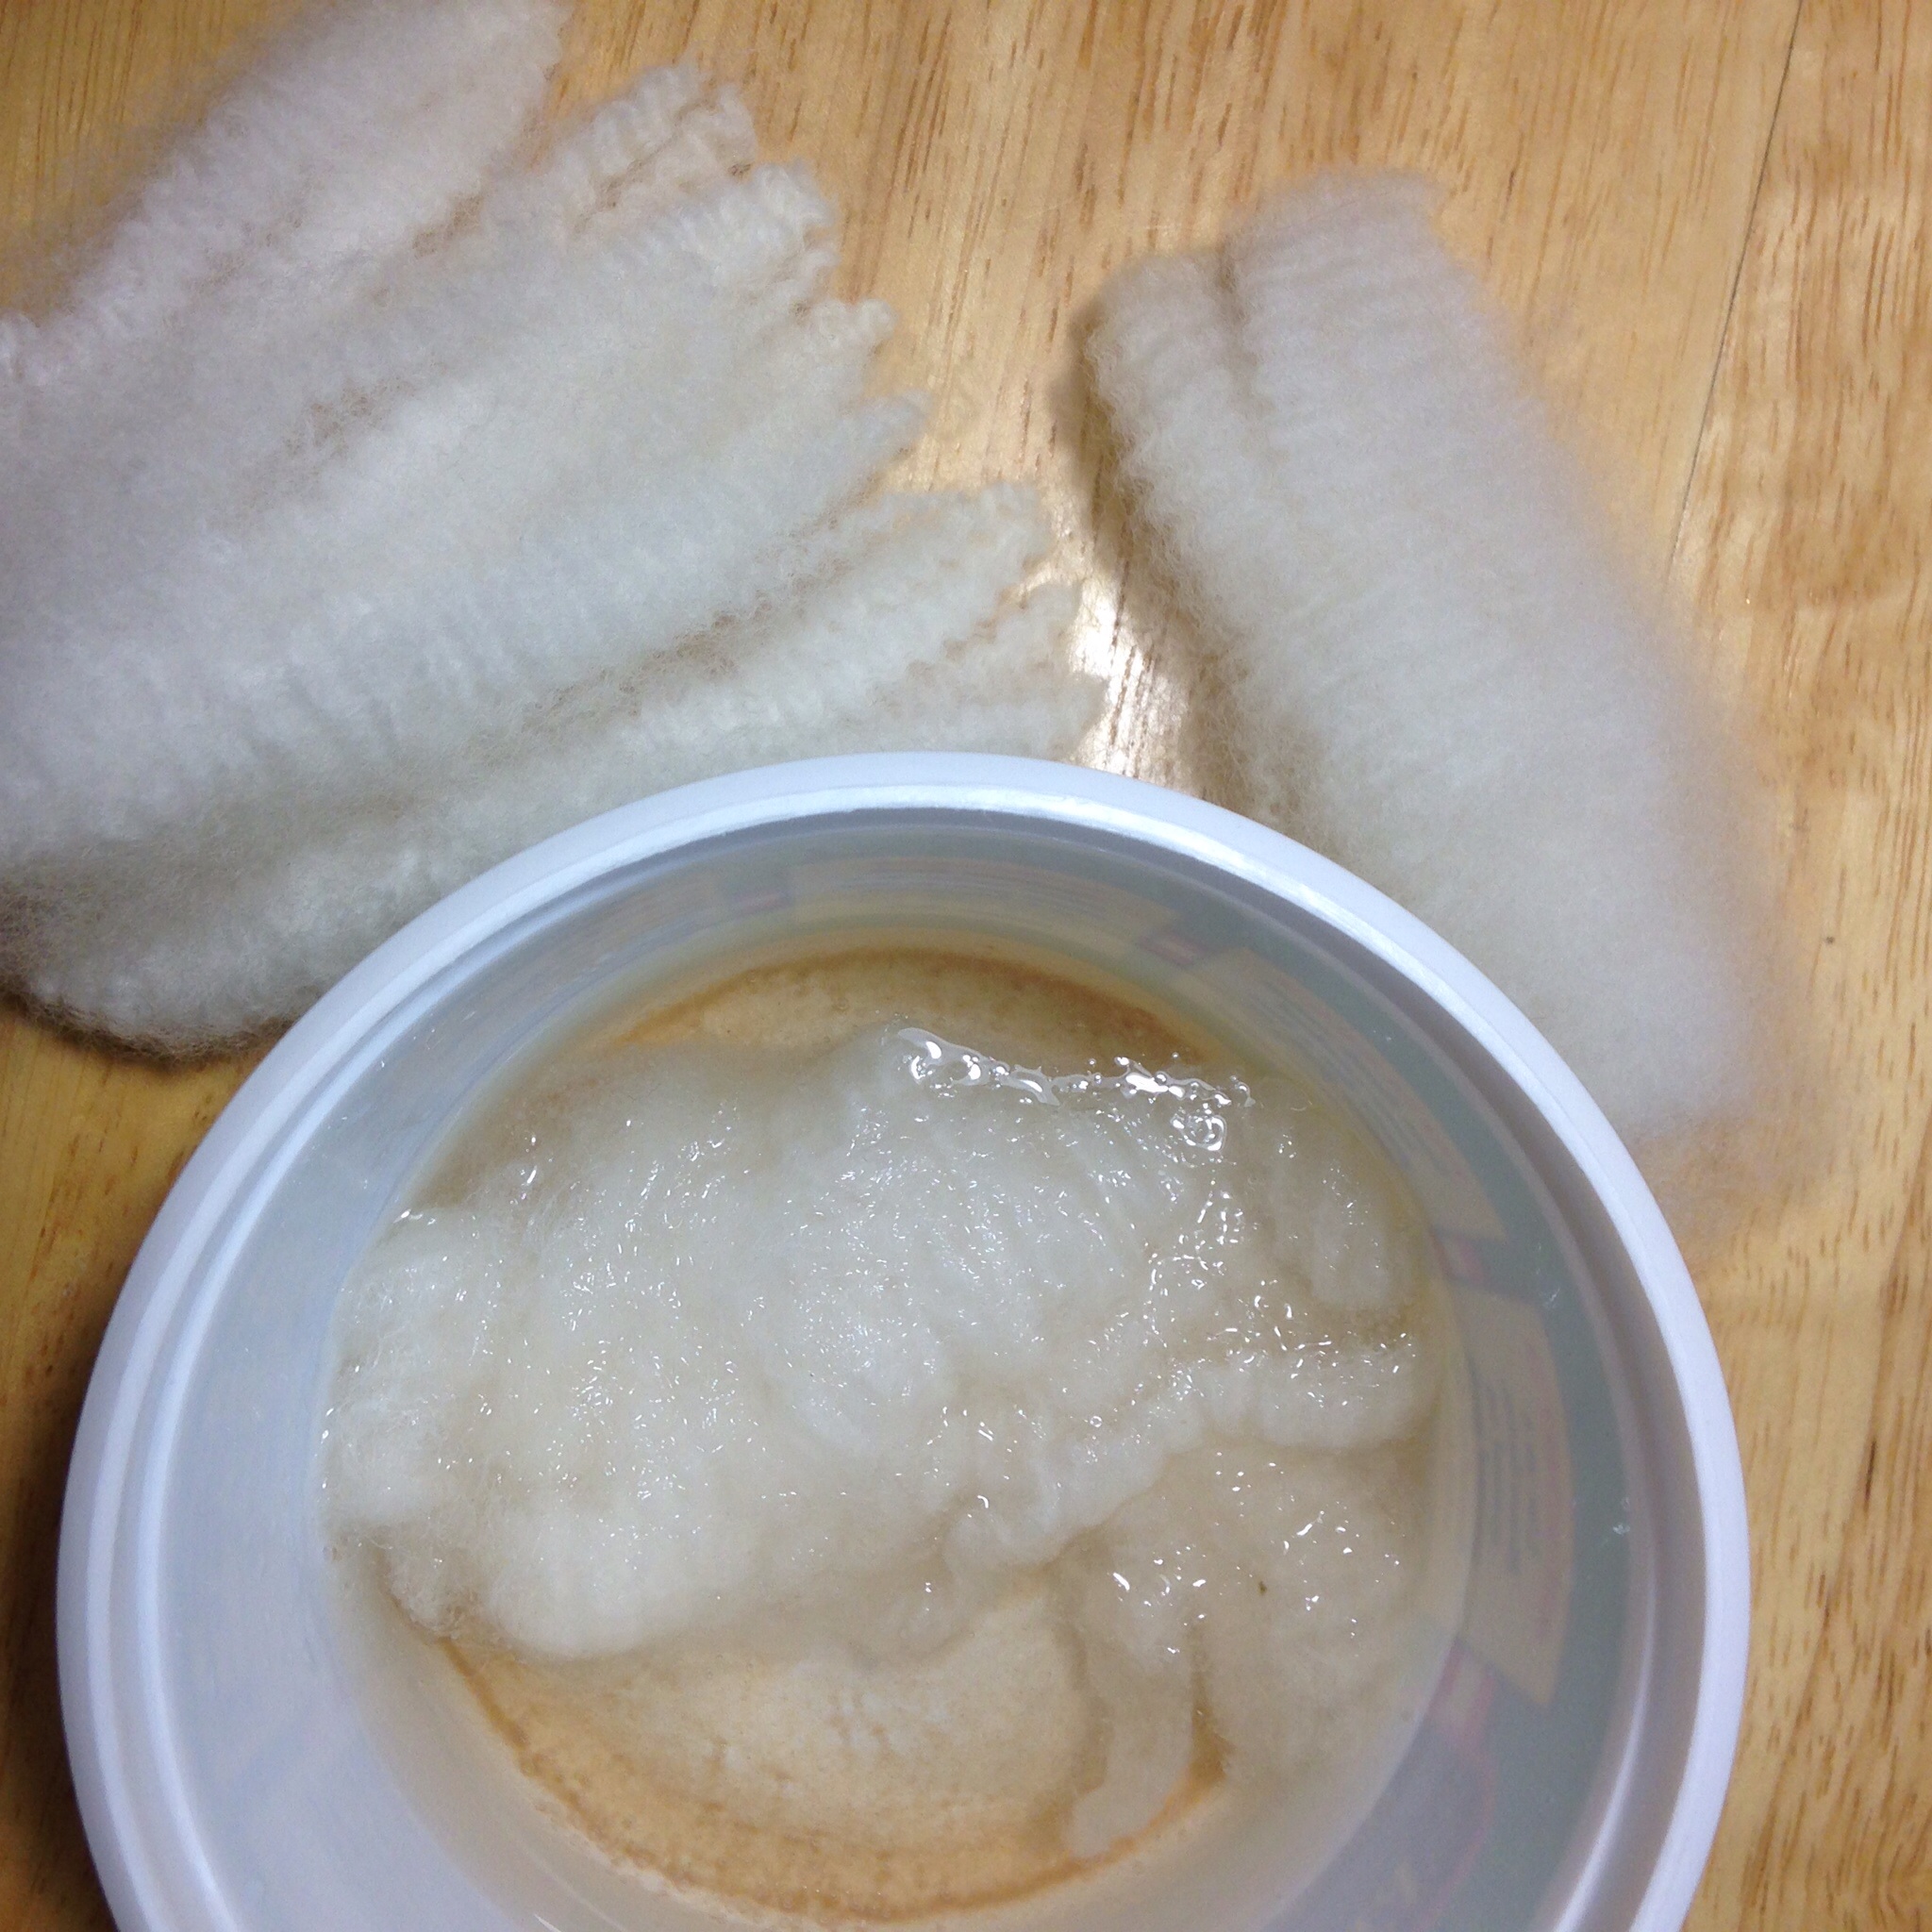
Dirty tips, next to a clean sample I wanted them to look like, these are from different parts of the fleece, but the clean lock is my control sample, I also kept a dirty lock back, for before and after ,along with my all white, control sample I’m aiming forok, as you see in the picture I have brown stained dirty tips, with my control sample, showing, what the aim is. I filled a small tub with hydrogen peroxide, and gently laid my precious, brown tip stained lock. Now to wait. I’d give it over night, but I couldn’t help but peaking in.
Only half the lock in hydrogen peroxide and it’s doing something already not quite fizzing but the tips unlocked in secondsSomething was already happening in the first few seconds.. I had a good feeling about this. But, my curiosity, had me look…. Again.
10 minutes later, I had to see what’s happening. Hmmm, I see that It’s all in, ok then, 24 hours to gook so this photo above, is only 10 minutes later and it’s all in. Now, I had to put it away, and wait. I put a lid on it, to prevent, rather, try to deter myself from being ridiculous about checking. The next day came, finally, and it was time to check my dirty tipped lock, and here is what it looked like.
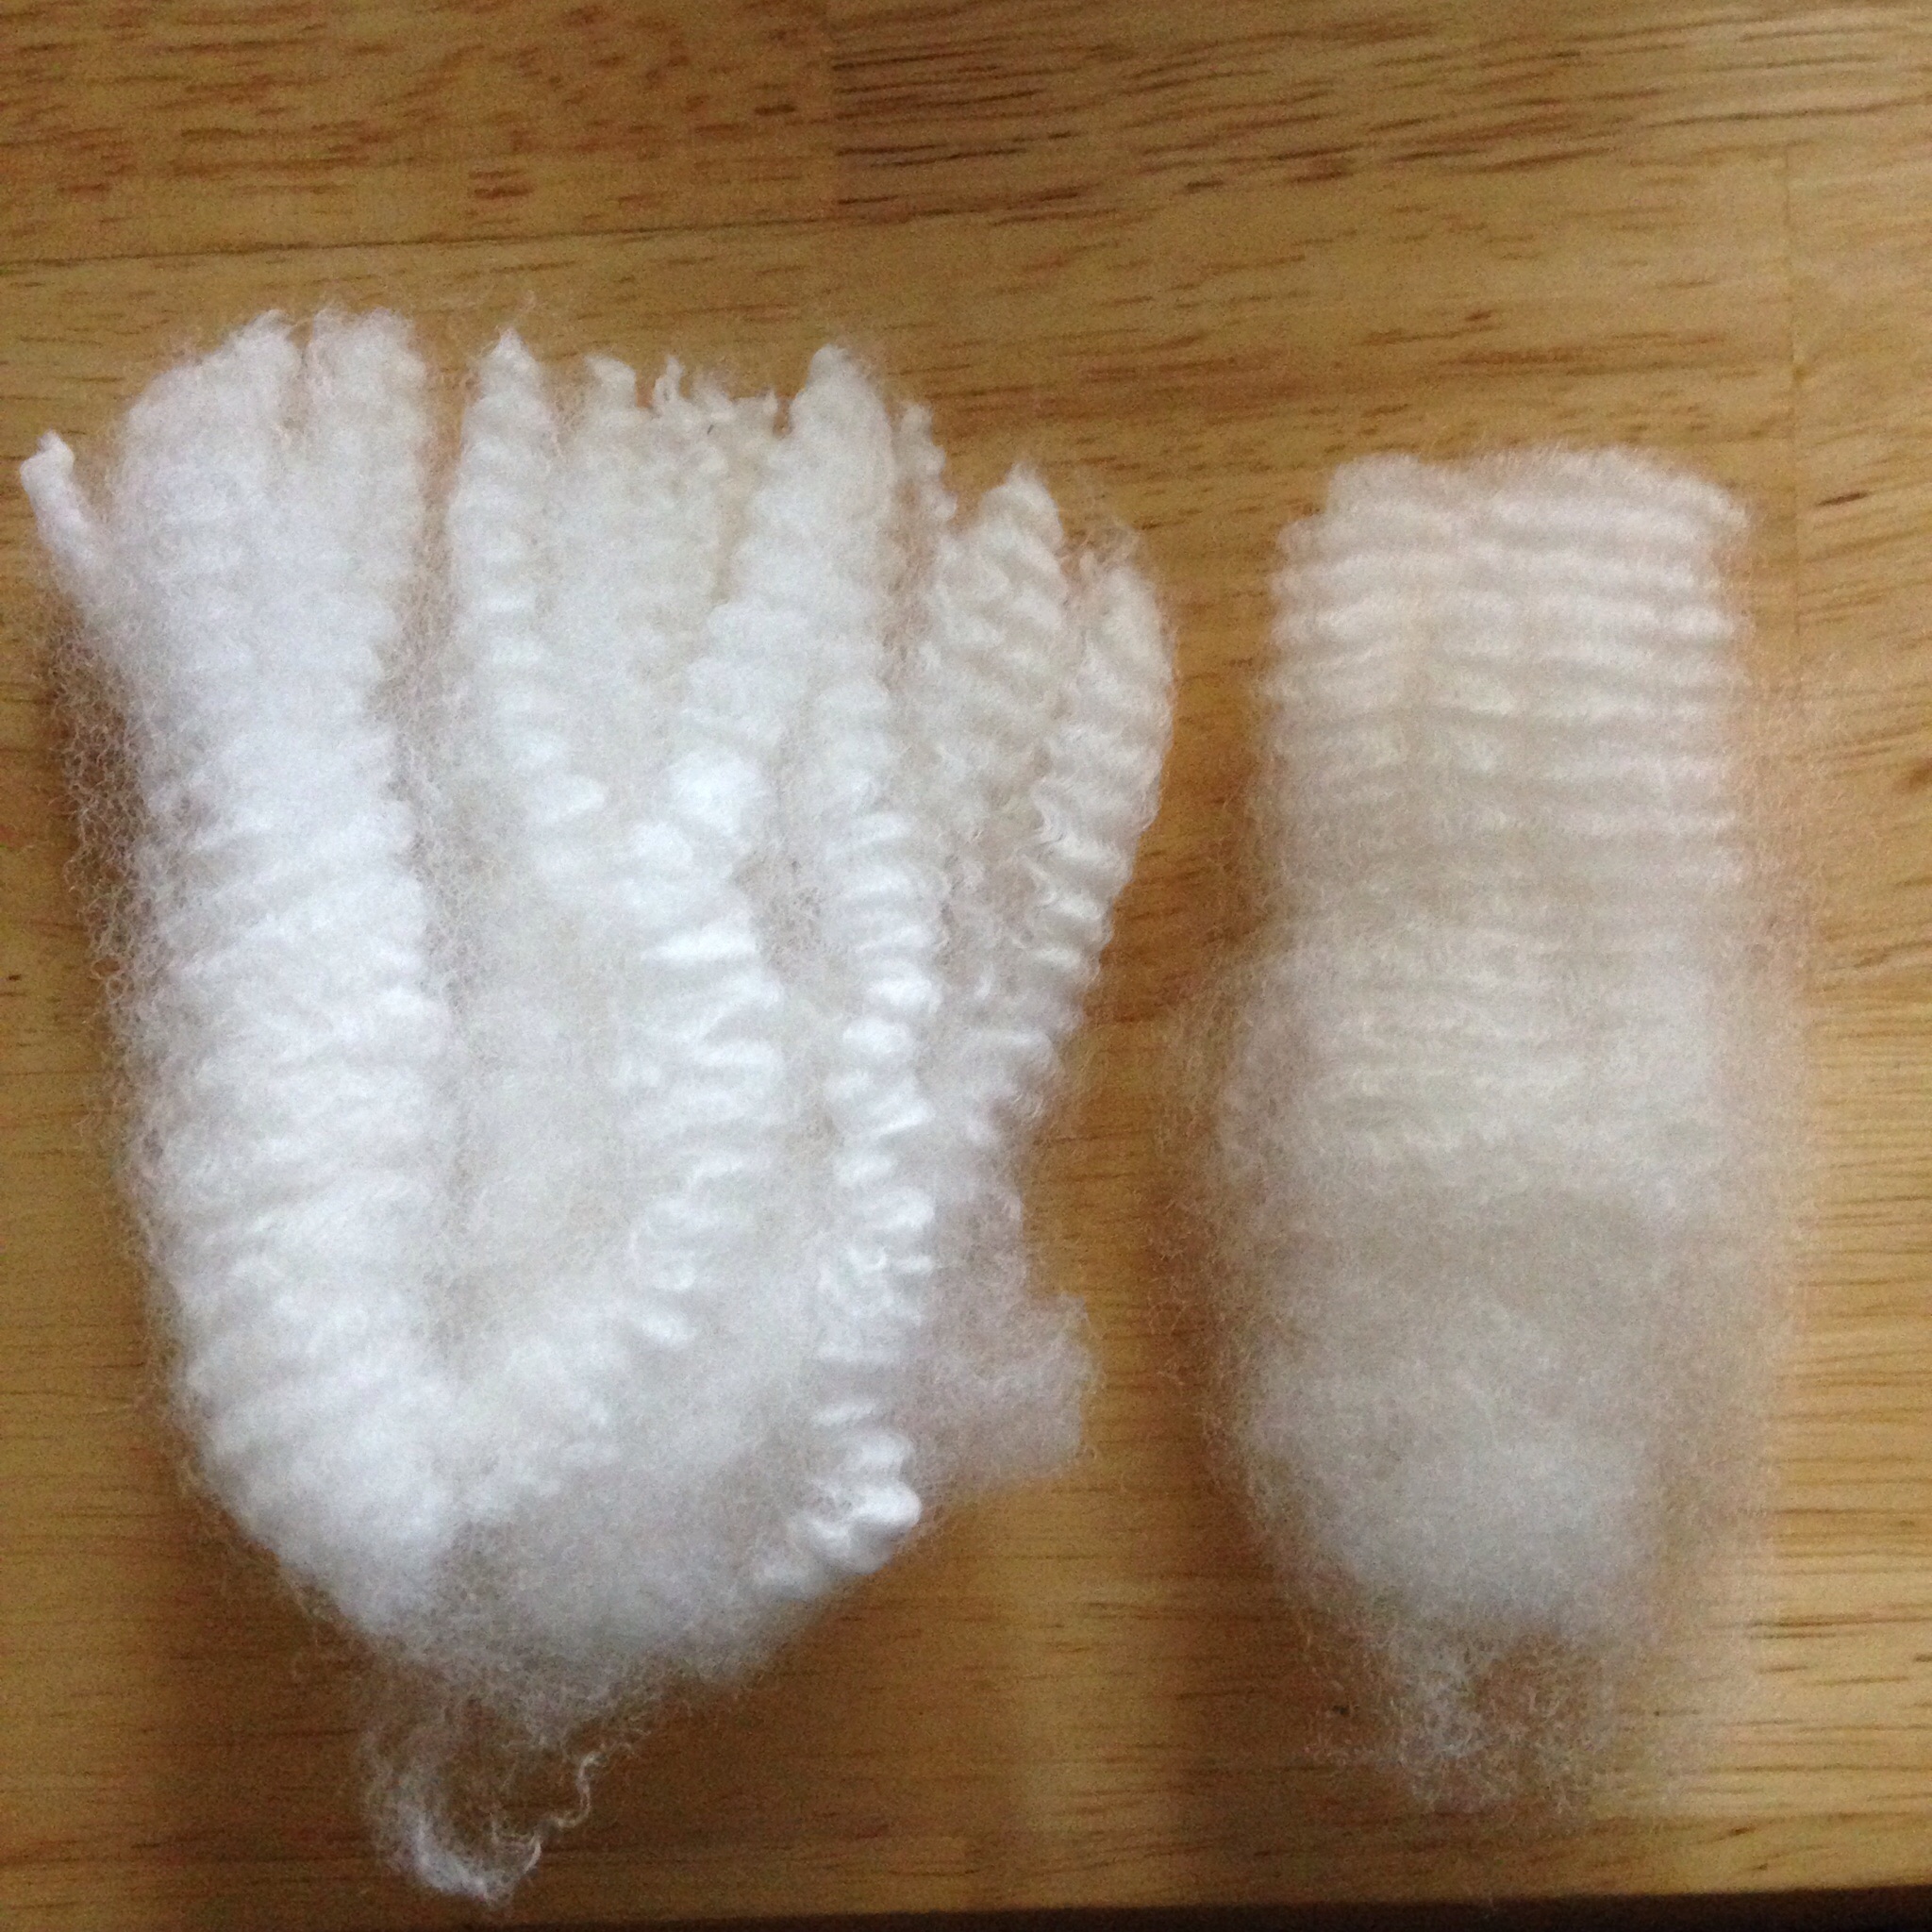
Dirty tipped lock out of the hydrogen peroxide pre rinse-check out what’s left behind in the tub Already an improvement from my control dirty tipped lock, but will it measure up to the white lock far left, look at that tub liquid, eww,Next, time to wash and dry, hydrogen peroxide treated lock. Again reminding readers, patience, is not my best quality, but good things come to those who wait. Hmm, maybe , I should work on that crochet blanket that got me into this yarn enslavement, and finish it. But if I keep it in UFO status (unfinished object)forever, it will still always be new, I love that blanket, look what it started. If I finished it, it might get used and ratty, or dirty…. Although, this is workin prettttty dang good, lol, so far.
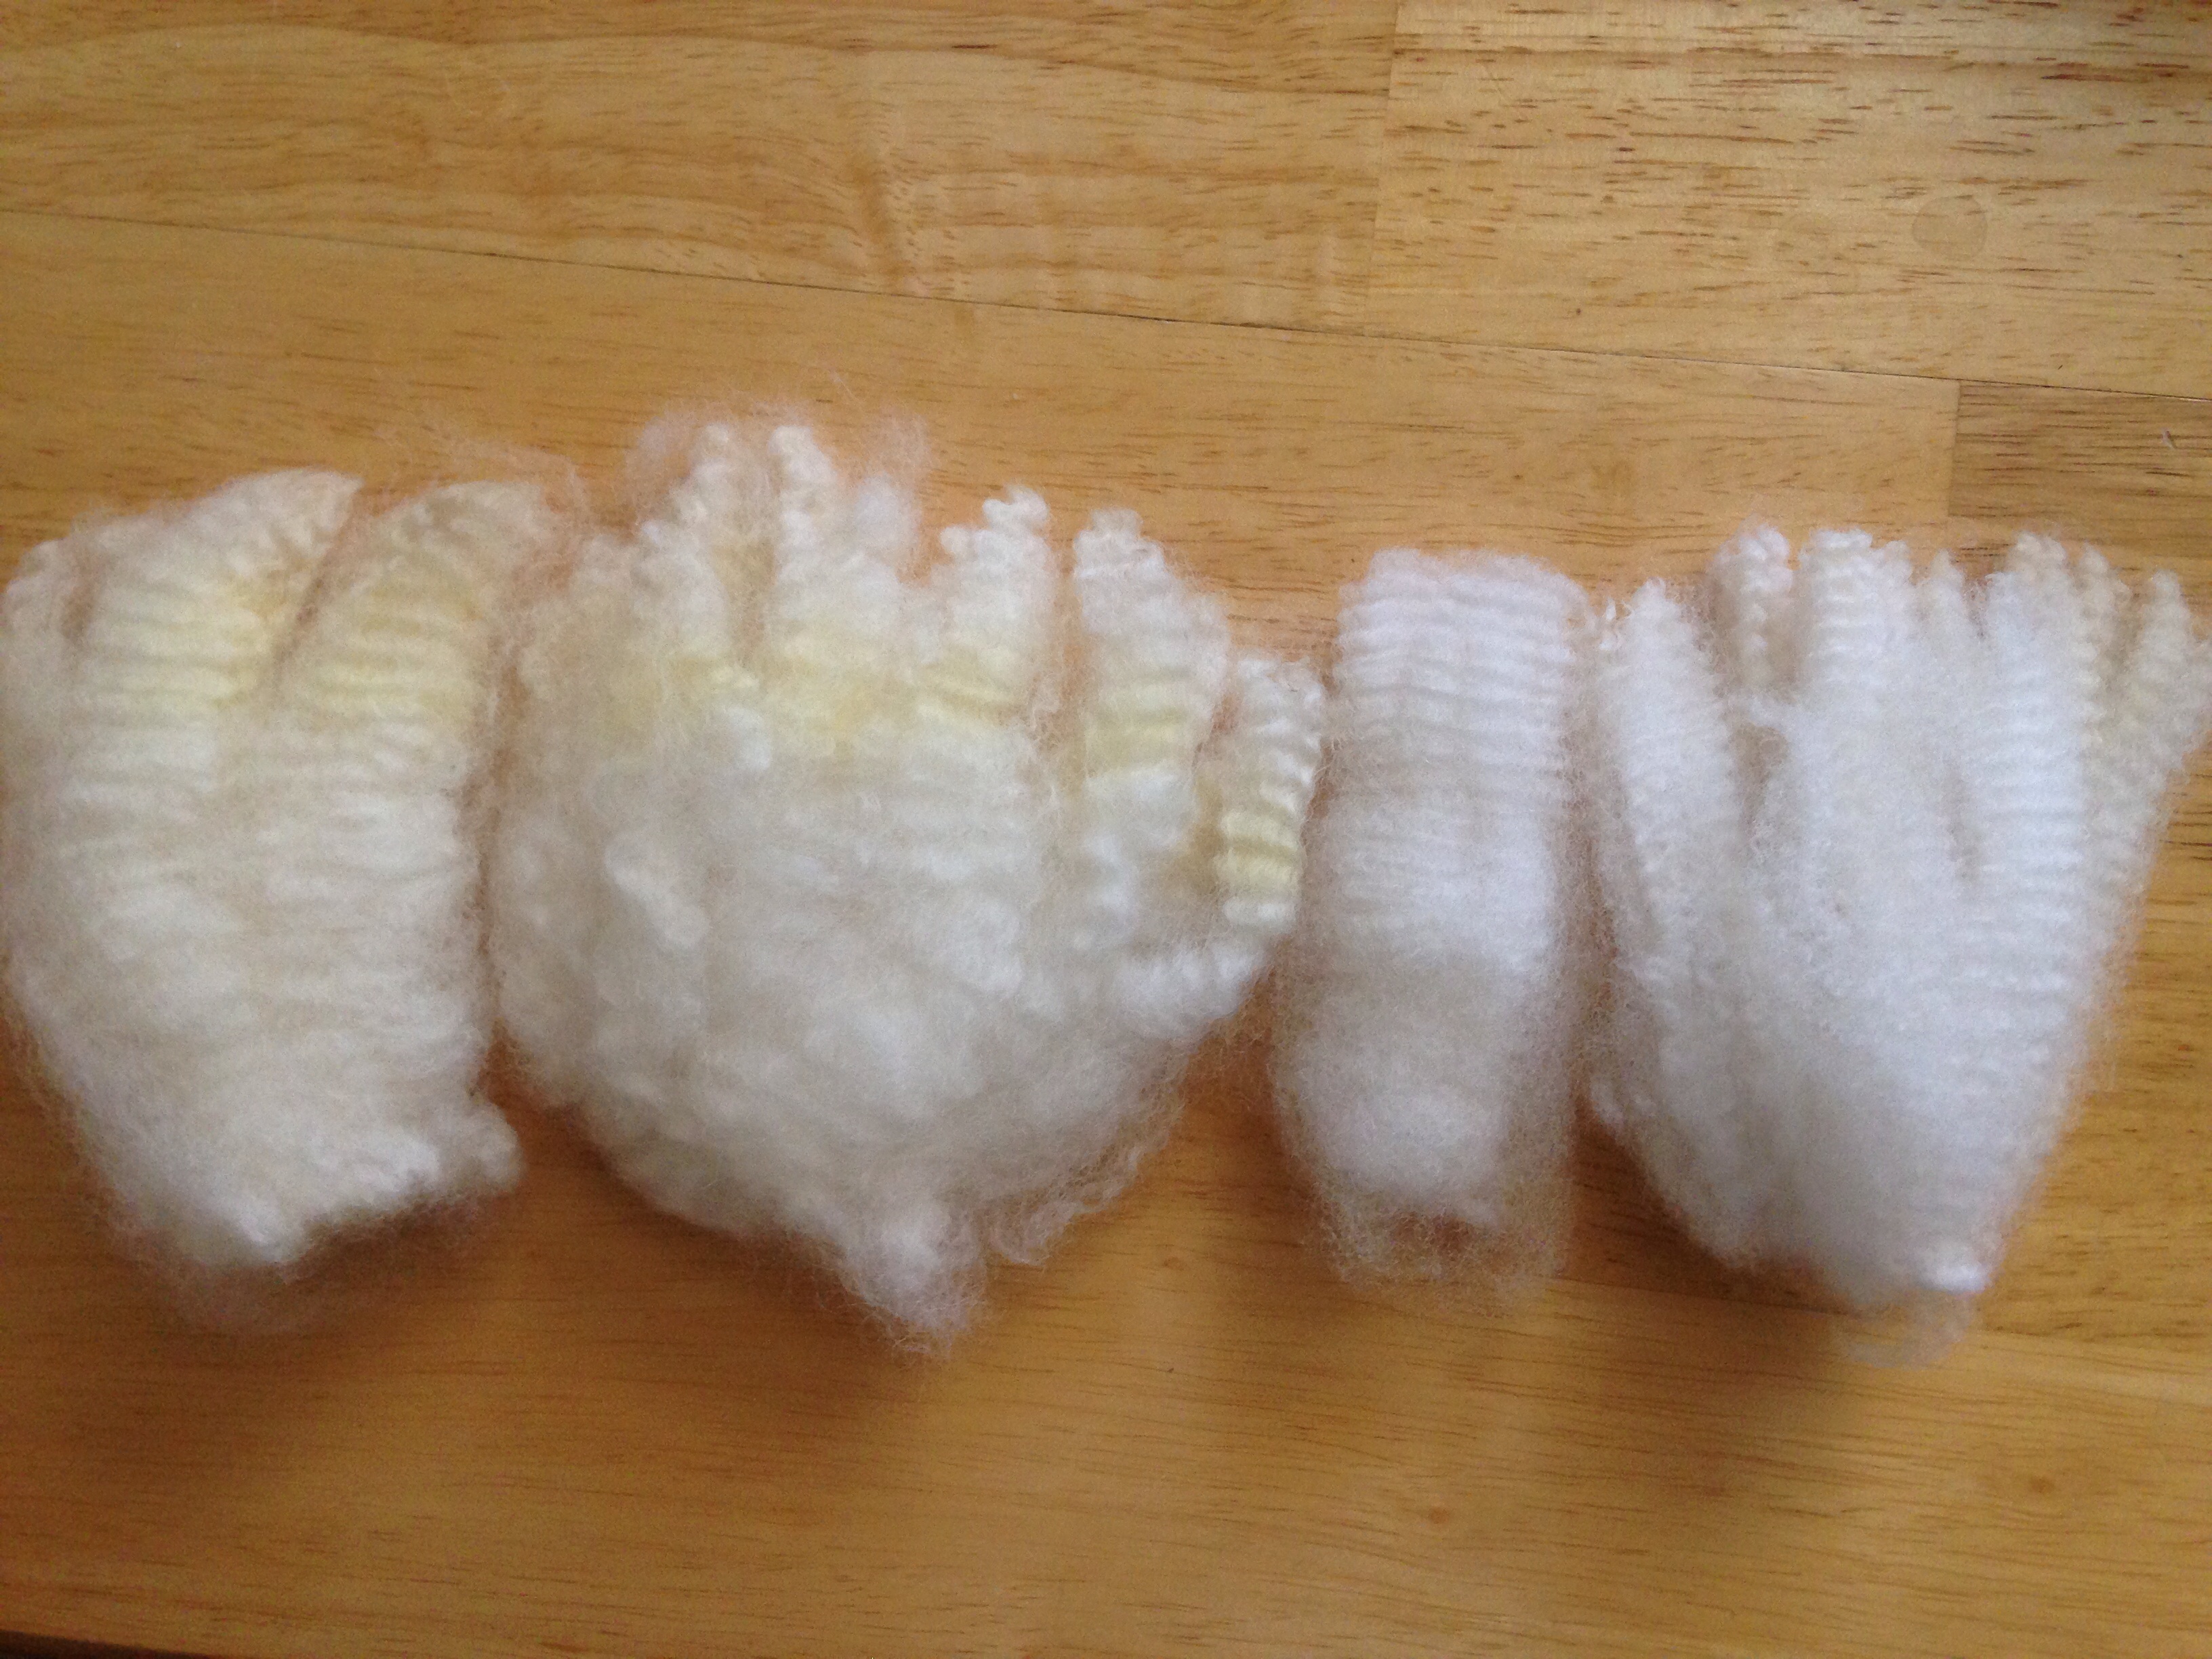
Pictured from left to right, clean white control lock (what I’m aiming for, dirty lock pre hydrogen peroxide, and post HP soakThis tested lock(the lock right next to the tub), after rinse and dry, is completely 100% white. And you can see the muck it took off in the bowl.
after a good rinse, and dry, the results are even more dramatic.
see picture below of results of that show completely dry, picture describes which lock is which. I’m not only pleased, I’m actually surprised.
i didn’t expect this much of a before and after
Look at the the result, isn’t that insane! I was so pleased. HP tubbed lock on the left, clean control lock on the right. Wow, much more than I expected, it’s so much more white than my already clean white lock. Way more than I had predicted or foreseen.Seriously, these results speak volumes. I mean woah! I’m in awe here.
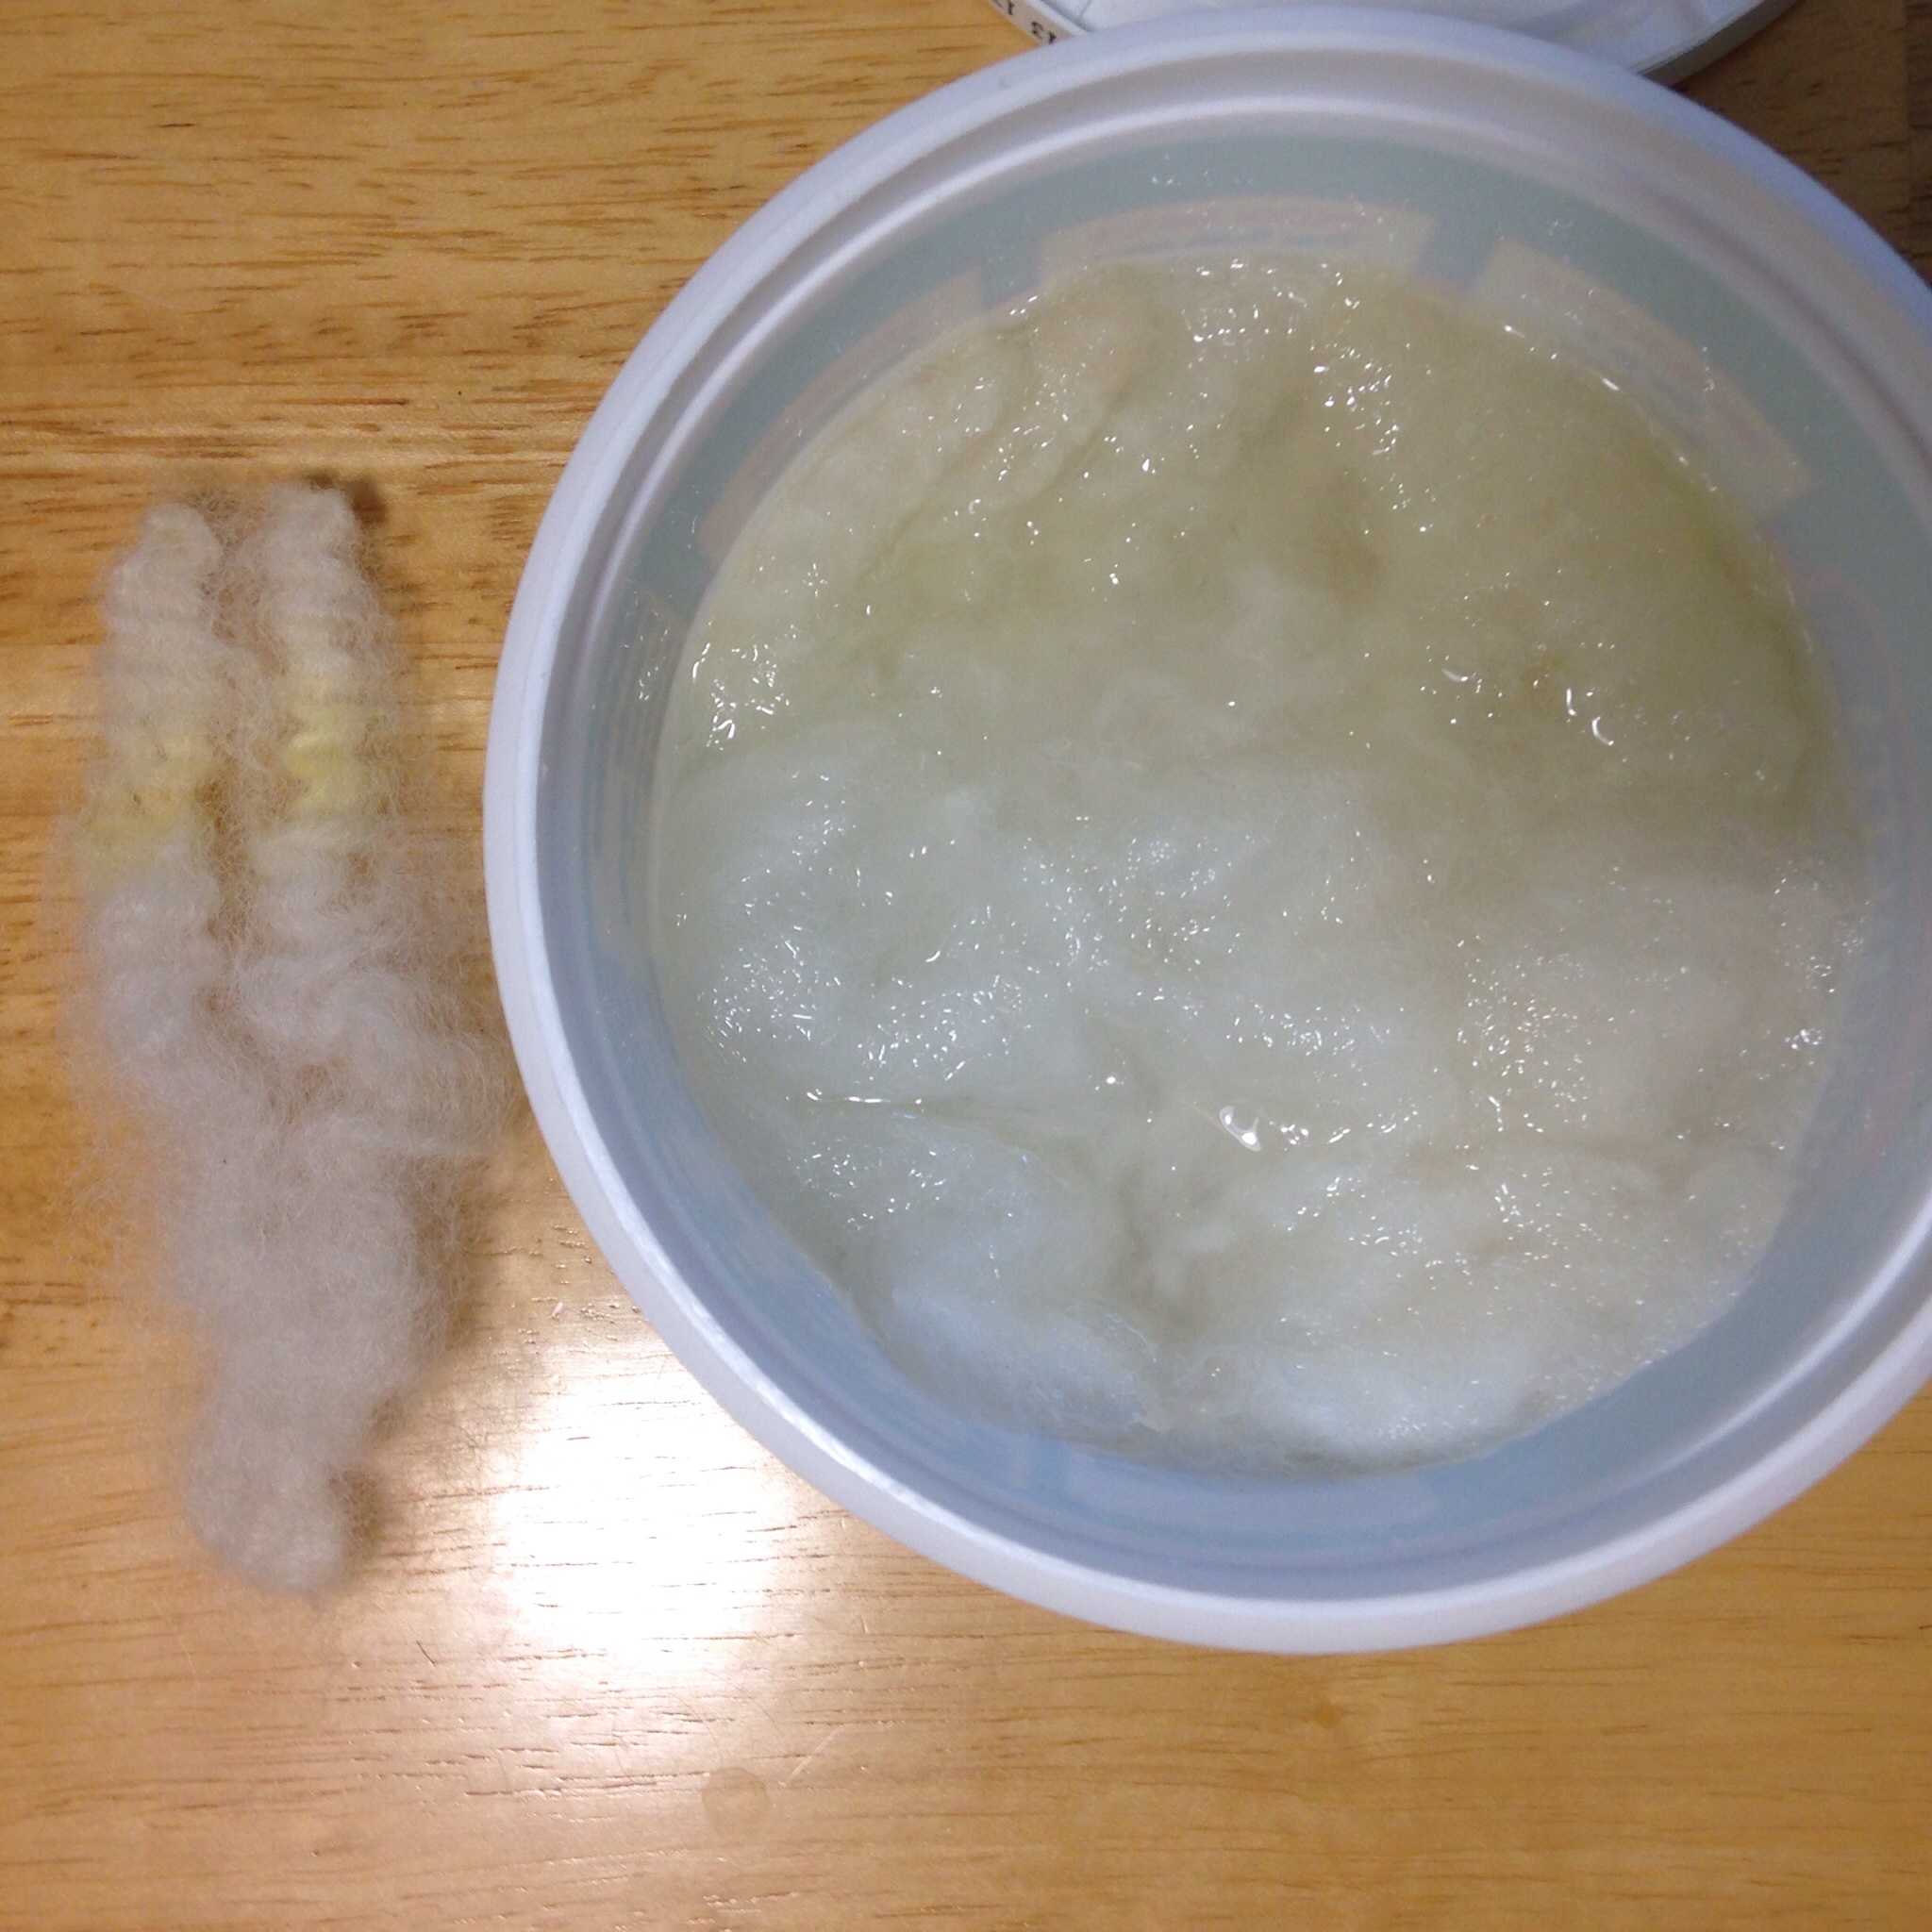
So I decide… Let’s see if it will clean that other lock, in the already used dirty tub.
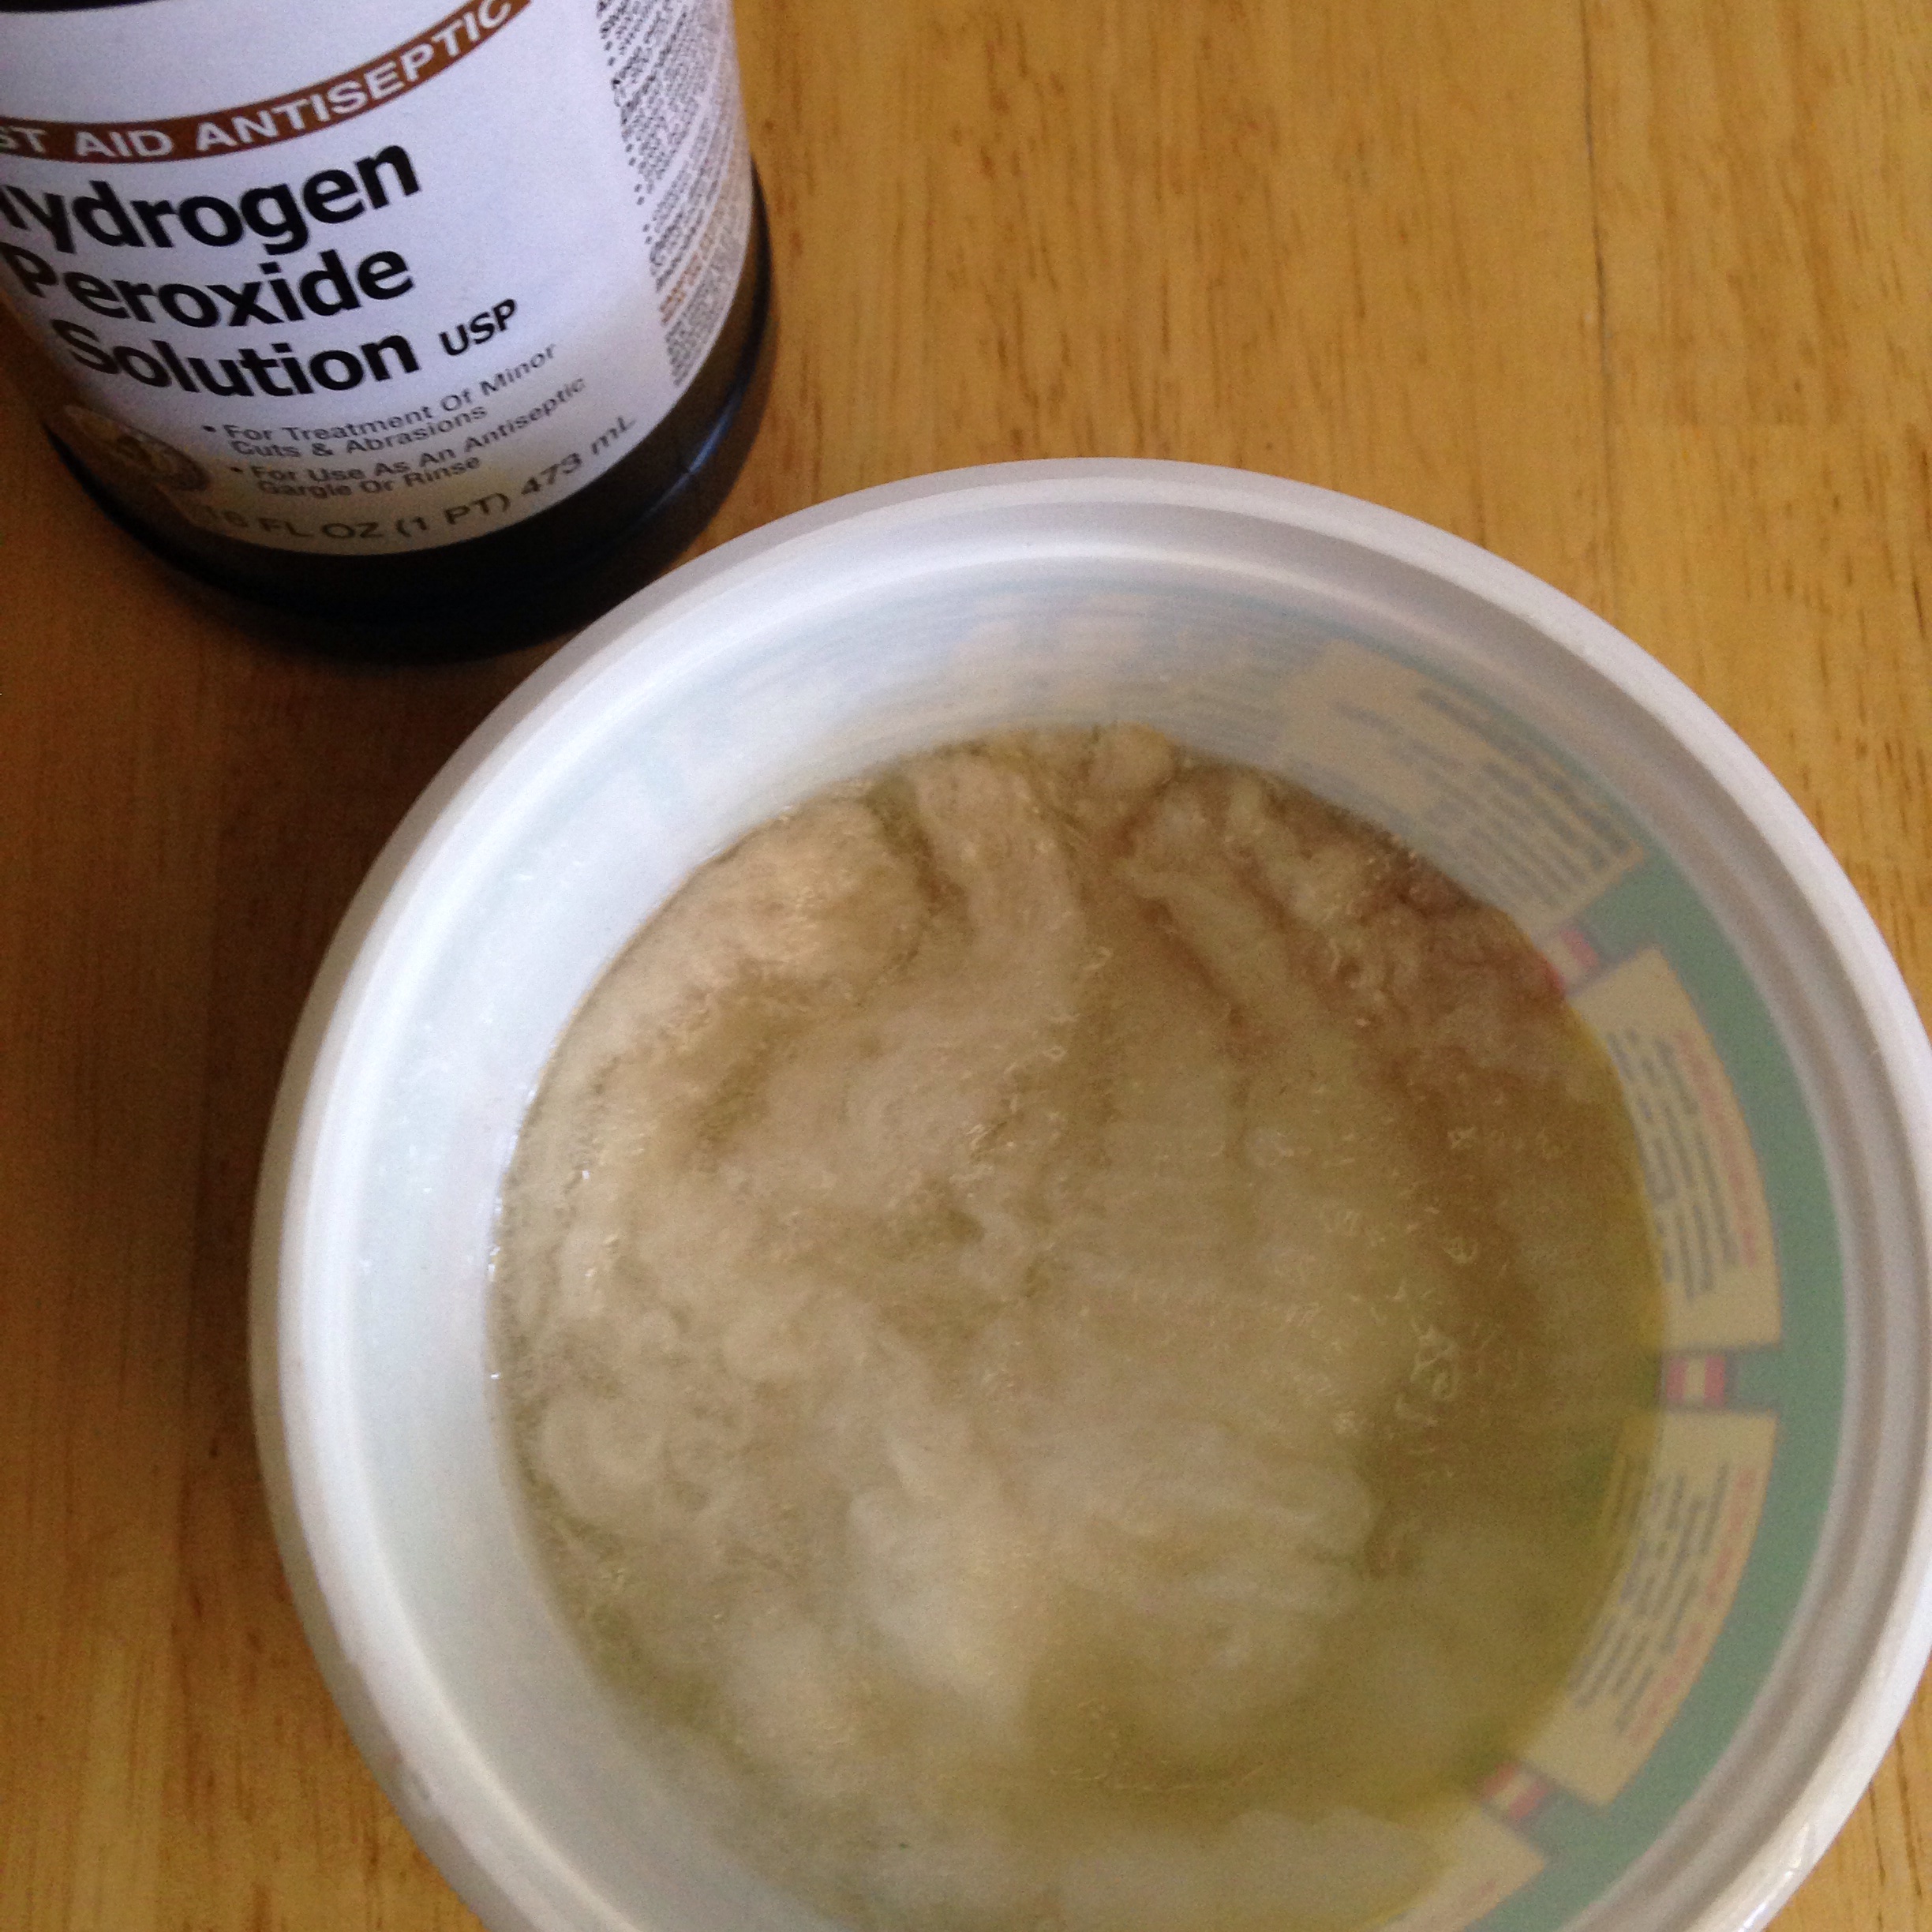
Yep, I put that in too. Didn’t change the dirty liquid inside the tub, just left it in there, I’m testing this, how far can I go? Notice I’m using small samples. For those curious, Im reusing tubs that food come in. The experiment tub used to hold Trader Joes, fresh bruschetta sauce. It holds (14.5 oz or 411 grams of product). As you can see the tub is filled less than half way with hydrogen peroxide. I only wanted enough to cover a lock.
The other dirty tipped lock in the mucky hydrogen peroxide tub, hoping for as excellent results as the first try. Seriously check out how gross that liquid is…That liquid was already filled with nasty brown… Who knows, dirt, maybe poopy dirt, dirt mixes in the poo it’s possible. Our best soil is manure based. It was gross, but let’s fast forward 24 hours, and see how that lock ends up. Time to give it a good rinse, let it dry and see what results I have.
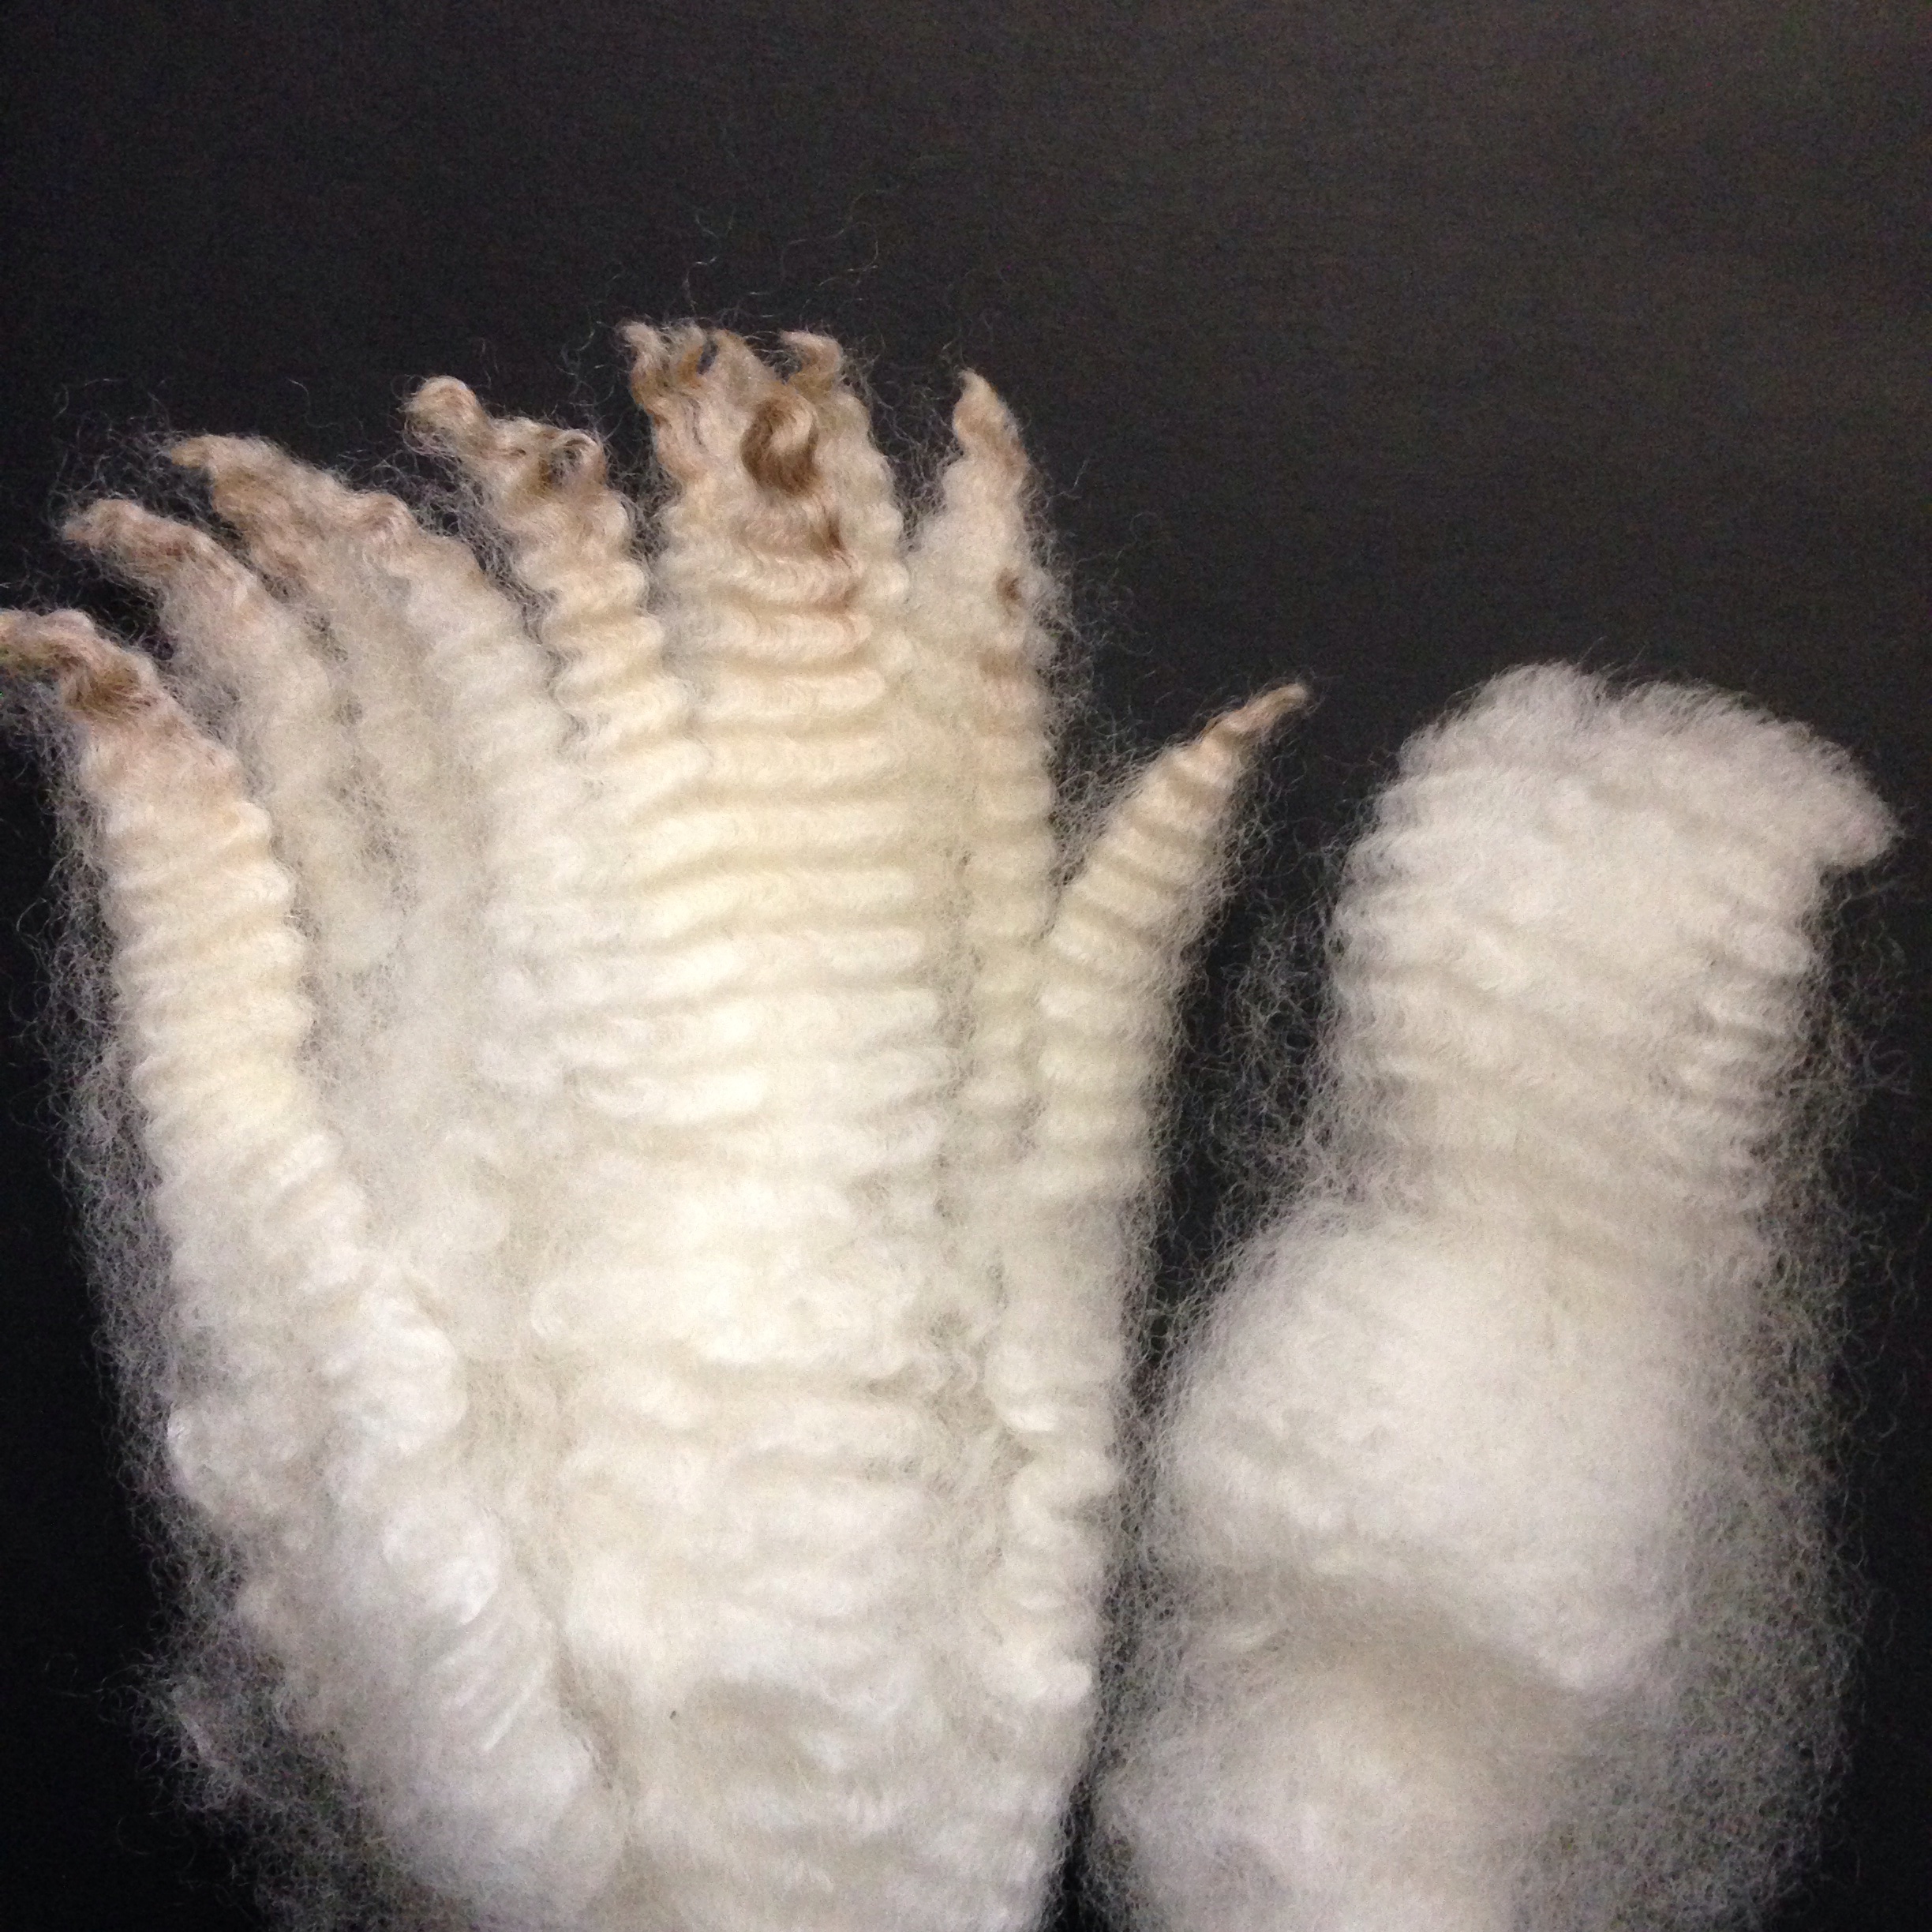
Here they are. All three locks, clean as a whistle, two started out with stains. Clearly, the hydrogen peroxide works on dirty brown stained tips. You can even see there is some yellowing that is gone from the initial picture.
Lets see though how it does with urine stains, or yellowing that’s notorious, for being difficult to come out in a regular wash or scouring. If it doesn’t work, no problem, wool can be dyed. Really, there aren’t too many problems that can not be solved, if one puts there mind to it. However I really adore this fleece and most of it is stark white, there are very very few areas with urine stains, or dirty tips, it’s just beautiful. Unbelievable this came from an animal the amount of how really clean it was. However, if possible, I’d love to make the yellow disappear. Lol, can you imagine leaving it in, and someone asks, “oh this is beautiful, what’s that yellowish right there, in that part of the hat? Does it have some significance?”
oh, that? No, That’s just a sheep urine stain… Here is your hat. Look it’s clean, urine stains are just hard to remove. Just put it on, I want to see if it fits. Stop being so weird about it, it’s clean, just put it on your head, I worked really hard on this. Whatever, ya ingrate, Your welcome!
Ok that conversation, would not happen, more than likely. But it could, no? More than likely, we dye the yellowing, and don’t add it to the stark white project, but should it get missed, guess what, if this technique works, and you see yellow blaring in your all white project, you could still give it some time in the hydrogen peroxide. Below, we have a few yellow stained samples next to the white, for contrast.
Classic yellowing stain on white wool, we are dealing with animals here, and urine stains will happen, what’s that saying pee happens? Actually we already did the brown stain, could’ve been just dirt, you never know, but again stain just means difficult to remove – not impossibleI’m emptying my test tub, cleaning it, and starting with a fresh batch of my special potion, and again I’m adding my yellow stained locks, holding back one for comparisons sake.
In goes the yellow stained locks, with a a little guy held back.Ok, did I mention I am not a fan of the waiting? Yea, so here is 10 minutes later. It’s still yellow, big surprise there. Mind you, during these tests, I just put the lock in, no moving around, no scrubbing, or rubbing between my fingers… Just get the lock in, submerged, and wait.
10 min later..
Ok, it’s all in there, it’s still yellow. Silly but, at the 10 minute point, I was always so excited to see, yay! What’s it done?! I was always sure I’d see something, no my fellow impatient friends, we must give it hours, to really do the job rightI put the lid back on and waited. I must say, now this was turning into a days long event, why I didn’t do several tubs at once is beyond me. Except to say maybe, I’m frugal, and I didn’t want to use a lot of hydrogen peroxide? Nope, not really, just didn’t think to do it.
Ok so 24 hours later, I open my tubs lid to unveil the yellow stains Houdini disappearance….. This is what I saw
Already, I’m impressed, I can hardly see any yellow, I’m thrilled
Let’s get the locks out of the tub, give them a good rinse, let them dry, and see what we really have here.
Overall results
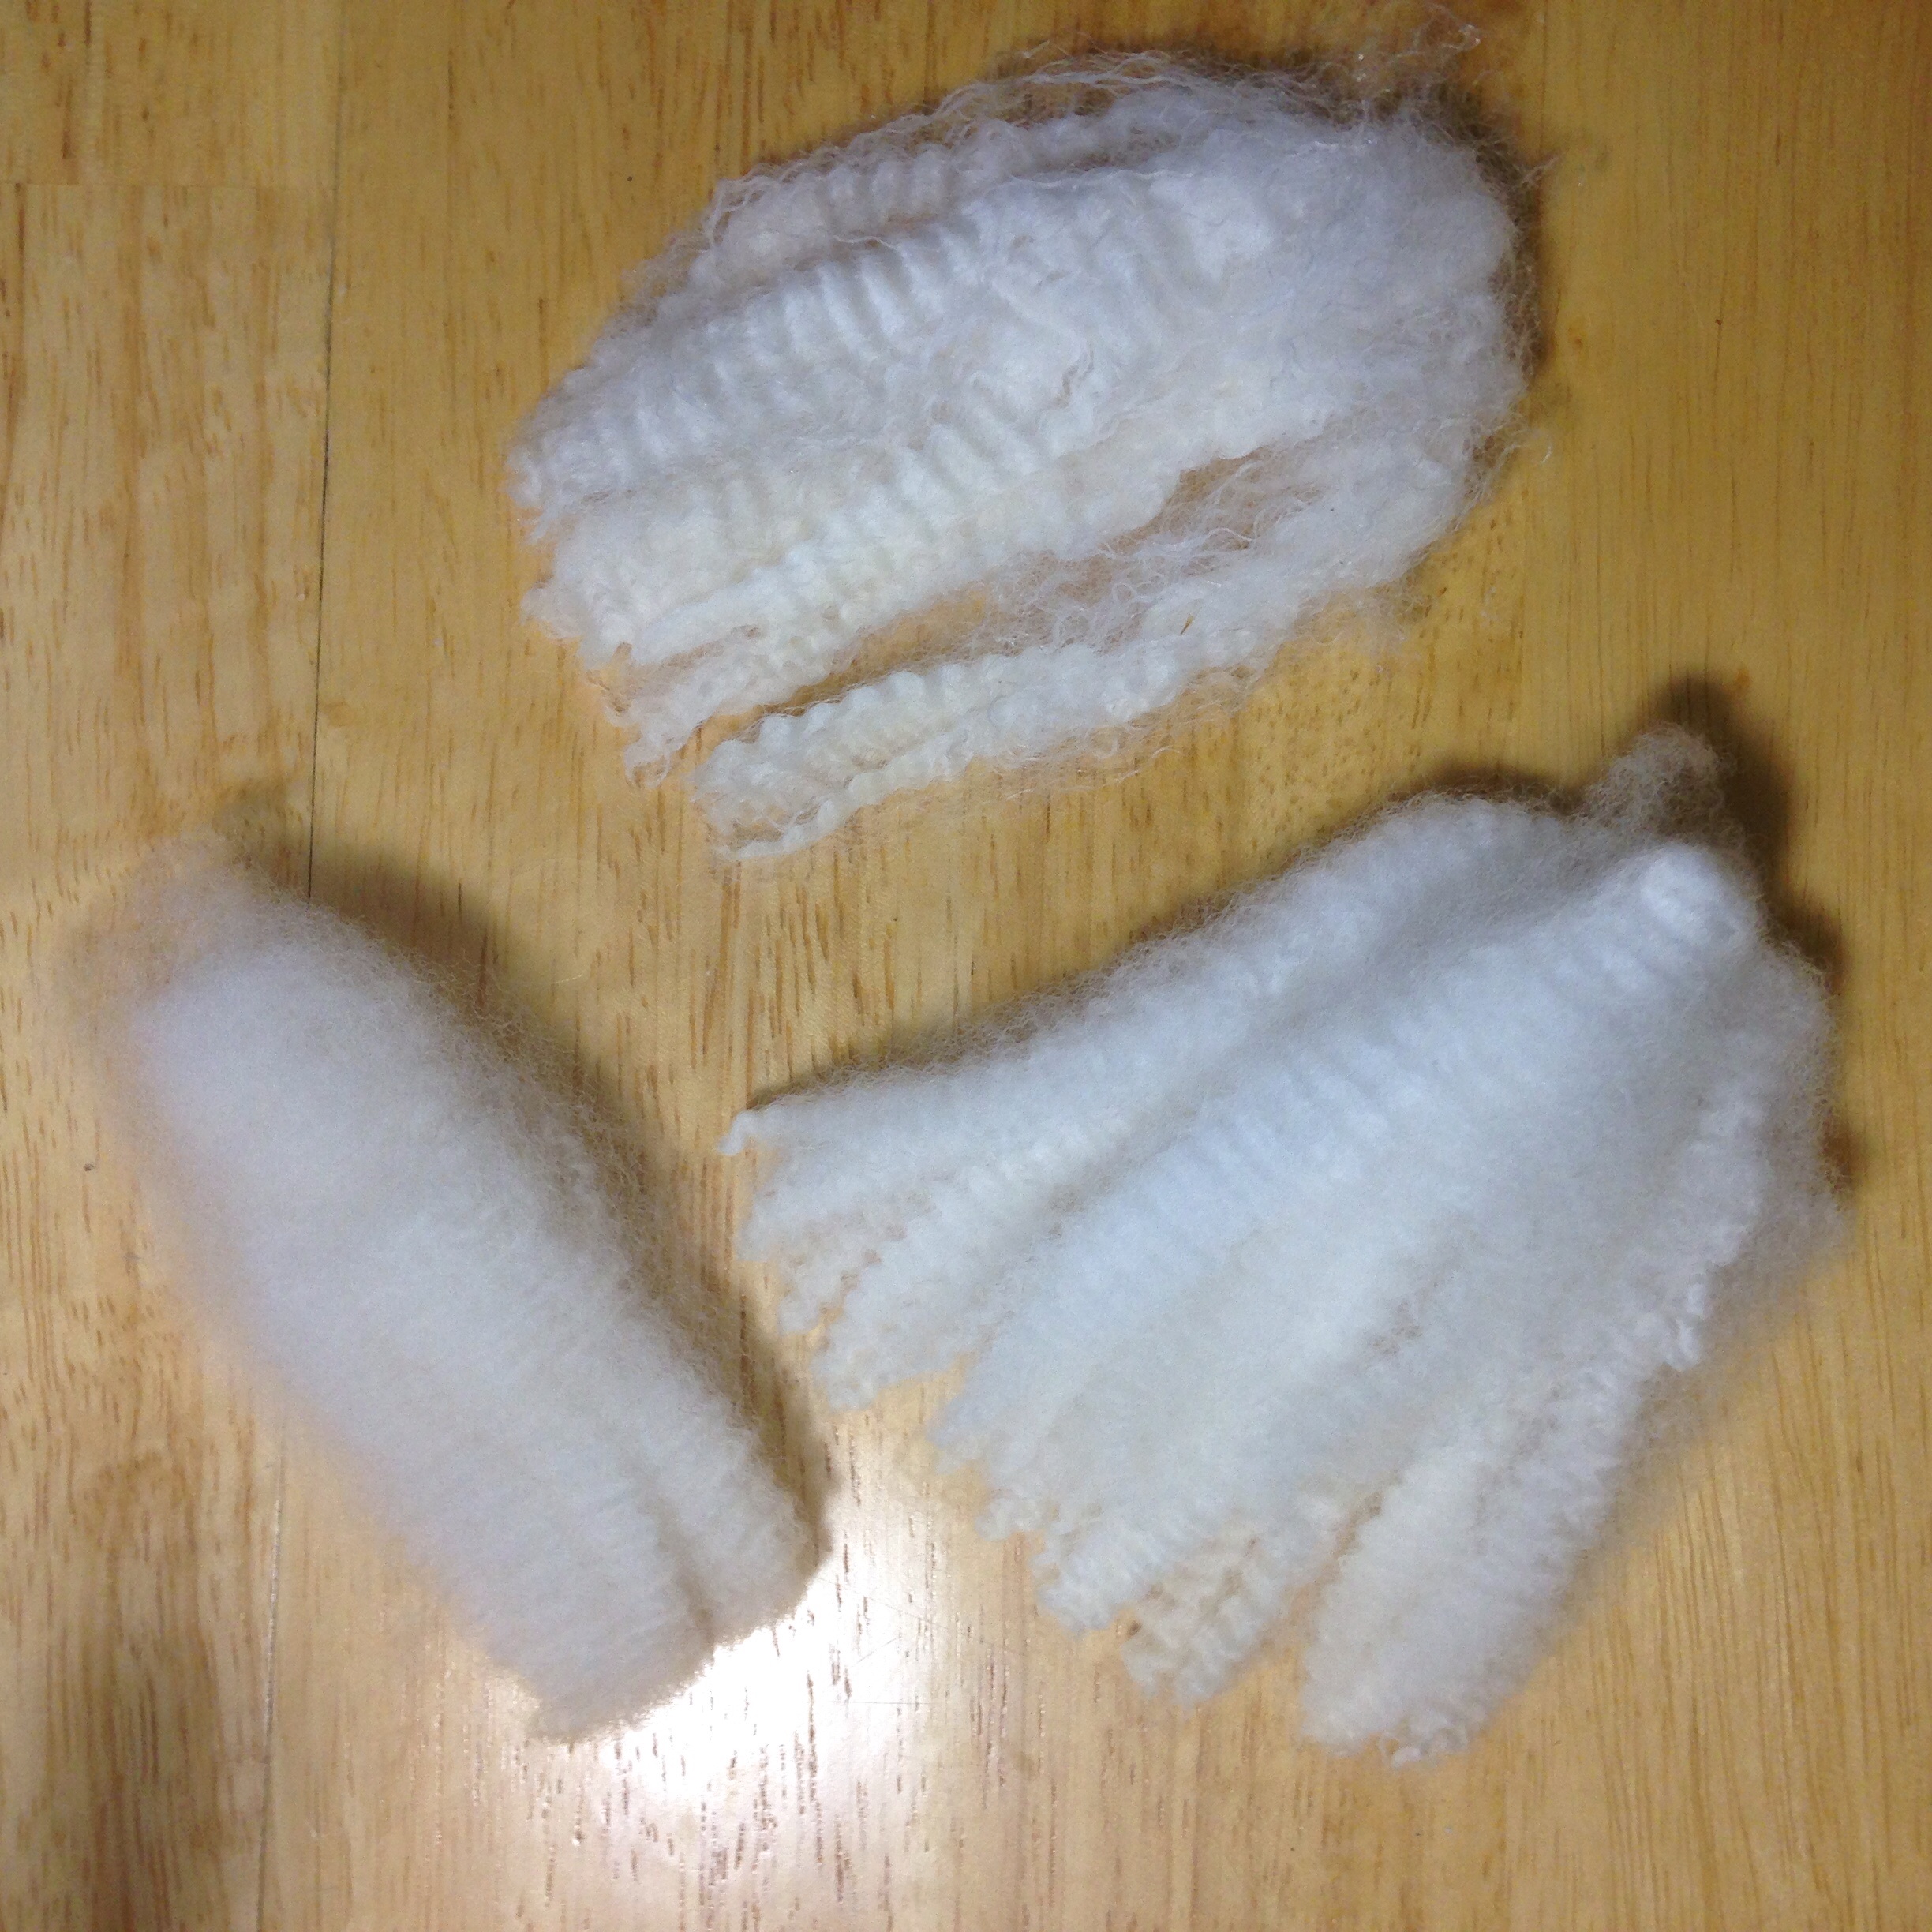
Top row shows brown stained locks
Bottom row shows yellow stains
Both -with example of stain on far right
These results are phenomenalThe above picture shows you my results of this experiment. Again, this couldn’t have been more easy. No scrubbing, no heating to such and such temperature, careful not to let this or that happen…. Nothing hard at all.
I literally dropped my stained locks, into a tub of hydrogen peroxide, and the next day, took them out, rinsed them with cool water from the tap, pat dried them in a towel to help remove excess water (so they would dry faster, you could probably even skip that step if you wanted, but then again, if they take too long to dry, mold can be a factor, and then you have another issue on your locks, so actually, don’t skip that step and just pat dry locks in a towel… Lol how’s that for a run on sentence, sorry about that, I was thinking out loud) so yes, pat dry rinsed locks in a towel and let them dry completely, either in the sun or on a sweater dryer rack (wherever you dry your locks/fleece)
I actually made my own dryer rack, out of PVC pipe, screen material, and zip ties. Before I made the PVC version, I’d just remove a screen off my window, hose it down, give it a quick towel off to dry and BAM! An aerated screen propped up on whatever is handy, and you have a place to dry locks of wool. Not to mention, it has a place to be put away, right where it belongs, back on the window.
A lot of my fiber tools are homemade ourself. By being able to save money on these fiber tools, leaves extra money for the wool we use on them. I promise, another blog on those tools later.
In the meantime, back to my hydrogen peroxide experiment. It works. I am now wondering, how big bottles of this stain removing gem, come in. I will have to do some research on that. The bottle I used, was 16fl oz, or 1pint, and was 3% hydrogen peroxide and purified water. It cost around $1 a maybe $1.99. Next, I will look to see if it comes in higher percentages and bigger bottles, and where I can find it. Surely, it must. With these results, even what I thought looked already white, in my control sample, the stained samples, came out even more white. It’s tempting to use hydrogen peroxide as one of the last rinse waters in my regular routine fleece washing of white fleeces.
i had excellent results on the samples I tried. There may come along a stain one of these days that will not disappear 100%, in that case, you can dye it, or maybe blend it with other fibers to disguise its whereabouts. This is why I love fiber arts. Bad wool for a perfect spin? Felt it. Stubborn stains, over dye or blend. No one will ever be the wiser they have sheep piss stains in the gift, I have lovingly, blood sweat and stitched for them, lol, speaking of, I wonder if hydrogen peroxide removes blood stains? Well, next time I bleed on a white lock, no doubt using those prime evil wolverine combs….new testing will commence, until then… Hydrogen peroxide is a winner. It really works. The results above are miraculous considering how easy it is. My gorgeous white locks, buuuuuuuh, I’m seriously, in love.
This experiment gave me another idea to try. I’m cutting very small, dirty tips from clean fleece, with the plan to soak in hydrogen peroxide, and make my own wool nepps. I’ve never seen a tutorial on making wool nepps…