I have a bunch of raw undyed white fleece that I have spun into yarn and I have decided I want to speckle dye my handspun.
I my first try was a total flop. I was going for neon rainbow speckles and first off I ended up with a kelly green, that brought down the entire neon rainbow feel… but also I had no speckles whatsoever! I had followed someone’s YouTube tutorial using plastic wrap in the microwave. Ultimately, I had ruined any chance of speckles from the plastic wrap touching everything and the steam inside the plastic wrap was too much… making water drip, which spread the color everywhere.
There is a technique and know how to get a good speckle yarn. And the dyers who make gorgeous speckles where the dark colors are sharp contrast and where the extra dye isn’t dyeing the bright or lighter colors in the rinsing.
I tried two skeins of handspun first and after my massive fail I thought, “ok…. I need to learn and practice on cheap mini skeins while I work this out…”
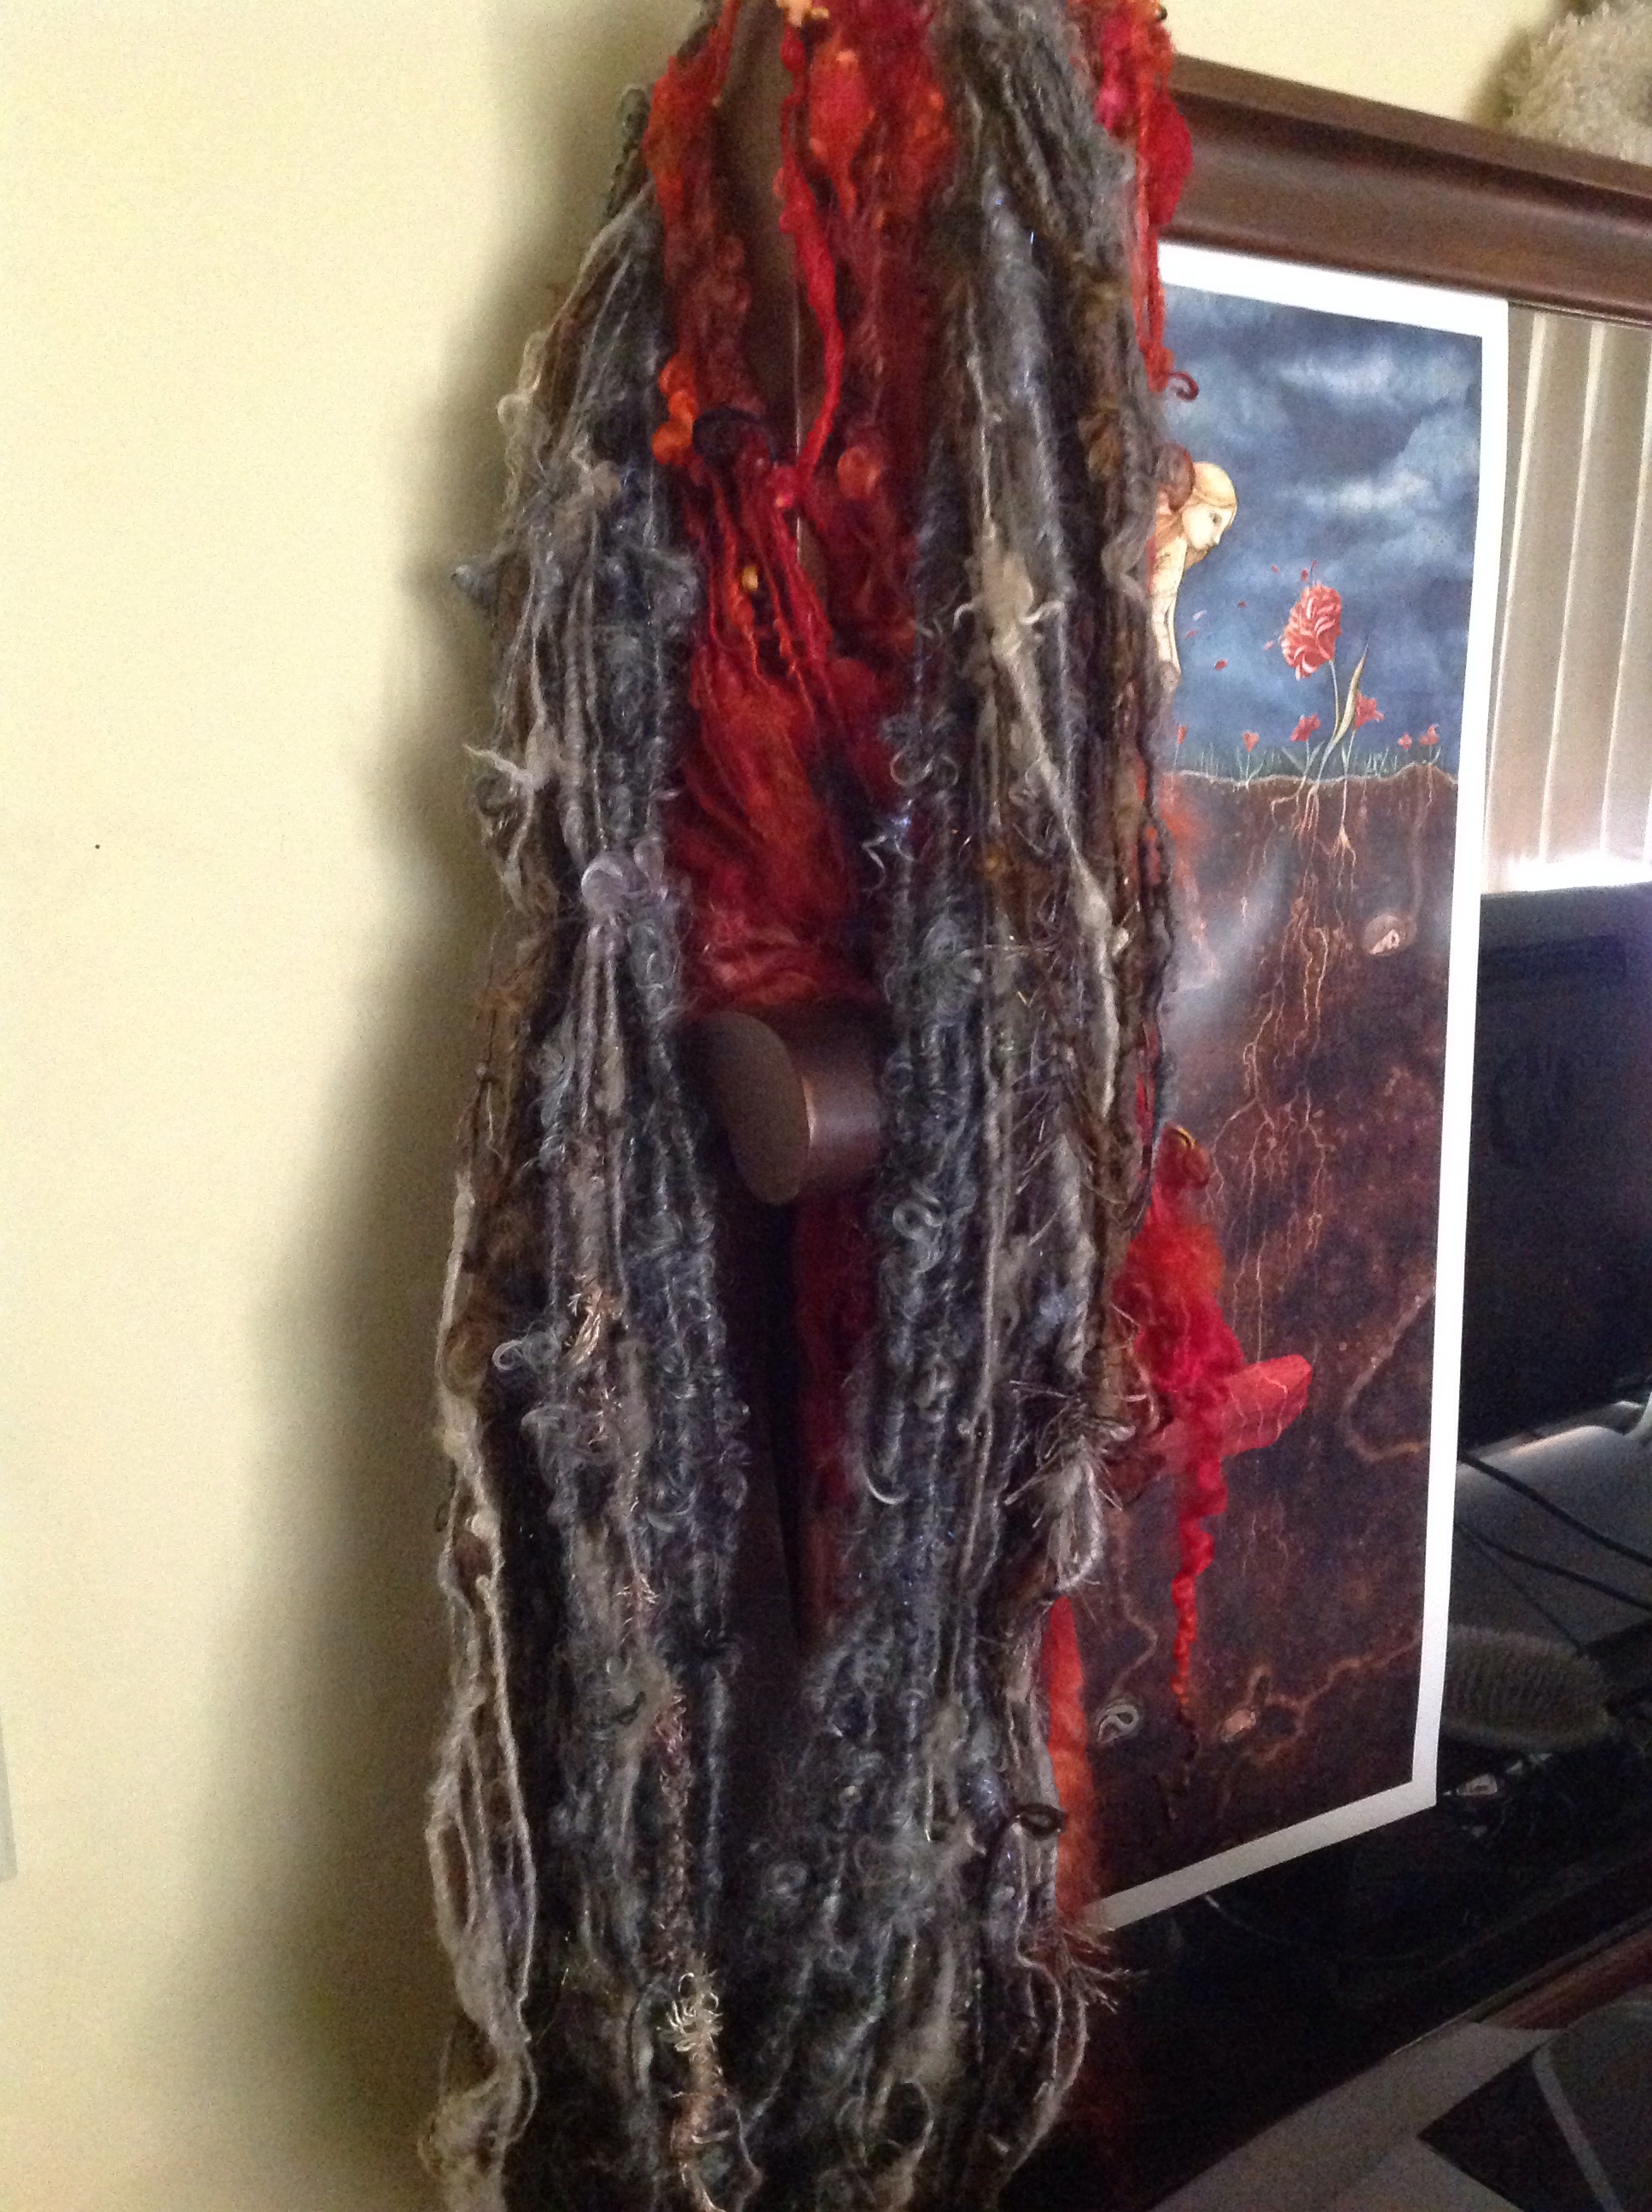
Here are the disastrous results of my first attempt on my handspun following the YouTube plastic wrap microwave method
It’s hideous!! lol It’s so bad, it’s embarrassing. One good thing about failing so miserably? I have wins in my future. I learn something every time.
I was not happy with the failed speckle handspun… it even fails as variegated yarn, IMO . I would not be moving forward with my speckle dyeing on yarn I had processed from raw fleece. I went to my local big box craft store, with 40% coupon in hand, to buy white basic wool/nylon yarn.
Fortunately, I have friends who are patient teachers, as well as, amazing dyers, to help me work through my speckle issues.
In the meantime, I made some squares for the long term project I’ve got going.
I’m making a blanket of squares from leftover yarn scraps. Part of a make along (knit crochet weave felt along) in the Redding Method group on Facebook. The make along is called the Redding Method block party. (hashtag #rmblockparty)
Anyone is welcome to join the group and play along. More on that in a later post.
I am very very pleased to report, I have been much more successful in my speckle dyeing since this first attempt… thanks to help from those with with knowledge and experience in these things..
I gotta say… This process was not at all, what I expected. Usually, I take great measures not to felt my fiber. I’ve always been afraid of the dreaded accidental felting. I would let the raw wool sink on its own in the scour process, to avoid agitation. I actually bought a laser temperature gun to make sure the fiber I was transferring to a new tub of rinse water, it would be the same.
I was really careful. I know the mechanics of felting… agitation, temperature change, soap (change in pH). I have watched several videos on the internet showing both how not to felt and even more on how to felt.
I had my bubble wrap, mesh, pool noodle all set…
Imagine my surprise, when it took me hours and hours to felt a very thin layer of cobweb felt. No exaggeration, it took hours of full on abuse to finally get a result. I wasn’t even sure I had felted the piece when I stopped that days attempt, from pure exhaustion. I physically could not continue. I got on Facebook live to express my frustration and I said jokingly,
“Now I understand why people started violently throwing it at a certain point… because they really were pissed trying to make felt”
All the videos I had watched would say, ‘now is a good time to get out any pent up aggression’ and proceed to wad it up and slam it into their work surface. The only aggression I had was toward this scarf I was failing at felting.
Putting myself on pause was the best thing, even though I couldn’t have gone on if I wanted.
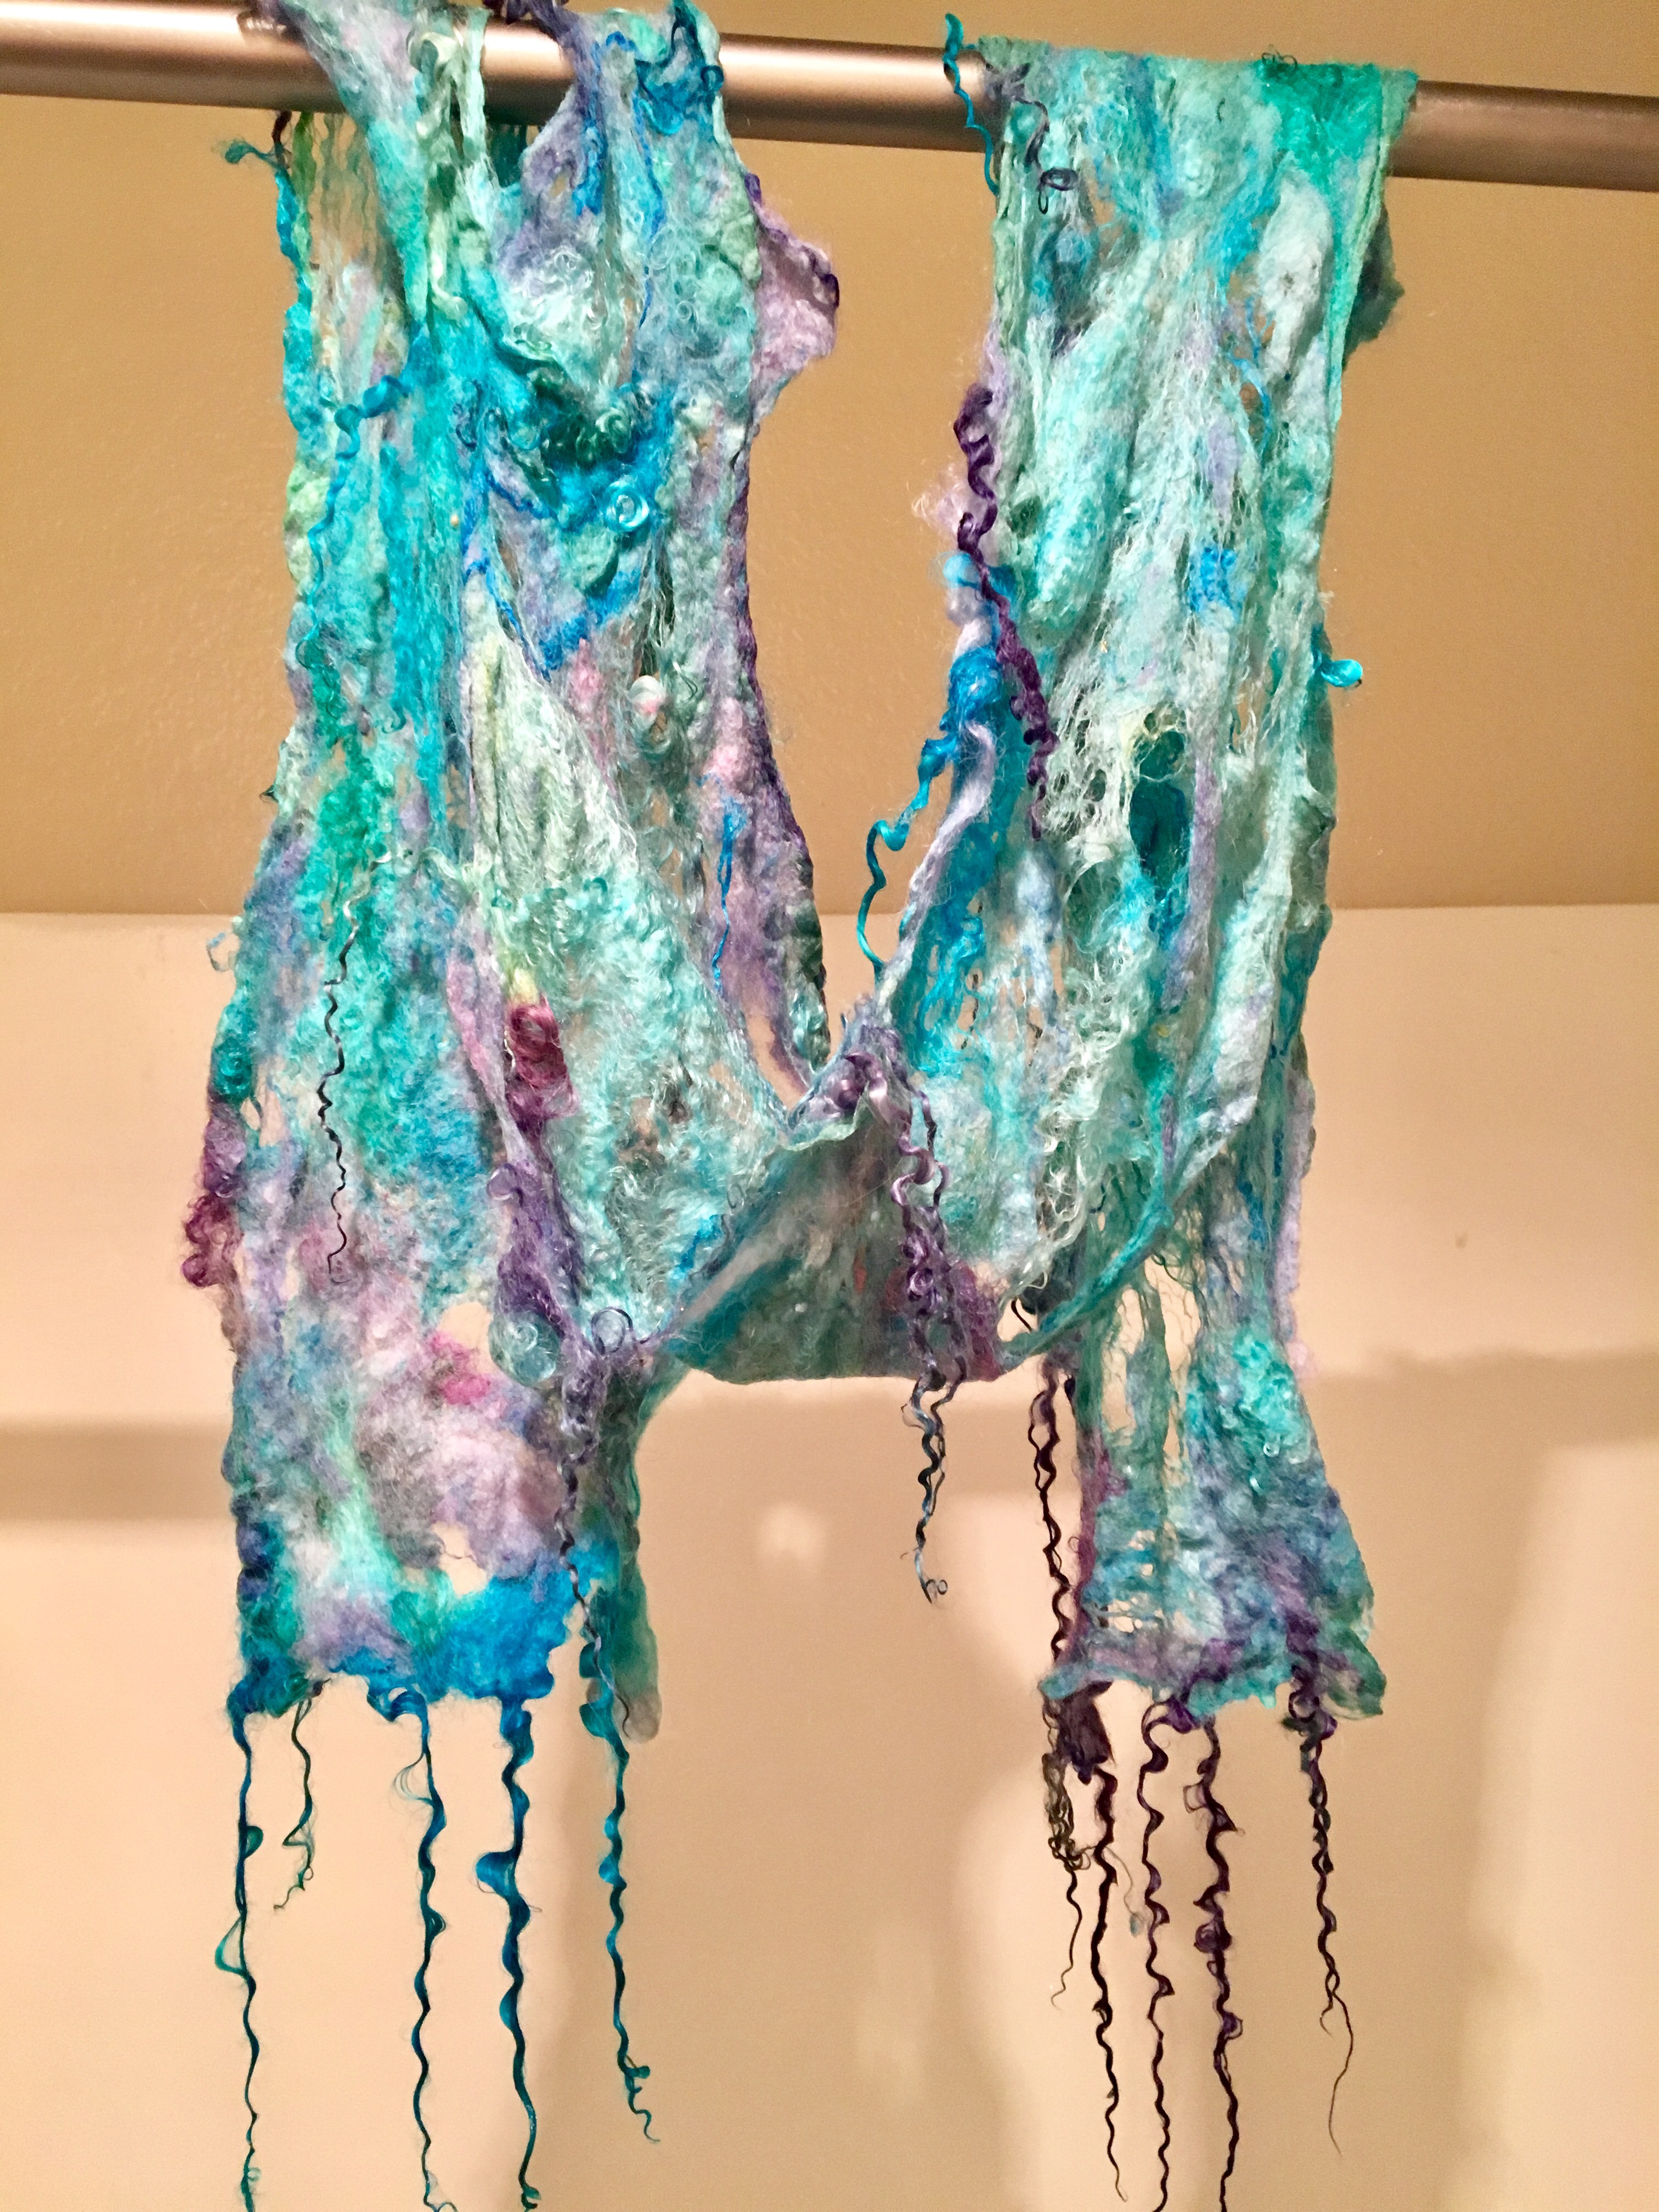
The next day, I went to check…
it was dry and damn if I wasn’t relieved, it was felted!!!
Let me just say wet cobweb felt does not feel felted. Or, maybe it does, but I just don’t have any clue what I’m looking for. I have to say I was really pleased with my result. It was light and airy and soft cobweb felt with teeswater locks dangling and silk integrated into the fabric.
Felt is the first ever cloth humans made. And I managed to make my own… barely. I didn’t know I had managed to create anything at the time, so there is still lots of learning to be done.
I really love the result. I didn’t expect it to be so soft and light. I’m into it… which is great news for all the wool waiting to be played with
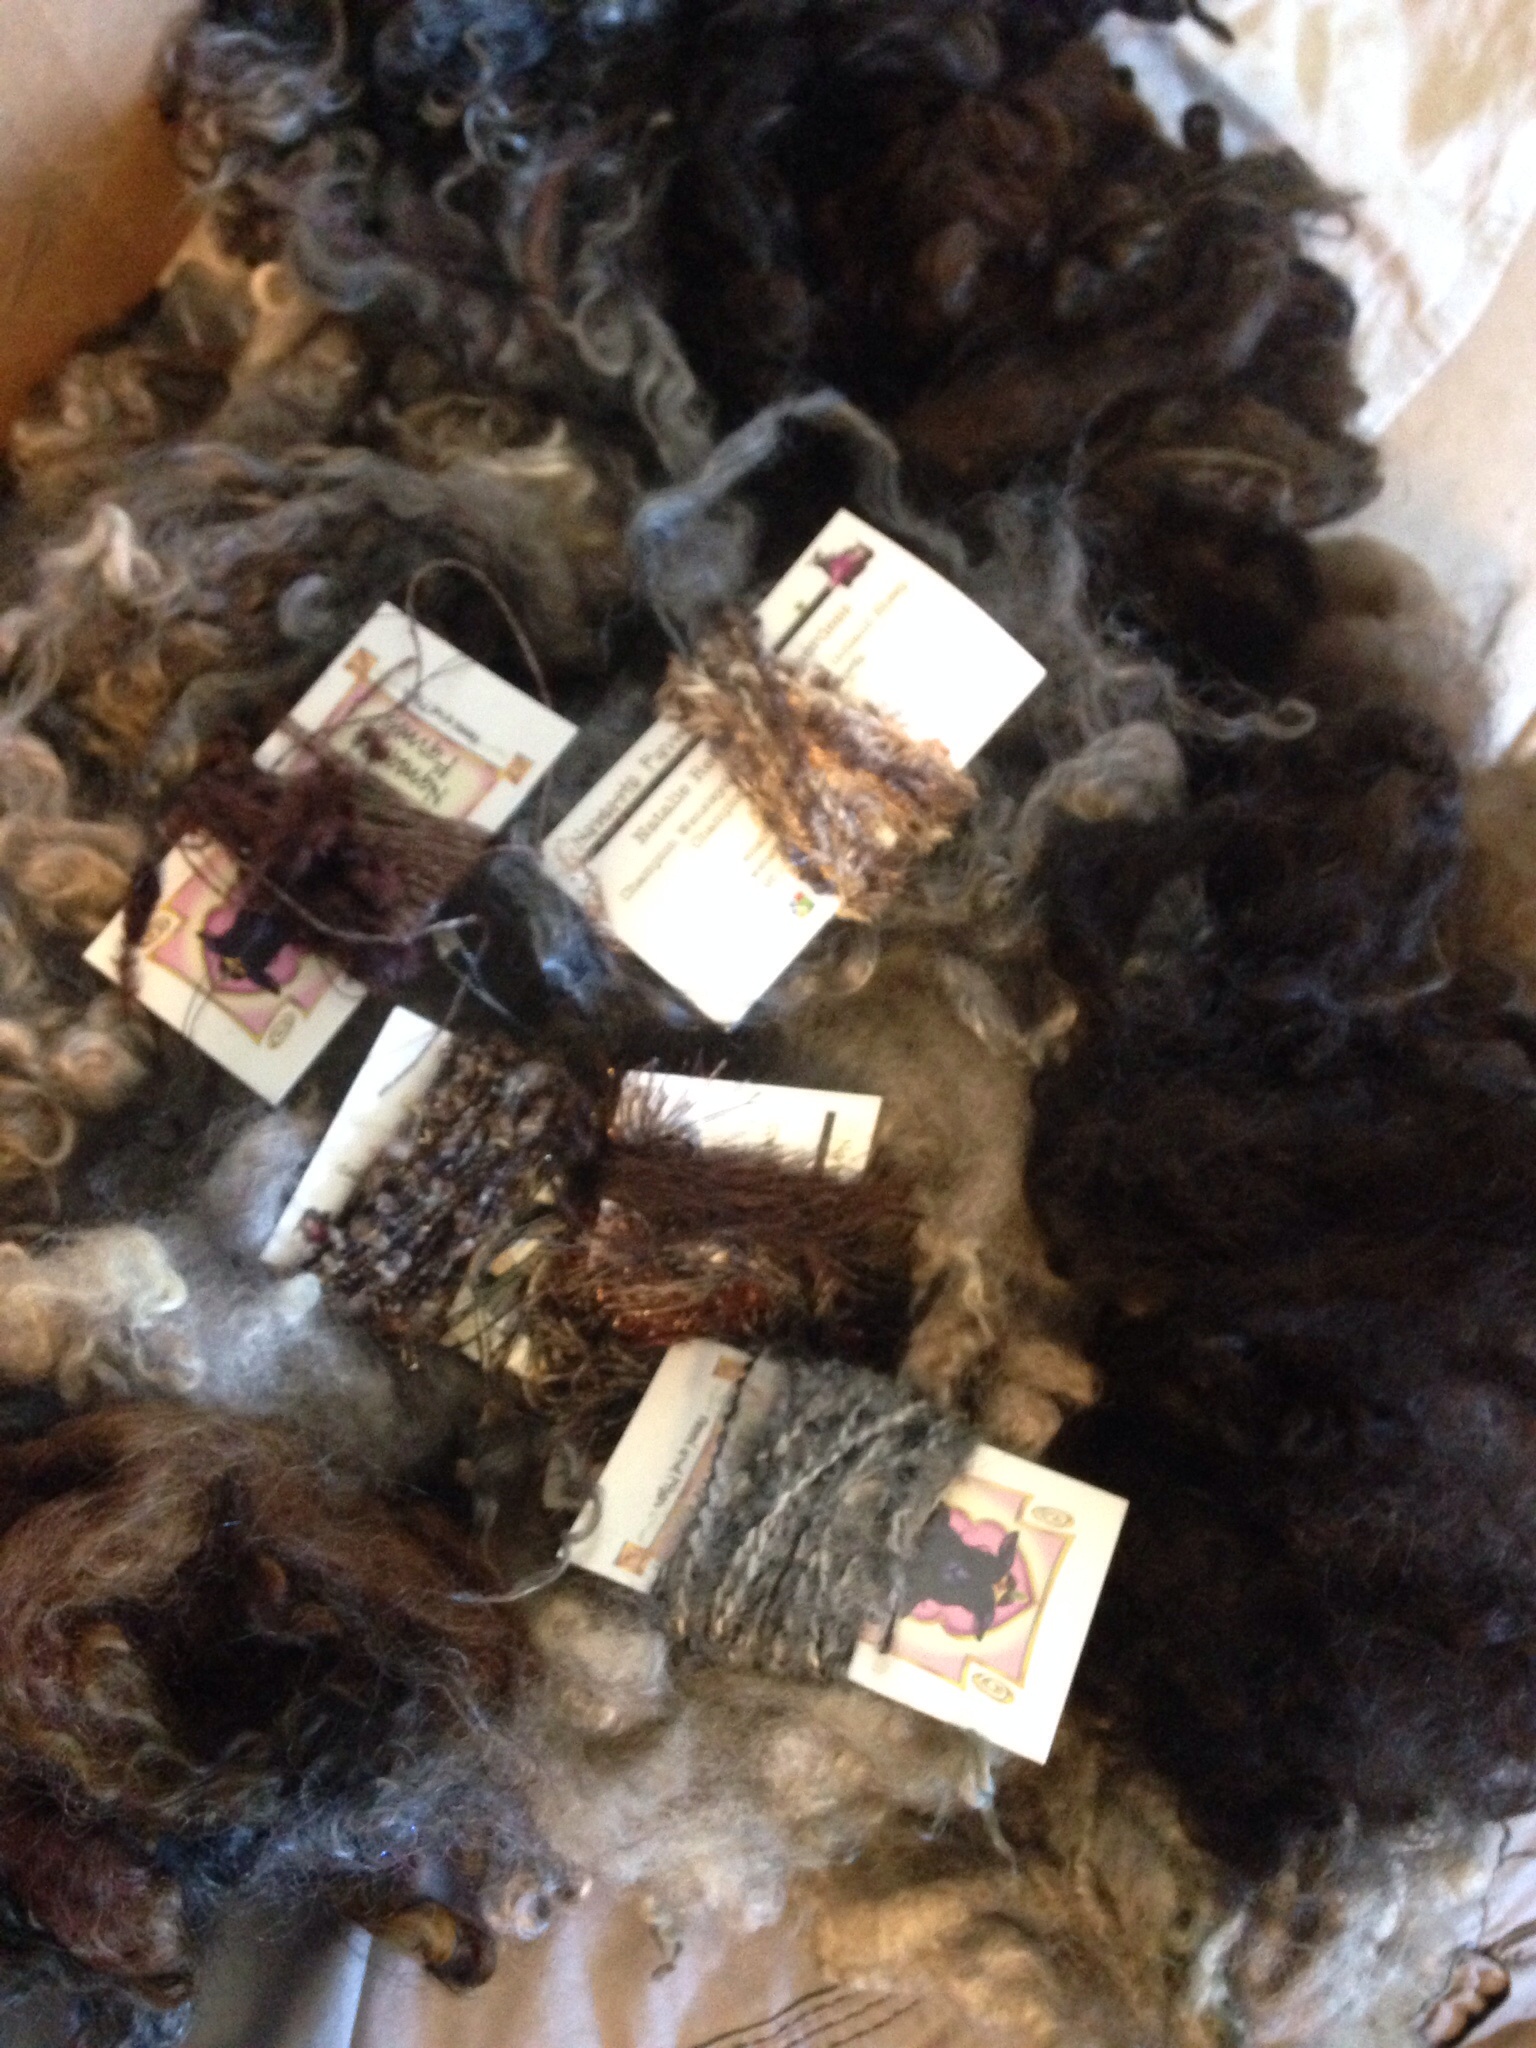
Yet Another, scrapbox from Namaste Farms, so what keeps bringing me back to spinning the same thing over and over again? That’s just it, it’s never the same! Each scrapbox brings me something new to taste test, whether it’s a new fiber, add in, or technique (taught via livestream tutorial that is sometimes offered with the scrapbox purchase)…I am addicted. Too much of a good thing doesn’t exist where fiber is concerned, and these Scrapboxes, are a healthy dose of just that!!!
Prior to lock spinning and NF scrapboxes, my all time favorite was polworth commercial top. (I still love polworth)
That was out of merino, BFL, and polworth that I had tried, to that point. There’s just so much more to experience in spinning!!
Over the years, opening my palette, I’m finding I love other wool preps and fiber blends so much more! Years of spinning and I’m still only scratching the surface. A scrapbox keeps it fresh, inspiring, and fascinating because I experience another first, everytime.
My blog is transparent, I’m a scrapbox fiend, that’s pretty clear. But I learn more of what I like to spin everytime I treadle one of these onto my bobbin. (I want to spin a little bit of everything, I want to try it all) Each fiber has a quality that makes it beautiful and these scrapboxes let me experience more fibers, treats, techniques etc, all at once. So yes, I’m on a scrapbox kick because I get a lesson and experience in each one, not to mention… The way it’s dyed, the colors!!
*swoooooon* there is nothing like beautiful color on fiber.
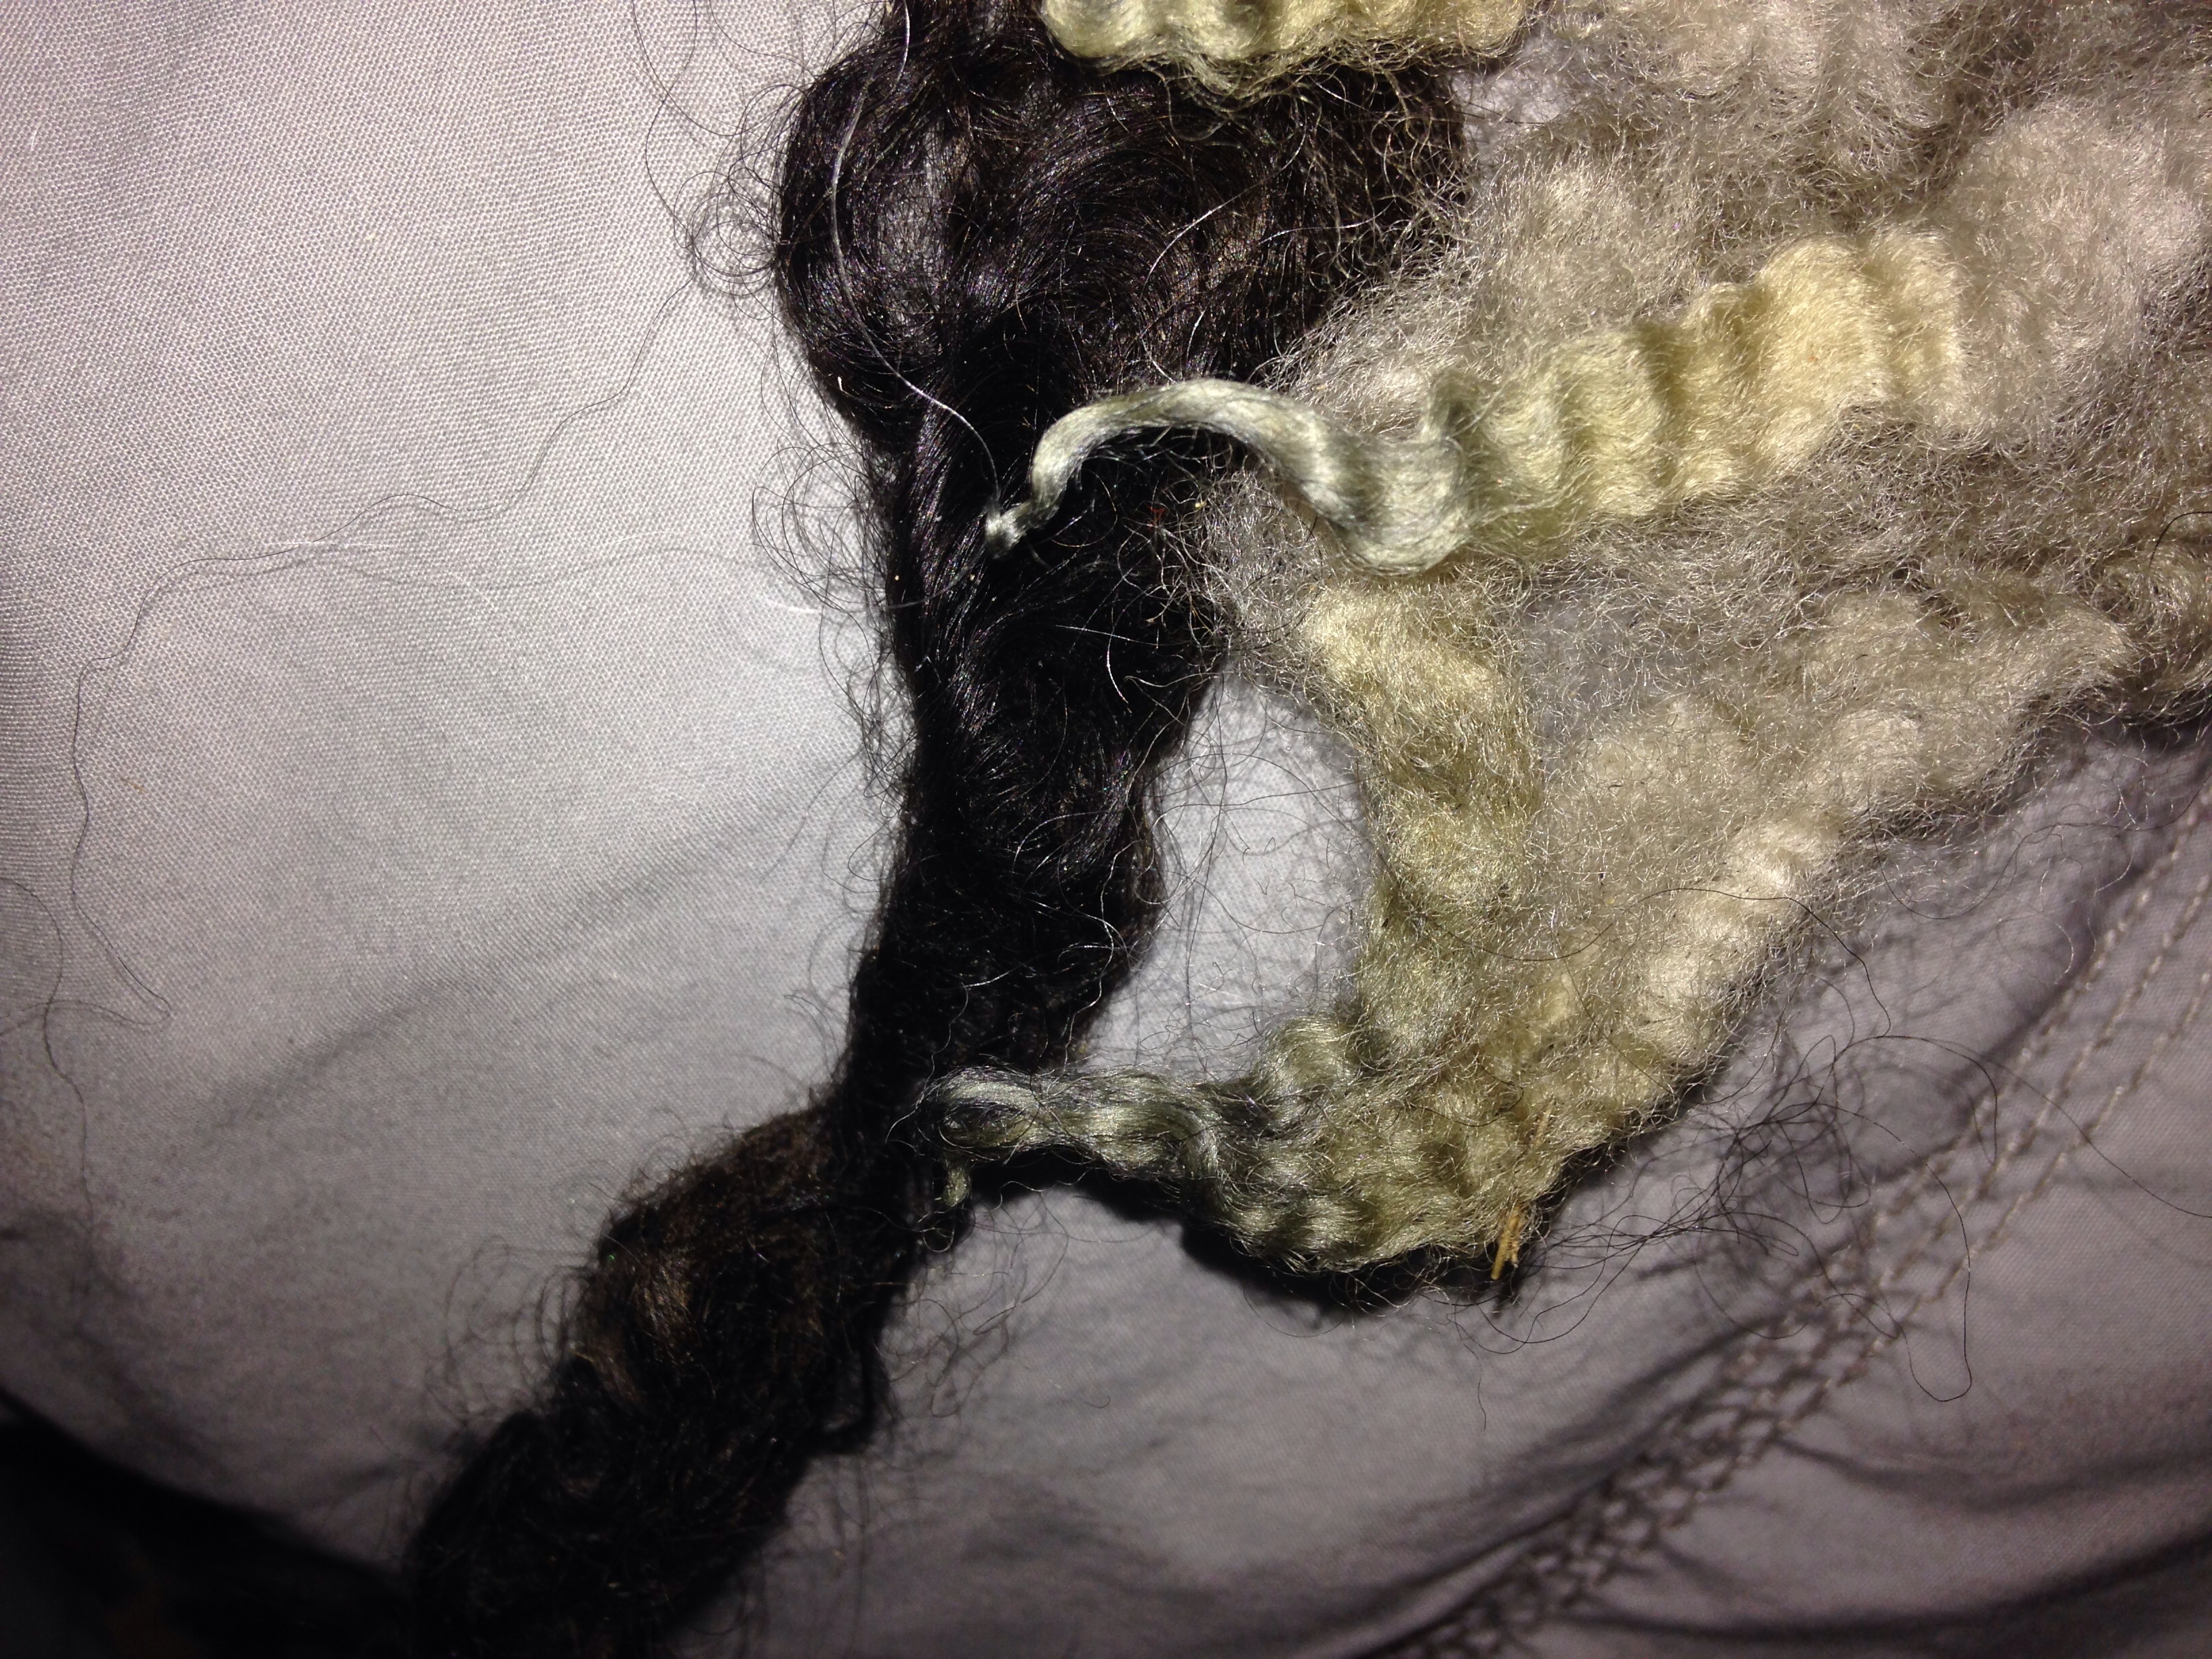
The color is what sucks me in, and then every discovery after, is bonus. I love when there is more then one color in the lock staple. I love when the tip is darker, or lighter or a completely different color then the rest of the lock.
Ive moved twice in the last 3 months, I might add, these are great during a move. When you need to spin, but your stash is packed. Order up one of these puppies and you are ready to go. Everything included for a fun and fulfilling spin.
I ordered some extra Angelina, in different colors, during a purchase from namaste farms. That is the only extra, I added to this kit. I didn’t need it, as this box came with a bunch of novelty add ins, but why not? I love sparkle.
Angelina in blaze, violet, blue, copper… Love sparkle
The Mink box, is dyed in neutral or natural colors. The taupe is worthy of special mention, it’s amazing. At first glance, you think it looks gray, until you have it next to gray, and then you see it’s not gray at all, but truly taupe. It’s gorgeous.
Taupe locks Exmoor/merino cross
The taupe locks are dyed on an exmoor/merino cross bred fleece, so they have a soft sproingy crimp, with a curly tip. A new breed and fleece type for me. Really really cool wool!! A must try!
Mink fiber and add ins
In addition to the color taupe, this box came with, fibers in all natural shades from light to dark. The taupe, actually, was originally a white fleece. It’s amazing for how natural all these colors look, they were dyed to be this way. This box came with colors from light gray, deep steel gray, cream, tan, beige, lighter medium browns to rich dark chocolate browns, some that seem to look black but in the sun, will show more depth and reveal other colors like deep mahogany. The tints of color, all mesh and put together make a gorgeous yarn. They look so natural to have been dyed. I think the steel gray mohair, was the original fleece color, but again, having been dyed so expertly, it’s hard to decipher in this scrapbox what is dyed vs originally grown that way on the animal.
Colors of mink
The add ins were several different novelty yarns and threads.
Three different colors of especially soft eyelash yarn, the good stuff, high end. Another was a golden train track or ladder novelty yarn. Now I say yarn, but it’s not what one would think of as a traditional yarn, more like novelty ribbon. It’s special, whatever it is. Several different threads in all neutral colors, matching the dyed fibers found in the scrapbox. All different (neutral/natural) tones and textures. A gray fuzzy halo thread, and a smooth brown with a little golden metallic sparkle.
Autowrap addins
One of my favorites, was the Habu textile thread in chocolate brown that appeared to have what looks like fat, soft furry caterpillars crawling across every few inches.
There were, well over, ten different add in threads, that came with the fiber. Each thread came in one long length, but I chose to cut them in shorter lengths for my purpose of use. Adding a touch here and there
Spinning goodies ranged from mohair, to long wools, to medium and fine wools. All variety of different fibers that inspire, with the many different staple lengths and textures. From crimpy, soft, fluffy and sproingy to light reflecting luster with ringlet curls, silky smooth to the touch, all in beautiful neutral shades.
As mentioned earlier, some of namaste farms scrapbox purchases come with a livestream tutorial. Prior to spinning Mink, I had the chance to watch one of these Livestream tutorials, held by Natalie Redding.(a lucky replacement for a namaste farms blogtalk one evening)
In this livestream episode, she shows several different techniques, while spinning the kits contents. Since she does this live, viewers can ask any questions, or request to “please show that again”, or “what ifs”, or “how would I”?
Anything really. These live tutorial spinning sessions are invaluable.
To quote Natalie, she knows how to spin “a balanced, light, lofty single.” And let me tell you, she does it well. Many many hours, many many skeins of practice makes perfect.
She referred to herself as a “one trick pony” spinner, as this, light lofty single, is the yarn she spins. With respect, I fervently disagree with this sentiment. With regards to Natalie’s spinning, this couldn’t be further from the truth, she is no “one trick pony”!!!
You won’t see MORE ways to spin a single ANYWHERE ELSE…
She shows more ways to
-spin a single,
-style a single,
-add something to a single
-all the while, keeping it stable, balanced, and freaking awesome.
Natalie demonstrates techniques that are unique and priceless. Sharing her proprietary knowledge, thereby, adding inspiration and tools to my own spinning repertoire. She is an intuitive spinner and is able to translate how she gets from point A, to point B, clearly. She is an excellent teacher. It is very difficult to spin a thick yarn, that’s light and airy. Even more difficult, is to keep it a low twist single, without it falling apart. If you have the chance to see and touch her yarn in person, it’s incredible. I got this chance in her booth at Lambtown 2014 held in Dixon, Ca. Photos of her yarn are incredible, but in person, you can feel the stability and just how weightless it is, it just boggles the mind. Seeing a bunch of her handspun skeins together, I realize how many options there are to spin a single. She is constantly formulating something new and different, forever changing and adding options available to a spinner. It never gets old.
I’m enthralled by the skills and amount of new content I learn. The above link is one of many recorded past spinning sessions. She always has new techniques and a new style yarn. Recent spin sessions, show several different techniques while spinning a single. On her livestream channel, one can find older posts where she has plied skein sessions, and even sheep to finished project. She shares many proprietary techniques exclusive to her. I feel very very lucky to have her share so openly, to help other spinners like myself.
A few examples of tips and tricks, would be, how to add a small puff of very short stapled fiber, and secure it to the single, by taking just a few long stapled fibers of longwool and essentially plying over those short bits locking everything in place. Brilliant!
Adding plied strength to a single where it otherwise may have been weakened! That was huuuuge for me. Major a-ha moment!
She’s shown several things to do with add in threads, like tucking one side in making it in invisible and allowing the other half to fly freely, much like a long lock. Or another technique, allowing the addin to auto wrap and hide both sides of the string within the fiber.
Another technique that blew my mind was how to lock “something” in (a curl, a long lock, or how to spin a lock of fiber, the cut end in the single without a trace but leave out the perfect curled tip she wants to show) with a tug of fiber up toward the “something”she wanted secure, sometimes wrapping the tugged bit with fiber, sometimes leaving it as is, depending on the outcome she was aiming for. These techniques were just a few she shared and I have never seen them before anywhere. Because Natalie is an intuitive spinner, she spins fast, but when teaching, is able to slow it down significantly while giving a detailed, step by step, explanation of exactly what she is doing.
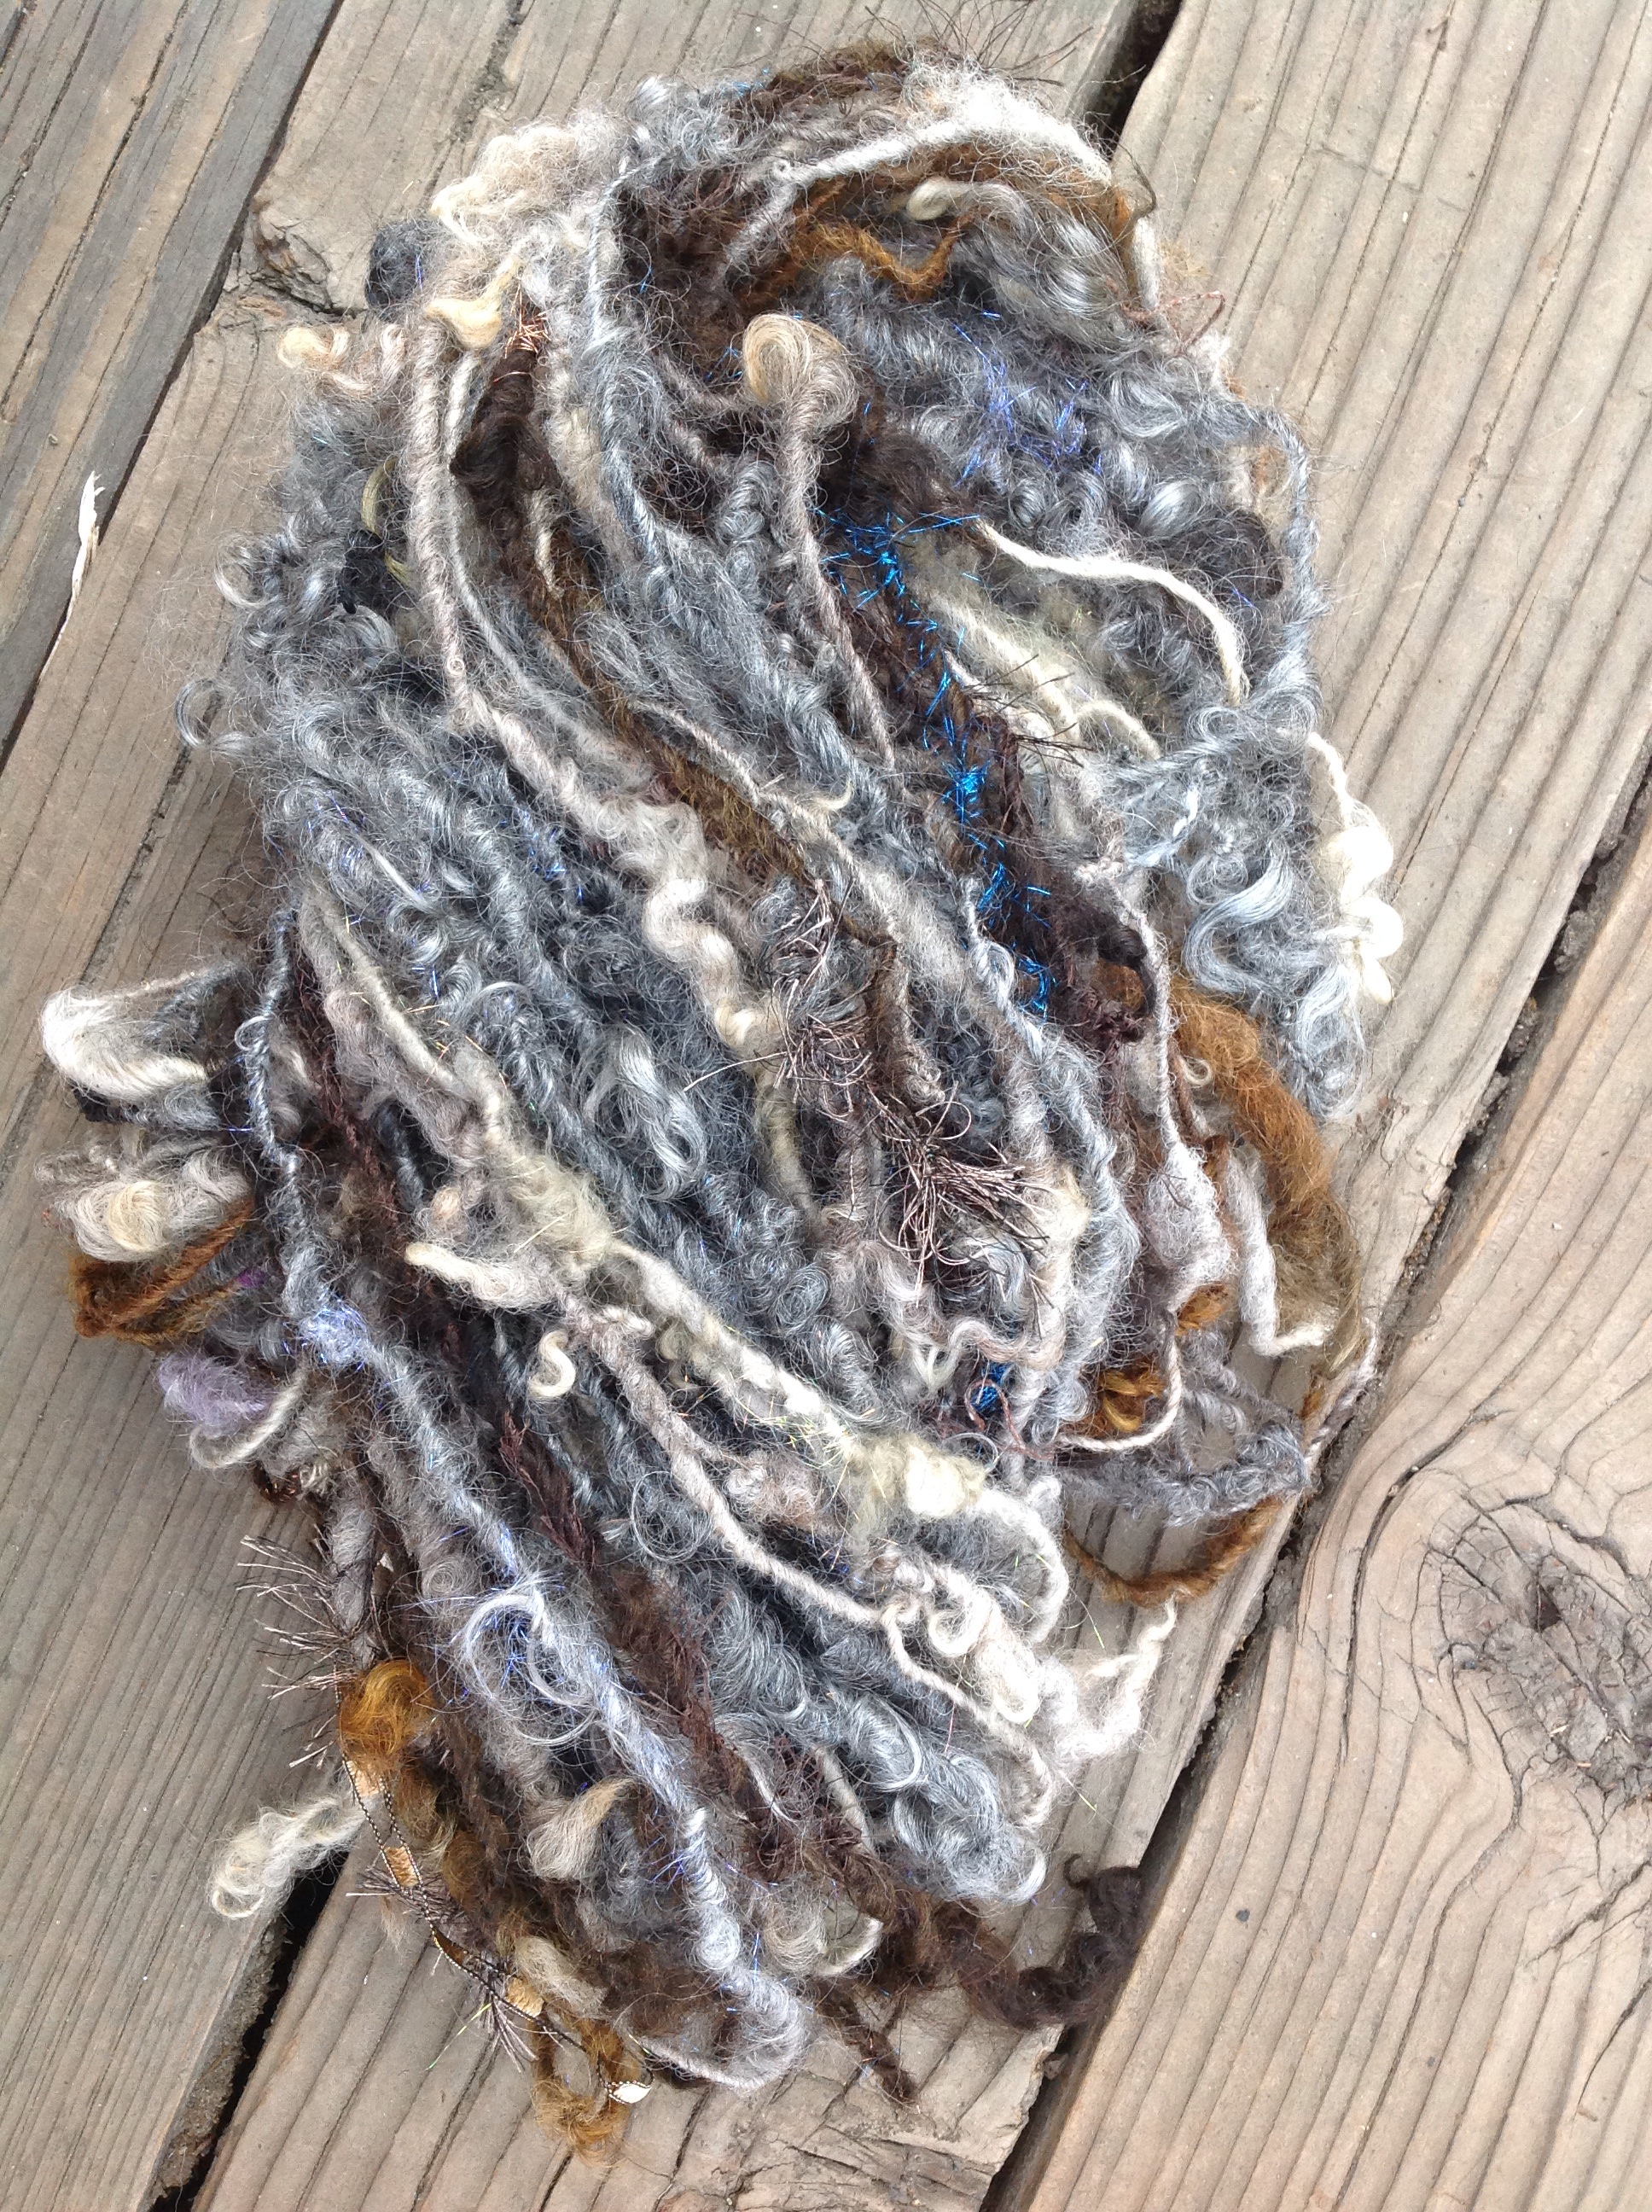
After watching this I was excited. I got to spinning straight away. This yarn is the coolest Ive made.
It’s natural colors are subtle, but all the add ins, autowraps, different fibers, textures, techniques, sparkles, etc etc etc I mean,
This handspun has so many elements of interest… It’s a special skein and one that I am really proud of. With so many things going on in this yarn, the natural colors of the dyed fiber tone it down, and it works. It’s wildly complex but sophisticated. I’m still learning color, I love me some bright rainbows, neon aqua and hot peach, but my wardrobe shows I’m a fan of plain black and white,of blue jeans. So to make a neutral yarn with this much fun going on, it kinda blew my mind. This is the styling of a yarn, I’m talking about, that I didn’t know played a part.
I can’t recommend enough, to watch, Namaste Farms tutorials.
Coming up, she is also doing spin in labs/ classes with http://www.fiberygoodness.com hosted by Spin Artiste creator – Arlene Thayer and Woolwench – Suzy Brown.
Check the fiberygoodness website for further information on all the spinning inspiration and classes they offer. The gallery of handspun made by students is motivational eye candy.
I’ve signed up for one of the fibery goodness labs by on November 19 with Namaste Farms. I barely got in, as these classes sold out In minutes for months in advance. Keep an eye out for more!
Mink and Shanghai
Awww I love spinning… I imagine how impressed our ancestors over thousands of years would be, to see what we are making today… Spinning is such an intricate art, as is the wool that is grown today. Animal husbandry is an artform. The constant quest for perfection over centuries, to bring the best fiber, to hand spinners and the textile industry. Especially, with the latest in AI science, and the ability to bring the best genetics from across the globe. We are so fortunate to be spinners today. The progress is monumental and something to be revered. The hard work of our shepherds and shepherdess’s to bring about such a superior product is truly an art in itself. This isn’t nearly as recognized as it should be. This is where spinning begins, and our handspun art as spinners, is made possible. I appreciate them and all their efforts to bring nothing but the best fiber. I love to grab a handful of dyed locks and just play. I could do this for hours… And I do,
as often as I can.
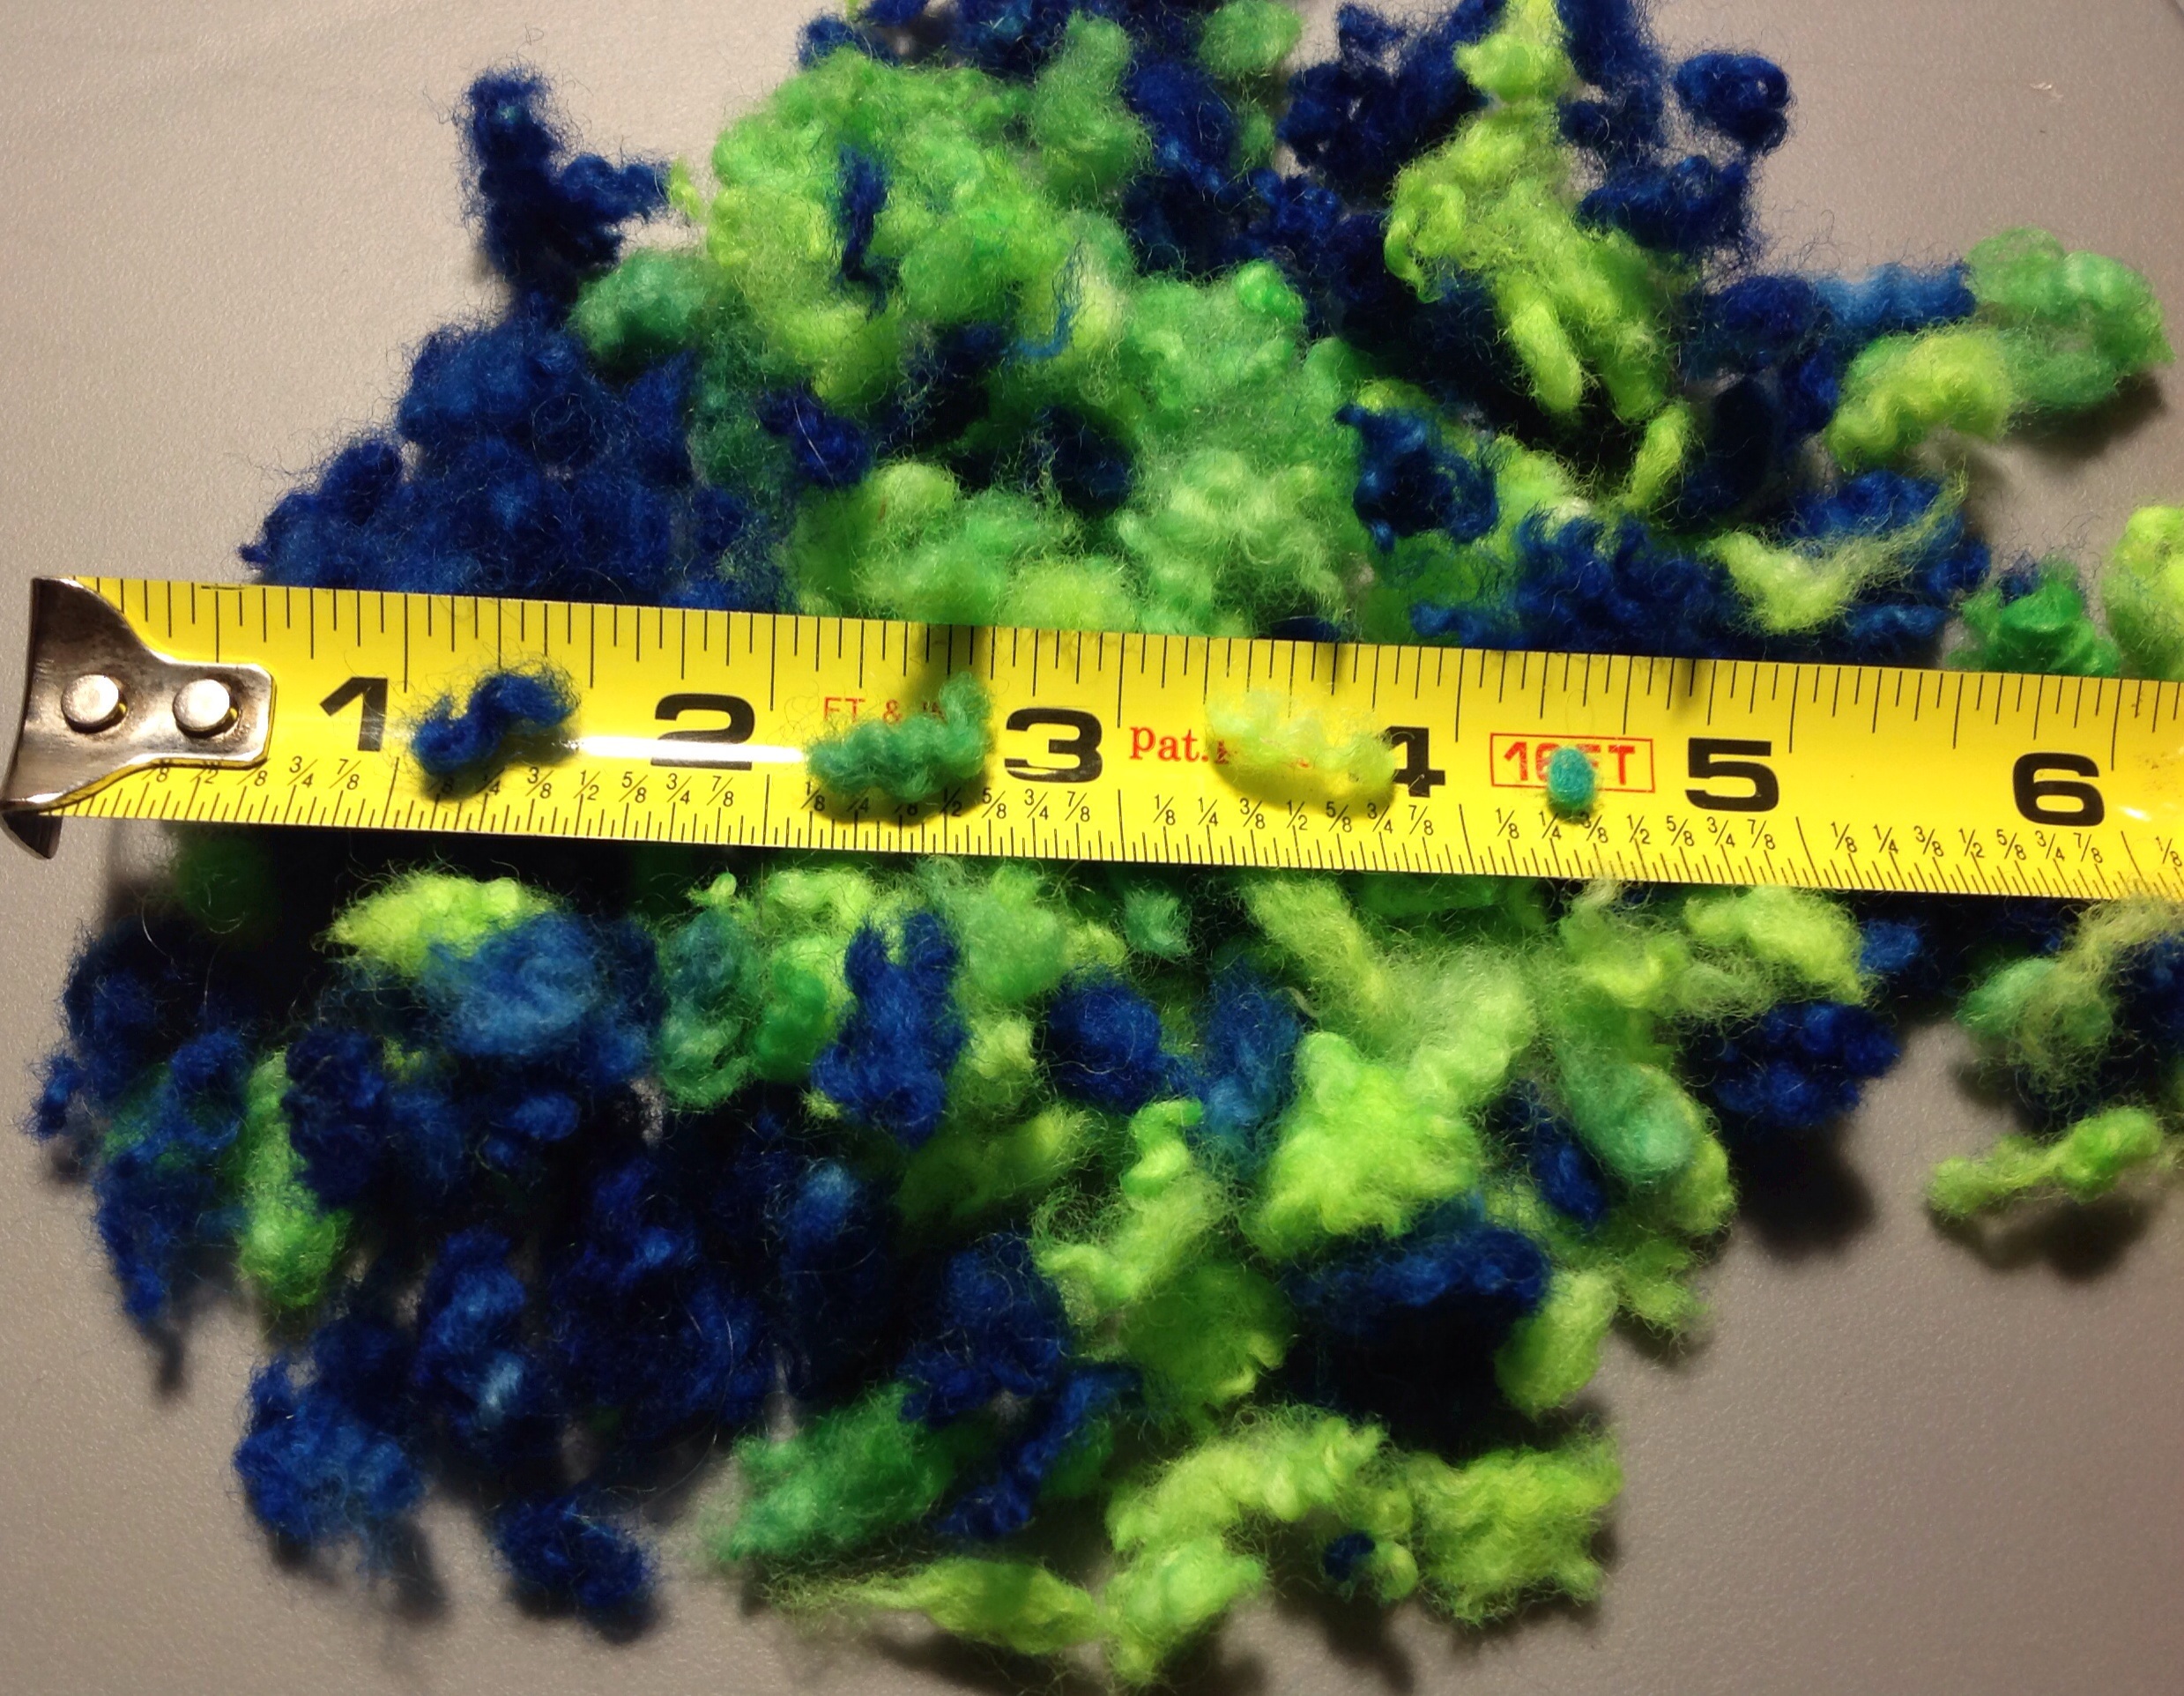
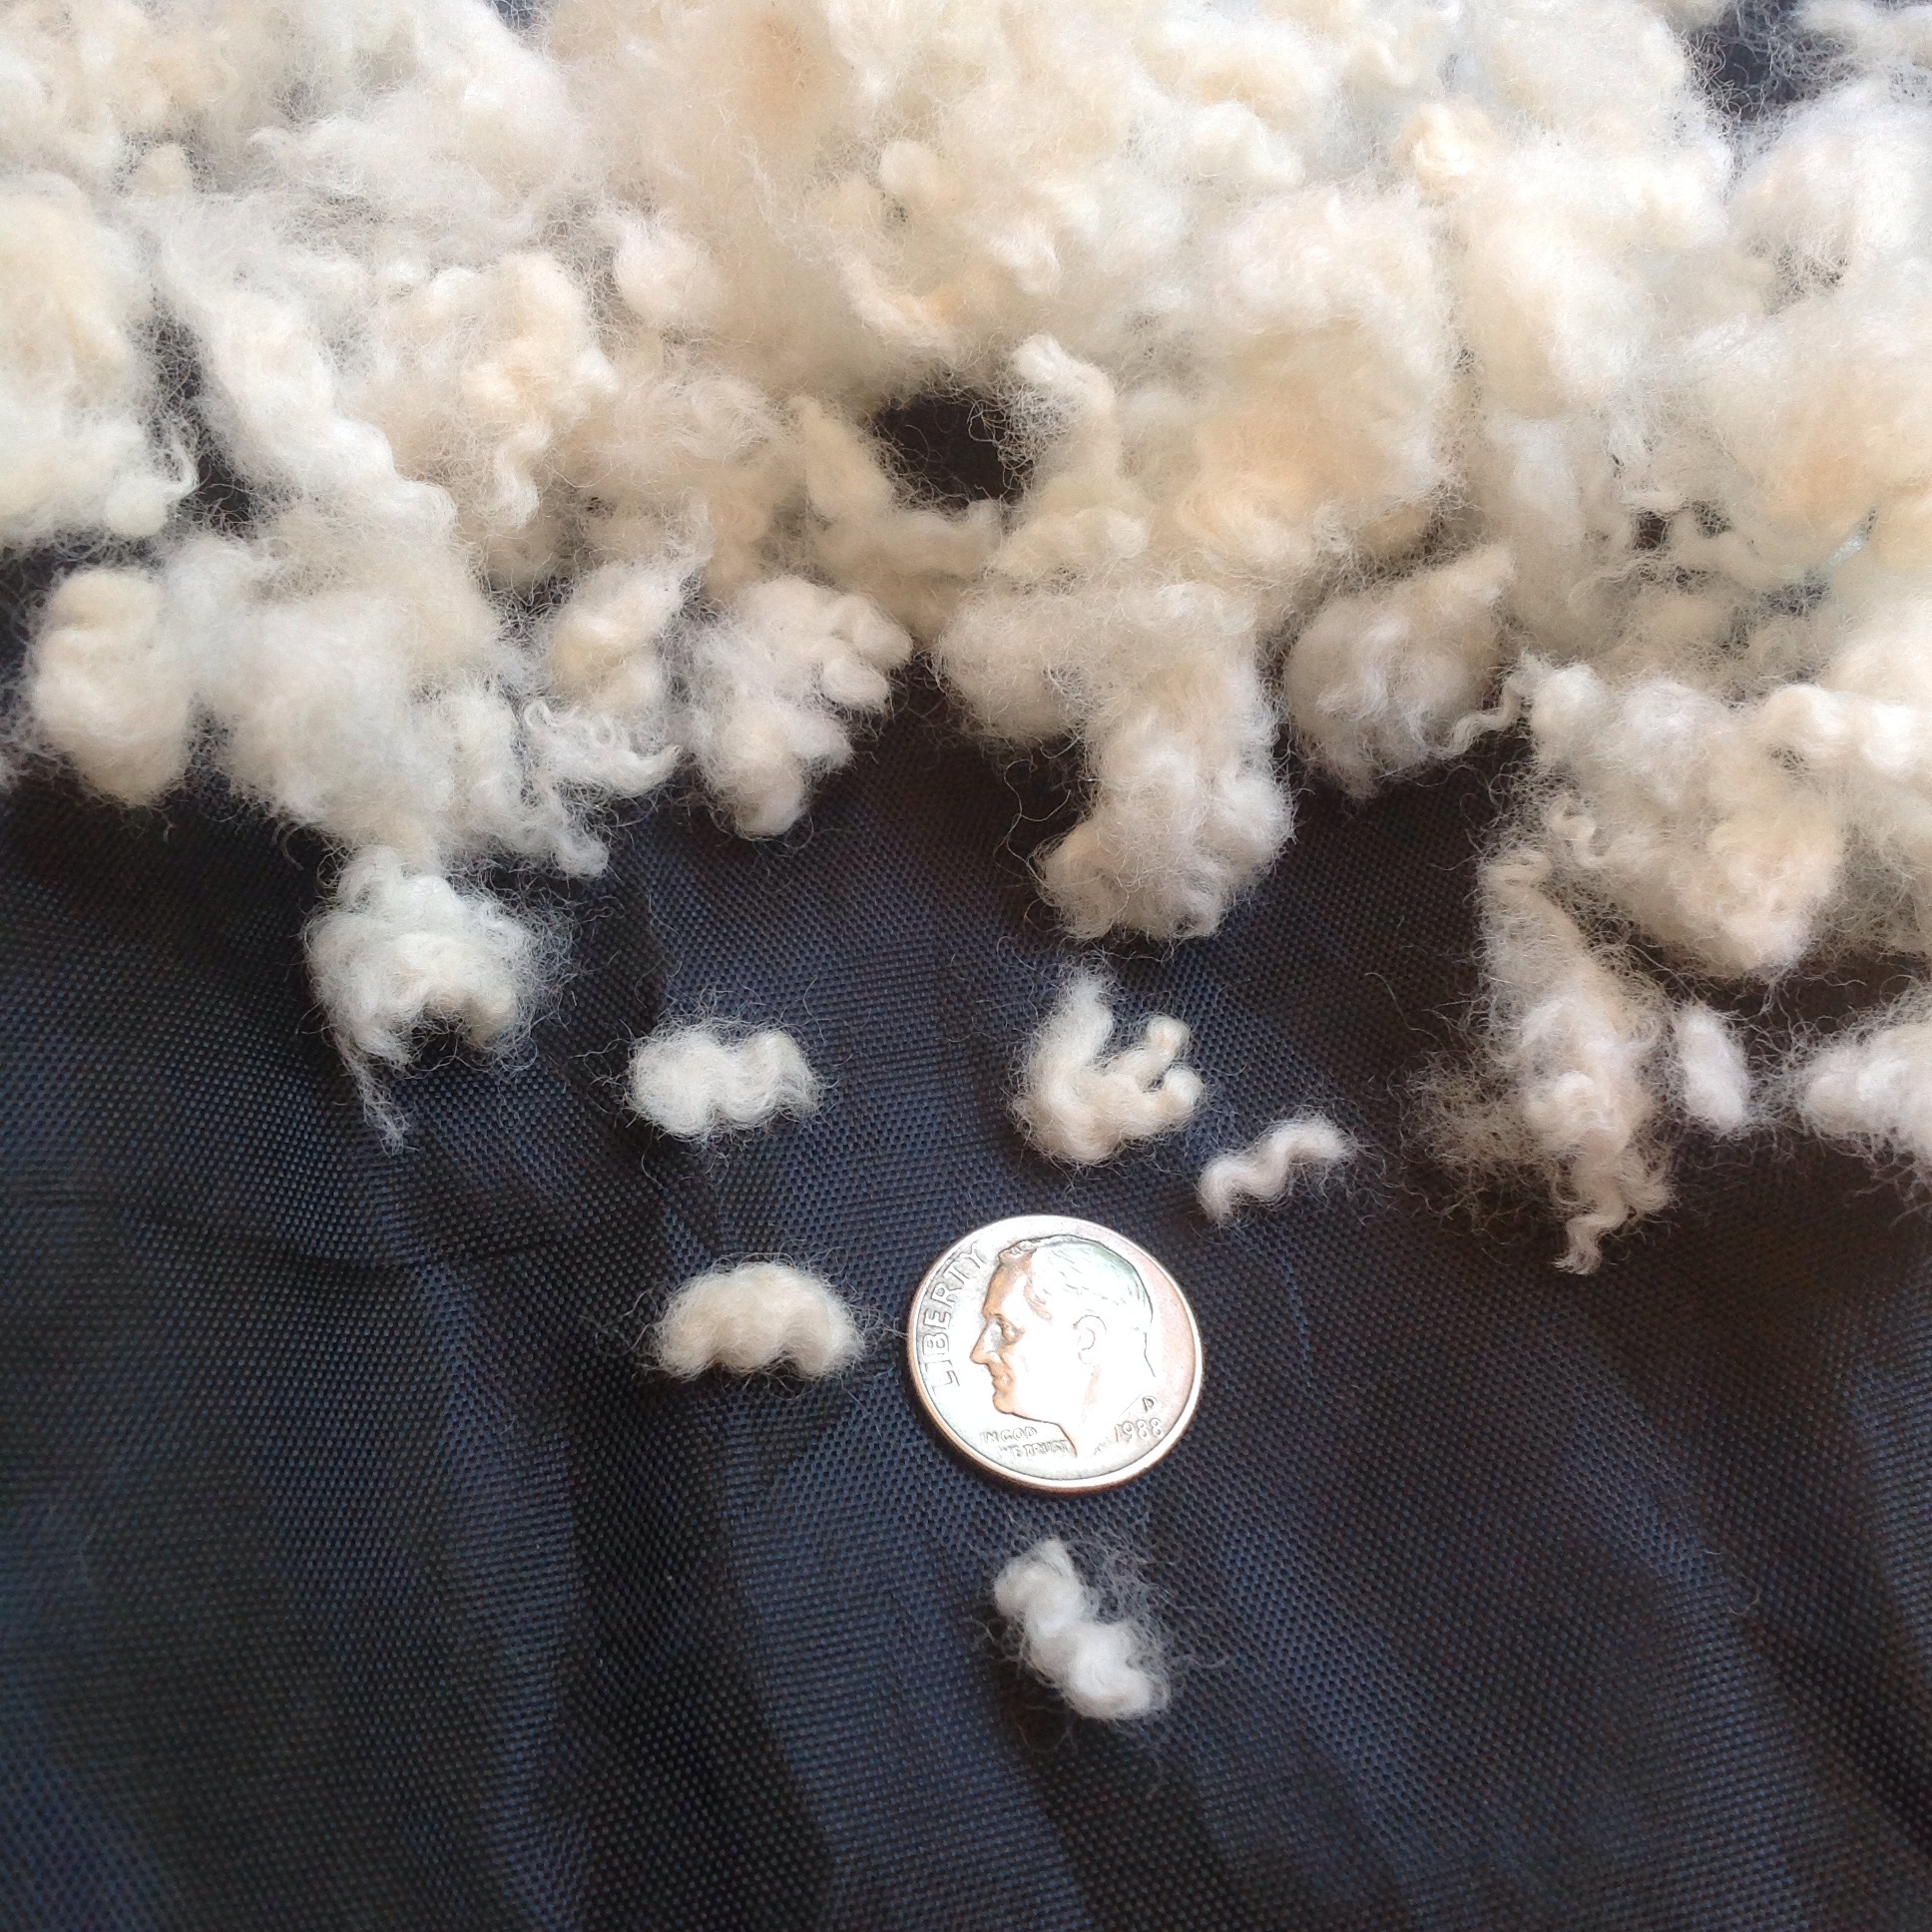
My wool nepps are the first 3, on the tape measure.
The 4th wool nepp, is generally what is available online for purchase.Wool nepps a tutorial, well, a curly wool nepp. It’s a start, and just my style, easy and cute
I have searched the web far and wide about how to make wool nepps on my own. I’ve seen, where to but them how to use them, but…
I can’t seem to find a tutorial, on how to make my own wool nepps. So after my hydrogen peroxide trial went so well, it gave me an idea for another experiment.
Wool nepps are considered a by product, waste, second cuts. Naturally, the fiber folks are smart people and took those little bits of waste and made them a fun add in. I think where fiber is concerned, we find ways to ascertain nothing is wasted. Again, everything has it’s place, and these nepps become these cute, tiny wool sprinkles, by dying them bright colors, and adding to artisan batts or yarns. Maybe needle felt eyes on a toy, etc,… No waste!!
Cleaned Corriedale lock with dirty tips…I had washed a fleece, it was clean but a few locks had the tips stuck together by dirt. This time, I was undeniably, too lazy to wait for locks to take a swim in the hydrogen peroxide, and then dry. Instead, I decided to clip the dirty tip off as I spun, instantly opening up the lock for spinning. Fibers are all aligned in these locks, since they are grown side by side. That dirty tip being clipped off and gone, the lock opens up instantly, without any flicking, and ready for instant, top-like spinning.
Clip dirty tips off clean locks, and add into a tub until you have filled the tub enough to make it worth the next step… Or maybe until you are out of dirty tipsI started saving my clipped tip pieces in a tub and once I had a good amount, I thought these, yes, these could be nepps.
The picture shows my little clipped lock tips next to the bright white lock it was clipped from, for reference. They were dirty, and unwelcome in my white yarn. We know how to clean these clippings effortlessly, no problem, with that hydrogen peroxide soak.
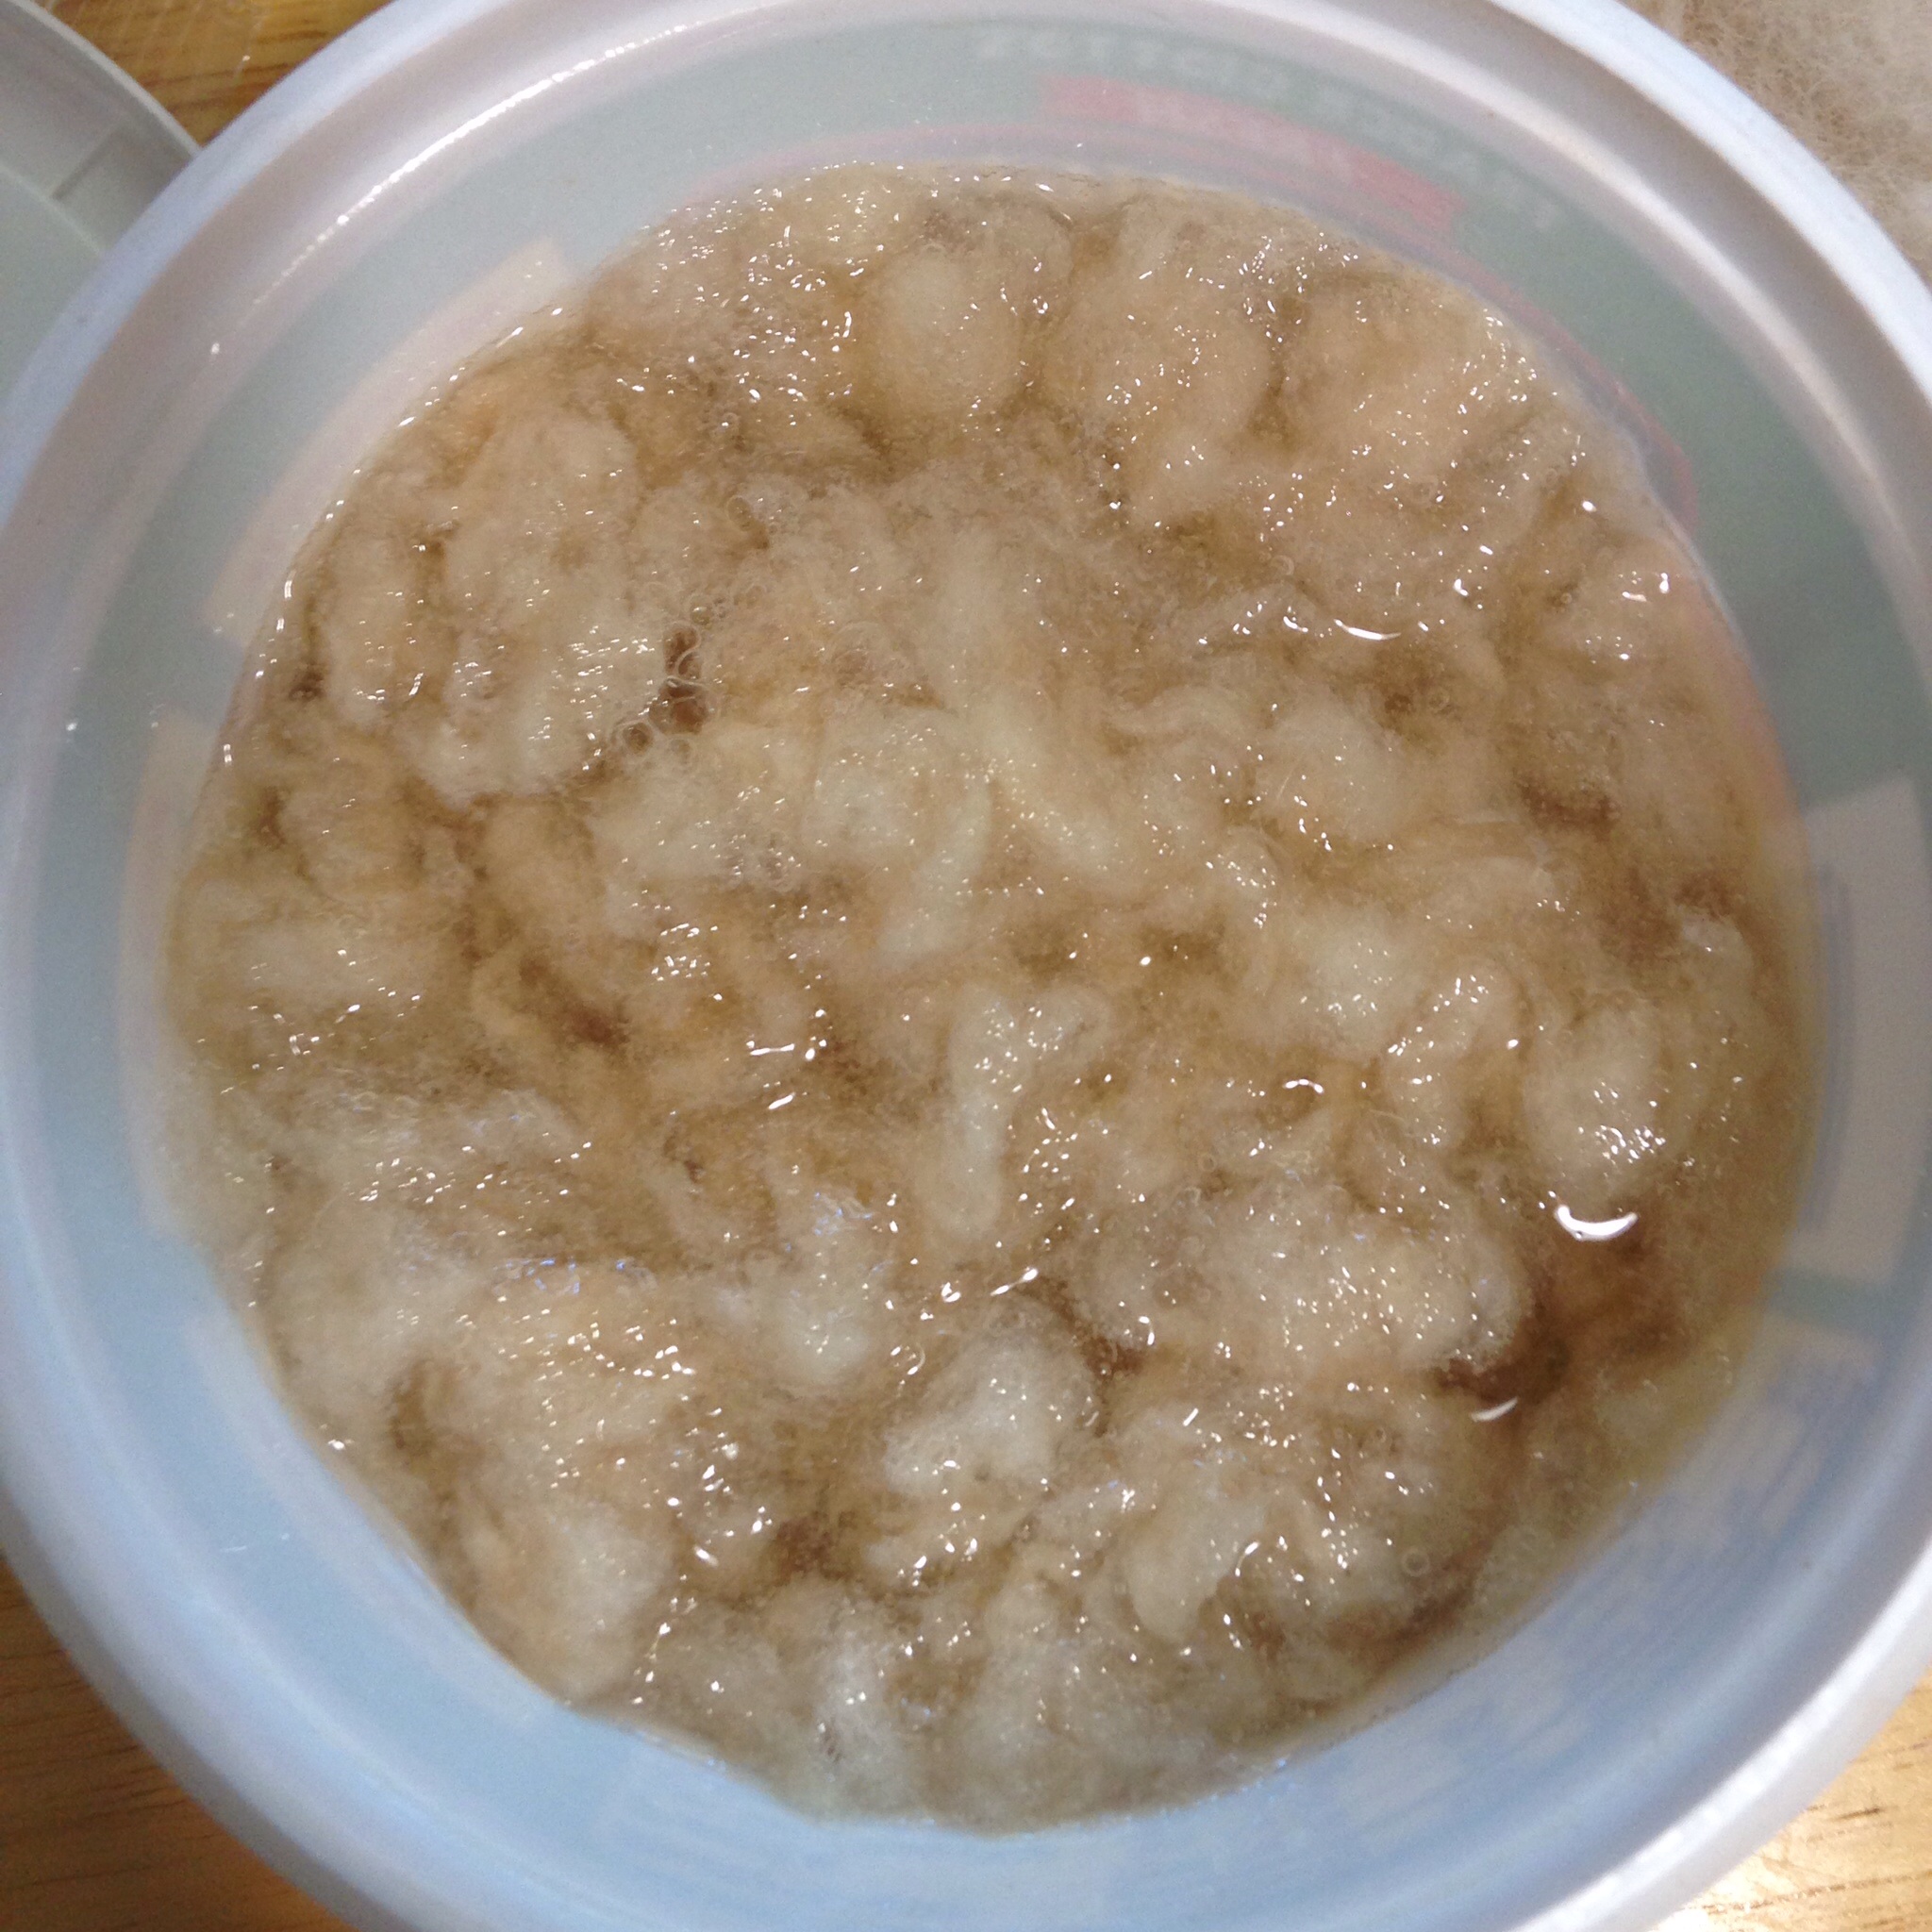
My pile of dirty tips ready for a soak, next to the white locks I’m left withFirst things first, I plopped them into my hydrogen peroxide to melt off the dirt as I learned(see earlier blog here)
and let the magic happen, after the 24 hours were up…
Tips in hydrogen peroxide soak for 24 hoursI emptied the container and rinsed my little pieces of wool, in some room temp/cool water, and set them on the rack to dry.
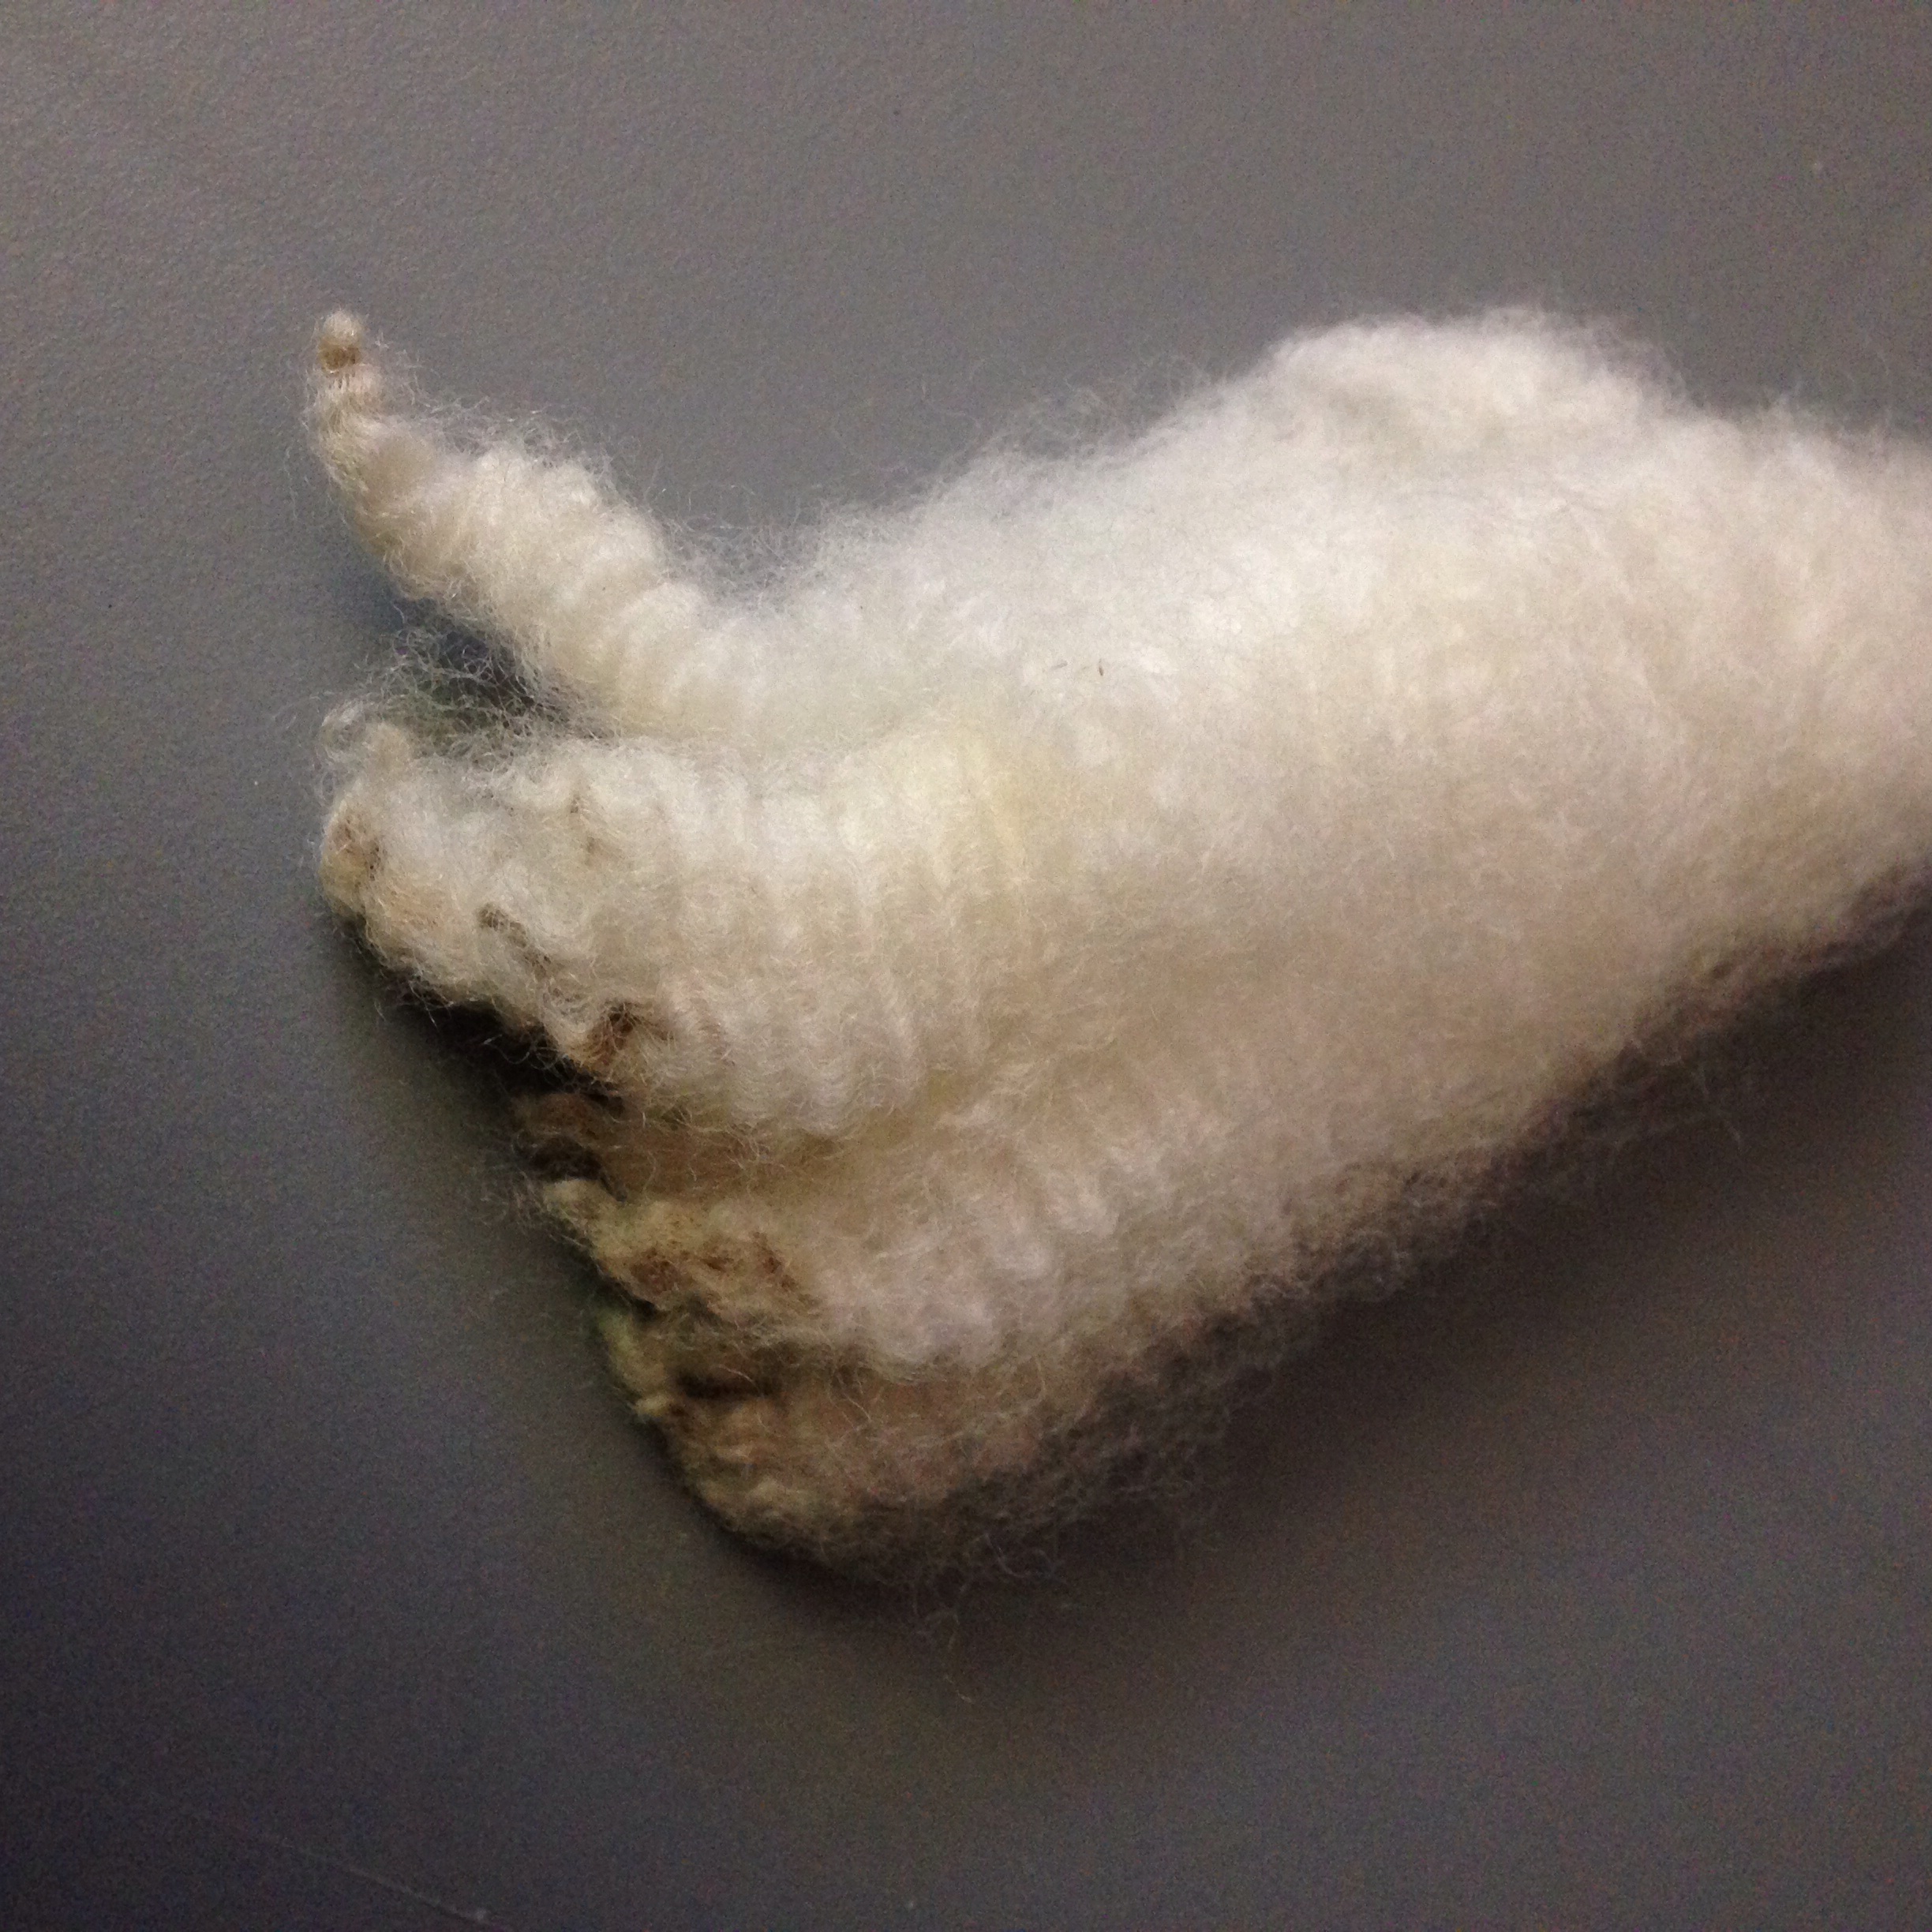
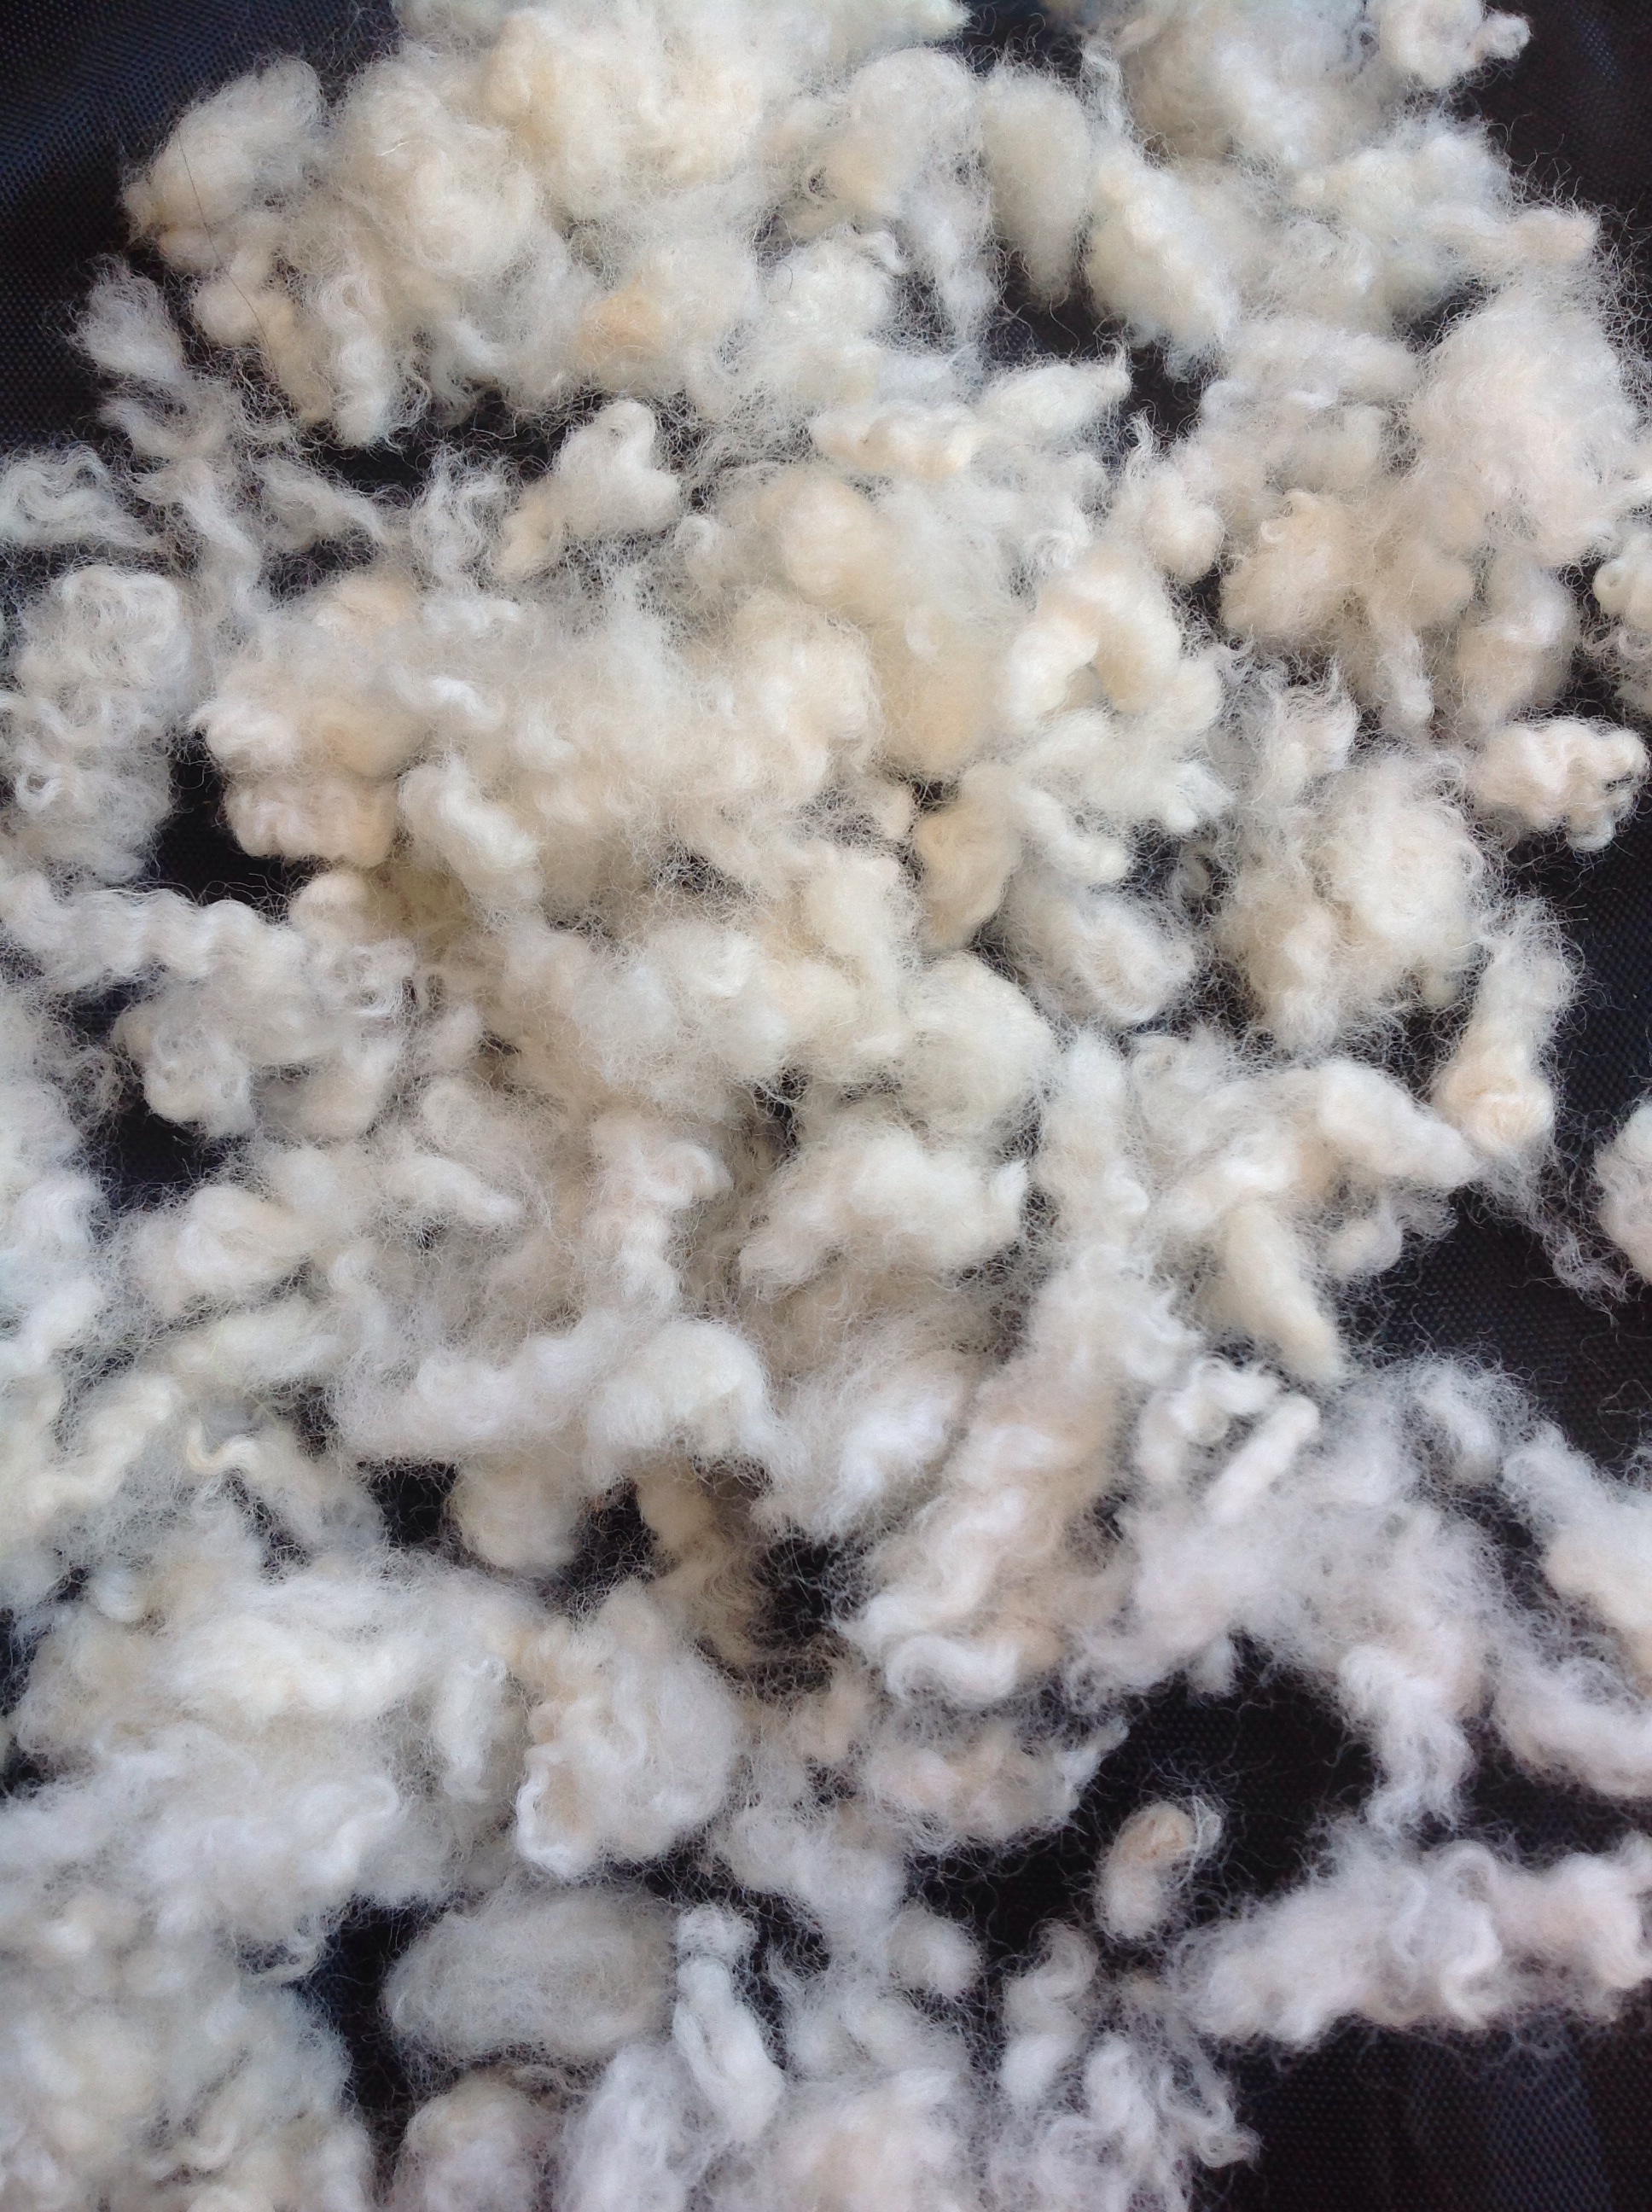
After drying I was left with mini curl nepps – dime for size referenceThey turned out to be mini curls, little white tips and I must say, I think they are cute as ever, not the nepp ball I’m used to seeing but an awesome add in, so next up, a quick dye job, when dying other fleece . No extra steps to dye when I’m already doing a batch of dying something and BAM!
Curly neppsI have a new add in that otherwise would have been waste, it doesn’t look exactly like a nepp ball, but I must say, just as cute, if not cuter, then the usual round balls on the market.
I adore the little curl.
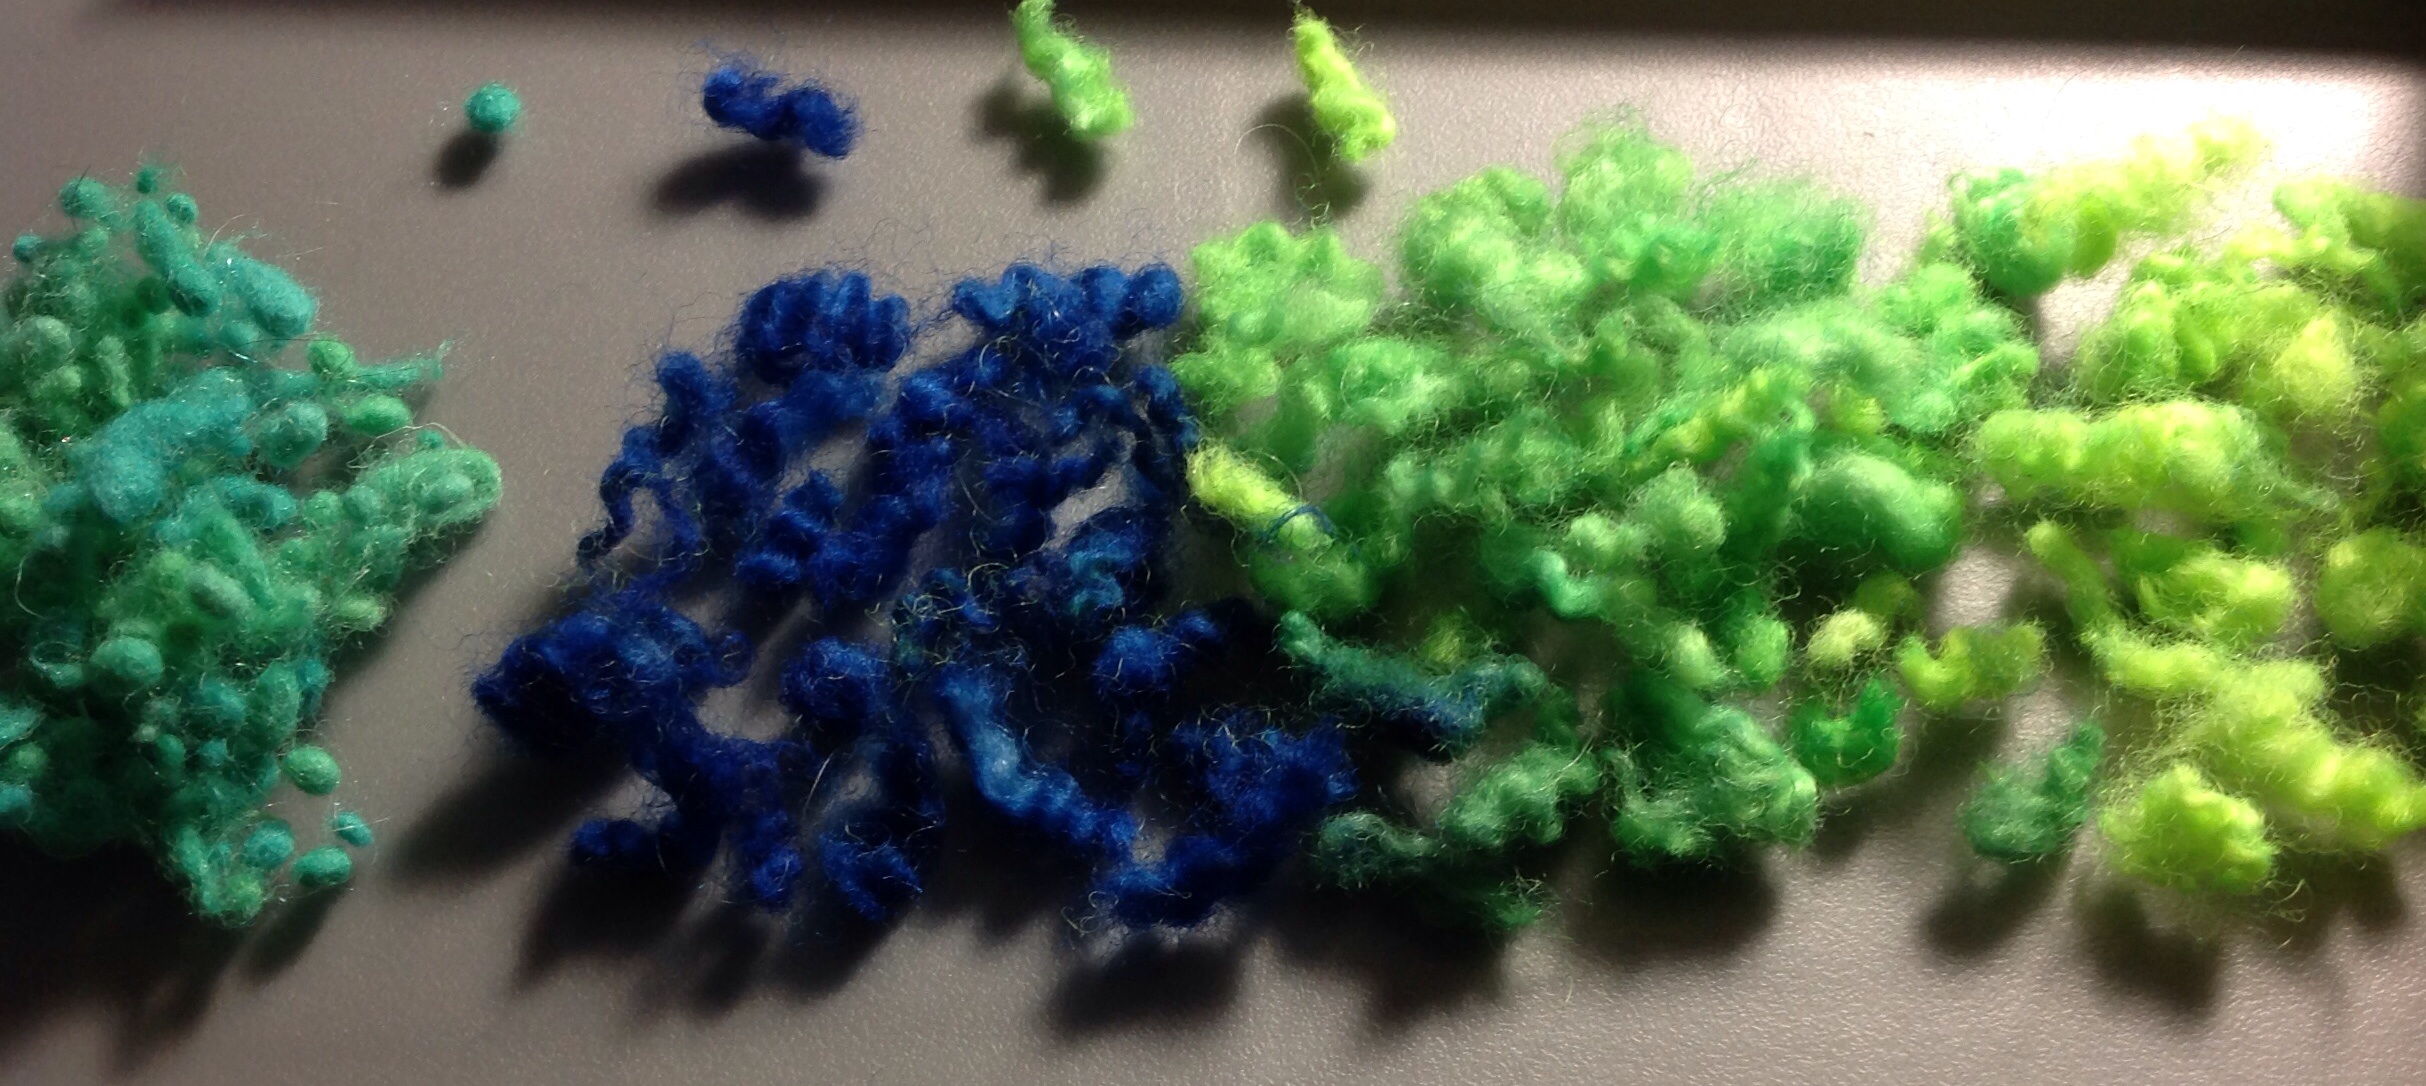
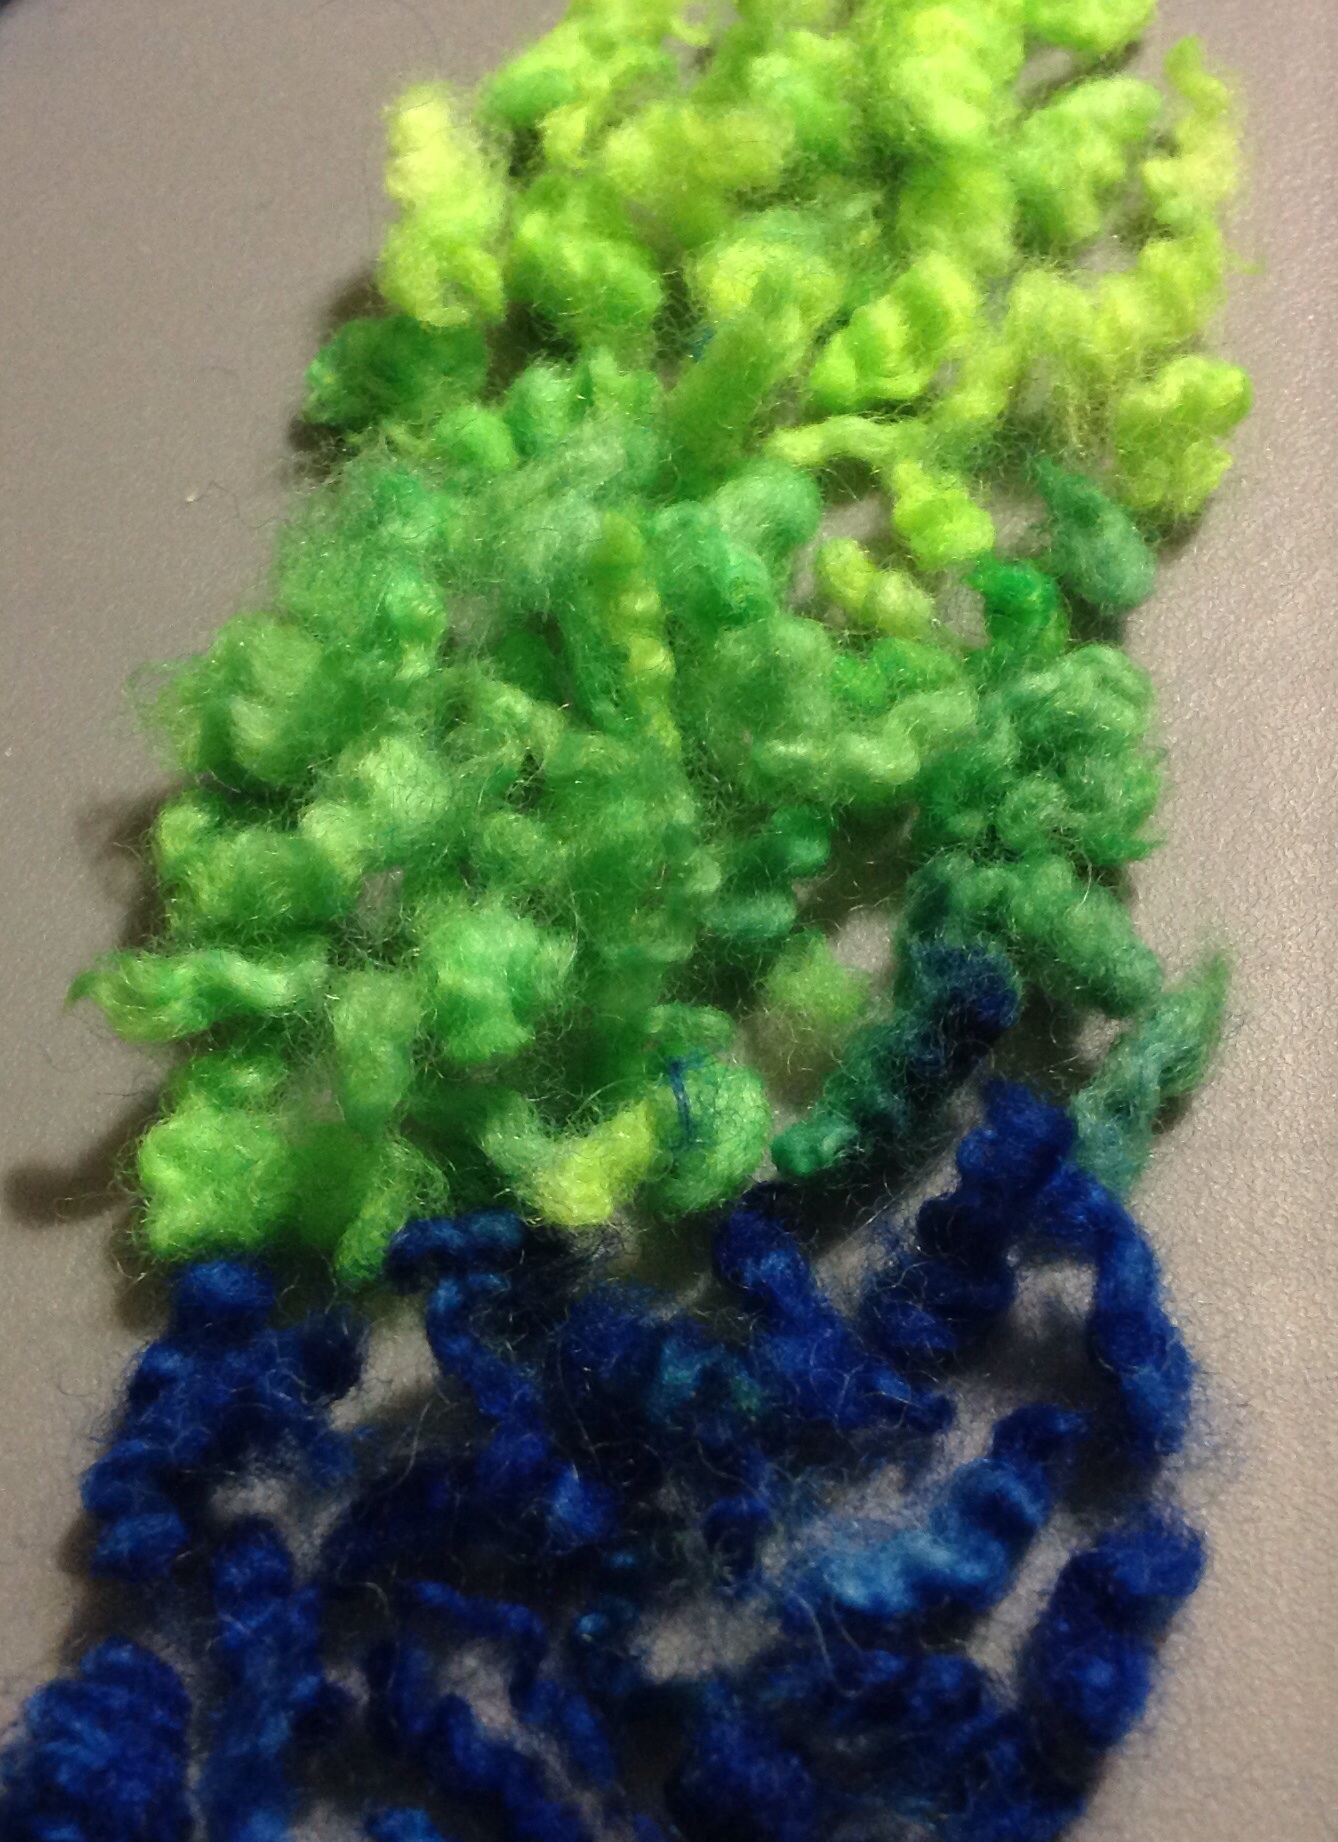
Left – nepps purchased online
But from the royal blue, Kelly green, and chartreuse are all mine 🙂Next time you are spinning by the lock, if you don’t want to wait for the hydrogen peroxide method, maybe try clipping that tip off, and saving them until you have a good amount, do the easy soak, rinse, dry, and dye (unless white is good for the project, leave as is)
Homemade nepps, the curls are darling!
if I do say so myself (again nepps to the left were online purchase)
This is as close to a nepp as I got with minimal, very minimal work. It actually, saved time snipping the lock tip as I spun and saving up my dirty tips for future nepps, I gotta say I’m pretty pleased with myself. The hydrogen peroxide bath really isn’t work. Not quite the nepp balls that can be bought, but tiny sprinkled curls, still cute.
I bet I could run them through the dryer wet and have balls, but that’s more work then I want to put into my nepps, however, I have to say I really do like the curls I got. Although, I suspect, results will vary depending on fleece type, and how fine/coarse curly/crimpy the fiber is you try this with. All in all, should I end up with dirty tips from any fleece, they will now be trimmed for future nepp styles, colors, really the possibilities are endless…
I think they turned out awesome for a first try, again super easy… And no wasted woolI suppose I will have to show them in an art batt or maybe even some finished handspun! 🙂
what do you think? Will you ever give this a try? Make your own wool nepps and save a little wool, that’d otherwise be trashed.
Natalie Redding of Namaste Farms, sent me samples of her new products along with some ruined wool/mohair samples to try it on the worst of the worst. It fixed everything, and made it even better. This stuff is so amazing, be excited people, be very excited.
My blurb on her Facebook page was this:
“Seriously, Natalie has the most brilliant game changer for fleece and fiber, there is no competitor for this product, Dirty Bastard and wool shampoo is so out of their competitors league, it’s not even the same game. It really isn’t like anything else on the market it works that awesome.”
This fleece shit is so bizarre and unreal in an amazing exciting way it’s hard to not sound fan girl about it. And I am so humbled and honored, I can’t even express. It’s only the first test run, so there are some fixes to make, with notes already back to the Research and Development team, but considering where it’s at already, I am more than stoked!
This stuff is no joke. We are so lucky to have Natalie, she has experimented and shown us different techniques exclusive to her. And now this…
Whenever it is possible, you will want to buy it, get your pre order, however it comes, let me tell you, it will sell out as fast as her fiber does!
You won’t believe it, I’ve seen it do it’s magic and I’m still completely baffled. I am excited beyond words the old way of washing fleece is finely going to change in a big way. This can’t come soon enough!!!
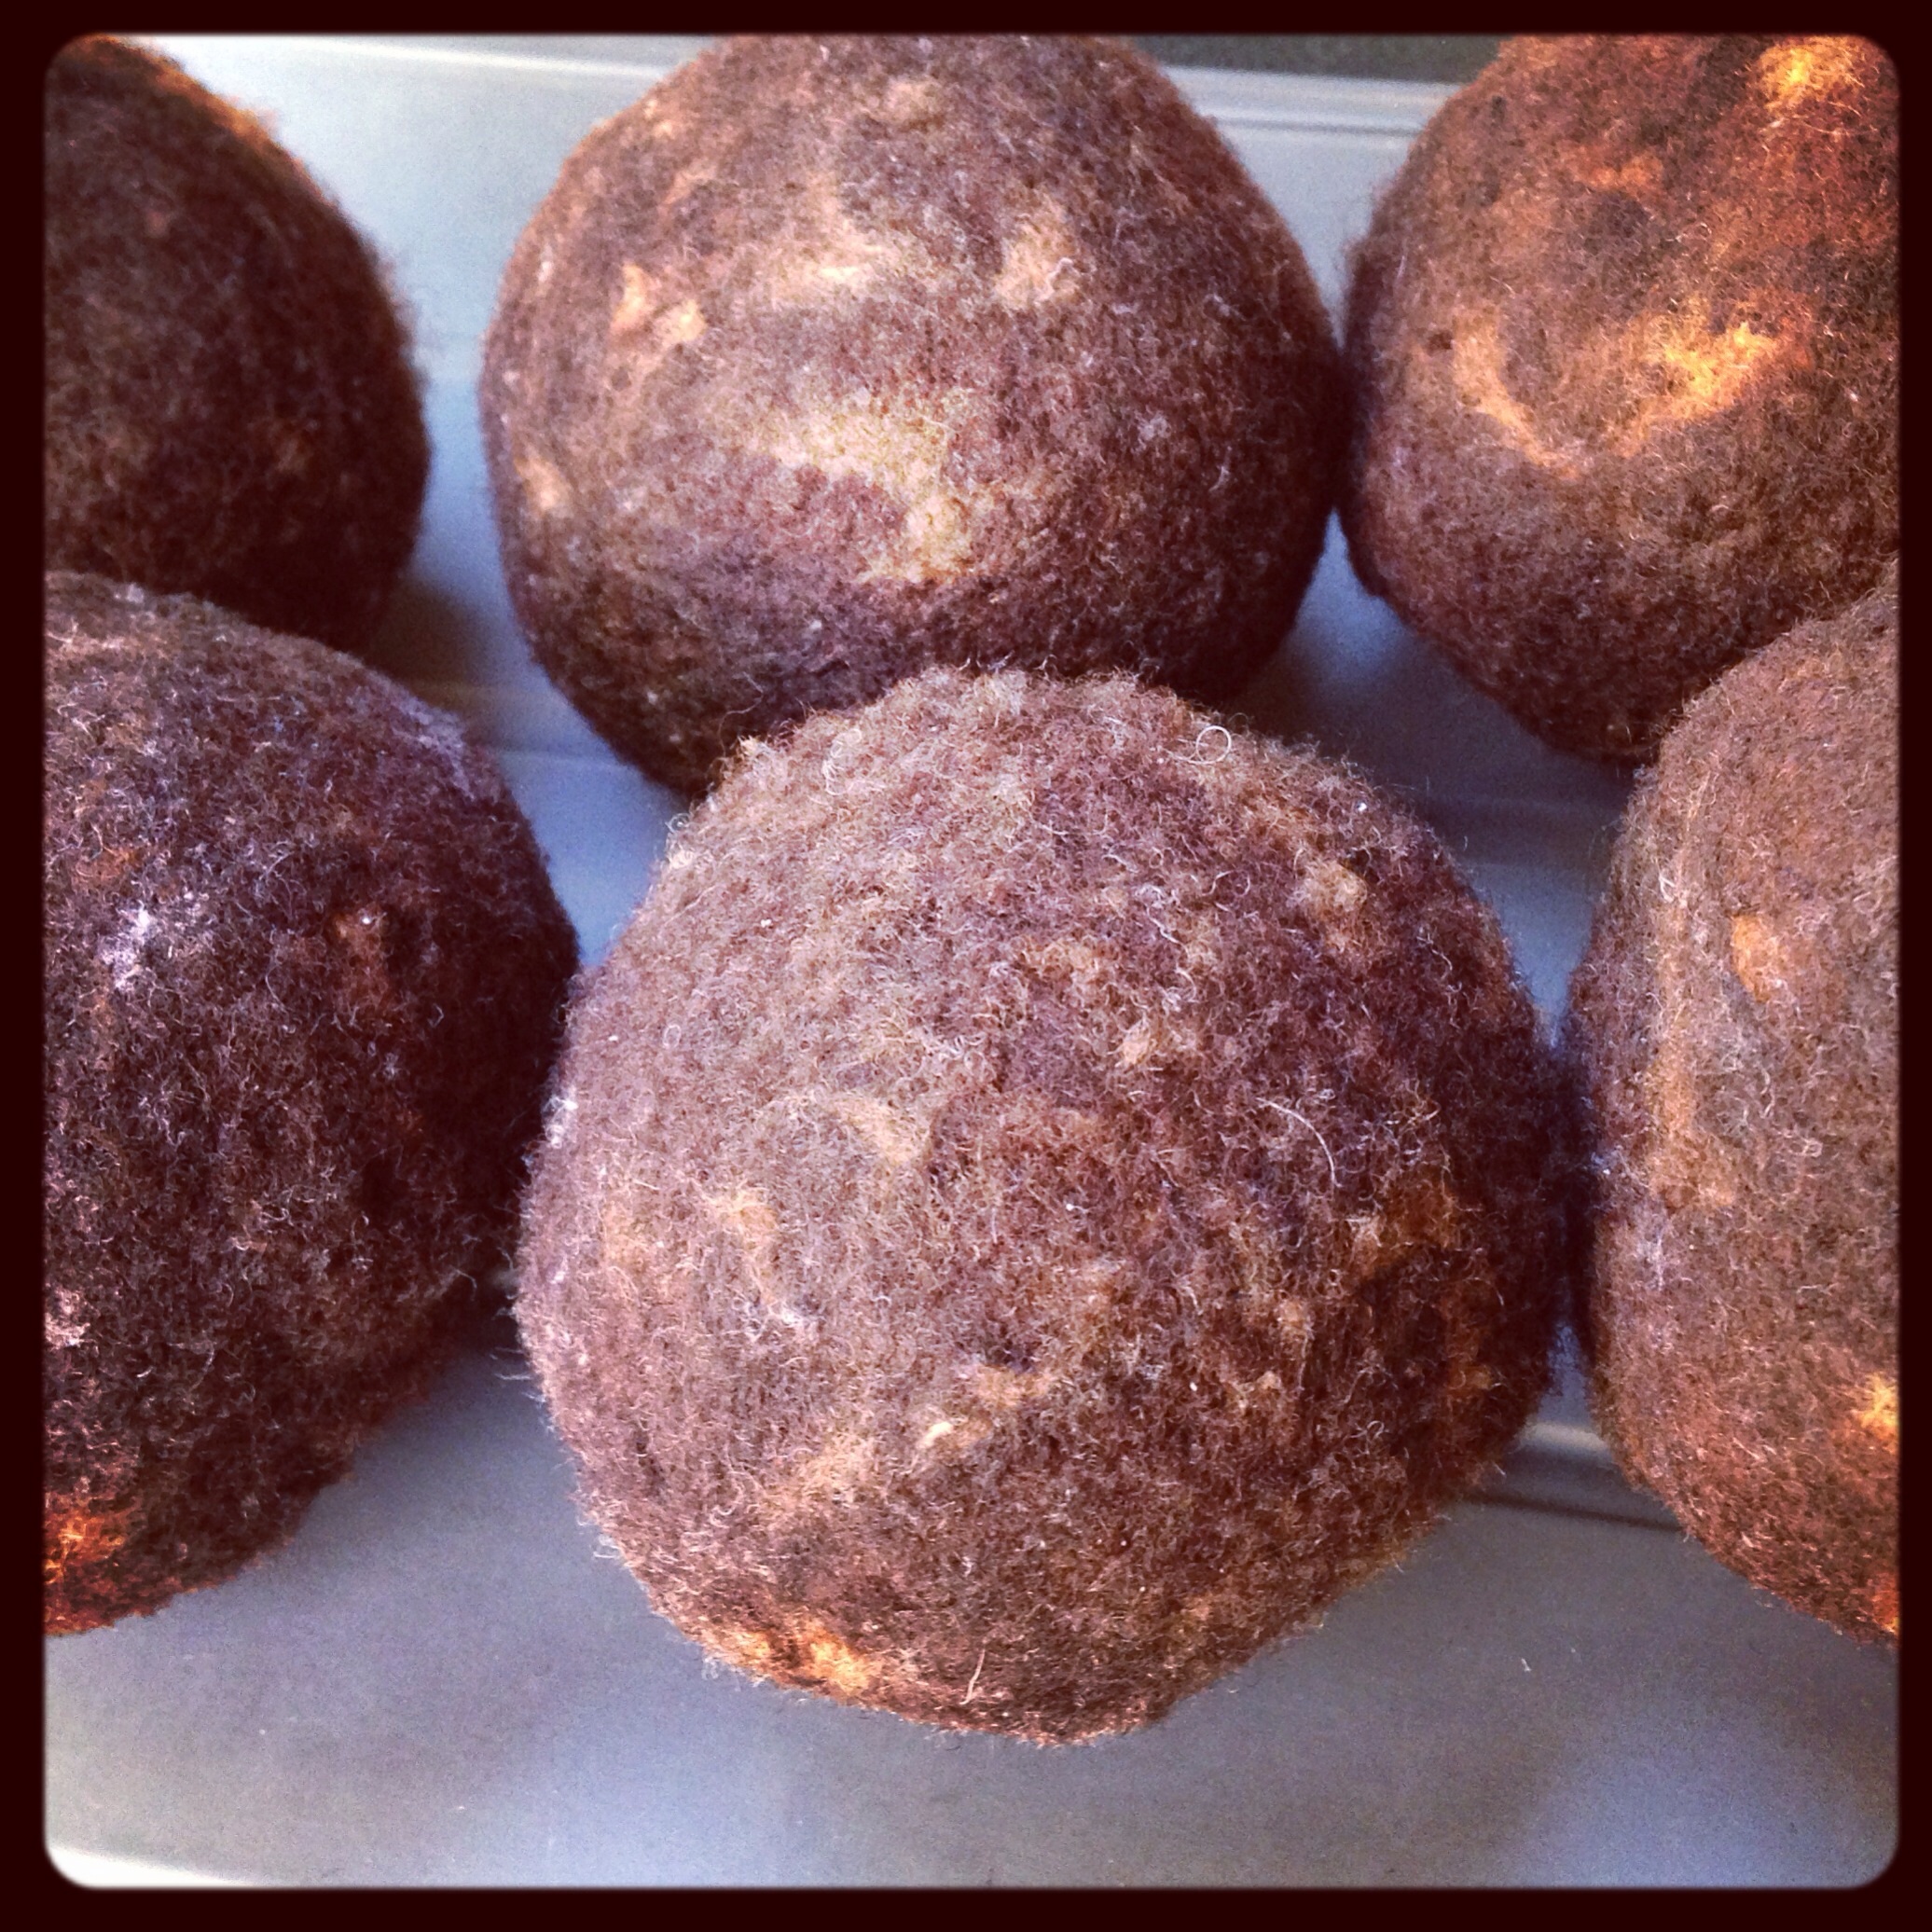
Wool felted dryer balls were my first attempt at felting.
I got exactly what I set out to make! Success.
my husband said they look like road apples,
Road apples aka horse poopwhile everyone else saw snicker doodle cookies prior to the fork smash, and chocolate truffles, and cinnamon covered donut holes.
Either way, they turned out amazing and were so easy. This was an awesome project that will save money in future clothes drying while keeping the chemicals out of the clothing, hence, away from seeping into your skin and dryer sheets out of the landfills. These dryer balls also decrease dry time, saving on electricity.
Pssshhhh road apples….
I started out with a raw, horribly tender, old (decades old, no exaggeration) mystery wool fleece. It was very fine, next to skin soft, very crimpy, greasy, fleece.
Honestly, I considered throwing it away, or donating it to one of those places that uses wool to clean up oil spills. I hated the idea of not trying to make something useful out of it. So… I grabbed handfuls of this raw, dirty fleece and stuffed an old, thin from wear, sock.
One thing to note, I turned the sock inside out, so the wool would not incorporate and felt to the little loops, that looked like terry cloth, on the inside of the sock. Socks vary, but if one attempts this, I recommend, stuffing the sock with the smoothest portion inside. I stuffed it, to what I thought was pretty solid, shaped it from the outside of the sock, to a round, ball shape. I could actually see the fleece through the sock, again, I used a thin, worn out, old old sock, but I stuffed it good and tight. I tied it off with cotton yarn, and stuffed more handfuls of fleece into the sock making a second ball, tied it off with cotton yarn, repeated a third time. I now had 3 balls in one sock, and a good amount of fleece used. I filled up the second sock in the same manner.
With high hopes, I threw both fleece filled socks in my top loader washing machine, with 2 white bath towels. When I poured in the detergent, I poured it aiming across all 6 balls in the two socks. I set the wash for a hot wash and cold rinse. I also set it on the comforter, heavy duty cycle with an extra rinse and spin.
After I checked the load, I was very surprised to see how much they shrunk. My once full, tight balls, now looked saggy, with bits of brown fiber growing out of the socks pores. Lol, a picture is worth a thousand words. Sorry, but, as you see, the socks I used happen to be flesh color, while the wool, dark brown
In any case, they felt like hard, round balls inside. 😉 so I threw them in the dryer, with the towels. I was surprised how easy this was, and how perfect they turned out. Since they shrunk so much, my second round, I made two balls per sock, for slightly bigger dryer balls. Really, that easy… Stuff, wash, dry, and oh I did trim fuzzes to clean it up a bit. I probably didn’t need to but, I did. Once you start trimming, it’s kind of addicting, for me it was anyways.
Now, I have a set of 10 dryer balls, and feel I used an old gross fleece very wisely. From trash to money saving treasure. If I were to make some of these as a gift I might felt some swirly pieces of bright yarn or some wool nepps in a coordinating color for a cute polka dot look. Although, I kinda like the plain old road apple look myself. If you wanted to spruce up the gift, you can add a favorite scented essential oil, and a drop can be placed on the dryer ball prior to throwing in with laundry for the smell good factor dryer sheets have.
ill be honest I loooove the smell of my fabric softener. So I’ve made a spray bottle with a watered down version. Way watered down. And I spritz the dryer ball prior to use. Hey I’m still saving money and the environment.
next time you think a raw fleece is unusable give this a try before trashing it.