
I gotta say… This process was not at all, what I expected. Usually, I take great measures not to felt my fiber. I’ve always been afraid of the dreaded accidental felting. I would let the raw wool sink on its own in the scour process, to avoid agitation. I actually bought a laser temperature gun to make sure the fiber I was transferring to a new tub of rinse water, it would be the same.

I was really careful. I know the mechanics of felting… agitation, temperature change, soap (change in pH). I have watched several videos on the internet showing both how not to felt and even more on how to felt.

I had my bubble wrap, mesh, pool noodle all set…
Imagine my surprise, when it took me hours and hours to felt a very thin layer of cobweb felt. No exaggeration, it took hours of full on abuse to finally get a result. I wasn’t even sure I had felted the piece when I stopped that days attempt, from pure exhaustion. I physically could not continue. I got on Facebook live to express my frustration and I said jokingly,
“Now I understand why people started violently throwing it at a certain point… because they really were pissed trying to make felt”
All the videos I had watched would say, ‘now is a good time to get out any pent up aggression’ and proceed to wad it up and slam it into their work surface. The only aggression I had was toward this scarf I was failing at felting.
Putting myself on pause was the best thing, even though I couldn’t have gone on if I wanted.
The next day, I went to check…
it was dry and damn if I wasn’t relieved, it was felted!!!
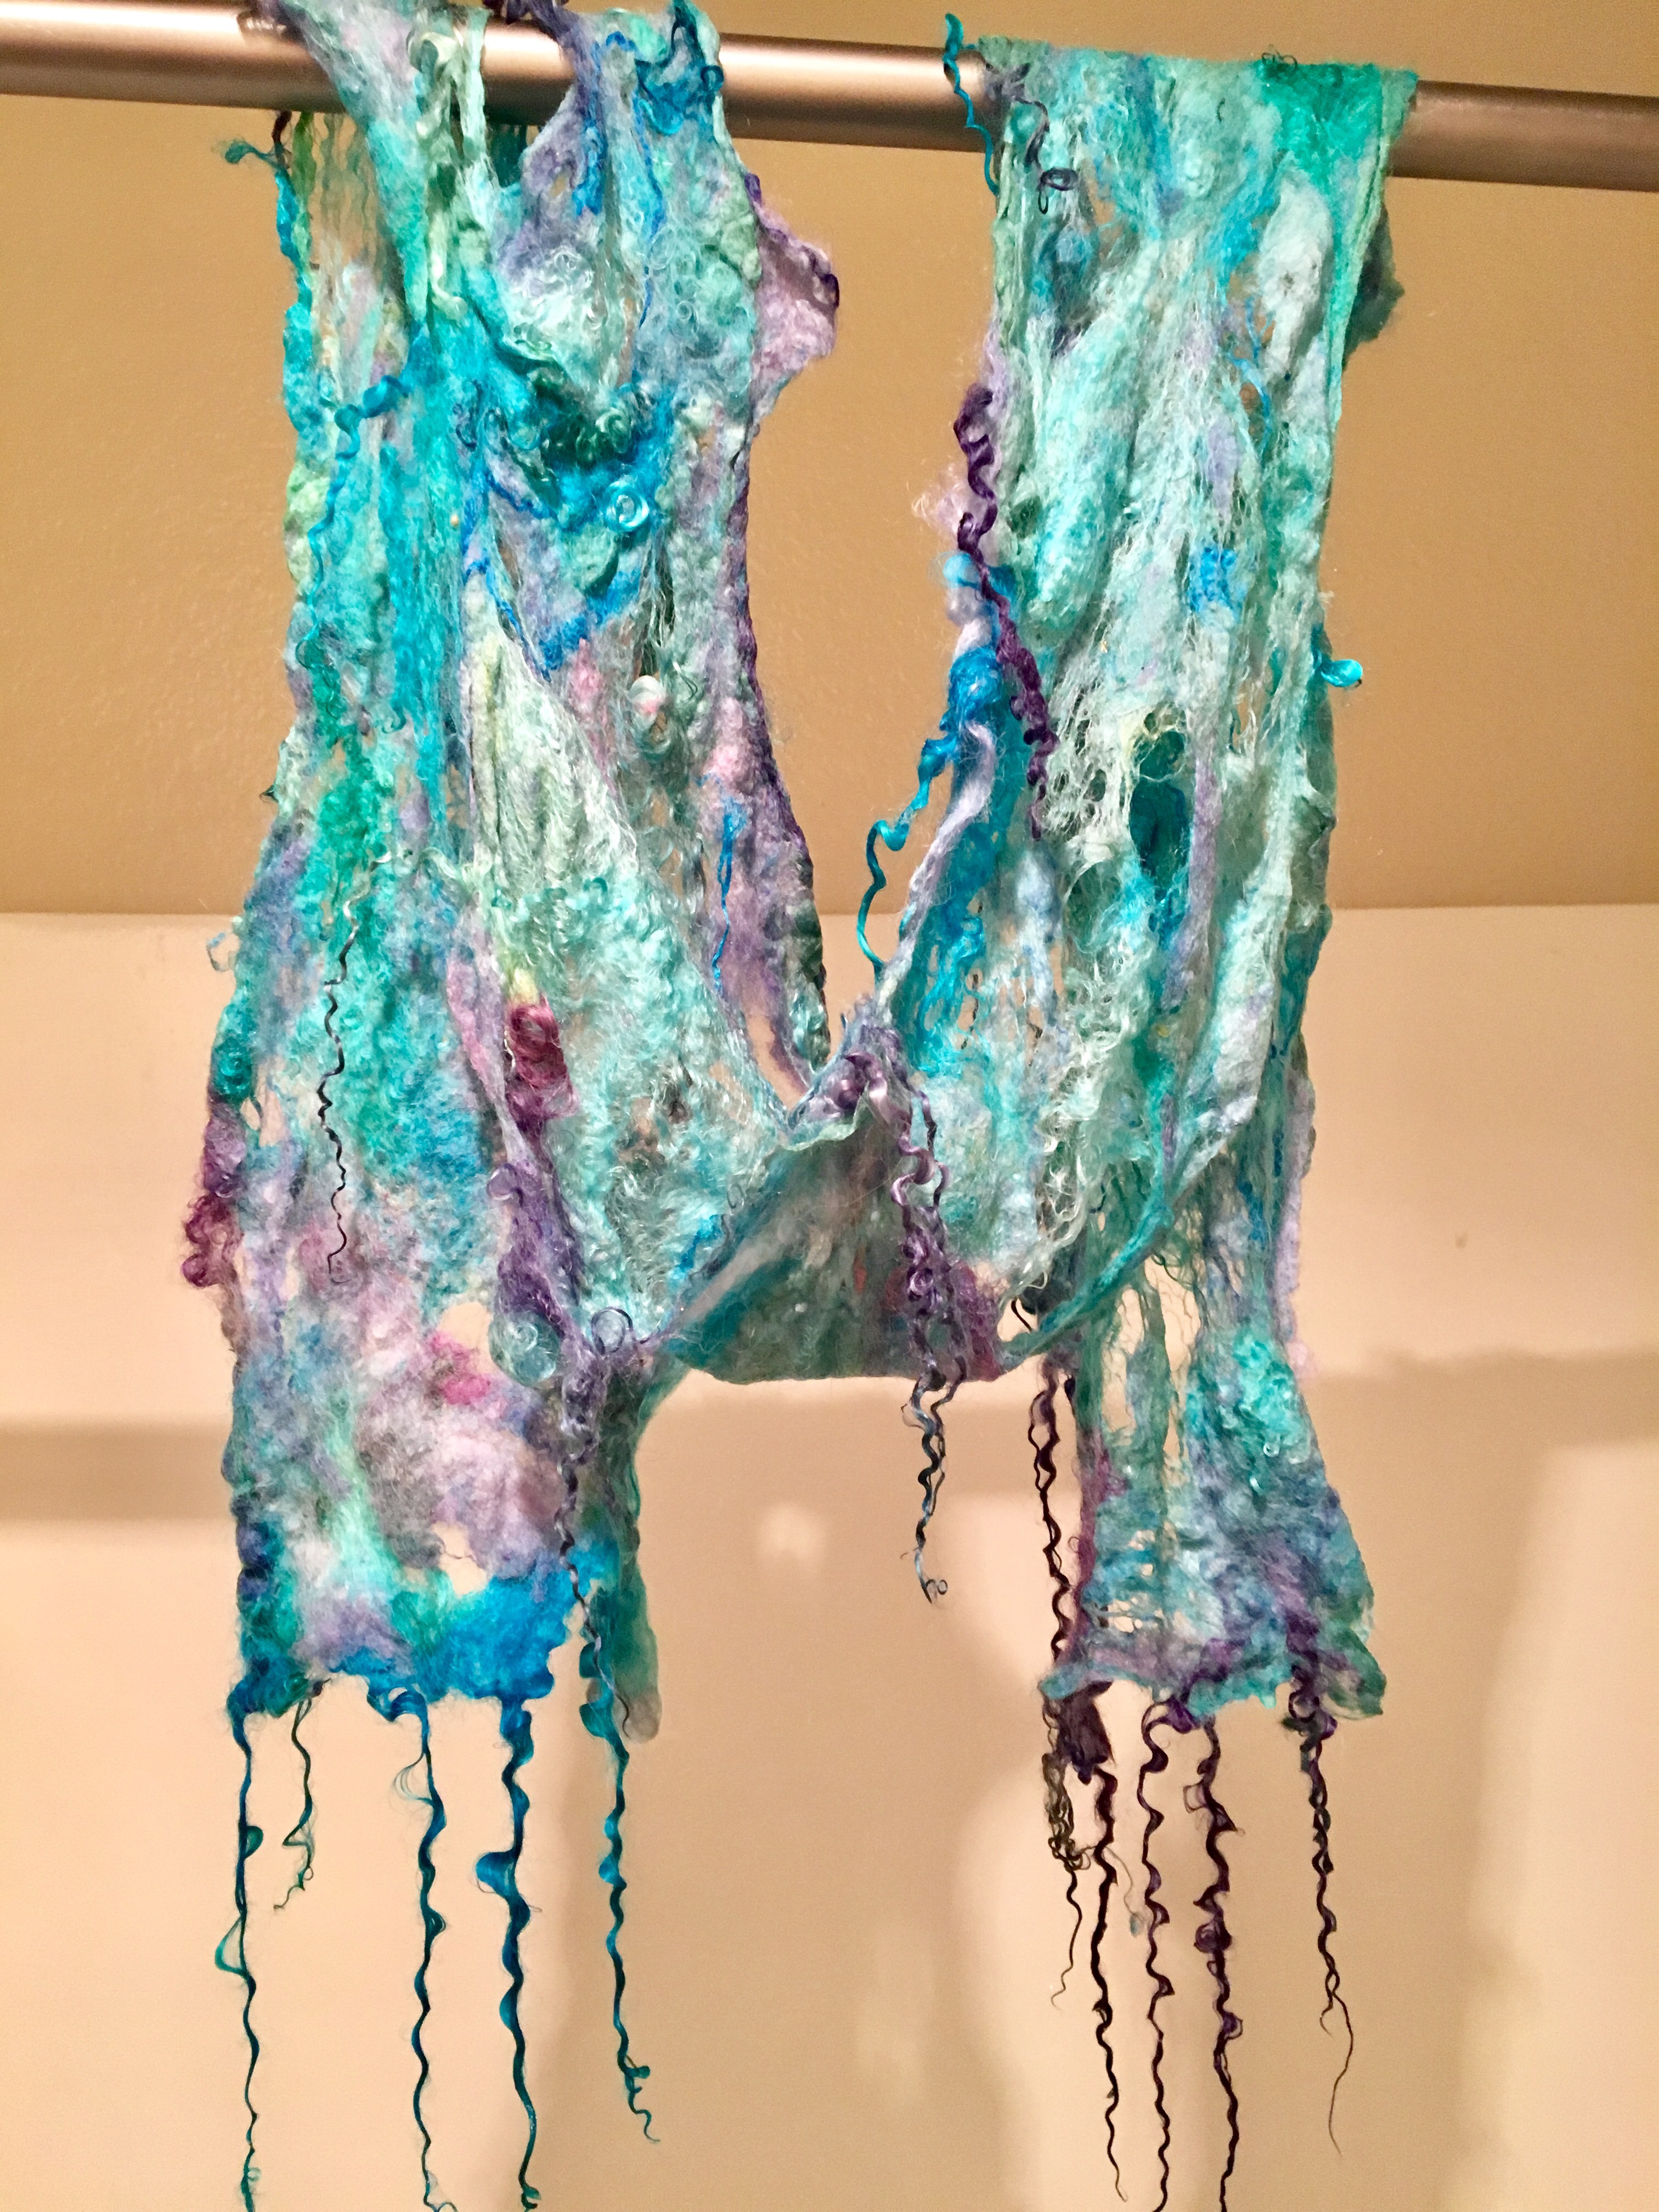
Let me just say wet cobweb felt does not feel felted. Or, maybe it does, but I just don’t have any clue what I’m looking for. I have to say I was really pleased with my result. It was light and airy and soft cobweb felt with teeswater locks dangling and silk integrated into the fabric.
Felt is the first ever cloth humans made. And I managed to make my own… barely. I didn’t know I had managed to create anything at the time, so there is still lots of learning to be done.
I really love the result. I didn’t expect it to be so soft and light. I’m into it… which is great news for all the wool waiting to be played with


